SparkFun Arduino UNO R4 WiFi Qwiic Kit Hookup Guide
Example 1: Qwiic LED Button
This first example shows how the Qwiic LED Button can be hooked up and programmed to pulse while pressed.
Library Installation
In order for this example to work, you'll need to also install the library for the SparkFun Qwiic Button. The easiest way to install this library is to search for SparkFun Qwiic Button in the Arduino Library Manager tool. You can also manually install the Qwiic Button Library from the GitHub Repository or you can download it by clicking the button below.
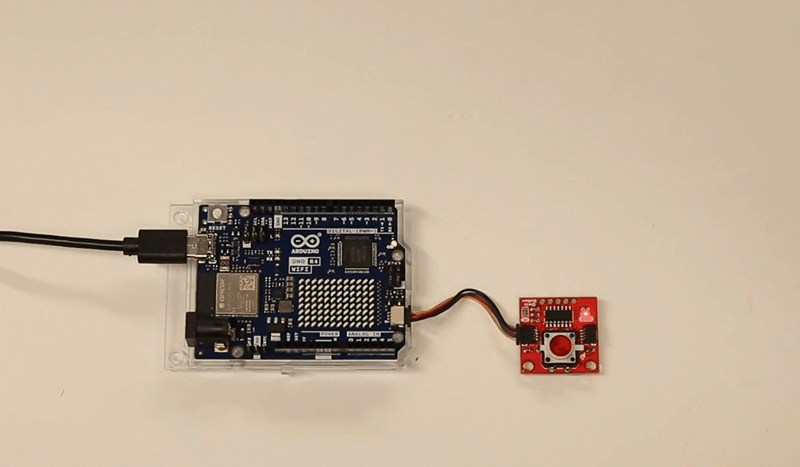
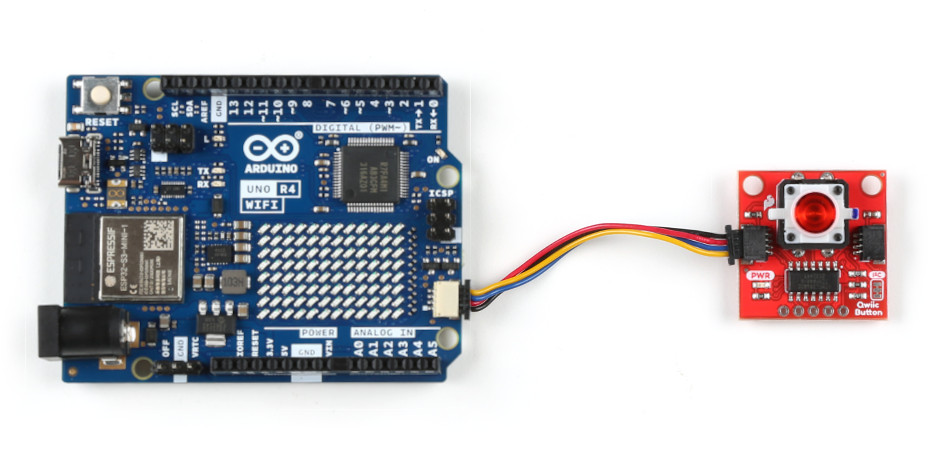
Hardware Hookup
Plug one end of the Qwiic connector into the Qwiic port on the breakout board, and the other end into the Qwiic connector on the Arduino Uno R4 WiFi board like so:
Software Example - Pulse When Pressed
The following example is taken from Example 3 of the SparkFun Qwiic Button library and is titled "Pulse When Pressed". The code connects the Qwiic Button to the I2C bus and runs the Button LED through a configured sequence when the button is pressed. The code configures the LED settings for brightness, cycleTime and offTime to pulse the Button LED while it is pressed. Try playing around with these settings to change the behavior of the LED.
language:c
/******************************************************************************
  Checks whether the button is pressed, and light it up if it is! Also prints
  status to the serial monitor.

  Fischer Moseley @ SparkFun Electronics
  Original Creation Date: July 24, 2019

  This code is Lemonadeware; if you see me (or any other SparkFun employee) at the
  local, and you've found our code helpful, please buy us a round!

  Hardware Connections:
  Attach the Qwiic Shield to your Arduino/Photon/ESP32 or other
  Plug the button into the shield
  Print it to the serial monitor at 115200 baud.

  Distributed as-is; no warranty is given.
******************************************************************************/

#include <SparkFun_Qwiic_Button.h>
QwiicButton button;
//Define LED characteristics
uint8_t brightness = 250;   //The maximum brightness of the pulsing LED. Can be between 0 (min) and 255 (max)
uint16_t cycleTime = 1000;   //The total time for the pulse to take. Set to a bigger number for a slower pulse, or a smaller number for a faster pulse
uint16_t offTime = 200;     //The total time to stay off between pulses. Set to 0 to be pulsing continuously.

void setup() {
  Serial.begin(115200);
  Serial.println("Qwiic button examples");
  Wire1.begin(); //Join I2C bus

  //check if button will acknowledge over I2C
  if (button.begin(SFE_QWIIC_BUTTON_DEFAULT_ADDRESS, Wire1) == false) {
    Serial.println("Device did not acknowledge! Freezing.");
    while (1);
  }
  Serial.println("Button acknowledged.");
  button.LEDoff();  //start with the LED off
}

void loop() {
  //check if button is pressed, and tell us if it is!
  if (button.isPressed() == true) {
    Serial.println("The button is pressed!");
    button.LEDconfig(brightness, cycleTime, offTime);
    while (button.isPressed() == true)
      delay(10);  //wait for user to stop pressing
    Serial.println("The button is not pressed.");
    button.LEDoff();
  }
  delay(20); //let's not hammer too hard on the I2C bus
}
Notice that the code uses Wire1. The Qwiic connector on the Arduino UNO R4 WiFi Board is connected to a secondary I2C bus on this board, IIC0. This connector is 3.3V only, connecting higher voltages may damage your board. To initialize this bus, use Wire1.begin() instead.
You should have the correct board and port selected, as per the Software section of this guide. Upload the code, and when you press the button you should see the button pulse as below: