Simultaneous RFID Tag Reader Hookup Guide
Using an External Antenna
Swapping from the PCB antenna to an external antenna can help with the range of your SRTR, but there are a few things to keep in mind before making that leap.
FCC Regulations
From page 42 of the Nano Design Guide:
No additional transmitter-compliance testing is required if the module is operated with the same type of antenna as listed in the FCC filing as long as it has equal or lower gain than the antenna listed. Equivalent antennas must be of the same general type (e.g. dipole, circularly polarized patch, etc.), must be of equal or less gain than an antenna previously authorized under the same FCC ID, and must have similar in band and out of band characteristics (consult specification sheet for cut-off frequencies).
The PCB trace antenna is a patch antenna with much lower gain than the list of approved antennas, therefore, the SRTR evaluation board as-is can be used in the field without additional FCC testing.
The u.FL connector is an easy way to connect higher gain directional antennas. However, there are stipulations as to what external antennas can be used and additional FCC certifications may be required.
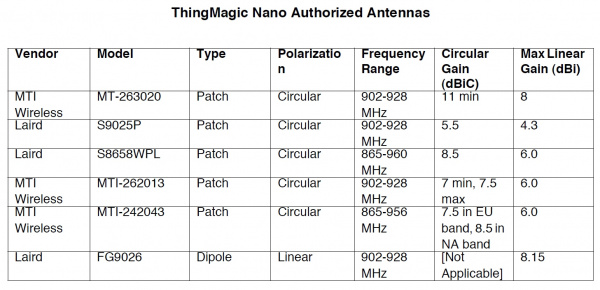
Below is a list of antennas that ThingMagic has tested and gotten approved by the FCC. You may use a different antenna from the ones in the list but it must be of equal or less gain than an antenna previously authorized under the same FCC ID, and must have similar in band and out of band characteristics (consult specification sheet for cut-off frequencies) in order to use it in a product without additional testing.
Attaching the External Antenna
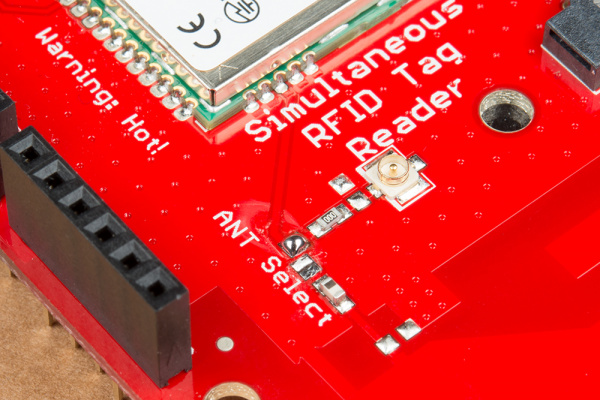
If you want to switch from the onboard antenna, you will need to change the antenna jumpers around to enable the u.FL connector.
How to Work with Jumper Pads and PCB Traces
Using some solder wick, clear the solder jumper to the trace antenna and close the solder jumper to the u.FL connector by adding a blob of solder.
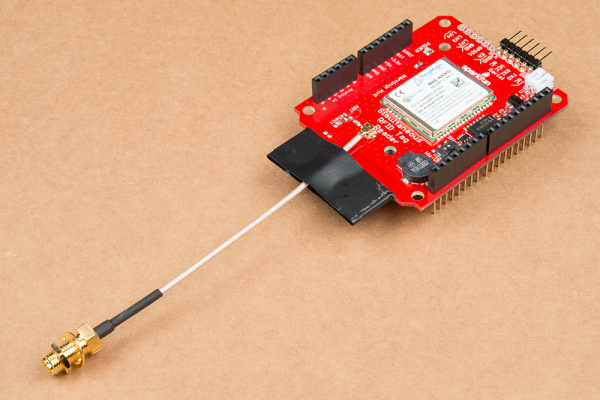
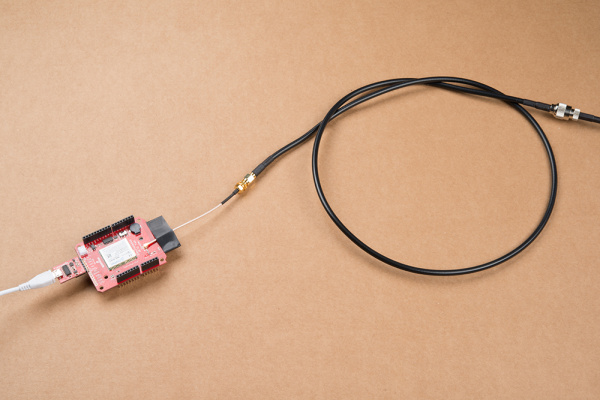
Next, attach the u.FL to the RP-SMA connector cable. Because this connector is fragile we recommend either taping or hot gluing the sheath of the cable to the PCB. This will help prevent damage to the u.FL connector in case the cable gets pulled on.
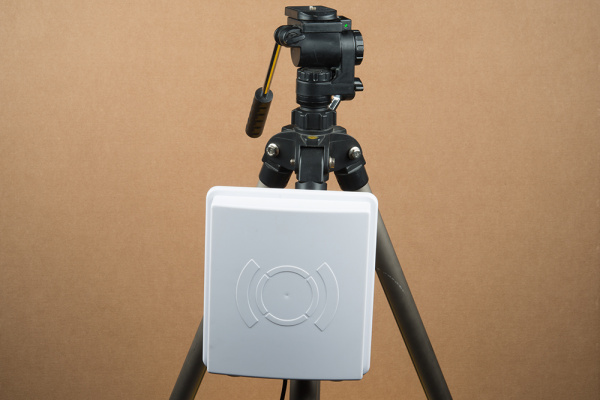
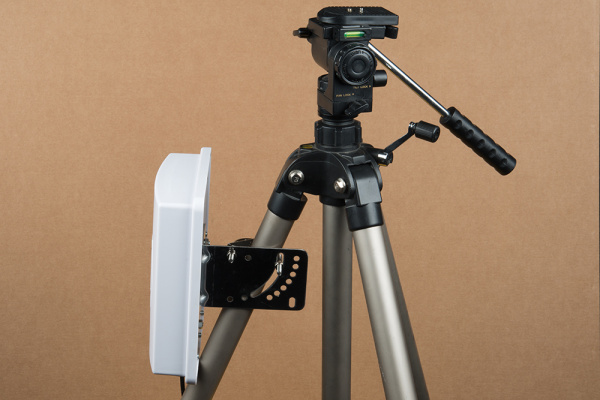
To get the best range we recommend attaching an external high-gain antenna to a tri-pod of some sort. If you only have a desk, that's ok too.
We used the included hardware with the antenna to attach it to a leg of the tripod.
Now connect the RP-SMA to RP-TNC cable. And finally connect the RP-TNC to the external antenna. You can use a different UHF RFID antenna but you will need to have the correct connectors and cables to go from the u.FL connector on the PCB to the connector on your specific antenna.
