Contributors:
santaimpersonator, MAKIN-STUFF
Introduction
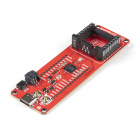
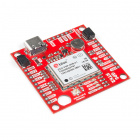
The RP2040 mikroBUS™ Development Board is our latest RP2040 microcontroller (MCU) development board. This new board takes advantage of the Qwiic and the mikroBUS™ ecosystems and allows users to take advantage of the growing number of 94 Qwiic boards and 1079 Click boards™ (as of September 2021) to develop with the Raspberry Pi RP2040 microcontroller.
DEV-18721
The SparkFun RP2040 mikroBUS Development Board is a low-cost, high performance platform with flexible digital interfaces feat…
Retired
The Raspberry Pi RP2040 (the first MCU from the Raspberry Pi Foundation) is a low cost, dual-core Arm® Cortex® M0+ microcontroller with 264kB of SRAM, running at 133MHz. It includes USB host functionality, a timer with 4 alarms, a real time counter (RTC), six dedicated IO pins for Quad-SPI flash (supporting execute in place), and thirty multifunction GPIO
(*18 of which are broken out on the board), with the following capabilities:
- Four 12-bit Analogue to Digital Converter (ADC) channels
- Two UART buses
- Two I2C buses
- Two SPI buses
- Up to 16 PWM channels
- Can emulate interfaces such as SD Card and VGA
The mikroBUS™ standard was developed by MikroElektronika and provides a standardized connection to interface with Click boards™.
Image source: https://www.mikroe.com/1000-click-boards
For more details, check out their blog post on the 1000th Click board™ and the origins of the mikroBUS™ standard and mikroBUS™ standard specifications.
Required Materials
To get started, users will need a few of items listed below. (You may already have a some of these items; read through the guide and modify your cart accordingly.)
Required Hardware
A USB-C cable is needed to connect the RP2040 mikroBUS™ Development Board to a computer.
CAB-14743
USB C is fantastic. But until we have converted all our hubs, chargers, and ports over to USB C this is the cable you're goin…
DEV-18721
The SparkFun RP2040 mikroBUS Development Board is a low-cost, high performance platform with flexible digital interfaces feat…
Retired
Click Board™
We recommend purchasing a Click board™ to utilize the mikroBUS™ socket. We also suggest novice users select a Click board™ that is supported with an Arduino library. Otherwise, users will have difficulties programming their board to utilize the associated Click board™. Below, is a sample of the options available in our catalog:
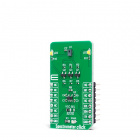
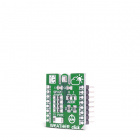
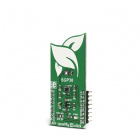
SEN-18785
MIKROE Spectrometer Click features an 11-channel spectrometer for spectral identification and color matching applications.
Retired
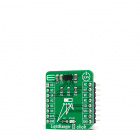
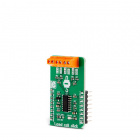
SEN-18803
MIKROE LightRanger 8 Click is a compact add-on board that contains a ranging sensor with multi-target detection.
Retired
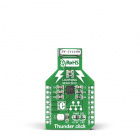
SEN-18821
MIKROE Thunder Click features AS3935 lightning sensor as well as MA5532 coil antenna.
Retired
SEN-18823
MIKROE Weather Click carries BME280 integrated environmental unit from Bosch.
Retired
SEN-18824
MIKROE Load Cell Click is a weight measurement Click which utilizes a load cell element, in order to precisely measure the we…
Retired
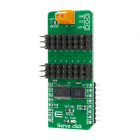
ROB-18867
MIKROE Servo Click is a compact add-on board that contains a PWM servo driver with voltage sensing circuitry.
Retired
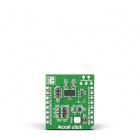
SEN-18925
It features ADXL345 3-axis accelerometer module with ultra-low power and high resolution (13-bit) measurement, from Analog De…
Retired
SEN-18928
This is an advanced air quality sensing device that combines multiple metal-oxide sensing elements on a chip to provide detai…
Retired
Optional Hardware
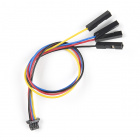
To connect Qwiic breakout boards for your MicroMod project, Qwiic cables are required.
PRT-15109
The Qwiic to Grove Adapter Cable allows interoperability between the SparkFun Qwiic Connect System and the I2C based Grove bo…
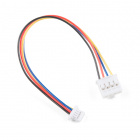
PRT-17259
This polarized I2C cable insulation is made from silicon making it more flexible than our original Qwiic cable particularly i…
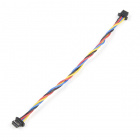
PRT-17260
This polarized I2C cable insulation is made from silicon making it more flexible than our original Qwiic cable particularly i…
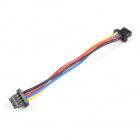
CAB-17261
This polarized I2C cable insulation is made from silicon making it more flexible than our original Qwiic cable particularly i…
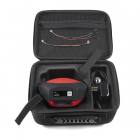
GPS-19984
The SparkFun RTK Facet is a fully enclosed GNSS receiver for centimeter-level positioning. Perfect for high precision geoloca…
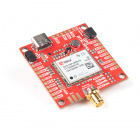
GPS-16481
The SparkFun GPS-RTK-SMA raises the bar for high-precision GPS and is the latest in a line of powerful RTK boards featuring t…
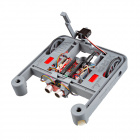
KIT-27644
The XRP Robotics Platform is a hands-on, comprehensive robotics platform and includes everything needed to build and program …
GPS-15136
The SparkFun GPS-RTK2 is a powerful breakout for the ZED-F9P module. The ZED-F9P is a top-of-the-line module for GNSS & GPS s…
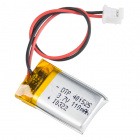
A single-cell Lithium-ion battery can be connected to the Qwiic Carrier Board for portability.
PRT-13851
This is a very small, extremely lightweight battery based on Lithium Ion chemistry, with the highest energy density currently…
PRT-13853
This is a very small, extremely light weight battery based on Lithium Ion chemistry. This is the highest energy density curre…
PRT-13855
These are very slim, extremely light weight batteries based on Lithium Ion chemistry. Each cell outputs a nominal 3.7V at 200…
PRT-13813
Slim, extremely light weight batteries based on Lithium Ion chemistry. Each cell outputs a nominal 3.7V at 1000 mAh!
Retired
To modify the jumpers, users will need soldering equipment and/or a knife.
TOL-09325
This is your basic spool of lead free solder with a water soluble resin core. 0.031" gauge and 100 grams. This is a good spoo…
TOL-14579
This 10mL no-clean flux pen from Chip Quik is great for all of your solder, de-solder, rework, and reflow purposes!
TOL-09200
It's like an Xacto knife, only better. We use these extensively when working with PCBs. These small knives work well for cutt…
TOL-14228
The WLC100 from Weller is a versatile 5 watt to 40 watt soldering station that is perfect for hobbyists, DIYers and students.…
Retired
Suggested Reading
The MicroMod ecosystem is a unique way to allow users to customize their project to their needs. The Qwiic connect system is a simple method for interfacing with I2C devices. Click on the banners below for more information on each system.
For users who aren't familiar with the following concepts, we also recommend reading the following tutorials before continuing.
Serial Communication
Asynchronous serial communication concepts: packets, signal levels, baud rates, UARTs and more!
Logic Levels
Learn the difference between 3.3V and 5V devices and logic levels.
I2C
An introduction to I2C, one of the main embedded communications protocols in use today.
Analog vs. Digital
This tutorial covers the concept of analog and digital signals, as they relate to electronics.
Processor Interrupts with Arduino
What is an interrupt? In a nutshell, there is a method by which a processor can execute its normal program while continuously monitoring for some kind of event, or interrupt. There are two types of interrupts: hardware and software interrupts. For the purposes of this tutorial, we will focus on hardware interrupts.
Installing an Arduino Library
How do I install a custom Arduino library? It's easy! This tutorial will go over how to install an Arduino library using the Arduino Library Manager. For libraries not linked with the Arduino IDE, we will also go over manually installing an Arduino library.
Installing Arduino IDE
A step-by-step guide to installing and testing the Arduino software on Windows, Mac, and Linux.
Installing Board Definitions in the Arduino IDE
How do I install a custom Arduino board/core? It's easy! This tutorial will go over how to install an Arduino board definition using the Arduino Board Manager. We will also go over manually installing third-party cores, such as the board definitions required for many of the SparkFun development boards.
RP2040 Thing Plus Hookup Guide
Want to take a stab at advancing your programming skills? Check out the Thing Plus - RP2040, with the first microcontroller from the Raspberry Pi Foundation. This guide will get you started working with the RP2040 and programming in MicroPython and C/C++.


