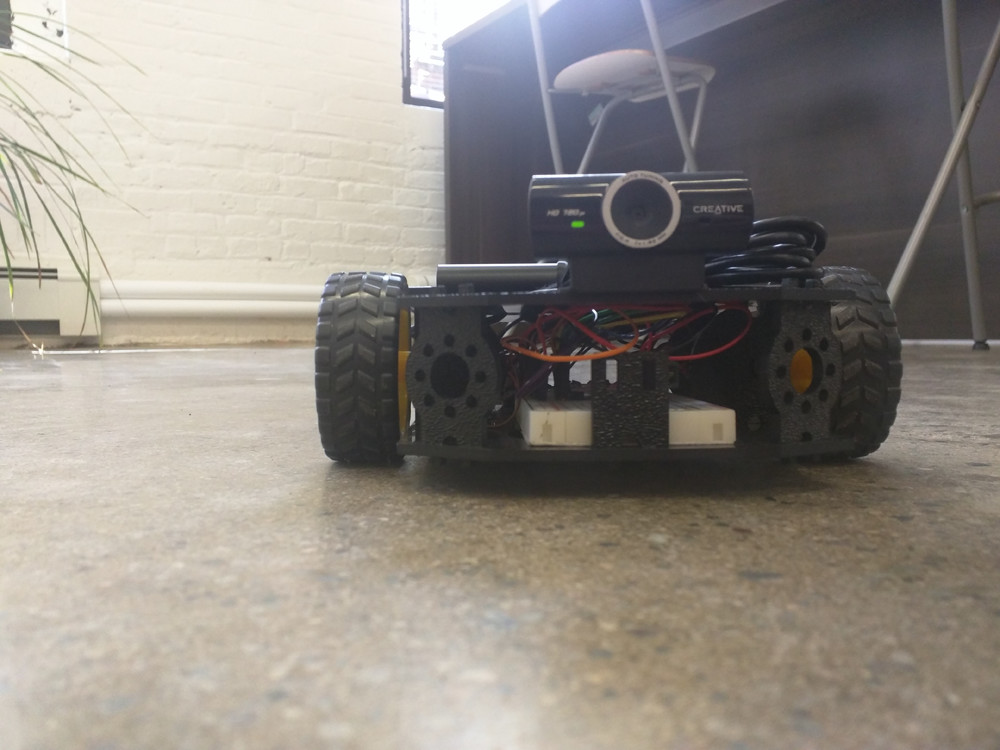
ReconBot with the Tessel 2
 rwaldron
How the Robot Works
The software for this project is similar in structure to the software in the Johnny-Five Inventors Kit Guide Experiment 10: Using the BME280—if you haven't read that guide, we suggest doing so now and working through that experiment. That will help to familiarize you with how we will be using Web Sockets in the robot's application.
The robot's code is composed of two main "chunks":
- Client code. This code runs inside a web browser (on your laptop or phone, e.g.) and consists of an HTML page and some JavaScript. The client code is responsible for displaying the robot's streaming video, as well as the display and behavior of the steering controls. The HTML and JavaScript that make up the client code are delivered to your web browser by the server code when you connect to the Tessel. The client code is contained within the
app/directory of the project. - Server code. This Node.js application code runs on the Tessel when you execute
t2 run index.js. The server code creates a web server to respond to requests from web browsers. It starts a process that streams video from the webcam and makes it available for browsers that connect. It also takes incoming steering data from the browser-based controls and translates it into speed and direction of the robot's motors (wheels).
How the Web Interface Works (The Client Code)
The client code—which executes in your browser—is responsible for rendering the controls, showing the streaming video and sending steering and speed instructions to the server.
The client application's user interface is a single HTML file (app/index.html). The important parts of this file are:
- An
<img>element to display themjpg-streamer"video stream". Thisimgis sized so that the video stream fills the browser's viewport. - A
<canvas>element to display the touch-driven virtual thumb-stick. - JavaScript (inline in a
<script>tag) to draw the shapes of the controls into thecanvas, capture and process interaction events (e.g. touch) and send socket messages containing axis value payloads to the server application.
How Steering Works
The virtual thumbstick is designed in a way that hearkens back to traditional radio-controlled (RC) transmitters. Take a look at a "real" RC transmitter control:
And our version:
Interacting with the thumbstick causes a message to be sent over the connected socket to the server. This message contains an object representing a point { x, y } for the coordinates (relative to the thumbstick) last touched. Values for both x (left-right) and y (up-down) axes are between -100 and 100.
        (X, Y)

-100,   0,100    100,
100              100
  \       |       /
   \      |      /
    \     |     /
     \    |    /
      \   |   /
       \  |  /
        \ | /
         \|/
-100,-----+-------100,
  0      /|\       0
        / | \
       /  |  \
      /   |   \
     /    |    \
    /     |     \
   /      |      \
  /       |       \
-100,   0,-100   100,
-100            -100
On the server, this point object is used to compute an angle, which is then used to find a "turn coefficient", which is then used to calculate how much "turn" to apply to the motors. Yay, trigonometry!
How the Server Code Works
The code that runs on your Tessel is a Node.js application. It:
- hosts an HTTP server. This is what will serve the HTML page and the streaming video you'll see in your browser when you connect to the Tessel. Using the built-in module
http, as well as the popular third-party web framework moduleexpress, the server code serves static content (HTML and JavaScript) as well as routing requests for/videoto support the streaming video. - hosts a web socket. Remember, the virtual thumbstick in the browser will be sending data messages about its position to the server so that the robot's direction and speed can be controlled. The code combines uses the
socket.iomodule to pull this off. - controls the robot hardware itself. As the server receives axis data on the web socket, it passes these values along to an
update(...)method on an object that is controlling the robot itself (an instance of a class calledRover.
Let's take a look at the supporting cast—a script that fires up a video-streaming process and a class (Rover) for controlling the robot's movements.
How the Video is Streamed
At the beginning of index.js, an instance of av.Camera is created, which itself controls an mjpg_streamer child process that streams video, which is available at port 8080 on the Tessel.
How the Robot Controls its Motors
lib/rover.js contains a class called Rover, which encapsulates the logic for actually moving the two-wheeled robot around. Most of Rover's functionality is within a method called update(...). update(...) takes in axis information (direction and speed information from the controller) and converts that into the right kind of motor motion.
There's a bunch of trigonometry in update(...) and we don't want to make you glaze over completely (though, by all means, explore the source code if you're curious!). It does the heavy lifting of calculating and converting angles, computing "move" and "turn" values, scaling values to the correct speed and updating the motors.
How it all Fits Together
index.js is the script that pulls it all together, and this is the script you'll run on the Tessel using t2 run (or t2 push). Here is the script in its entirety (and then we'll break it down):
language:javascript

"use strict";

// Built-in Dependencies
const cp = require("child_process");
const Server = require("http").Server;
const os = require("os");
const path = require("path");

// Third Party Dependencies
const five = require("johnny-five");
const av = require("tessel-av");
const express = require("express");
const Socket = require("socket.io");
const Tessel = require("tessel-io");

// Internal/Application Dependencies
const Rover = require("./lib/rover");


// Application, Server and Socket
const app = express();
const server = new Server(app);
const socket = new Socket(server);
const video = new av.Camera({
   fps: 15,
   dimensions: "320x240",
   quality: 50,
});

// Configure express application server:
app.use(express.static(path.join(__dirname, "app")));
app.get("/video", (request, response) => {
  response.redirect(`${video.url}`);
});

// Start the HTTP Server
const port = 80;
const listen = new Promise(resolve => {
  server.listen(port, resolve);
});

// Initialize the Board
const board = new five.Board({
  sigint: false,
  repl: false,
  io: new Tessel()
});

board.on("ready", () => {
  const rover = new Rover([
    // Left Motor
    { pwm: "a5", dir: "a4", cdir: "a3" },
    // Right Motor
    { pwm: "b5", dir: "b4", cdir: "b3" },
  ]);

  console.log("Reconbot(T2): Initialized");
  socket.on("connection", connection => {
    console.log("Reconbot(T2): Controller Connected");
    connection.on("remote-control", data => {
      rover.update(data.axis);
     });
  });

  listen.then(() => {
    console.log(`http://${os.hostname()}.local`);
    console.log(`http://${os.networkInterfaces().wlan0[0].address}`);

    process.on("SIGINT", () => {
      video.stop();
      server.close();
      process.exit();
    });
  });
});
Breaking down index.js
The very first thing we encounter is a Use Strict Directive—this informs the JavaScript engine that this code conforms to a safe subset of JavaScript. It will also appear at the beginning of the lib/rover.js:
language:javascript
"use strict";
Getting our Dependencies in Order
This is the program's "setup" stage, and we need to organize and require all of the application's dependencies: built-in node modules, third-party packages and our own modules:
language:javascript
// Built-in Dependencies
const cp = require("child_process");
const Server = require("http").Server;
const os = require("os");
const path = require("path");

// Third Party Dependencies
const av = require("tessel-av");
const express = require("express");
const five = require("johnny-five");
const Socket = require("socket.io");
const Tessel = require("tessel-io");

// Internal/Application Dependencies
const Rover = require("./lib/rover");
Starting up the Streaming Video
To create our video stream, all we have to do is instantiate a new av.Camera object:
language:javascript
const video = new av.Camera({
  fps: 15,
  dimensions: "320x240",
  quality: 50,
});
Starting the Web Server and Web Socket
We'll be using a web application framework called Express to provide the logic necessary to support what our web server does:
language:javascript
const app = Express();
We'll need a web server (via Node's built-in http module) to handle delegating incoming requests to our application:
language:javascript
const server = new Server(app);
And a web socket hosted by that http server:
language:javascript
const socket = new Socket(server);
Most of what our web application needs to deliver is static content: an HTML document, specifically. For that, we can use Express' static "middleware". Long story short, the following makes it so clients (i.e. browsers) can request and successfully receive files that live under the app/ directory:
language:javascript
app.use(Express.static(path.join(__dirname, "app")));
But the app does need to do one fancy thing. When the browser requests /video, our app redirects it to the specific URL where the streaming video is available:
language:javascript
// Configure express application server:
app.use(Express.static(path.join(__dirname, "app")));
app.get("/video", (request, response) => {
  response.redirect(`${video.url}`);
});
Finally, we'll fire up the web server so it's listening on port 80 (default HTTP port):
language:javascript
// Start the HTTP Server
const port = 80;
const listen = new Promise(resolve => {
  server.listen(port, resolve);
});
Initializing the Tessel Board
Note: If this is your first exposure to using the Johnny-Five Board class to represent the state of the Tessel 2's board, we recommend you read (at the least) Experiment 1: Blink an LED for a little background.
This Board instantiation looks a little different from other Johnny-Five Tessel examples. We're explicitly disabling the automatic REPL (interactive console). We also tell the board not to respond in its default way to SIGINT events. SIGINT is a signal sent by Unix-based systems when a process is interrupted, like when you type ctrl-C after using the t2 run command. We'll shortly define how we do want the robot to respond if the process is interrupted.
language:javascript
// Initialize the Board
const board = new five.Board({
  sigint: false,
  repl: false,
  io: new Tessel()
});
When the board emits the ready event, the Tessel 2's hardware is ready for interaction.
language:javascript
board.on("ready", () => {
  // ... Let's go!
});
Creating the Rover Object
Within the "ready" event handler, we can be confident that the Tessel hardware is ready to go. The next step is to instantiate an object of the Rover. When we instantiate a Rover, we need to give it some information about the motors attached to the board. Each motor has three relevant pin connections: pwm (pulse-width modulation), dir (direction) and cdir (counter-direction). You can read more about this in the documentation for Johnny-Five's Motor class. The pin numbers correspond to how the pins on the motor driver are connected to the Tessel.
language:javascript
const rover = new Rover([
  // Left Motor
  { pwm: "a5", dir: "a4", cdir: "a3" },
  // Right Motor
  { pwm: "b5", dir: "b4", cdir: "b3" },
]);
Phew! Now the robot is ready to rock. A message is logged that says "Reconbot(T2): Initialized":
language:javascript
console.log("Reconbot(T2): Initialized");
Handling socket connection events
When you open the robot's controlling web page in a browser, it will trigger a "connection" event on the web socket. The "connection" handler logs a message confirming the connection and sets up an event handler for "remote-control" events. Remote control events are fired when new axis data is sent from the thumbstick controls. This axis data gets passed on to the rover.
language:javascript
socket.on("connection", connection => {
  console.log("Reconbot(T2): Controller Connected");
  connection.on("remote-control", data => {
    rover.update(data.axis);
  });
});
That's it for hardware interaction control! The next few lines helpfully show the URL for your robot's controlling web page. Remember how we turned off default SIGINT handling? Here's where we circle back and define how we do want SIGINT events to be handled—making sure to close the web server before exiting the process.
language:javascript
listen.then(() => {
  console.log(`http://${os.hostname()}.local`);
  console.log(`http://${os.networkInterfaces().wlan0[0].address}`);
  process.on("SIGINT", () => {
    video.stop();
    server.close();
    process.exit();
  });
});
Deployment And Operation of the Robot
It's time to deploy and run the software on our robot—which also means it's time to drive!
Whenever you're ready, go ahead and type—or copy and paste—the following command into your terminal:
t2 run index.js
Once the program is deployed and started, you will see the URL of the controller application displayed:
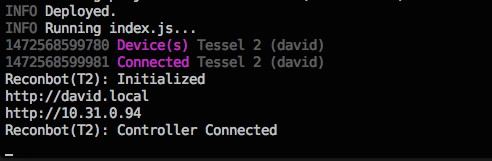
Go ahead and open that URL in a browser on your mobile device or laptop. If your friend is positioned directly in front of the bot, you might see something like this:
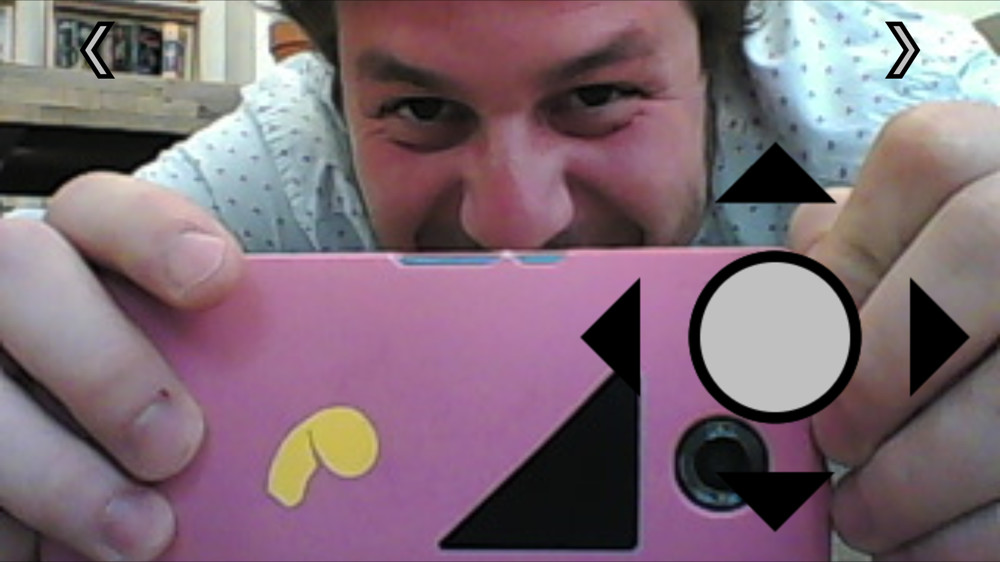
While they will see this: