ReconBot with the Tessel 2
 rwaldron
Prepping and Testing the Robot
Before you secure all of your connections and put the top on your robot, put the chassis aside for a few minutes, and install the robot's software. You'll want to test to make sure your motors run in the expected directions before putting it all together. Trust us. We speak from experience.
Installing the Robot's Software
Get the Software
If you have git installed and feel comfortable using that tool, open your terminal and run:
git clone https://github.com/bocoup/j5ik-reconbot-tessel-edition.git;
cd j5ik-reconbot-tessel-edition;
npm install;
If git is not your thing, you can also download the project as a zip file:
You can always find the most up to date content at in the GitHub repository as well.
Extract the contents however you prefer, then open your terminal and navigate to the extracted project directory.
Install the Software
From your project directory, run:
npm install;
...And that should do it! Go ahead and open the project directory in your preferred editor, and familiarize yourself with the location of each file. The structure should look something like this:
language:console
 .
 ├── app
 │   ├── index.html
 │   ├── pep.js
 ├── lib
 │   └── rover.js
 ├── node_modules
 │   ├── express
 │   ├── johnny-five
 │   ├── socket.io
 │   ├── tessel-av
 │   └── tessel-io
 ├── .tesselinclude
 ├── index.js
 ├── install.js
 └── package.json
Installing mjpg-streamer on the Tessel
Next, install needed video software on your Tessel.
To support one of the most important components of this project—an efficient video stream over a Wireless LAN connection—you'll need to install mjpg_streamer. To do that, you could SSH to the board and manually install it by using opkg (Open PacKaGe Management, a package manager for embedded Linux)—but instead you'll use another JavaScript program! Yay!
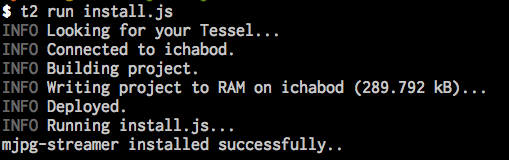
In the project's directory, there's a script called install.js—this contains our installation operations. Feel free to open and read the contents of that file if you're curious how it works. You can type—or copy and paste—the following command into your terminal:
t2 run install.js
Hit enter and let the script run to completion. The result should look similar to the following:
Testing the Motors
Now's the time to make any needed adjustments to the motor driver circuit. Double-check the "Pre-Flight Check" above to make sure your Tessel is prepped and powered. You may want to use the (USB micro) wall adapter to power the motors during this step.
With your Tessel and robot chassis base ready and off the ground, type—or copy and paste—the following command in your terminal:
t2 run motors.js
This script will cause the robot's motors to run alternately forward and backward, accelerating from slow to top speed. A console log message will let you know which way the motors should be turning at any given time.
Troubleshooting Motor Connections
Don't freak out if one (or both) of your motors is spinning in the wrong direction. If your left motor is spinning the wrong way, swap the red and black connections on the motor driver's A01 and A02 pins. If the right motor is misbehaving, swap the red and black connections on B01 and B02.
If your script crashes suddenly or your Tessel becomes unresponsive, double-check to make sure that you are providing the motors with enough power—remember, the Tessel's USB connection to your computer cannot provide enough current. You'll need to use the DC adapter or a standalone USB power bank.