nRF9160 Thing Plus Hookup Guide
 Circuit Dojo, Ell C
SDK Setup - Windows
This page is all about getting your Windows machine compiling code for the nRF9160 Thing Plus. Run into trouble during the process? Post your questions on the community forum.
IDE Setup
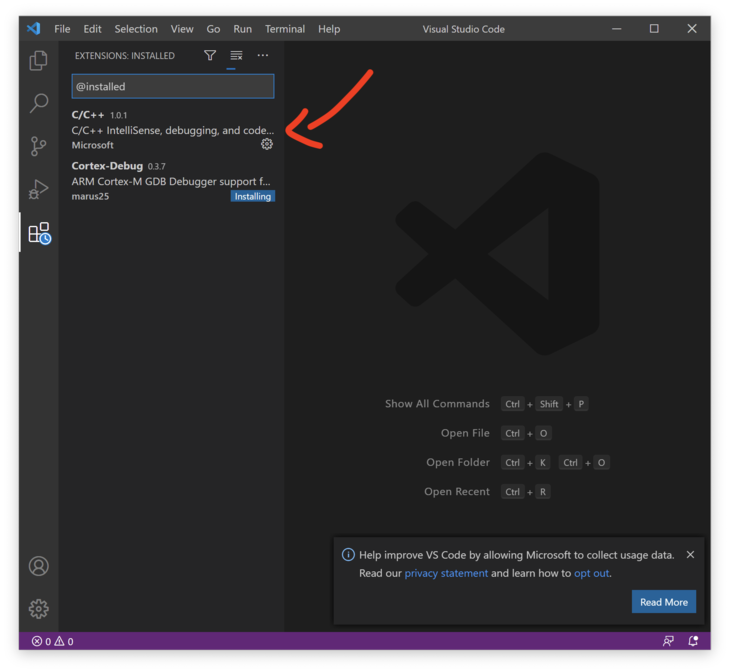
Install or use the code editor of your choice. I personally use Microsoft Visual Studio Code. The download link is here, or you can download by clicking the button below. If you decide to use Visual Studio Code, make sure you install the C/C++ and Cortex-Debug extentions using the built in extension marketplace.
SDK Install
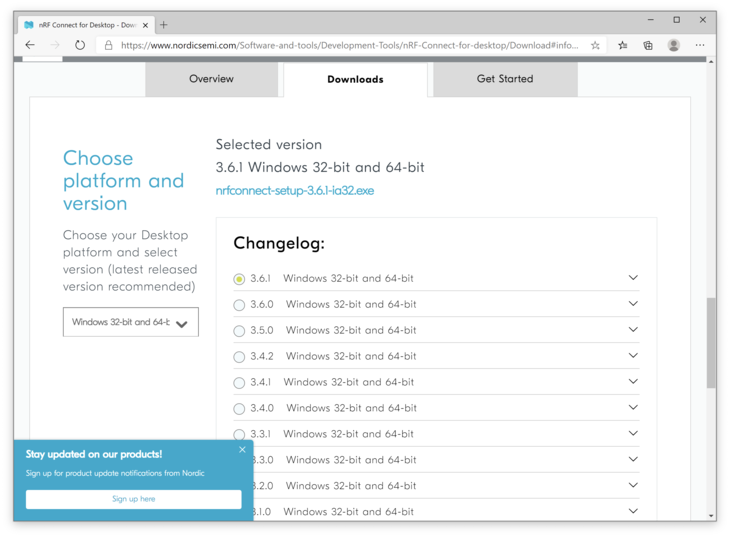
nRF Connect For Desktop is the utility that you can use to manipulate your nRF9160 Thing Plus. Download and install nRF Connect For Desktop.
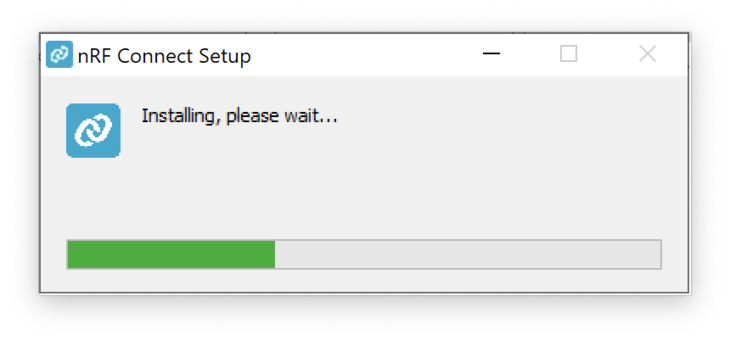
Once downloaded, run the installer:
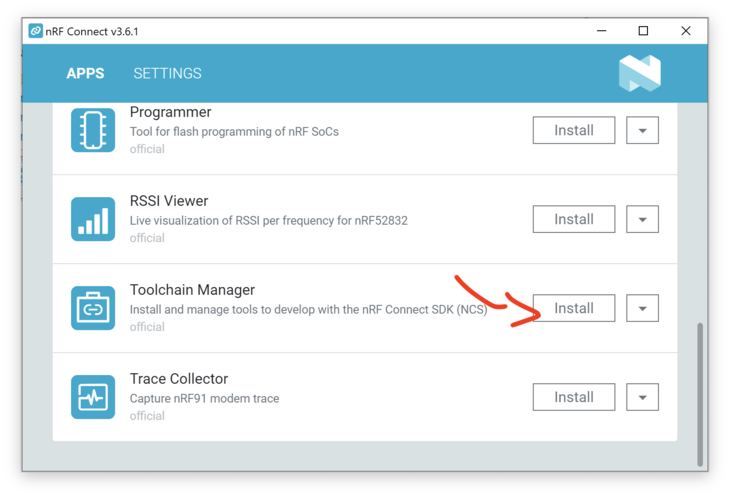
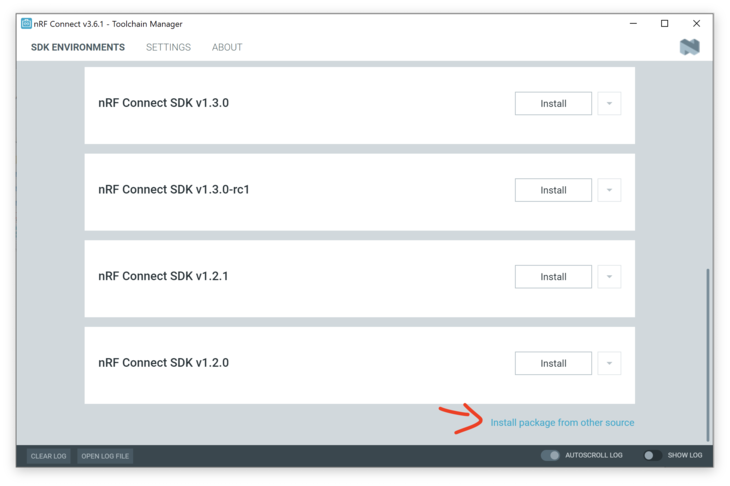
Open up the app and install the Toolchain Manager:
Open up the Toolchain Manager after installing. Scroll to the bottom and click Install package from other source
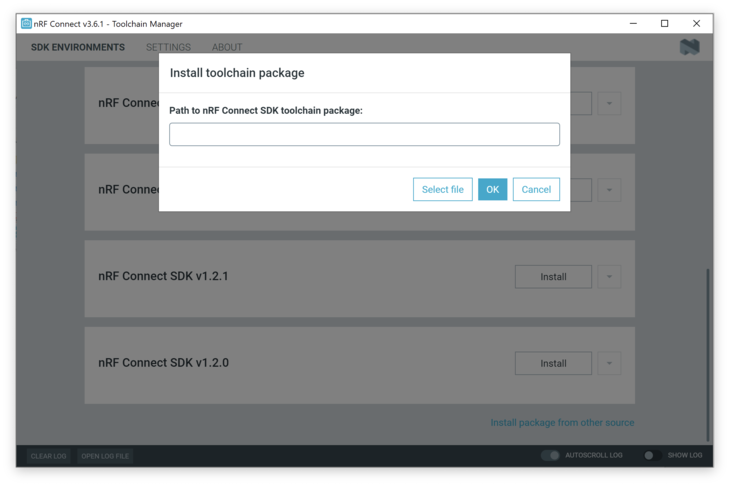
Then paste this url into the box and click ok:
http://developer.nordicsemi.com/.pc-tools/toolchain/ncs-toolchain-v1.4.1-20201215-7ecf886-minimal.zip
Warning: Nordic had deprecated the this toolchain, the legacy files have been relocated here:
https://files.nordicsemi.com/ui/native/swtools/external/legacy-toolchains/
The download and install will take a few minutes. Hang out, take a walk, sing a song, and come back later.
Once installed you'll have a dropdown that you can access. Click on it and then the Open Bash or Open Command Prompt option. (I prefer bash since I use *nix a lot)

To get the nRF9160 Thing Plus examples we'll update C:\Users\<your username>\ncs\v1.4.1\nrf\west.yml. First in the remotes section add:
language:c
name: circuitdojo
url-base: https://github.com/circuitdojo
Then in the projects section add at the bottom:
language:c
name: nfed
repo-path: nrf9160-feather-examples-and-drivers
revision: v1.4.x
path: nfed
remote: circuitdojo
Then run west update in your freshly created bash/command prompt session. This will fetch the nRF9160 Thing Plus examples.
Installing newtmgr
newtmgr is required for the MCU bootloader to work. You can download the binary file here or by clicking the button below:
Extract it and move it into your C:\Users\<your username>\ncs\v1.4.1\toolchain\bin directory.
Add the path to your newtmgr.exe to your system $PATH. If you're unfamiliar with the process check out this guide. Also remember to restart your bash window after updating the system $PATH.
Setting your connection configuration (one time only)
In order to easily work with newtmgr you'll need to make a one-time connection profile. Make sure that the COM port matches the one attached to the nRF9160 Thing Plus. An easy way to check is to remove and add the device to see which COM port shows up in device manager.
language:c
newtmgr conn add serial type=serial connstring="dev=COM3,baud=1000000"
You've now created a connection called serial. We'll be using that when issuing commands to the nRF9160 Thing Plus.