nRF9160 Thing Plus Hookup Guide
 Circuit Dojo, Ell C
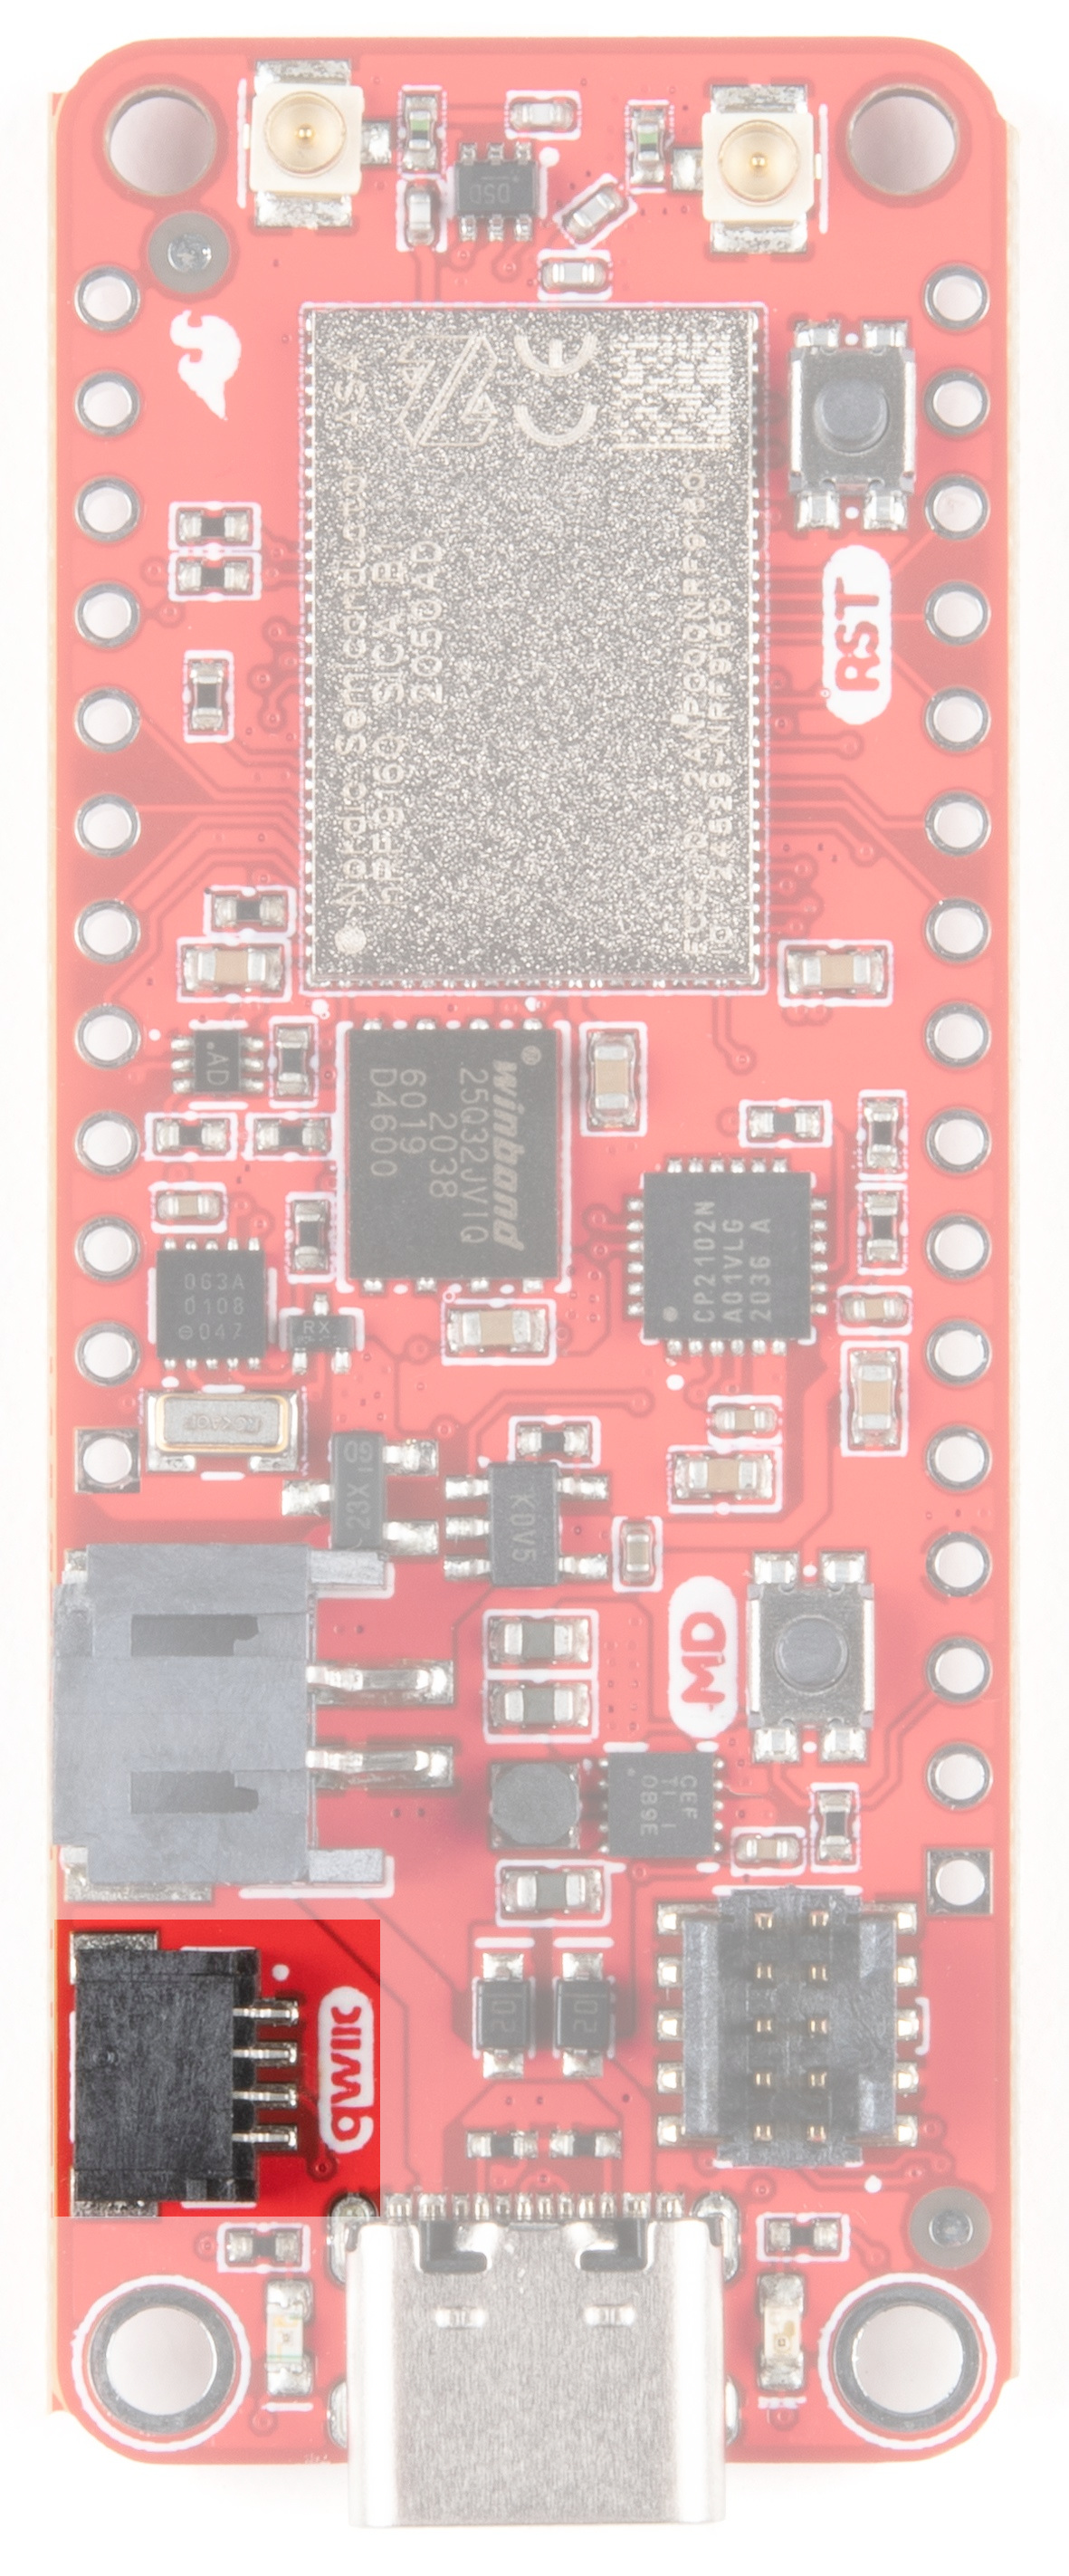
Hardware Overview
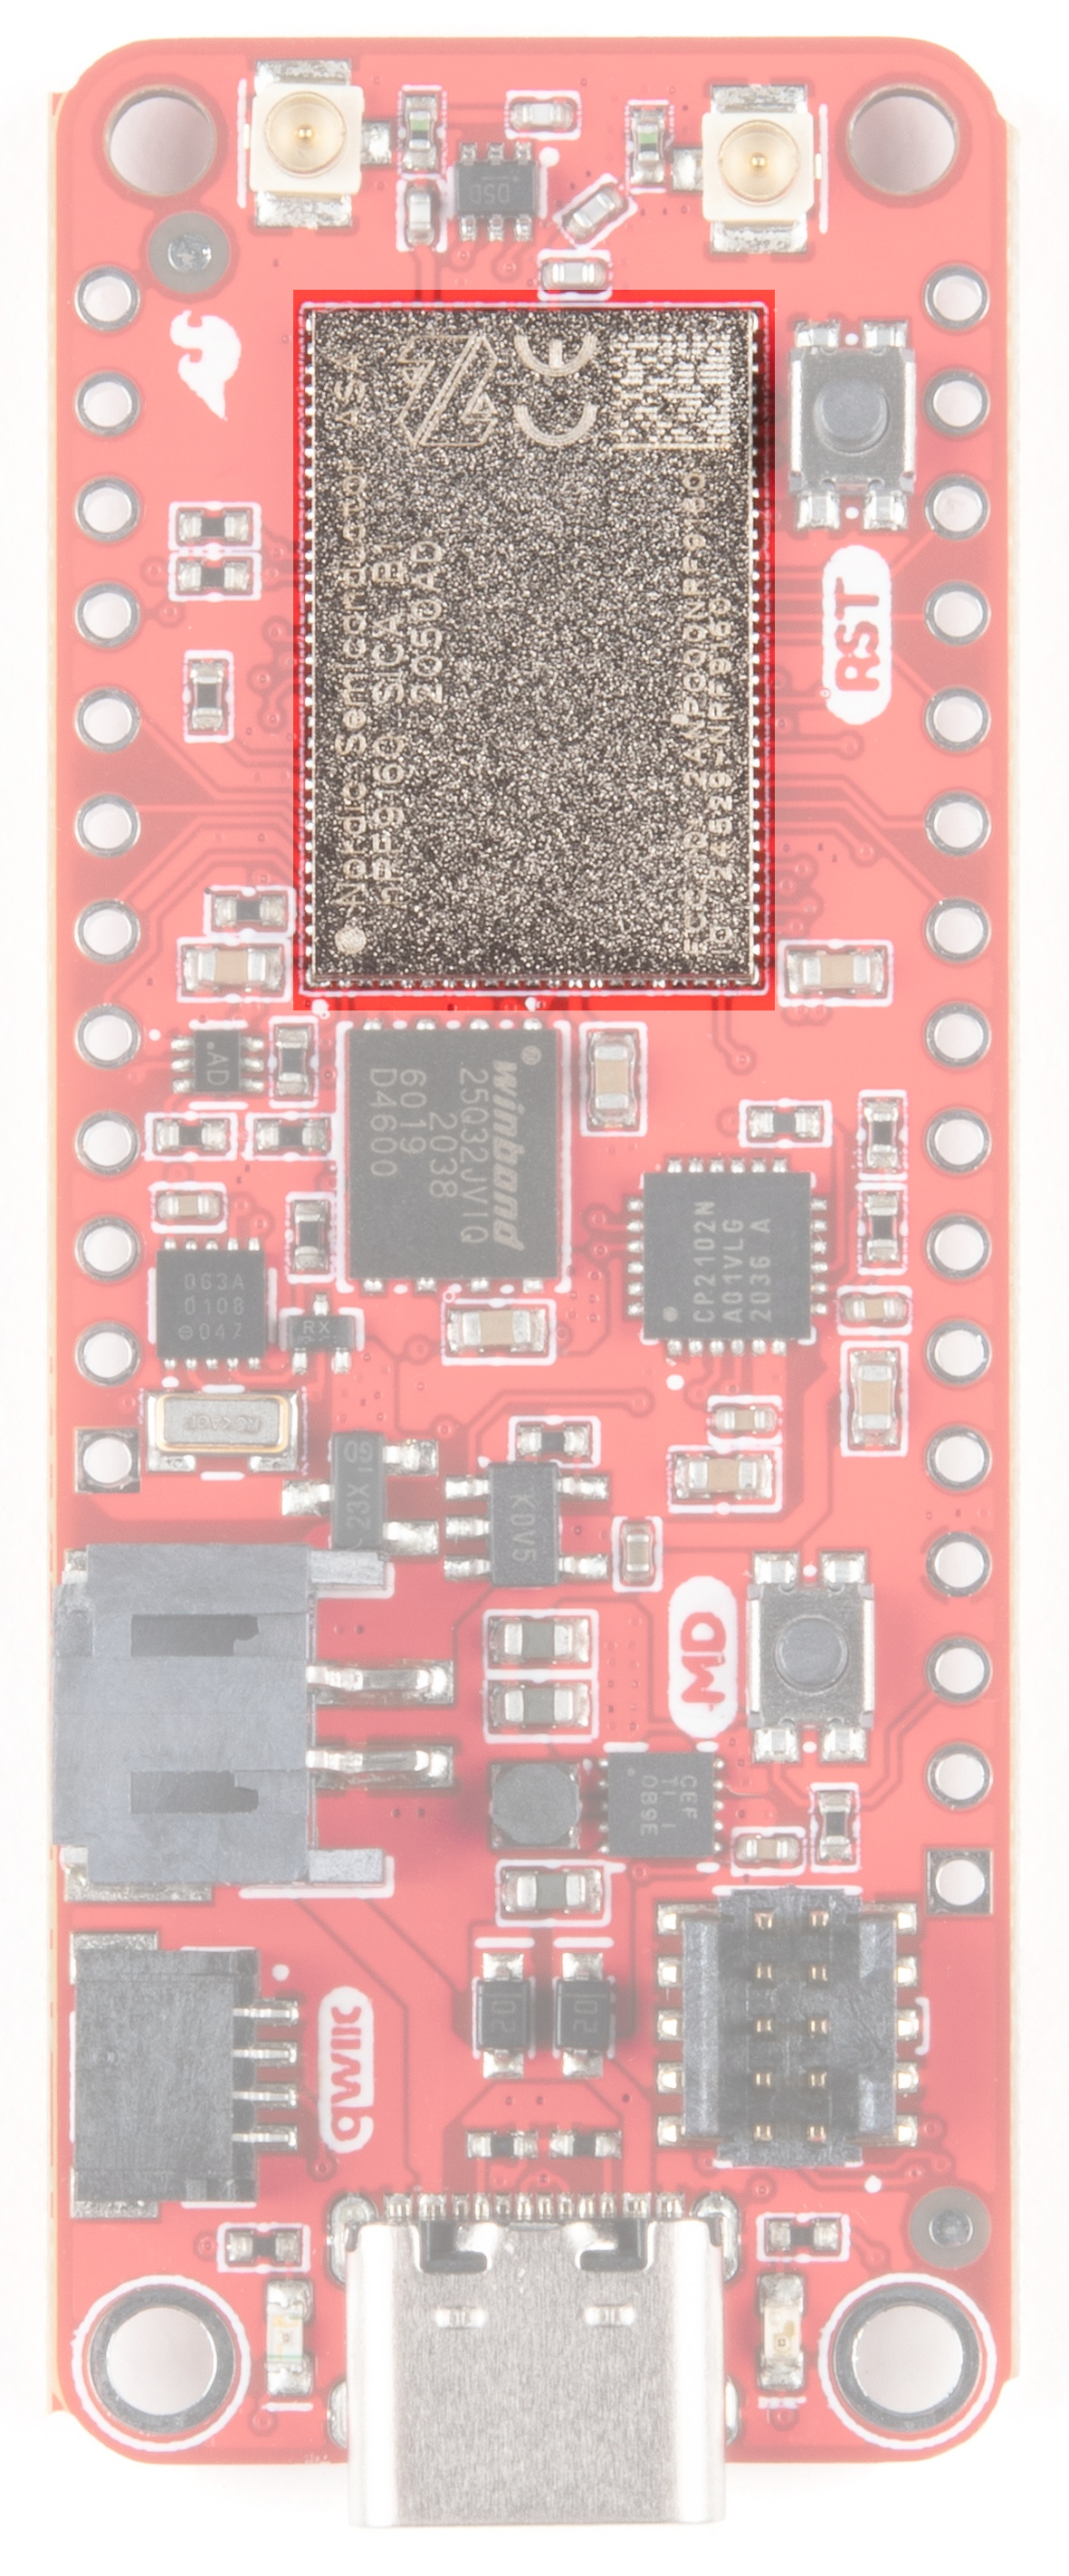
nRF9160
The nRF9160 from Nordic Semiconductor has some amazing capabilities. Some of the more prominent features are listed below. See the datasheet for more information.
- Microcontroller
- ARM Cortex M33
- 1MB Flash
- 256kB RAM
- ARM® TrustZone®
- ARM® Cryptocell 310
- Up to 4x SPI, I2C and UART with Easy DMA
- I2S w/ EasyDMA
- 4x PWM with EasyDMA
- 12bit SADC with EasyDMA
- 2x RTC
- PPI (Programmable peripheral interconnect) interface
- Radio
- Transceiver and baseband
- 3GPP LTE release 13 Category M1 and NB1 compliant
- 3GPP release 14 NB2 compliant
- GPS receiver (GPS L1 C/A supported) - Active antenna only.
- RF Transceiver for global coverage supporting bands:
- Cat-M1: B1, B2, B3, B4, B5, B8, B12, B13, B14, B17, B18, B19, B20, B25, B26, B28, B66
- Cat-NB1/NB2: B1, B2, B3, B4, B5, B8, B12, B13, B17, B18, B20, B25, B26, B28, B66
- Supports 4FF Nano SIM
Power
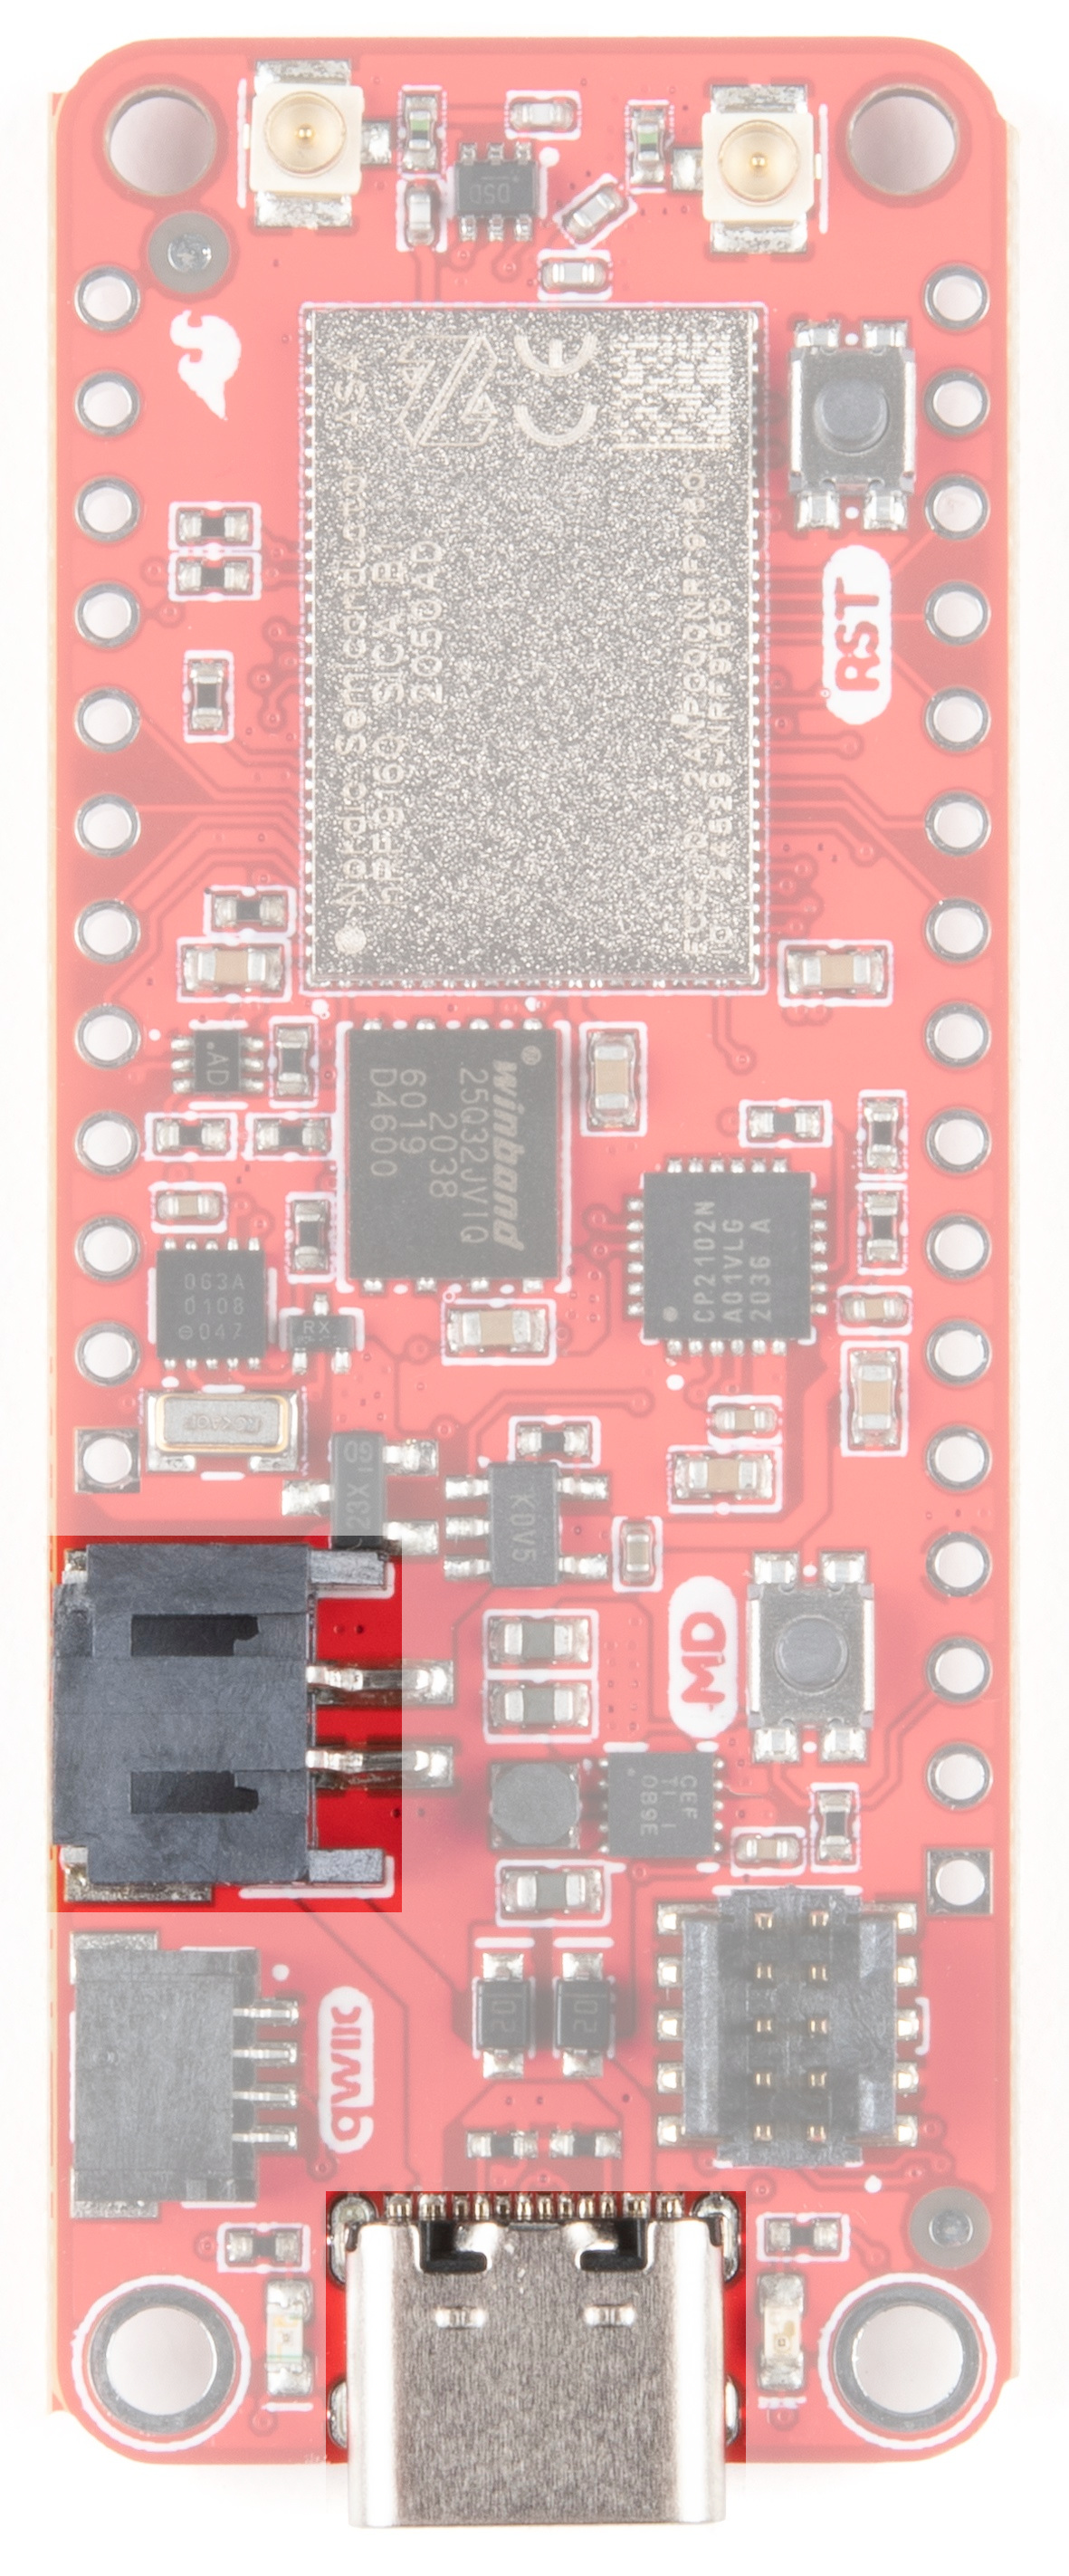
The nRF9160 Thing Plus has an operating range of 2.8V to 5.5V and can be powered several ways. The most popular way to power Thing Plus boards is by using the USB C port on the bottom of the board. Alternatively, the board can be powered by a LiPo battery plugged into the 2 pin JST connector on the left side.
The board is designed from the ground up to be power efficient at the most used power state: standby. As of this writing the estimated current draw in this state should be about 2µA.
In addition, the nRF9160 Thing Plus also has a fully fledged DC/DC Buck Boost. That way, whether your input voltage is 5.5 or 2.8V you'll get a nice stable 3.3V at the output.
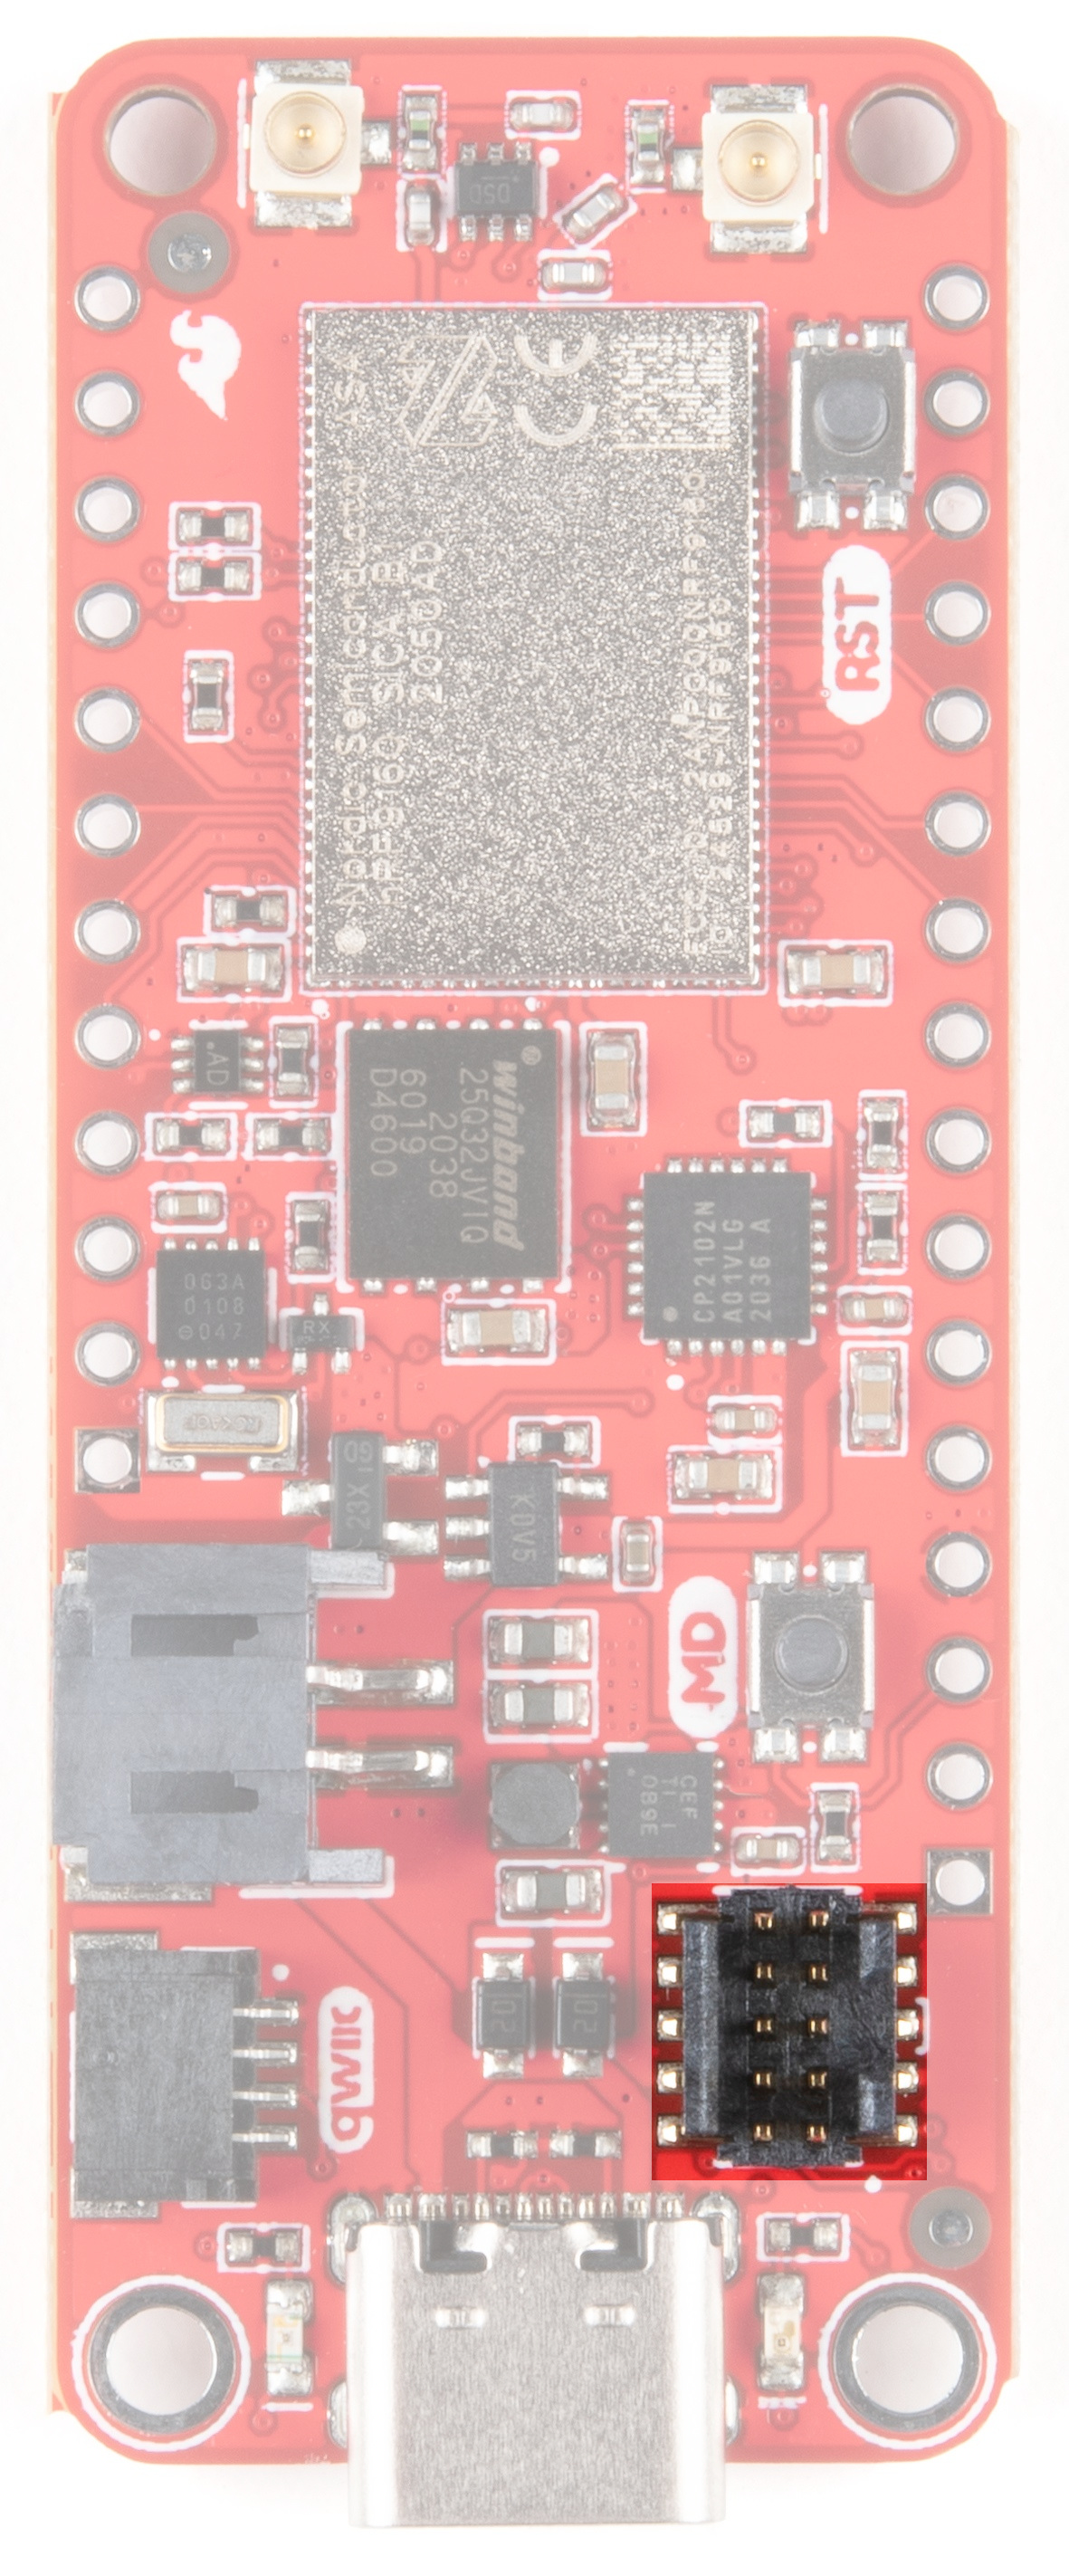
JTAG
If you choose to use an external programmer, the JTAG pins highlighted here will allow you to connect. We recommend the nRF5340DK or, for non-commercial use, we recommend the J-Link EDU Mini Programmer.
Sim Card
In order to use the LTE functionality, you'll need to activate and insert the included Hologram Sim Card. Head over to Hologram's Start Page and follow the instructions to activate your card. In this tutorial, we are using the most basic license, which is free (up to a point).

Qwiic Connector
Our Qwiic Ecosystem makes using qwiic sensors pretty much plug and play. Use this port to attach your sensor of choice!
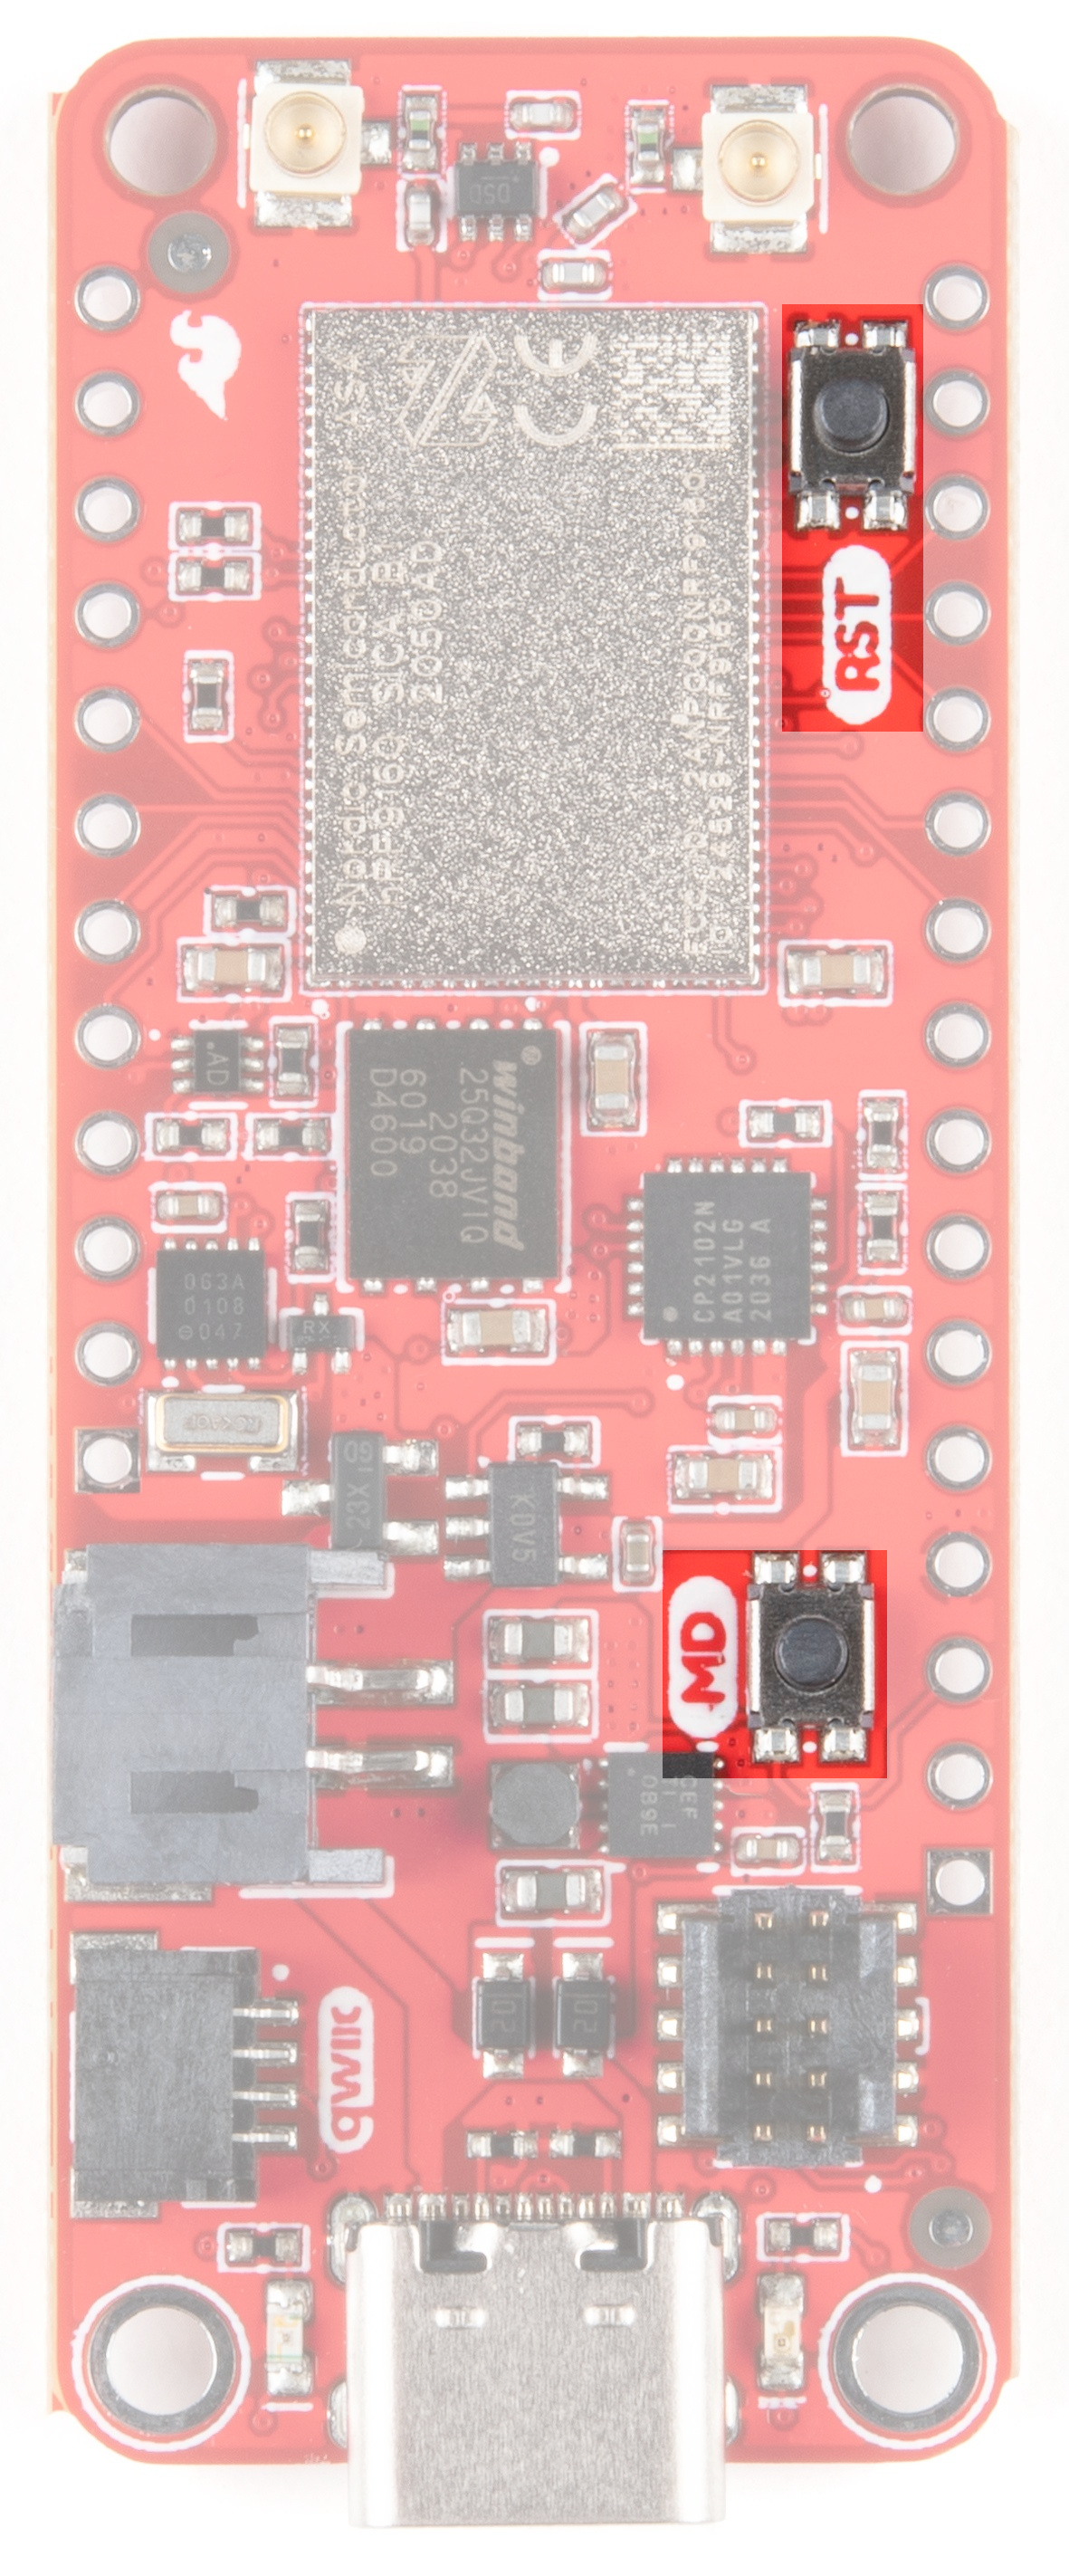
Buttons
In order to upload code to the nRF9160 Thing Plus, you'll need to put the board in Bootloader mode. To do so, do the following:
- Press the Mode button (MD)
- While holding down the Mode button, press and release the Reset (RST) button.
- When the LED lights up, release the Mode button
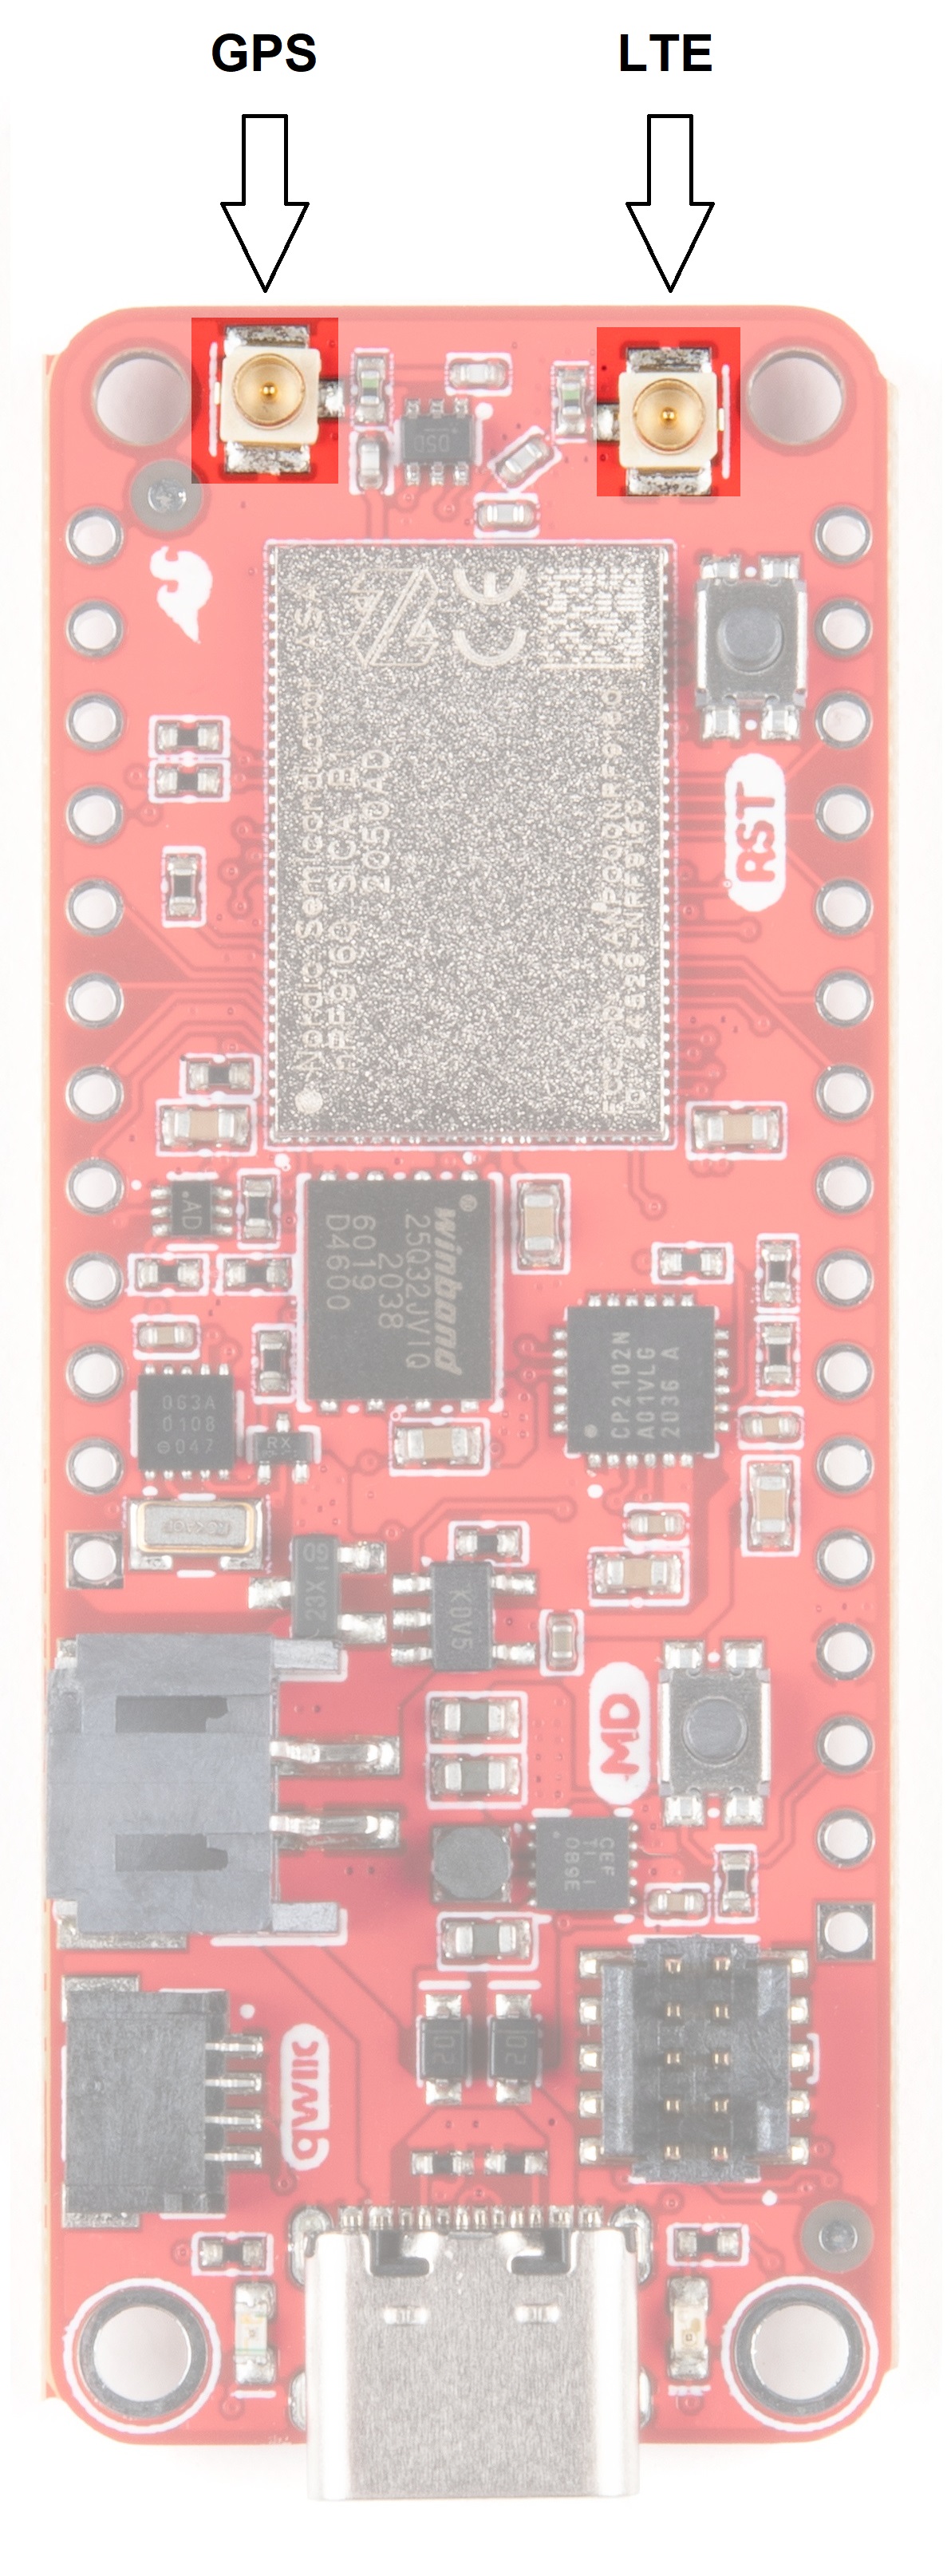
Antenna Connections
There are two antenna connectors - one U.FL for the LTE with matching network, one U.FL for active GPS antennas (active only). The connectors are labelled on the back of the board to help you remember which is which.
- Antenna supply voltage: 3.3V ± 0.3V
- Antenna current rating: 15mA
Jumpers
There are two jumpers on the board.
JMP1 is used to disable the accelerometer interrupt on Pin 2. By default, the interrupt is push/pull and is always enabled. To disable, cut the trace.
JMP2 is used to disable PS_EN's connection to the power supply, which allows you to use PS_EN as a GPIO pin. You can turn this functionality to "Always on" operation by shorting the middle and right pads on JMP2 and cutting the existing short.

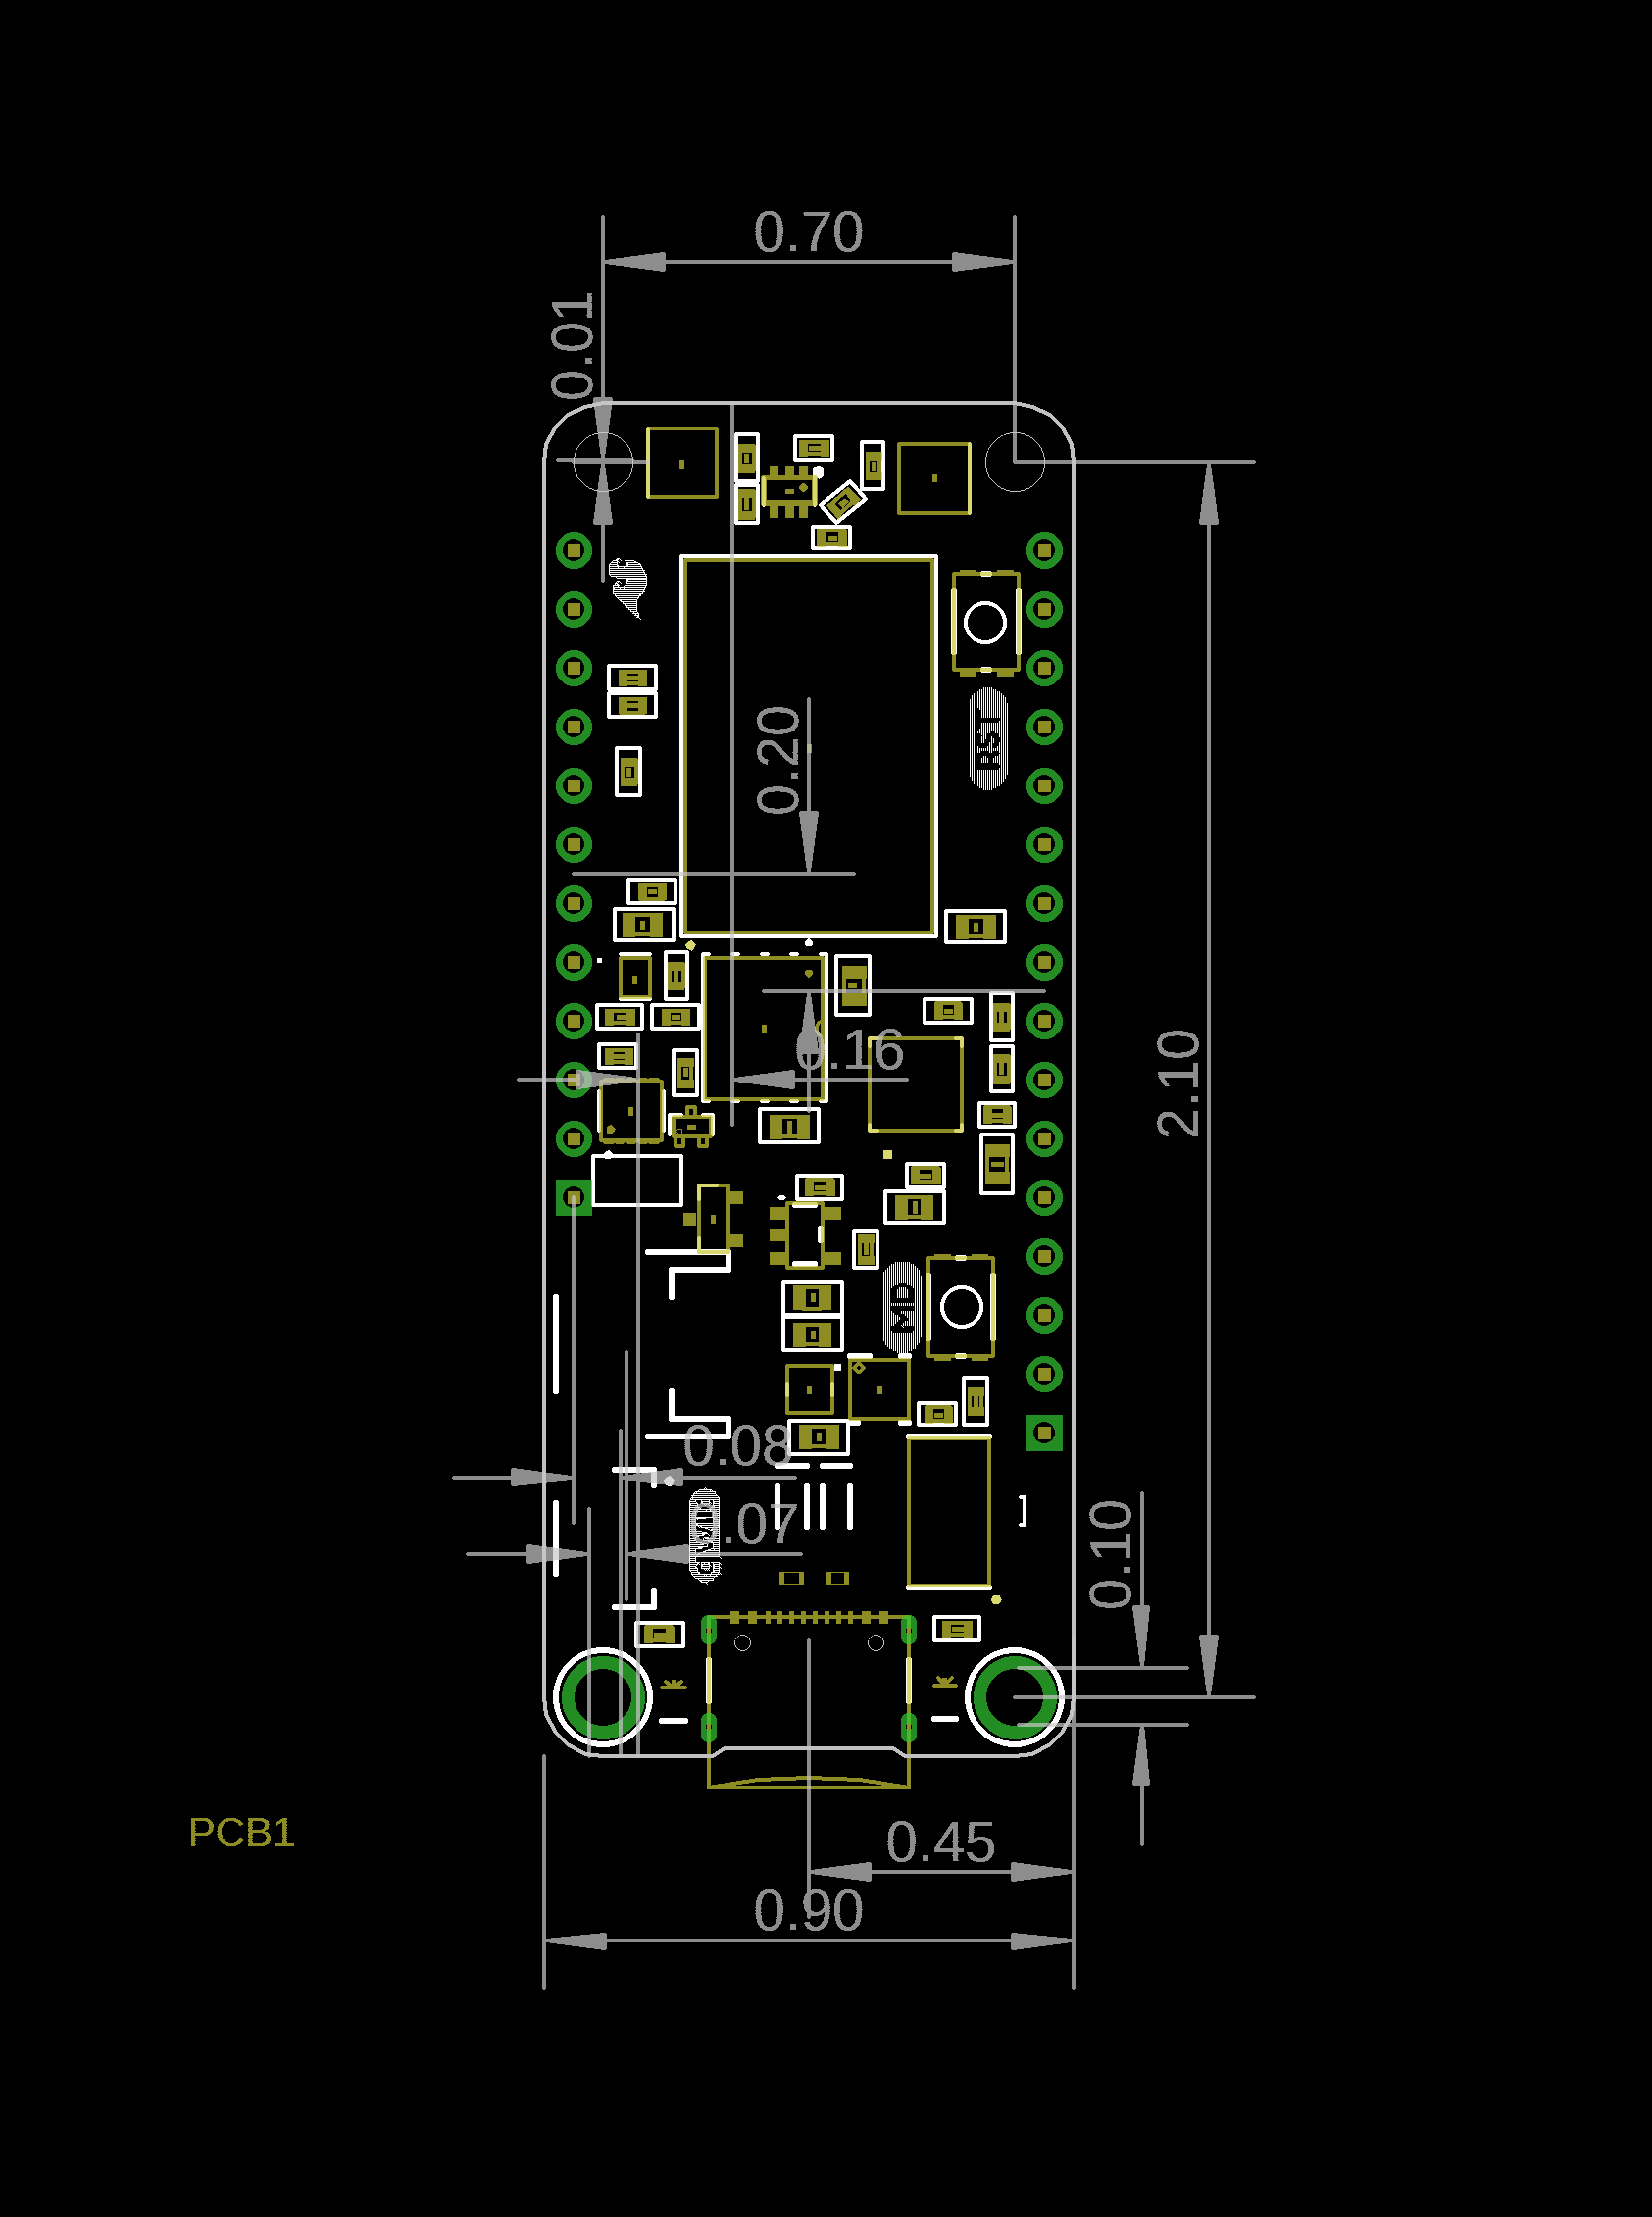
Board Dimensions
The nRF9160 Thing Plus measures 2.10 inches by 0.9 inches.