nRF9160 Thing Plus Hookup Guide
 Circuit Dojo, Ell C
Example - nRF Cloud AGPS Sample
The nrf_cloud_agps sample is the easiest way to get started with generating GPS coordinates with your nRF9160 Thing Plus.
Programming nrf_cloud_apgs Sample
Change directories to ncs/v1.4.1/nrf (Make sure you're using NCS v1.4.0 or newer). Then change directories to /nrf/samples/nrf9160/agps/. Add the following to prj.conf:
language:bash
# Cloud prefix for nRF9160 Thing Plus
CONFIG_NRF_CLOUD_CLIENT_ID_PREFIX="thing-plus-"

# Enable Zephyr application to be booted by MCUboot
CONFIG_BOOTLOADER_MCUBOOT=y

# COEX0 is used to enable the GPS LNA, but it has to be configured to do so.
CONFIG_NRF9160_GPS_SET_COEX0=y
CONFIG_NRF9160_GPS_COEX0_STRING="AT%XCOEX0=1,1,1565,1586"
Then compile as normal:
language:bash
west build -b circuitdojo_feather_nrf9160ns
Uploading Code
Make sure that you have set your connection configuration (this should only need to be done once) and put your nRF9160 into Boot mode.
- Press the Mode button (MD)
- While holding down the Mode button, press and release the Reset (RST) button.
- When the LED lights up, release the Mode button
Programming can then be completed with newtmgr by pasting the following into your bash/terminal window:
language:bash
newtmgr -c serial image upload build/zephyr/app_update.bin
newtmgr -c serial reset
Setting Up nRF Connect for Cloud
During factory test, your nRF9160 Thing Plus is added to nRF Connect for Cloud for your immediate use. The boards are registered with an nRF cloud key of 7753 (SPKF). You'll use this, along with your nRF9160 Thing Plus, SIM and antenna to connect to the nRF Connect for Cloud and get GPS readings.
Every nRF9160 Thing Plus has a device ID generated based on the IMEI. Your full device ID will look something like:
thing-plus-<IMEI> where <IMEI> is the IMEI tied to your specific device. You'll need this in a moment.
Above you should have compiled and programmed your device with the nrf_cloud_agps sample. Power up and confirm that the device can connect to the cloud. Then pop on over to your favorite internet browser, go to nrfcloud.com, and create an nRF Connect for Cloud Account.
Once created, go to the top left and click the big + icon.
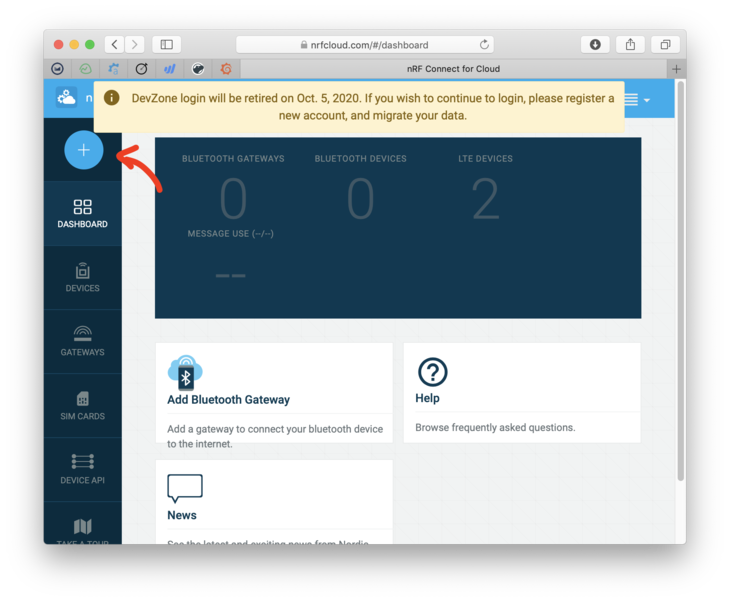
Add new:
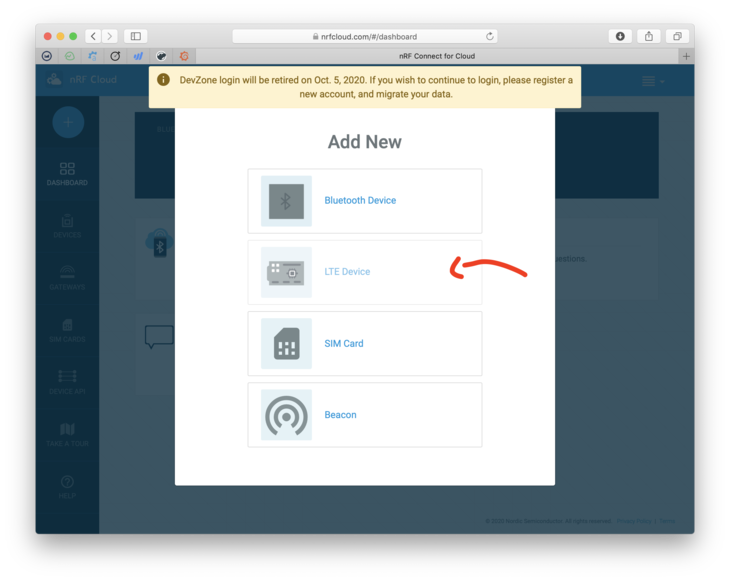
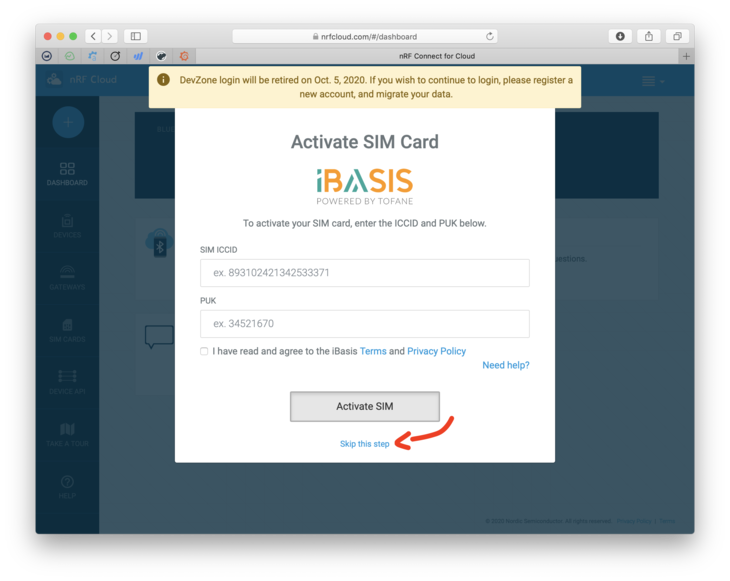
Then skip the iBasis setup since we're using Hologram.
Enter the Device ID and the PIN.
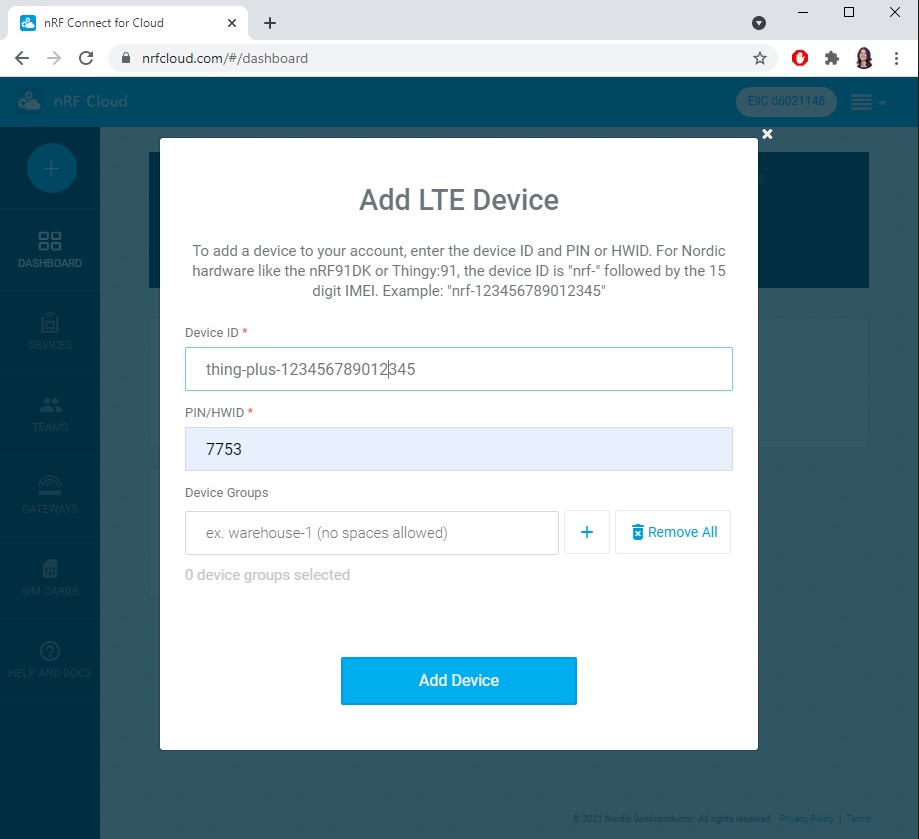
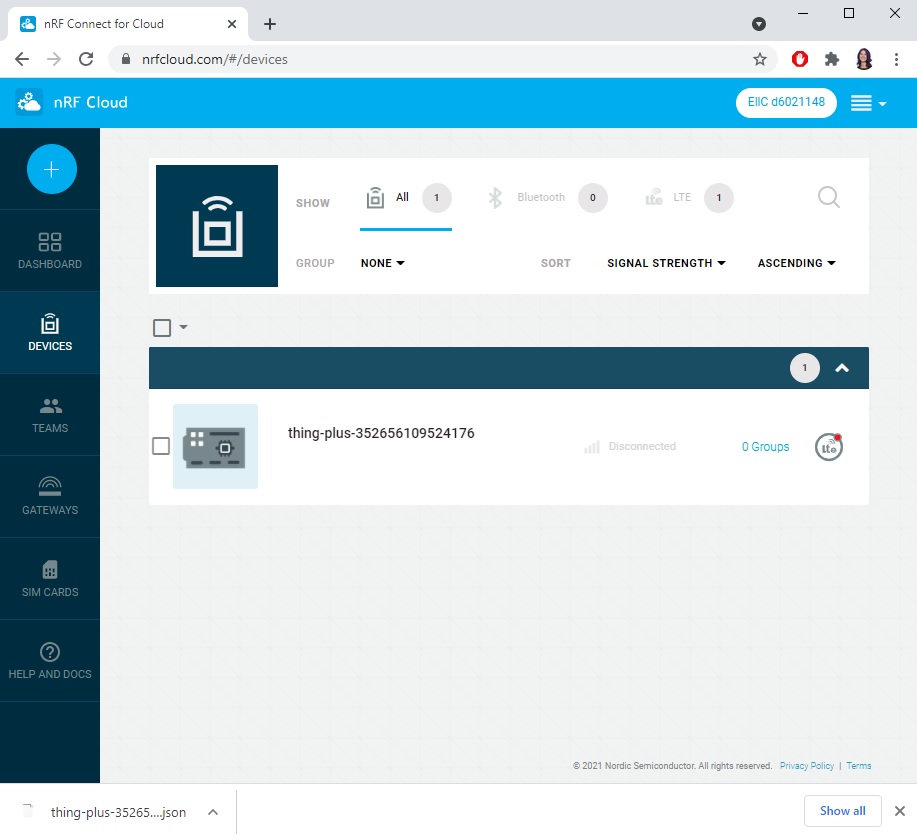
Once you press Add Device, nRF Connect for Cloud should notify you that your device has been added. Navigate to Devices and click on the device you're working with!
That's it! Your device screen will adapt to whatever example code that you're using.
Troubleshooting
There are some things that can go wrong here. They're usually related to your nRF Cloud certs.
Reloading the certs can be done using the tutorial here.