mbed Starter Kit Experiment Guide
This Tutorial is Retired!
This tutorial covers concepts or technologies that are no longer current. It's still here for you to read and enjoy, but may not be as useful as our newest tutorials.
Experiment 7: USB Device
This tutorial covers USB devices with the mbed LPC1768. Using a USB mini-B breakout and some buttons, we enumerate the mbed as a USB mouse and control the computer's pointer with the buttons.
Suggested Reading
The Circuit
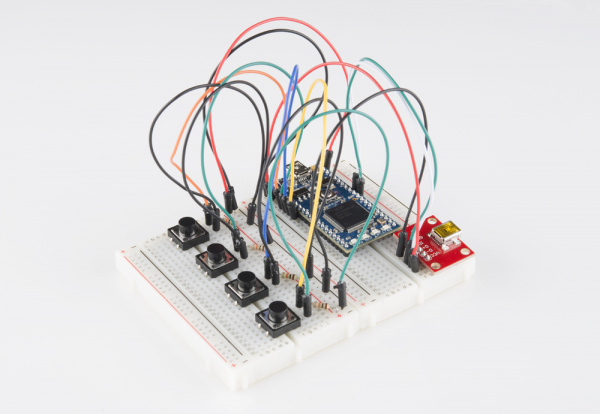
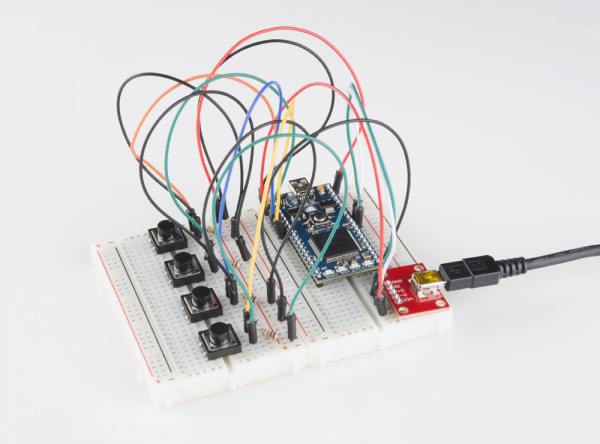
This circuit can be made with parts in the SparkFun mbed Starter Kit. Also, keep in mind that the LPC1768 box contains a USB mini-B cable for programming and power.
Parts List
To follow this experiment, you would will need the following materials if you did not order the SparkFun mbed starter kit. You may not need everything though depending on what you have. Add it to your cart, read through the guide, and adjust the cart as necessary. The experiment will be using 4x 10kOhm resistors.
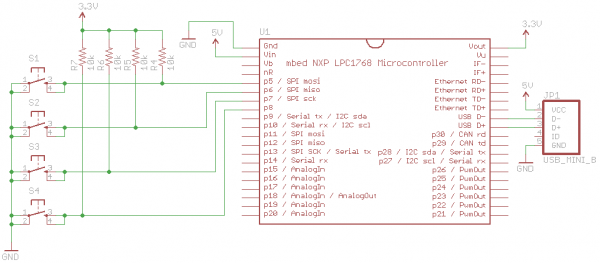
Schematic
Connections
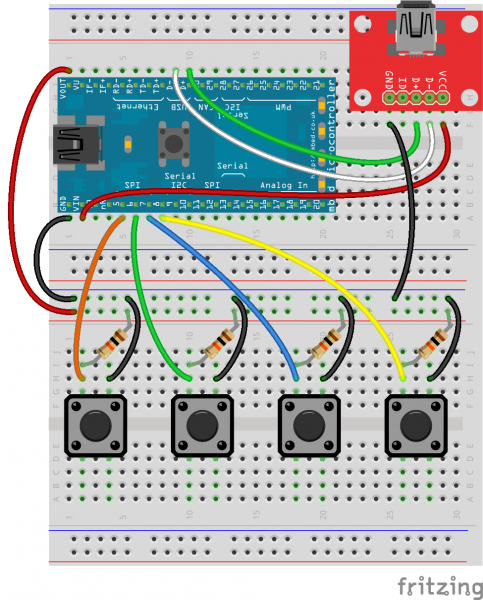
Connect the LPC1768 to the USB mini-B breakout and buttons.
Fritzing Diagram
Hookup Table
Place the LPC1768 in the first breadboard with pin VOUT in position i1 and pin 20 in position b20.
Connect the rest of the components as follows:
| Component | Breadboard 1 | Breadboard 2 | ||||||
|---|---|---|---|---|---|---|---|---|
| Mini USB Breakout* | h25 (GND) | h27 (D+) | h28 (D-) | h29 (VCC) | ||||
| Pushbutton | d2 | d4 | g2 | g4 | ||||
| Pushbutton | d10 | d12 | g10 | g12 | ||||
| Pushbutton | d18 | d20 | g18 | g20 | ||||
| Pushbutton | d26 | d28 | g26 | g28 | ||||
| 10K Resistor | i2 | ( + ) | ||||||
| 10K Resistor | i10 | ( + ) | ||||||
| 10K Resistor | i18 | ( + ) | ||||||
| 10K Resistor | i26 | ( + ) | ||||||
| Jumper Wire | j1 | ( + ) | ||||||
| Jumper Wire | a1 | ( - ) | ||||||
| Jumper Wire | a2 | f29 | ||||||
| Jumper Wire | f25 | ( - ) | ||||||
| Jumper Wire | j9 | f28 | ||||||
| Jumper Wire | j10 | f27 | ||||||
| Jumper Wire | a5 | h2 | ||||||
| Jumper Wire | a6 | h10 | ||||||
| Jumper Wire | a7 | h18 | ||||||
| Jumper Wire | a8 | h26 | ||||||
| Jumper Wire | ( - ) | h4 | ||||||
| Jumper Wire | ( - ) | h12 | ||||||
| Jumper Wire | ( - ) | h20 | ||||||
| Jumper Wire | ( - ) | h28 | ||||||
* Pins not listed are not used.
The Code
In order to make the mbed act like a USB mouse for this walkthrough, we will rely on mbed's USBDevice library. This library contains all the necessary functions to enumerate as a USB device to a computer and function as a mouse.
Libraries
Navigate to the mbed.org, login, and navigate to your Compiler.
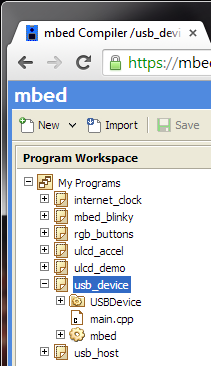
Create a new program with the "Blinky LED Hello World" template. Name it something like "usb_device."
Navigate to the following pages and import each library into your "usb_device" program.
The mbed library should already be imported if you used the "Blinky" template.
Program
Click on "main.cpp" in your project, remove the template code, and copy in the following code.
language:c
// USB Device demo - control mouse pointer with buttons

#include "mbed.h"
#include "USBMouse.h"

// USB Mouse object
USBMouse mouse;

// Define buttons
DigitalIn button_up(p5);
DigitalIn button_down(p6);
DigitalIn button_left(p7);
DigitalIn button_right(p8);

DigitalOut myled(LED1);

int main() {
    int x = 0;
    int y = 0;


    while (1) {

        // Determine mouse pointer horizontal direction
        x = button_left ^ button_right;
        if ( button_right ) {
            x = -1 * x;
        }

        // Determine mouse pointer vertical direction
        y = button_up ^ button_down;
        if ( button_down ) {
            y = -1 * y;
        }

        // Move mouse
        mouse.move(x, y);

        // Wait for next cycle
        wait(0.001);
    }
}
Run
Compile the program and copy the downloaded file to the mbed. Disconnect the USB mini-B that you used to program your mbed and connect it into the USB mini-B breakout board.
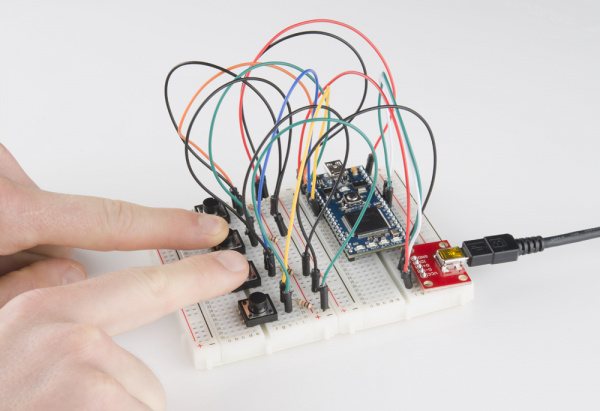
Make sure that the other end of the USB cable is plugged into your computer and press the mbed's restart button. Your computer should tell you that a USB input device has been detected. Start pressing the four buttons on the breadboard.
Your mouse pointer should start moving around!
Concepts
We really only covered one important new concept in this tutorial: USB devices. Instead of acting as a USB host to accept peripherals, we turned the mbed into a USB peripheral. This allowed us to plug the mbed into a computer and control some functions normally assigned to dedicated accessories (a mouse, in this case).
USB Device
A lot of things need to happen to show up as a USB device on a computer. The process of attaching a device, getting assigned a unique identifier and a driver is called "USB enumeration." Luckily, the mbed USBDevice library handles all of the device-side enumeration details for us.
Being able to enumerate as a USB device opens up a world of possibilities for us. We can make the mbed act as a mouse, a keyboard, an audio device, a mass storage device, and so on. Note that the LPC1768 only supports USB Full-Speed, which means that the higher rates of USB 2.0 and 3.0 are not available to us. If you wanted to make your own mbed Flash Drive, it would be quite slow.
If you want to get really involved in USB device development, see Jan Axelson's USB Complete book.
Going Further
Becoming a USB device lets us interact with many different computers and mobile devices. You could even make your own keyboard and mouse!
Beyond the Tutorial
- Make the buttons act as mouse clicks instead of moving the pointer
- Make the buttons act as keyboard keys (Hint: see USBDevice Keyboard)
- Create a program that automatically opens up a text editor and types out a message to the user whenever the mbed is plugged in as a USB device
Digging Deeper
- Look into the specifics of USB enumeration and messages
- Learn about making your own USB device drivers for Windows, OS X, and Linux
