LilyPad Development Board Activity Guide
 Gella
Gella 
1: Blink an LED
In this activity, you’ll run your first program on the LilyPad Arduino Simple at the center of the LilyPad Development Board. It will “just” make an LED blink, but there’s a lot going on even in this simple task. Let's get started!
LilyPad Boards Used in This Activity
- LilyPad Arduino Simple
- LilyPad LED

“LED” stands for “Light Emitting Diode”. These are electronic components that light up when electricity passes through them. They are available in a variety of colors; your LilyPad Development Board includes five white LEDs and a special tri-color "red-green-blue" (RGB) LED that can display a rainbow of colors.
New Concepts Introduced in This Activity
Exploring Your First Program
We've provided a pre-written example program that we'll load into the Arduino IDE.
Basic Program Structure
We'll walk you through the example program, explain how it's constructed, and go over the two basic functions every program needs; setup() and loop().
Lighting Up LEDs
We'll show you how to light up and blink an LED using the pinMode(), digitalWrite(), and delay() commands.
Modifying Code
A great way to learn to program is to make small changes to a program that someone else has written, and see what happens. We'll suggest places to try this, and give you a few challenges at the end of each activity.
Example Code
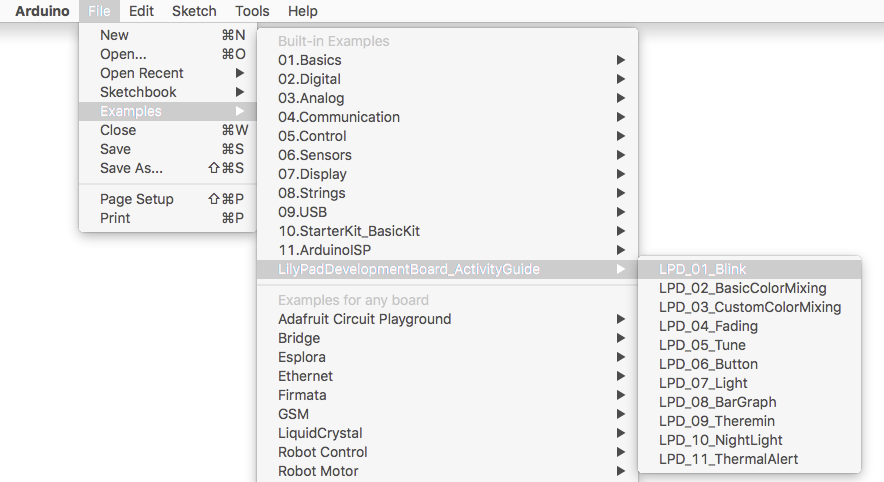
For each of these activities, we'll start with a pre-written program that you'll explore and modify. To load the first program, start up the Arduino IDE and go to:
File > Examples > LilyPadDevelopmentBoard_ActivityGuide > LPD_01_Blink
You can also copy and paste the following code into the Arduino IDE (be sure to delete any code already in the window first).
language:c
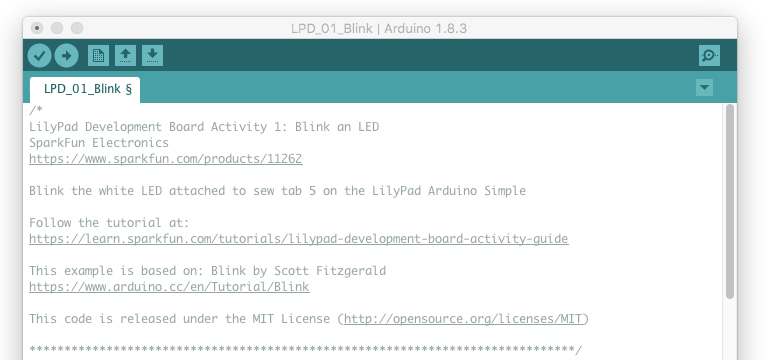
/*
LilyPad Development Board Activity 1: Blink an LED
SparkFun Electronics
https://www.sparkfun.com/products/11262
Blink the white LED attached to sew tab 5 on the LilyPad Arduino Simple
Follow the tutorial at:
https://learn.sparkfun.com/tutorials/lilypad-development-board-activity-guide/1-blink-an-led
This example is based on: Blink by Scott Fitzgerald
https://www.arduino.cc/en/Tutorial/Blink
This code is released under the MIT License (http://opensource.org/licenses/MIT)
******************************************************************************/
// The setup function runs once when the microcontroller starts up or resets:
void setup()
{
// Before you use a sew tab (pin), you must set it to be either an input or output:
pinMode(5, OUTPUT); // Set pin 5 to be an output
}
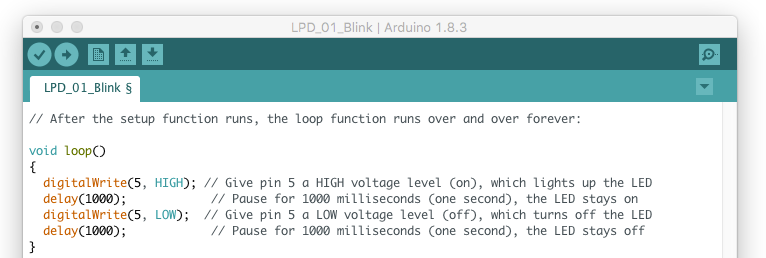
// After the setup function runs, the loop function runs over and over forever:
void loop()
{
digitalWrite(5, HIGH); // Give pin 5 a HIGH voltage level (on), which lights up the LED
delay(1000); // Pause for 1000 milliseconds (one second), the LED stays on
digitalWrite(5, LOW); // Give pin 5 a LOW voltage level (off), which turns off the LED
delay(1000); // Pause for 1000 milliseconds (one second), the LED stays off
}
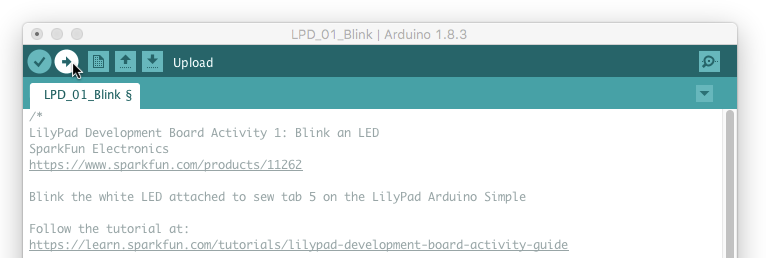
Once you've connected your LilyPad Development Board to your computer as shown in the Before You Begin section, and loaded or copied the example program into the Arduino IDE, click the upload button (the round button with the right arrow at the top of the window) and see what happens!
What You Should See
Once the code has uploaded, the first white LED in the bottom row on the Development Board will blink once per second.
Understanding Your Program
In this section, we'll explain what this program does. For this first activity we'll be pretty thorough. As we progress through future activities, we’ll just highlight new concepts as we introduce them.
Program Overview
- Turn the LED on by sending power to Pin 5.
- Wait 1 second.
- Turn the LED off by cutting power to Pin 5.
- Wait 1 second.
- Repeat.
Comments
At the top of the program, you'll find text describing what the program does, who wrote it, etc. These are called comments. They are there solely for your information and are ignored by the microcontroller. Comments in the Arduino IDE will show up as gray text.
We use special symbols to tell the microcontroller to ignore comments.
If you want to write a block of text on multiple lines as we've done above, the microcontroller will ignore any text between
/*and*/.If you want to put a comment on a single line, the microcontroller will ignore any text after two slashes
//.
Setup() Function
The next section of our program contains a function. A function is a named block of code that does a defined task or set of tasks. When a function is run, all of the code contained between the curly brackets { and } is run. Arduino has two essential functions that are required for every program to run properly: they are setup() and loop(). Arduino programs can use many functions (both built-in and user defined), but they must at least have those two. These and other control structure functions built into the Arduino software will display in green text. Let's explore the setup function.

When the microcontroller starts up or is reset, the setup() function runs once. As you may have guessed from the name, the setup() function is typically used to "set up" the hardware so that it operates properly during the rest of the program.
Statements and Commands
Inside functions, we put statements. A statement is a single instruction to the microcontroller. Statements always end with semicolons ;. It's a common error to forget the semicolon, so if you get an error when uploading your code, double-check that every statement ends with ;.
Most statements will include commands. Commands are specific functions you can use to complete common tasks in Arduino. There are many built-in commands that can be used for all sorts of things - input and output, math, decision making, etc. These commands display in orange text. We'll cover many useful commands in this guide.
In this program, we’ve put one command in the startup function, called pinMode(). Note the unusual capitalization, called "camel case". Commands are case-sensitive, so pay special attention to this.
The pinMode() command, as you may have guessed, sets the mode of a pin. Pins are the metal legs on microcontroller chips that are attached to the sew tabs on your LilyPad board. Pins can be configured as inputs or outputs. In this program, we’re going to use pin 5 to control an LED, which is a component sending information (light) to the world, so we'll make it an OUTPUT.
Commands take various numbers of parameters, which are the information the command needs from you. Parameters go inside parentheses () after a command, and are separated by commas if there are multiple. The pinMode command takes two parameters; the number of the pin, and whether you want it to be an INPUT or an OUTPUT. Here, we're setting pin 5 to be an OUTPUT.
Reserved Words in Arduino IDE
You may have noticed some parameters are shown in blue text and others plain black. Colored text indicates one of Arduino's reserved words. A reserved word can be a variable, function, or command that has a specified use in the Arduino software. If you are typing something in your code and it displays in colored text, it has a pre-set meaning for Arduino. We'll learn more about variable naming in the next activity. For a full list of reserved words, visit the Arduino Reference website.Loop() Function
The second essential function needed to run an Arduino program is called loop(). After the setup() function runs once, the loop() function runs over and over, forever (or until you turn off or reset the microcontroller).
A loop() function usually contains the main tasks and behaviors of your program; the things you want it to do repeatedly. You can use this to your advantage; for example, in this program we want to blink an LED continuously. Because the loop() function repeats, we only need to write the code to blink it once, and the loop() function will make it blink over and over.
The first thing we'll do is turn our LED on. To do that, we'll use the digitalWrite() command.
Like pinMode(), digitalWrite() takes two parameters: the pin we want to control, and whether we want to make the pin a HIGH voltage level (on), or a LOW voltage level (off). We want to turn the LED on, so we'll set pin 5 to HIGH.
Because the microcontroller runs so fast, if we immediately turned the LED off, you'd never notice it. So we'll slow things down with a command called delay() that does nothing but pause the program for a set amount of time.
The delay() function takes one parameter, the number of milliseconds to wait. There are 1000 milliseconds in one second, so here we're pausing for one second. If you make this value smaller, the LED will blink faster, and vice-versa. Try it!
After we've waited one second, we'll turn the LED off with a second digitalWrite(), this time setting the pin to LOW to turn the LED off.
Finally, we'll add a second delay(). This one pauses while the LED is off, finishing the complete on-off "blink" cycle. If we didn't have the second delay(), the LED would immediately turn on again when loop() starts over. This happens so quickly you wouldn't notice it being off.
Coding Challenges
Try changing the number inside
delay()- Can you make the LED blink faster or slower?Changing the pin number inside the
digitalWrite()function will change the sew tab being controlled by the code. Can you light up one of the other LilyPad LEDs on the ProtoSnap by changing this number? Hint: don't forget to set that LED to be anOUTPUTfirst.Can you modify the code to blink multiple LEDs?