Audio Codec Breakout - WM8960 Hookup Guide
 QCPete,
  bboyho
Example 14: Electret Mic
Continuing on from example 7, we will use differential microphones as the audio input based on the "pseudo-differential MIC configuration." The example will configure the PGA before passing it to the mixers and gain stages of the codec like the previous examples. The output will be to the headphones.
Hardware Hookup
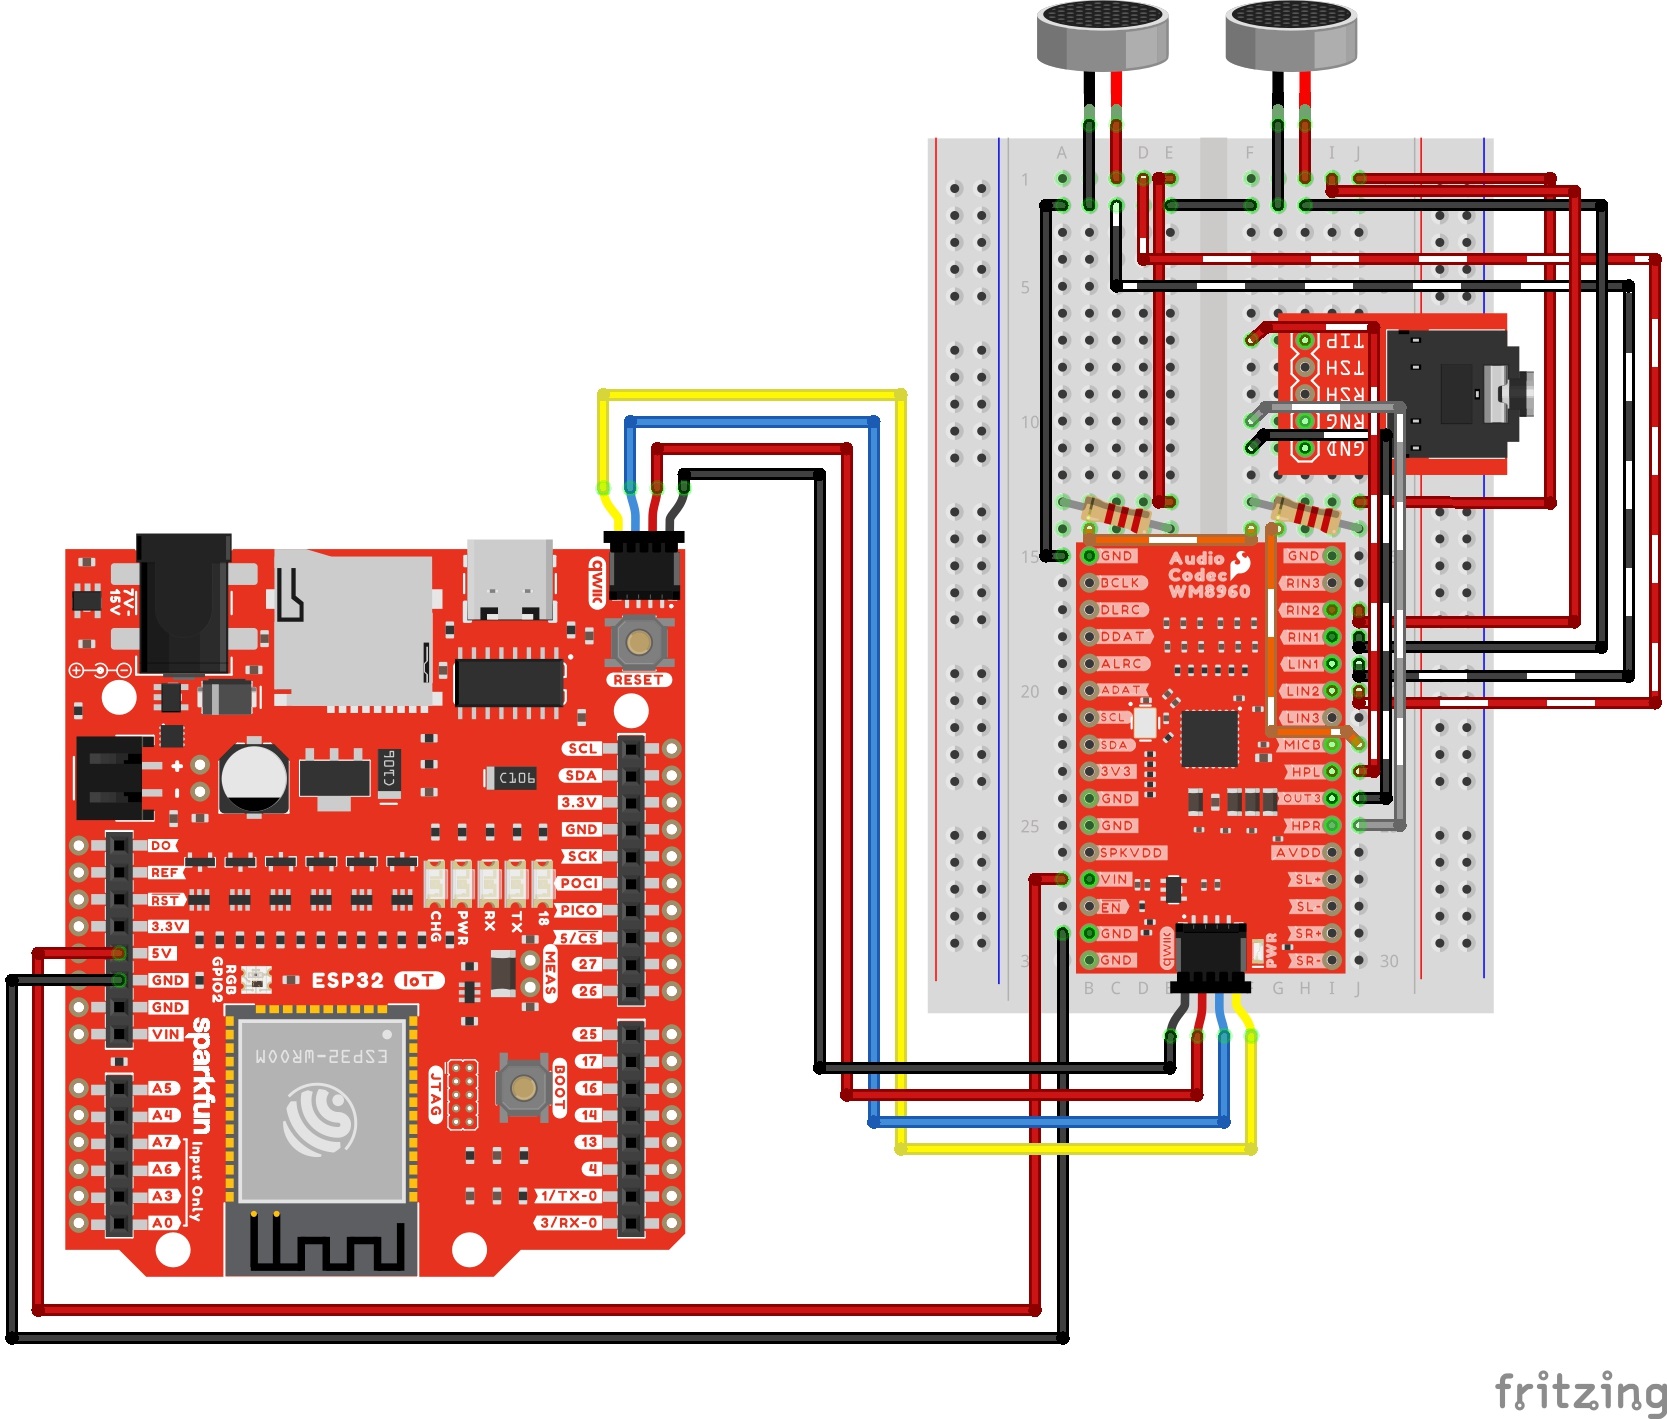
Connect power, I2C, I2S, differential microphones (each with a 2.2kΩ resistor wired in series with the MICBIAS pin), and the headphone output. Your circuit should look similar to the circuit diagram below.
If you have not already, insert a USB cable into your IoT RedBoard ESP32. Then connect your headphones to the output. For those that are sensitive to sounds, you may want to hear the example output before inserting the headphones into your ears.
Upload Code
From the menu, select the following: File > Examples > SparkFun WM8960 Arduino Library > Example_14_Electret_Mics. If you have not already, select your Board (in this case the SparkFun ESP32 IoT RedBoard), and associated COM port. Then hit the upload button.
Open the Arduino Serial Monitor and set it to 115200 baud to view the serial output. Make some noise on the differential microphones. You should hear some audio from the headphones.