Weather Station Wirelessly Connected to Wunderground
This Tutorial is Retired!
This tutorial covers concepts or technologies that are no longer current. It's still here for you to read and enjoy, but may not be as useful as our newest tutorials.
 Nate
Nate 
Lessons Learned
Lesson 1 - The Wind is Strong
Boulder is known for strong gusts of wind that can break 100MPH (160KPH) a few times a year. Finding a location on my roof where I could solidly attach the system was crucial. I didn't watch to drill into my roof or the sides of the house, so instead I decided to use a tripod with ballast to hold the station in place.
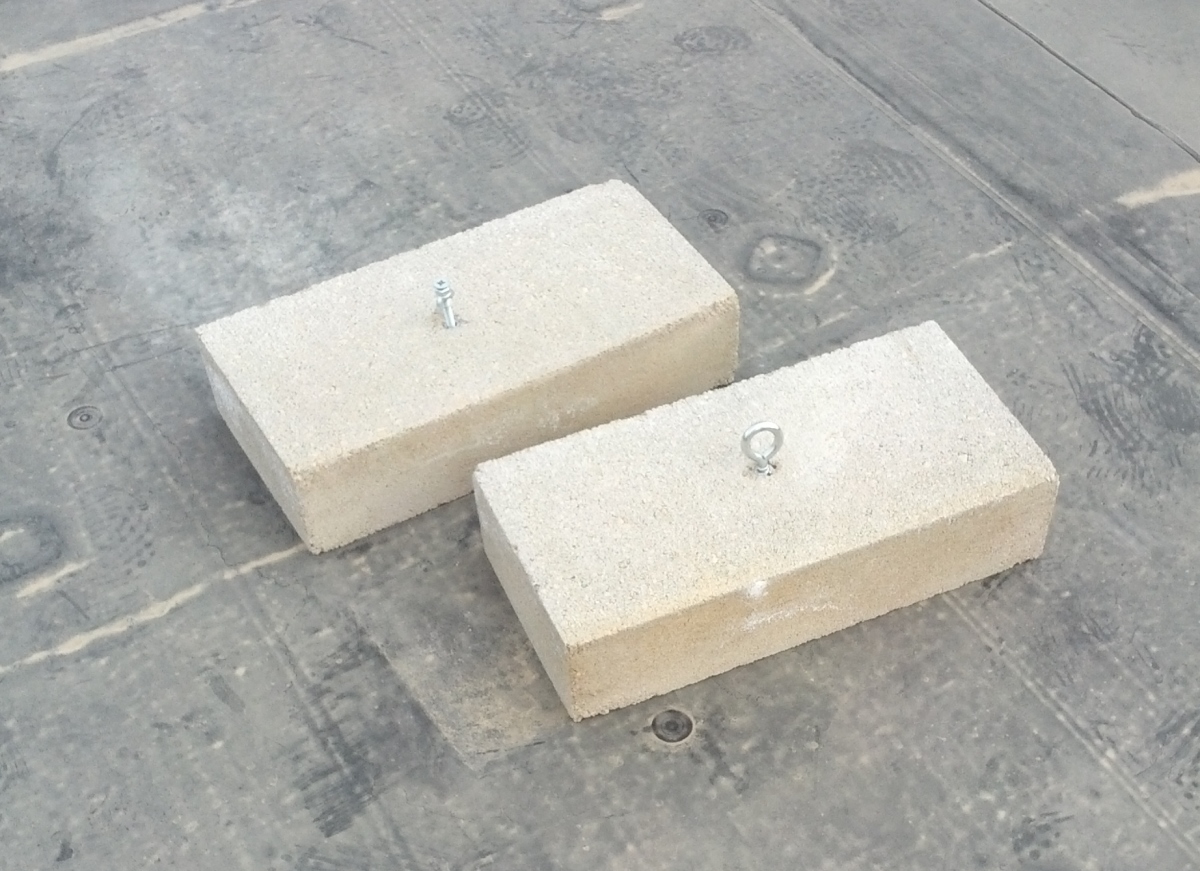
When I originally setup the weather station I calculated (with words in my head) that a single 35lbs block would hold the station in place. Should be fine...
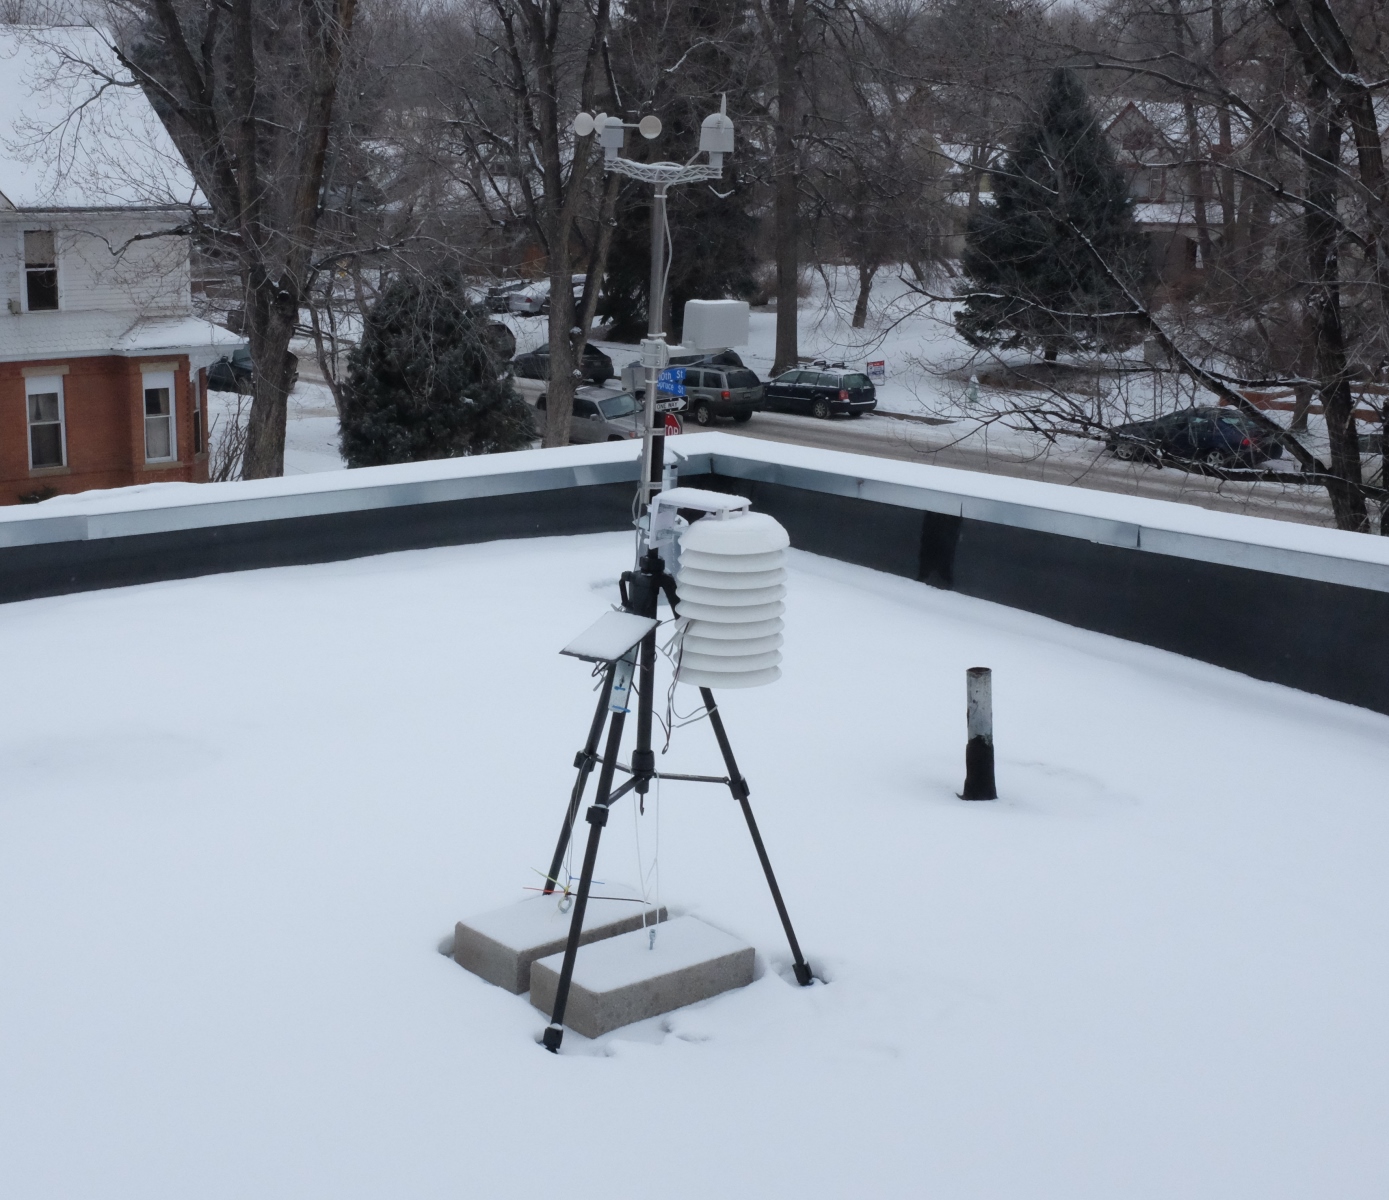
This first setup used zip ties to tension the two blocks to the base of the tripod. Unfortunately I had some really bad zip ties. You know - the ones that snap or release as soon as you put a bit of force behind them? I know this attachment system was questionable, but note the snow and my decision to start this project in December.
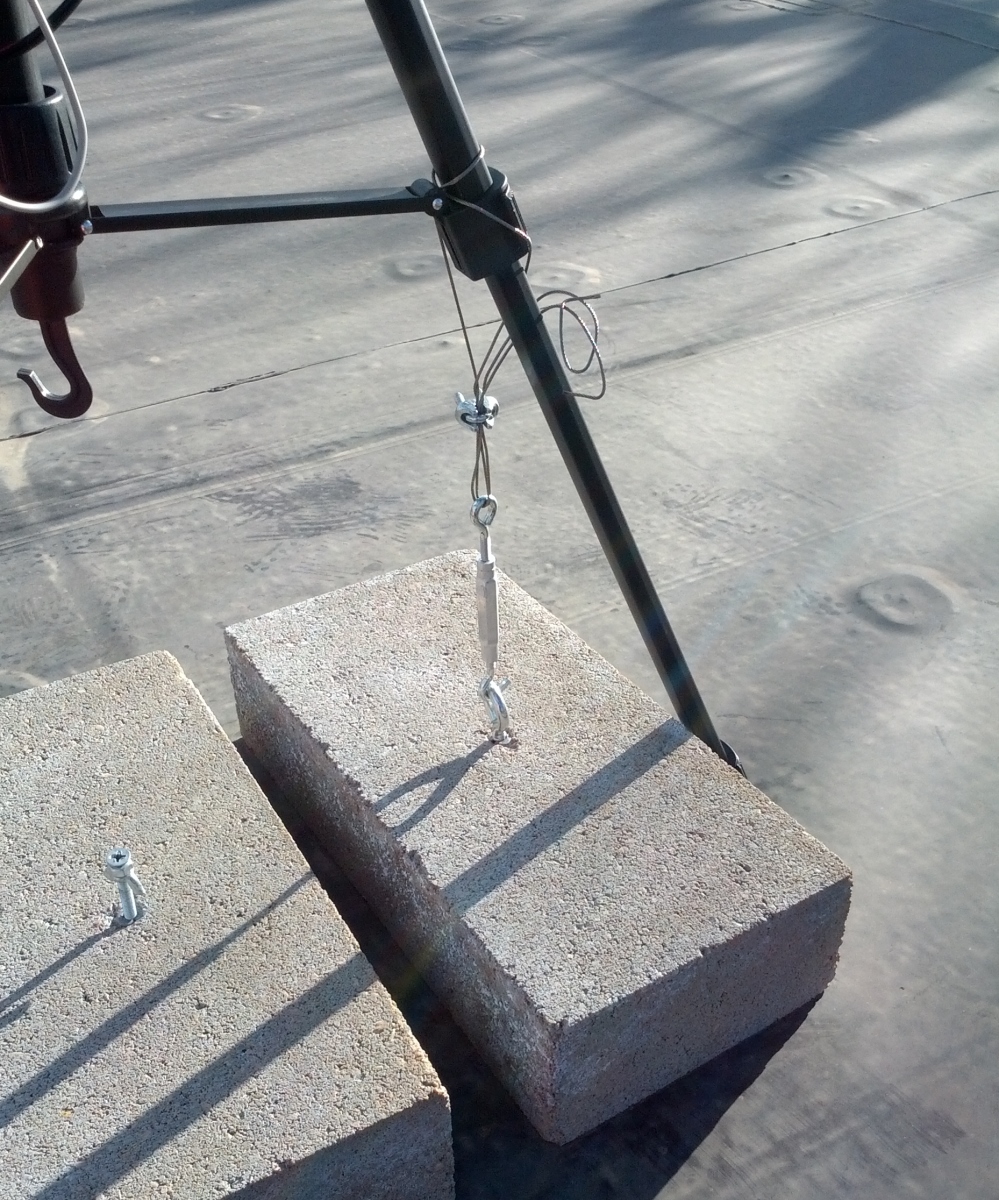
After a bit of Googling, I discovered these things called turnbuckles! Wow they work. You probably fall into one of two categories. Either you know exactly what wire rope is, and you think I'm crazy, or you're like me, never anchored something before, and think zip ties'll do it. Believe me - they won't.
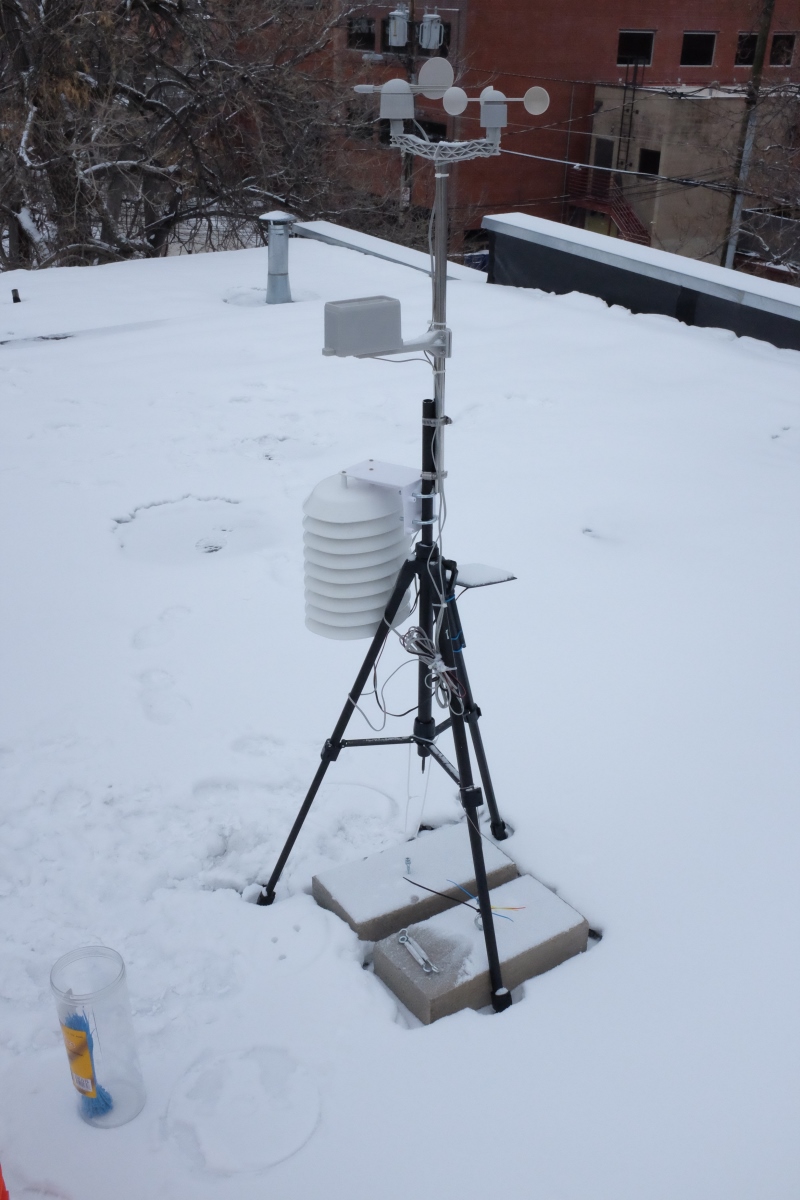
The third setup adds a proper turnbuckle and wire rope. This setup is really nice and solid! The turnbuckle makes it really easy to tension the full 35lbs onto the tripod. Who needs the second ballast?

There are roughly a dozen nights a year in Boulder, CO where you question the build quality of your home. The windows vibrate, the walls shake, and you lay awake at night thinking about the large trees out front coming down on your car. On February 20th, 2014, the station blew over. A cup broke off the anemometer, the wind direction vane broke off completely, and the solar cell broke off its mount. The damage was rough, but I'm lucky the station didn't leave the roof entirely.
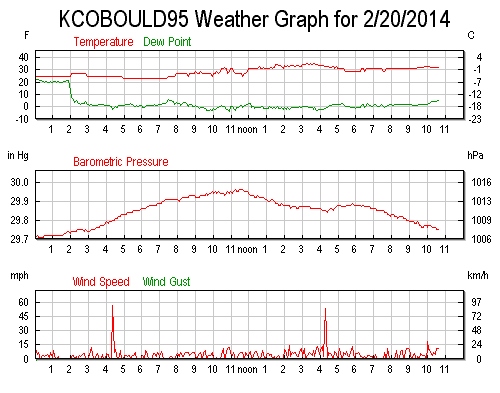
Late on February 20th, the station clocked a few 50mph gusts before the ballast was moved 6 inches and the turnbuckle came unhooked from the eye bolt. The station blew over, the Imp SD card popped out of the socket on the shield, and Wimp stopped reporting.
Because one ballast was attached and one was not, we get a neat view into how much the station actually dragged 35lbs across the roof. I believe the station would have not been blown over if the turnbuckle had not worked itself out of the eye bolt. Remember the previous picture? I never zip tied the hook to hold it against the eye bolt.
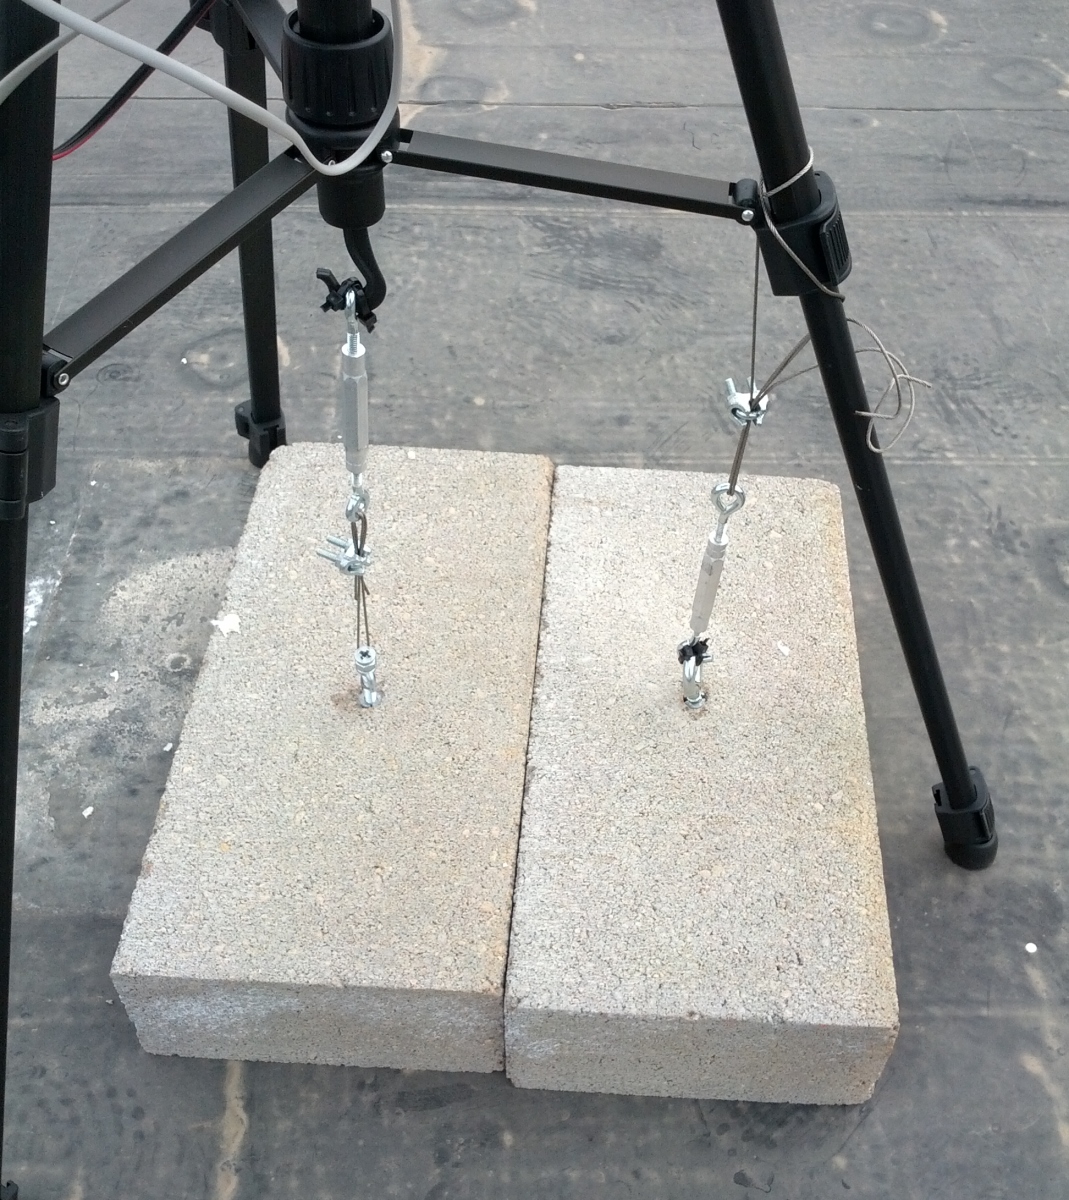
Here's what the setup looks like today. I don't recommend using zip ties for loads any more, but they do a great job of making sure the hooks won't escape the eye bolts.
Lesson 2 - Make it Accessible
Above all else, put the Wimp where it can be easily maintained. Things will break - be sure you can access your weather station with as little danger as possible.
You may think you'll only have to do maintenance on the weather station once a year. If you're building your own, plan to be in the station once a week in the beginning and once a month after you get it up and running.
I ended up having to replace the battery pack a few times. I had problems with my solar charger due to a rouge piece of code failing to put the Imp properly to sleep and because the solar cell was shaded by a large clamp (repairs post wind storm). Even with the best laid plans, you'll find yourself on the roof, in February, wondering why you started this project...
Lesson 3 - The Code is Wrong
No matter how much you try to prevent it, there will be problems with your code. Even Spirit, the Mars rover, had a rolling reboot issue. I had similar problems with small errors including a bug that arbitrarily zeroed the wind gust measurement.
When I started this project, I assumed the Arduino portion of the project would have to be locked in because who wants to climb on their roof to plug in a USB cable to reprogram the Arduino? Luckily, a few weeks after the first station was built I discovered the Imp could wirelessly reprogram the Arduino. This has proven to be extremely helpful. If you can, plan for bad code, and make your device remotely reprogrammable.