Serial Terminal Basics
 Joel_E_B,
  jimblom, maettu_this
Connecting to Your Device
Now that you know what a terminal is and the lingo that comes with the territory, it's time to hook up a device and communicate with it. This page will show you how to connect a device, how to discover which port it has been assigned, and how to communicate over that port.
What You'll Need
For this example you'll need
- An FTDI Basic - 5V or 3.3V will work fine. You can also use an FTDI Cable if that's all you have.
- A USB Mini-B Cable - (Not necessary if you have an FTDI Cable.)
- A jumper wire - Most FTDI products have female headers, so a male-to-male jumper cable should suffice. Or, you could just use a piece of wire that is stripped on both ends.
Discovering Your Device
Once you have all your supplies ready, attach the FTDI Basic to the USB cable, and attach the cable to your computer. If this is the first time you've plugged in a device of this nature into your computer, you may need to install the drivers. If this is the case, visit our FTDI Driver Installation Guide. If the drivers are all up to date, carry on.
Depending on which operating system you're using, there are a few different ways to discover which port your device has been assigned.
Device Manger (Windows)
No matter which version of Windows you have, you have a program called Device Manager. To open device manger, open the start menu, and type
devmgmt.msc
into the search bar. Press enter, and it'll open right up. Or, you can right-click on MyComputer, select Properties, and open the Device Manger from there (Windows 7). If you intend on using your computer to communicate with several serial devices, it may be worth creating a desktop shortcut to Device Manger.
Once you've got Device Manger open, expand the Ports tab. Here is where the information we need lives.
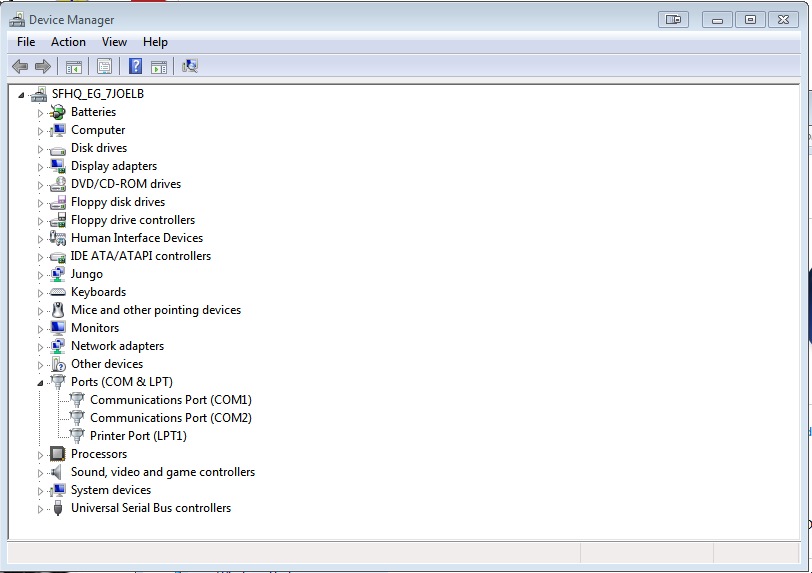
In this image, we have just a few COM Ports showing up. The first thing to know is that COM1 is ALWAYS reserved for the true Serial Port, not USB. You know those grey, bulky cables, which have a DB9 connection on each end. Yeah, that serial port. Many computers (especially laptops) no longer have serial ports, and they are becoming obsolete in exchange for more USB ports. Nevertheless, the OS still reserves COM1 for that port for people who still have an true serial port on their computer.
Another port that is likely to show up on most computers is LPT1. This is reserved for the parallel port. Parallel ports and cables are becoming even more obsolete than serial cables, but, again, many computers still have these ports (they're often used to connect to printers) and have to accommodate for that in the OS.
With those out of the way, we can focus on the ports that we do need to use. Now with your FTDI plugged in, you should see a new COM port get added to the list.
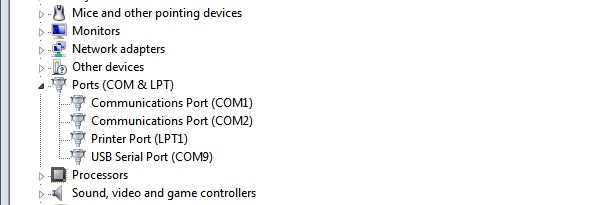
Typically, your computer will enumerate your devices. For instance, if this is the first serial communication device you've plugged into your computer, it should enumerate as COM2. On my computer this is the not the first device I've plugged in, but rather the eighth, so it has enumerated as COM9 (don't forget about COM1).
What's important to know is that once a device has been associated with your computer and has had a port assigned to it, the computer will remember that device every time it's attached. So, if you have an Arduino board that has been assigned COM4 for example, it is not necessary to open Device Manger and check which COM port it is on every time, because that device will now always be on COM4. This can be good and bad. Most people will never plug more than a couple dozen serial devices into their computers. However, some people will plug in lots of devices, and your computer can only assign so many ports (256 if I remember correctly). Thus, it may be necessary to delete some COM ports. We will discuss that in the tips and tricks section.
If you do have multiple devices and are not sure which device is the one you just plugged in, unplug it, watch for whichever COM port disappears, and then plug it back in. The COM port should reappear letting you know that's the device you're looking for.
One last thing to mention is that all serial devices, even if they require different drivers, will show up as COM ports in Windows. For example, an Arduino Uno and the FTDI Basic both have different drivers and are technically two different types of devices. Windows doesn't discriminate. It will treat both devices the same, and all you have to worry about is with which COM port it's associated. Mac OS and Linux treat this slightly differently. Read on to find out.
Command Line (Mac, Linux)
Similar to Windows, Mac OS and Linux assign a specific port to every device attached to the computer. However, unlike Windows, there is no specific program you can open up to view all the devices currently attached. Have no fear. There is still a simple solution to find you device.
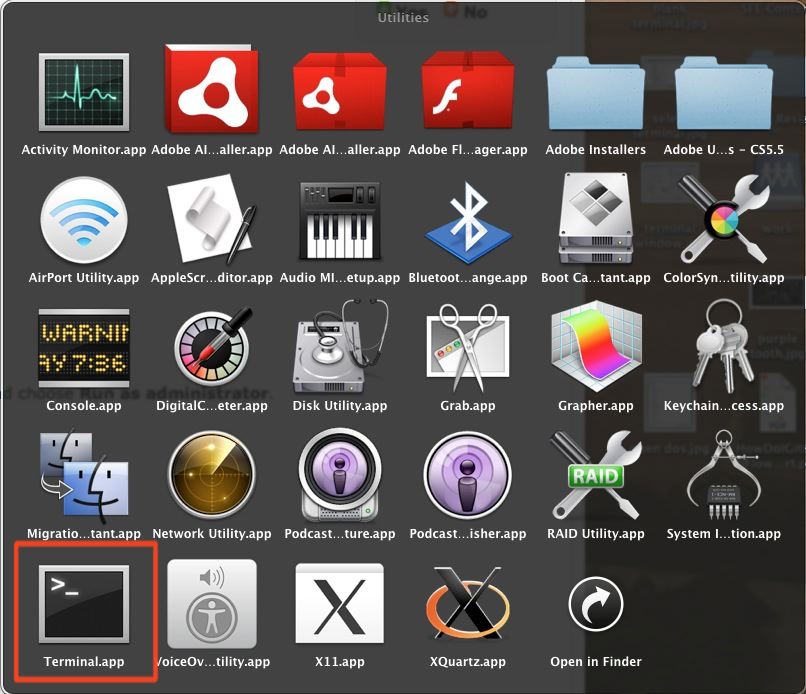
The default command line interface for Mac OS X is Terminal. To open it, go to your Utilities folder. There you should see the icon for Terminal. I'm going to assume that if you're using Linux, you already know how to open a command line window.
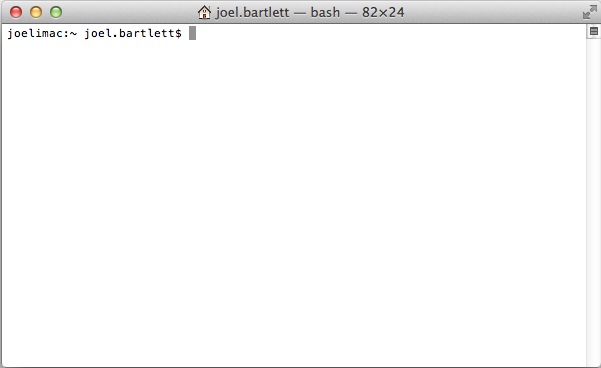
Once open, you should see the typical terminal screen.
To see a list of all the available Serial ports on both Mac and Linux, type this command:
ls /dev/tty.*
You should now see a list of all serial ports on your computer.
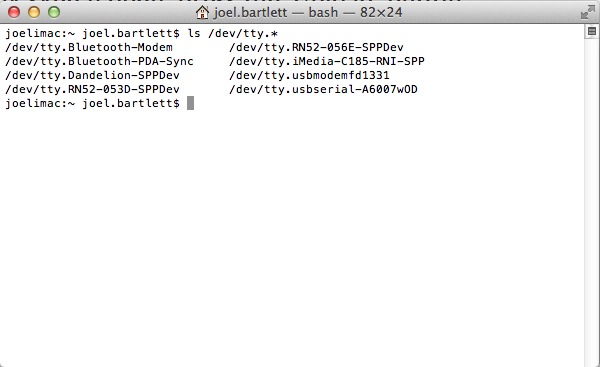
You'll notice a few Bluetooth ports on there. I have several Bluetooth devices paired with my computer, so you may have more or less devices that show up depending on what devices have been paired with your computer. (Notice the SPP portion of these names. That indicates that Bluetooth device can talk to the serial terminal as well.)
The important devices to note are the tty.usbserial and the tty.usbmodem. For this example I have both an FTDI Basic and an Arduino Uno plugged into my computer. This is just to show you the key difference between the two. As mentioned earlier, some devices are treated differently depending on how they communicate with the computer. The FT232 IC on the FDTI basic is a true serial device, and, thus, it shows up as usbserial. The Uno on the other hand, is an HID device and shows up as a usbmodem device. The HID (Human Interface Device) profile is used for keyboards, mice, joysticks, etc., and, as an HID device, the computer treats it slightly different despite the fact that is can still send serial data. In either case, these tty.usb______ ports are what we're after when connecting to a serial terminal.
Echo Test
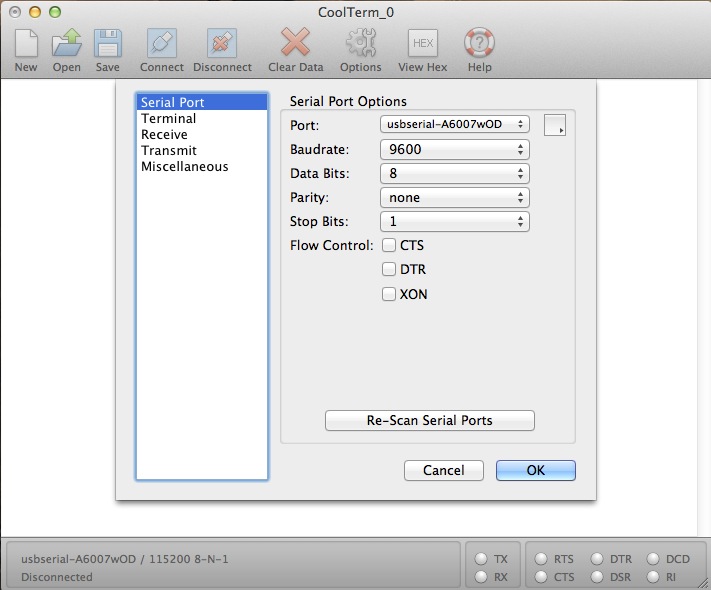
With that out of the way, it's time to actually communicate with the FTDI. The specifics of each terminal program will be discussed in the following sections. This example will be shown in CoolTerm, but be aware that this can be done with any terminal.
Open up a terminal with the correct settings: 9600, 8-N-1-None.
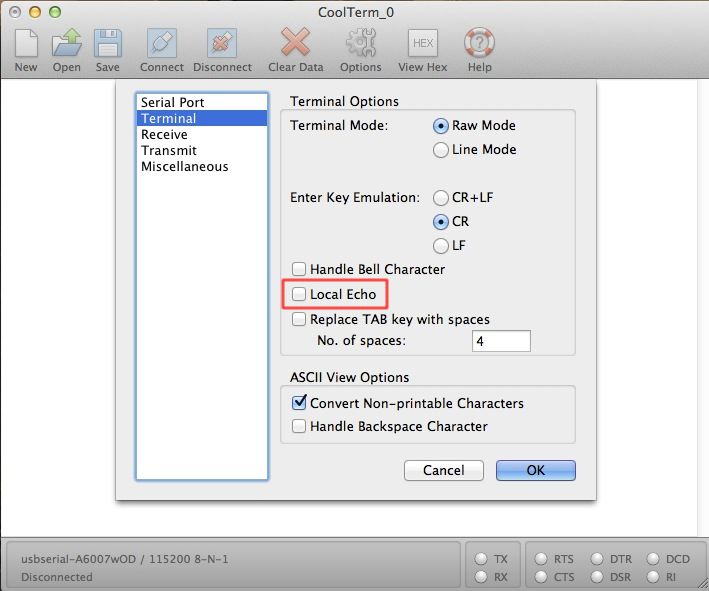
Make sure local echo is turned off for this test.
Take your jumper wire and connect it to the TX and RX lines of the FTDI Basic.
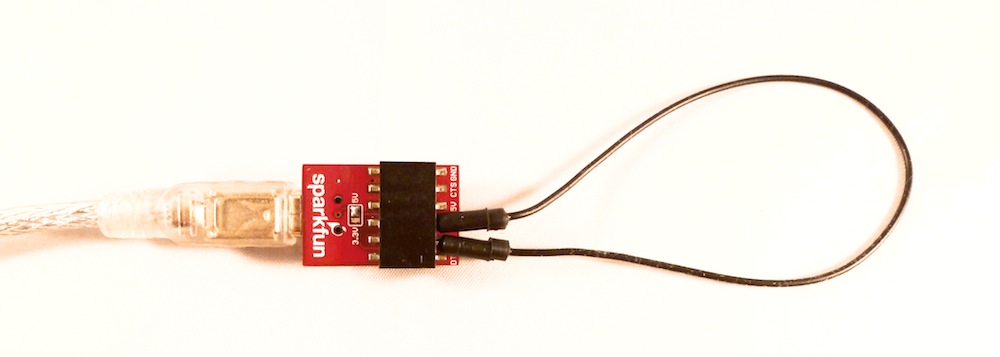
Now type!

Everything you type should be displayed in the terminal window. It's nothing fancy, but you are now communicating with the terminal. Data is being sent from your keyboard, to the computer, through the USB cable to the FTDI, out the FTDI's TX pin, into the RX pin, back through the USB cable, into the computer, and is finally displayed in the terminal window. Don't believe me? Unplug the jumper and type some more. Pending you did turn local echo off, you should not see anything being typed. This is the echo test.
Extra Credit
If you have two FTDI boards or other similar serial devices, try hooking up both of them. Connect the TX line of one to the RX line of the other and vise versa. Then, open two serial terminal windows (yes, you can have multiple terminal windows open at once), each connected to a different device. Make sure they are both set to the same baud rate and settings. Then connect, and start typing. What you type in one terminal should show up in the opposite terminal and vise versa. You've just created a very simplistic chat client!
Now let's explore the different terminal programs.