SparkFun Inventor's Kit Experiment Guide - v4.1
 Joel_E_B,
  bboyho
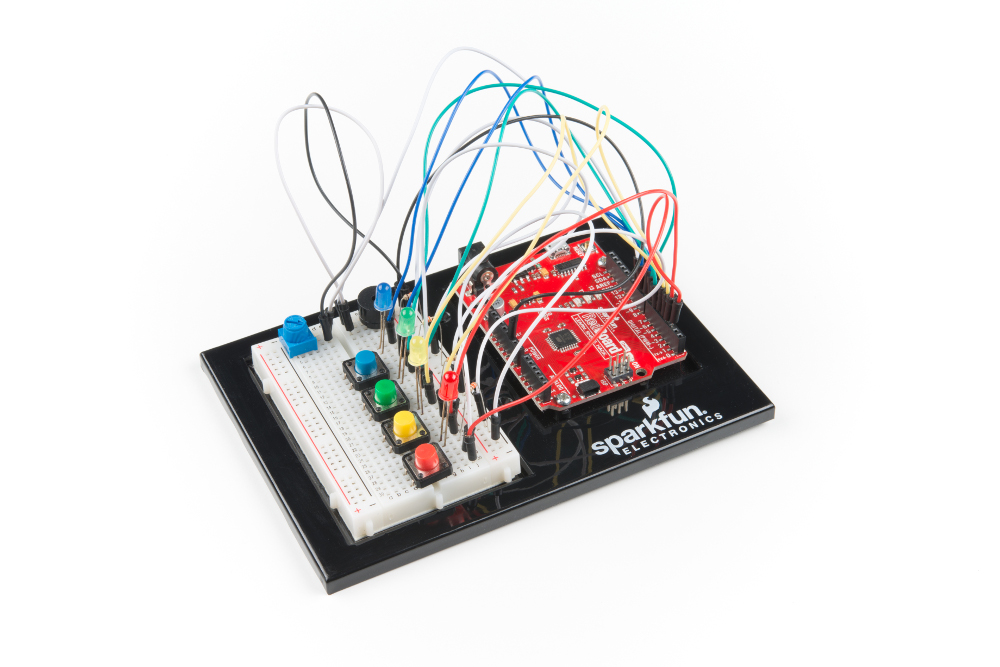
Circuit 2C: Simon Says Game
The Simon Says game uses LEDs to flash a pattern, which the player must remember and repeat using four buttons. The classic Simon game has been a hit since the 1980s. Now you can build your own!
Parts Needed
Grab the following quantities of each part listed to build this circuit:

New Concepts
For Loops
For loops repeat a section of code a set number of times. The loop works by using a counter (usually programmers use the letter “i” for this variable) that increases each loop until it reaches a stop value. Here’s an example of a simple for loop:
language:c
for (int i = 0; i < 5; i++){
    Serial.print(i);
}
The for loop takes three parameters in the brackets, separated by semicolons. The first parameter is the start value. In this case, integer i starts at 0. The second value is the stop condition. In this case, we stop the loop when i is no longer less than 5 (i < 5 is no longer true). The final parameter is an increment value. i++ is shorthand for increase i by 1 each time, but you could also increase i by different amounts. This loop would repeat five times. Each time it would run the code in between the brackets, which prints the value of i to the serial monitor.
Measuring Durations of Time With millis()
The RedBoard has a built-in clock that keeps accurate time. You can use the millis() command to see how many milliseconds have passed since the RedBoard was last powered. By storing the time when an event happens and then subtracting the current time, you can measure the number of milliseconds (and thus seconds) that have passed. This sketch uses this function to set a time limit for repeating the pattern.
Custom Functions
This sketch uses several user-defined functions. These functions perform operations that are needed many times in the program (for example, reading which button is currently pressed or turning all of the LEDs off). Functions are essential to make more complex programs readable and compact.
Hardware Hookup
Ready to start hooking everything up? Check out the circuit diagram and hookup table below to see how everything is connected.
Circuit Diagram
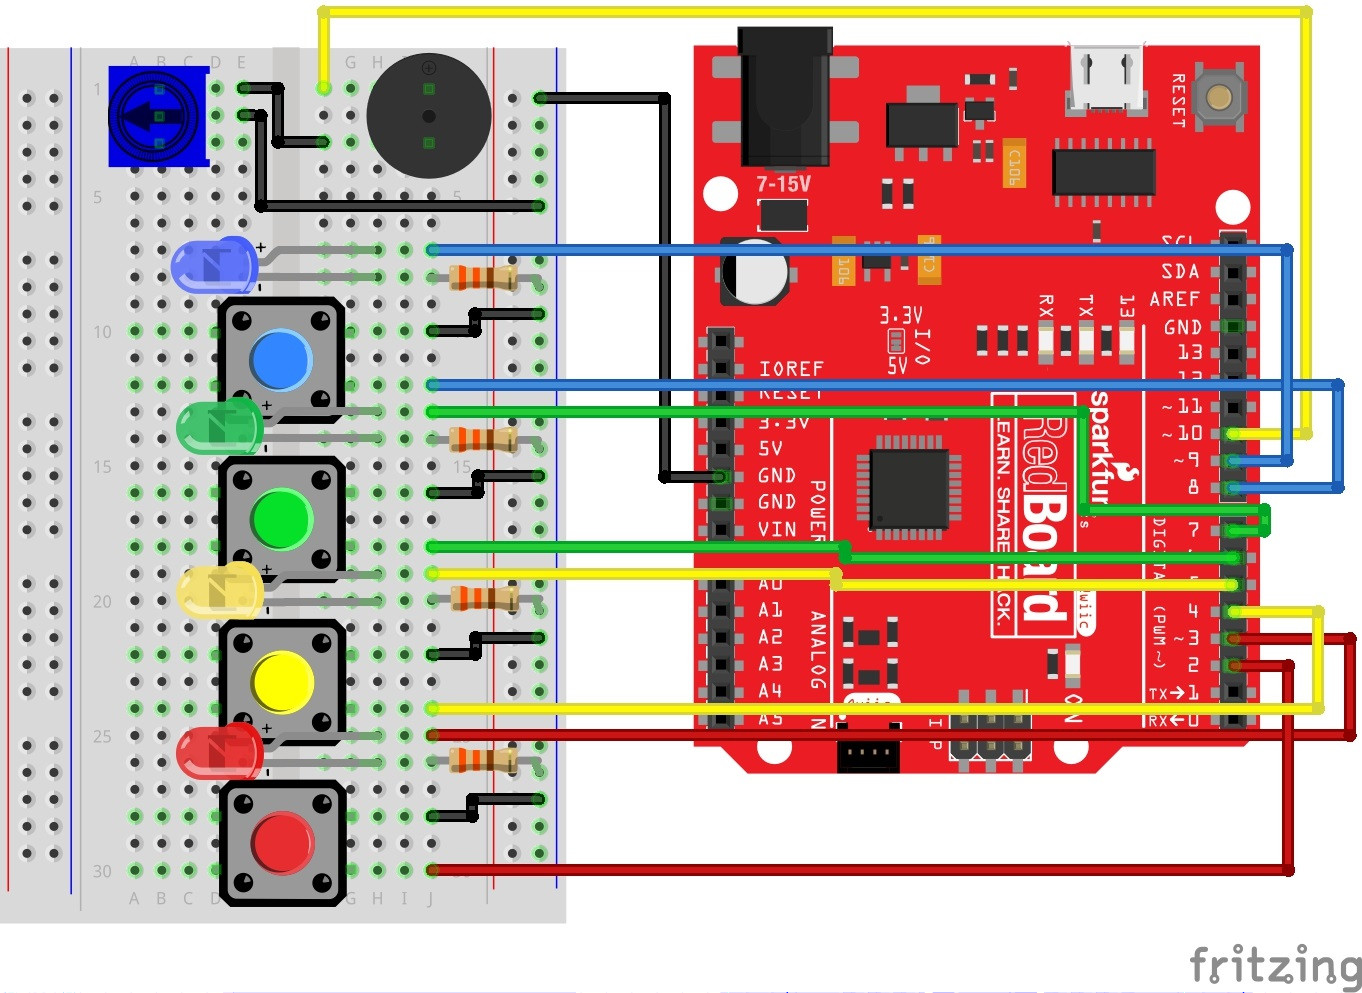
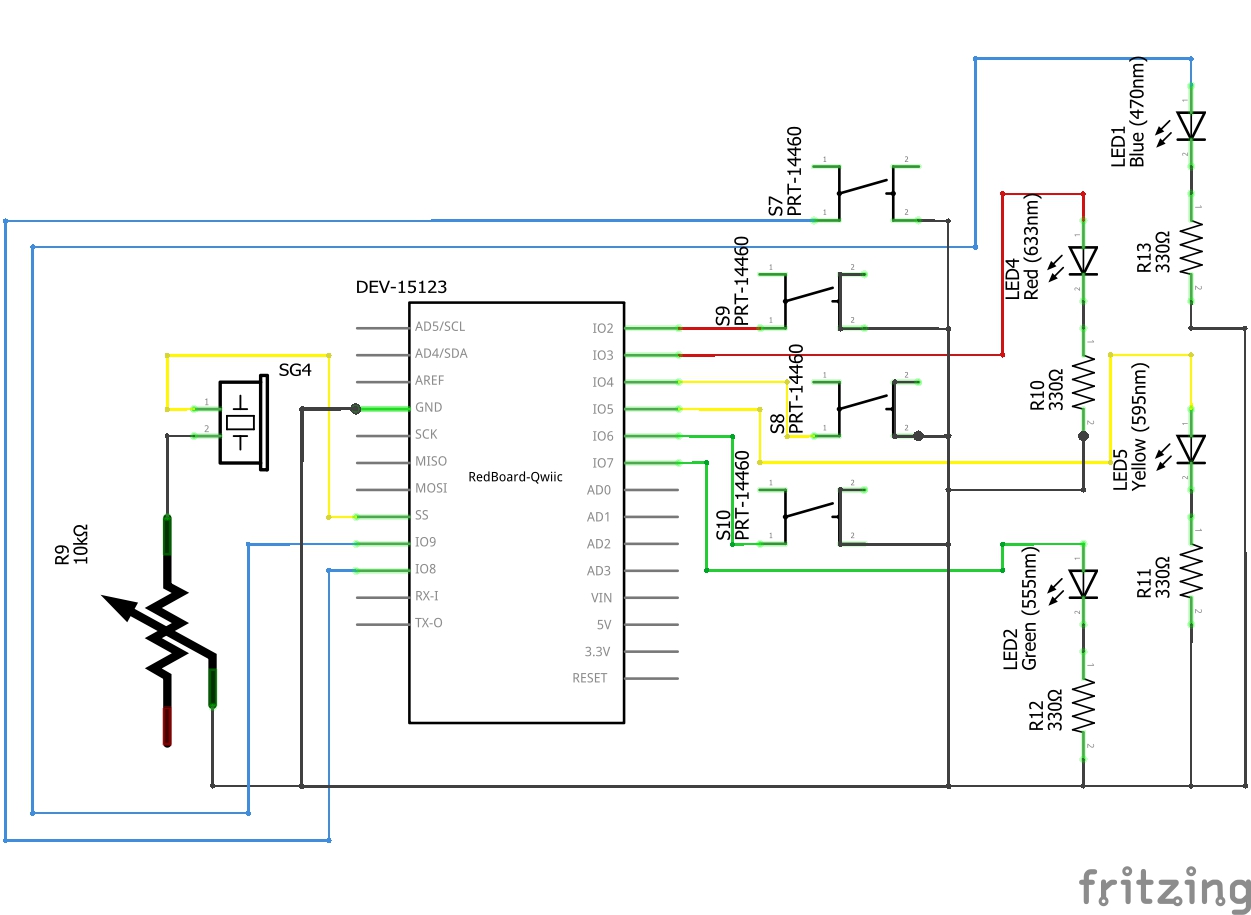
Having a hard time seeing the circuit? Click on the image for a closer look.
Hookup Table
| Component | RedBoard | Breadboard | Breadboard | Breadboard |
|---|---|---|---|---|
| Buzzer | J1 (Buzzer + ) | J3 (Buzzer - ) | ||
| Potentiometer | B1 | B2 | B3 | |
| Jumper Wire | GND | GND Rail ( - ) | ||
| Jumper Wire | Digital Pin 10 | F1 | ||
| Jumper Wire | E2 | GND Rail ( - ) | ||
| Jumper Wire | E1 | F3 | ||
| Push Button | D10/D12 | G10/G12 | ||
| Push Button | D16/D18 | G16/G18 | ||
| Push Button | D22/D24 | G22/G24 | ||
| Push Button | D28/D30 | G28/G30 | ||
| Jumper Wire | Digital Pin 8 | J12 | ||
| Jumper Wire | Digital Pin 6 | J18 | ||
| Jumper Wire | Digital Pin 4 | J24 | ||
| Jumper Wire | Digital Pin 2 | J30 | ||
| Jumper Wire | J10 | GND Rail ( - ) | ||
| Jumper Wire | J16 | GND Rail ( - ) | ||
| Jumper Wire | J22 | GND Rail ( - ) | ||
| Jumper Wire | J28 | GND Rail ( - ) | ||
| Blue LED | H7 LED ( + ) | H8 LED ( - ) | ||
| Green LED | H13 LED ( + ) | H14 LED ( - ) | ||
| Yellow LED | H19 LED ( + ) | H20 LED ( - ) | ||
| Red LED | H25 LED ( + ) | H26 LED ( - ) | ||
| Jumper Wire | Digital Pin 9 | J7 | ||
| Jumper Wire | Digital Pin 7 | J13 | ||
| Jumper Wire | Digital Pin 5 | J19 | ||
| Jumper Wire | Digital Pin 3 | J25 | ||
| 330Ω Resistor (orange, orange, brown) |
J8 | GND Rail ( - ) | ||
| 330Ω Resistor (orange, orange, brown) |
J14 | GND Rail ( - ) | ||
| 330Ω Resistor (orange, orange, brown) |
j20 | GND Rail ( - ) | ||
| 330Ω Resistor (orange, orange, brown) |
J26 | GND Rail ( - ) |
Open the Sketch
To open the code, go to: File > Examples > SIK_Guide_Code-master > SIK_Circuit_2C-SimonSays
You can also copy and paste the following code into the Arduino IDE. Hit upload, and see what happens!
language:cpp
/*
  SparkFun Inventor’s Kit
  Circuit 2C-Simon Says

  The Simon Says game flashes a pattern using LED lights, then the player must repeat the pattern.

  This sketch was written by SparkFun Electronics, with lots of help from the Arduino community.
  This code is completely free for any use.

  View circuit diagram and instructions at: https://learn.sparkfun.com/tutorials/sparkfun-inventors-kit-experiment-guide---v41
  Download drawings and code at: https://github.com/sparkfun/SIK-Guide-Code
*/

//set the pins where the buttons, LEDs and buzzer connect
int button[] = {2, 4, 6, 8};  //red is button[0], yellow is button[1], green is button[2], blue is button[3]
int led[] = {3, 5, 7, 9};     //red is led[0], yellow is led[1], green is led[2], blue is led[3]
int tones[] = {262, 330, 392, 494};   //tones to play with each button (c, e, g, b)

int roundsToWin = 10;         //number of rounds the player has to play before they win the game (the array can only hold up to 16 rounds)
int buttonSequence[16];       //make an array of numbers that will be the sequence that the player needs to remember

int buzzerPin = 10;           //pin that the buzzer is connected to

int pressedButton = 4;        //a variable to remember which button is being pressed. 4 is the value if no button is being pressed.
int roundCounter = 1;         //keeps track of what round the player is on


long startTime = 0;           //timer variable for time limit on button press
long timeLimit = 2000;        //time limit to hit a button

boolean gameStarted = false;      //variable to tell the game whether or not to play the start sequence

void setup() {

  //set all of the button pins to input_pullup (use the built-in pull-up resistors)
  pinMode(button[0], INPUT_PULLUP);
  pinMode(button[1], INPUT_PULLUP);
  pinMode(button[2], INPUT_PULLUP);
  pinMode(button[3], INPUT_PULLUP);

  //set all of the LED pins to output
  pinMode(led[0], OUTPUT);
  pinMode(led[1], OUTPUT);
  pinMode(led[2], OUTPUT);
  pinMode(led[3], OUTPUT);

  pinMode(buzzerPin, OUTPUT);   //set the buzzer pin to output
}

void loop() {

  if (gameStarted == false) {   //if the game hasn't started yet
    startSequence();            //flash the start sequence
    roundCounter = 0;           //reset the round counter
    delay(1500);                //wait a second and a half
    gameStarted = true;         //set gameStarted to true so that this sequence doesn't start again
  }

  //each round, start by flashing out the sequence to be repeated
  for (int i = 0; i <= roundCounter; i++) { //go through the array up to the current round number
    flashLED(buttonSequence[i]);          //turn on the LED for that array position and play the sound
    delay(200);                           //wait
    allLEDoff();                          //turn all of the LEDs off
    delay(200);
  }

  //then start going through the sequence one at a time and see if the user presses the correct button
  for (int i = 0; i <= roundCounter; i++) { //for each button to be pressed in the sequence

    startTime = millis();                 //record the start time

    while (gameStarted == true) { //loop until the player presses a button or the time limit is up (the time limit check is in an if statement)

      pressedButton = buttonCheck();      //every loop check to see which button is pressed

      if (pressedButton < 4) {            //if a button is pressed... (4 means that no button is pressed)

        flashLED(pressedButton);          //flash the LED for the button that was pressed

        if (pressedButton == buttonSequence[i]) { //if the button matches the button in the sequence
          delay(250);                   //leave the LED light on for a moment
          allLEDoff();                  //then turn off all of the lights and
          break;                        //end the while loop (this will go to the next number in the for loop)

        } else {                          //if the button doesn't match the button in the sequence
          loseSequence();               //play the lose sequence (the loose sequence stops the program)
          break;                        //when the program gets back from the lose sequence, break the while loop so that the game can start over
        }

      } else {                            //if no button is pressed
        allLEDoff();                      //turn all the LEDs off
      }

      //check to see if the time limit is up
      if (millis() - startTime > timeLimit) { //if the time limit is up
        loseSequence();                       //play the lose sequence
        break;                                //when the program gets back from the lose sequence, break the while loop so that the game can start over
      }
    }
  }

  if (gameStarted == true) {
    roundCounter = roundCounter + 1;      //increase the round number by 1

    if (roundCounter >= roundsToWin) {              //if the player has gotten to the 16th round
      winSequence();                      //play the winning song
    }

    delay(500);                           //wait for half a second between rounds
  }

}

//----------FUNCTIONS------------

//FLASH LED
void flashLED (int ledNumber) {
  digitalWrite(led[ledNumber], HIGH);
  tone(buzzerPin, tones[ledNumber]);
}

//TURN ALL LEDS OFF
void allLEDoff () {
  //turn all the LEDs off
  digitalWrite(led[0], LOW);
  digitalWrite(led[1], LOW);
  digitalWrite(led[2], LOW);
  digitalWrite(led[3], LOW);
  //turn the buzzer off
  noTone(buzzerPin);
}

//CHECK WHICH BUTTON IS PRESSED
int buttonCheck() {
  //check if any buttons are being pressed
  if (digitalRead(button[0]) == LOW) {
    return 0;
  } else if (digitalRead(button[1]) == LOW) {
    return 1;
  } else if (digitalRead(button[2]) == LOW) {
    return 2;
  } else if (digitalRead(button[3]) == LOW) {
    return 3;
  } else {
    return 4; //this will be the value for no button being pressed
  }
}

//START SEQUENCE
void startSequence() {

  randomSeed(analogRead(A0));   //make sure the random numbers are really random

  //populate the buttonSequence array with random numbers from 0 to 3
  for (int i = 0; i <= roundsToWin; i++) {
    buttonSequence[i] = round(random(0, 4));
  }

  //flash all of the LEDs when the game starts
  for (int i = 0; i <= 3; i++) {

    tone(buzzerPin, tones[i], 200); //play one of the 4 tones

    //turn all of the leds on
    digitalWrite(led[0], HIGH);
    digitalWrite(led[1], HIGH);
    digitalWrite(led[2], HIGH);
    digitalWrite(led[3], HIGH);

    delay(100);         //wait for a moment

    //turn all of the leds off
    digitalWrite(led[0], LOW);
    digitalWrite(led[1], LOW);
    digitalWrite(led[2], LOW);
    digitalWrite(led[3], LOW);

    delay(100);   //wait for a moment

  } //this will repeat 4 times
}

//WIN SEQUENCE
void winSequence() {

  //turn all the LEDs on
  for (int j = 0; j <= 3; j++) {
    digitalWrite(led[j], HIGH);
  }

  //play the 1Up noise
  tone(buzzerPin, 1318, 150);   //E6
  delay(175);
  tone(buzzerPin, 1567, 150);   //G6
  delay(175);
  tone(buzzerPin, 2637, 150);   //E7
  delay(175);
  tone(buzzerPin, 2093, 150);   //C7
  delay(175);
  tone(buzzerPin, 2349, 150);   //D7
  delay(175);
  tone(buzzerPin, 3135, 500);   //G7
  delay(500);

  //wait until a button is pressed
  do {
    pressedButton = buttonCheck();
  } while (pressedButton > 3);
  delay(100);

  gameStarted = false;   //reset the game so that the start sequence will play again.

}

//LOSE SEQUENCE
void loseSequence() {

  //turn all the LEDs on
  for (int j = 0; j <= 3; j++) {
    digitalWrite(led[j], HIGH);
  }

  //play the 1Up noise
  tone(buzzerPin, 130, 250);   //E6
  delay(275);
  tone(buzzerPin, 73, 250);   //G6
  delay(275);
  tone(buzzerPin, 65, 150);   //E7
  delay(175);
  tone(buzzerPin, 98, 500);   //C7
  delay(500);

  //wait until a button is pressed
  do {
    pressedButton = buttonCheck();
  } while (pressedButton > 3);
  delay(200);

  gameStarted = false;   //reset the game so that the start sequence will play again.
}
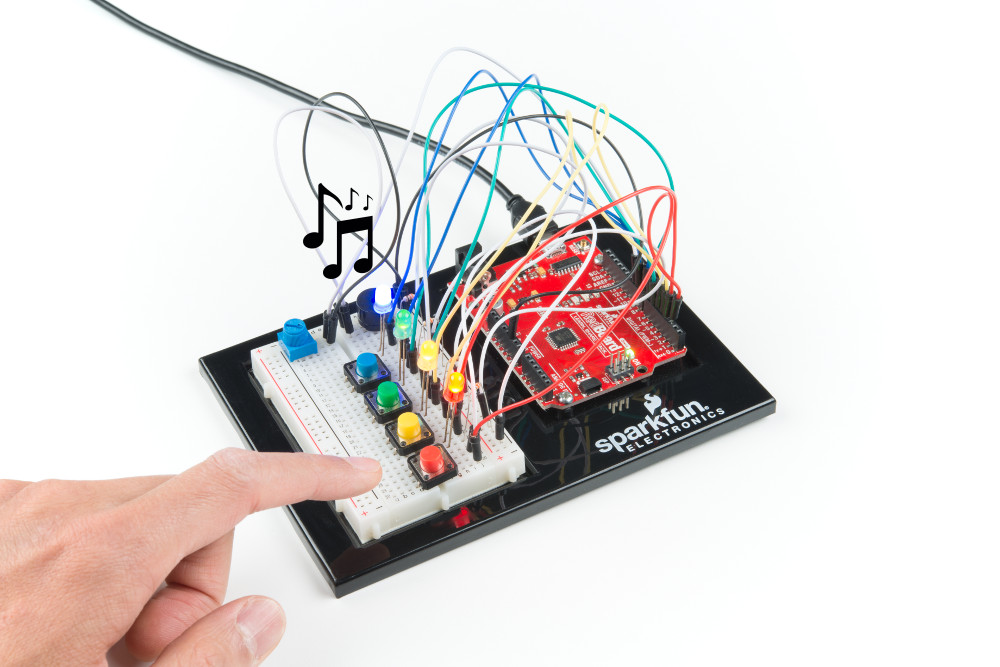
What You Should See
The circuit will flash all of the LEDs and play a melody. After a few seconds, it will flash the first light in the pattern. If you repeat the pattern correctly by pressing the corresponding colored button, then the game will move to the next round and add another color to the pattern sequence. If you make a mistake, the loss melody will play. If you get to round 10, the win melody will play. Press any button to start a new game.
Program Overview
- Check if a new game is starting. If it is, play the start sequence. Reset the counter that keeps track of rounds, and randomly generate a sequence of numbers from 0 to 3 that control which LEDs the user will have to remember.
- The game works in rounds that progress from 0 to 10. Each round the game will flash LEDs in a pattern, then the player has to recreate the pattern by pressing the button(s) that match the LED(s). In the first round, one LED will flash, and the player will have to press one button. In the eighth round, eight LEDs will flash, and the player will have to press eight buttons.
- Use a loop to flash LEDs from the sequence until you have flashed the number of LEDs that matches the round number (1 for round 1, 2 for round 2, etc).
- Start a timer, and wait for the player to press a button. The player has 1.5 seconds to press the correct button. a. If the time limit runs out before a button is pressed, the player loses. b. If the player presses the wrong button, the player loses. c. If the player presses the right button, move on to the next number in the sequence. d. Repeat this process until the player has lost or correctly repeated the sequence for this round.
- If the player repeats the entire sequence for that round. Increase the round number by one (this will add one extra item to the end of the pattern). Then go back to step 3.
- Keep incrementing the round until the player loses or the player finishes 10 rounds. If the player finishes 10 rounds, play the winning sequence.
Code to Note
| Code | Description |
|---|---|
Elapsed Time:millis(); | The millis function returns the number of milliseconds that have passed since the RedBoard was last turned on. |
Boolean Variables:boolean variable_name; | The name for these variables comes from Boolean logic. The Boolean variable type only has two values: 1 or 0, HIGH or LOW, TRUE or FALSE. Using Boolean variables helps save memory on your microcontroller if you only need to know if something is true or false. Space in your microcontroller's memory is reserved when a variable is declared. How much memory is reserved depends on the type of variable. |
Storing pin numbers in Arrays:int led[] = {3,5,7,9}; | Sometimes you will want to cycle through all of the LEDs or buttons connected to a project. You can do this by storing a sequence of pin numbers in an array. The advantage of having pins in an array instead of a sequence of variables is that you can use a loop to easily cycle through each pin. |
| User Functions | Description |
flashLED(# for LED to flash); | This turns one of the four LEDs on and plays the tone associated with it. 0 = Red, 1 = Yellow, 2 = Green, 3 = Blue. |
allLEDoff(); | Turns all four LEDs off. |
buttonCheck(); | Uses digitalRead() to check which button is pressed. Returns 0, 1, 2 or 3 if one of the buttons is pressed. Returns 4 if no button is pressed.
|
startSequence(); | Flashes the LEDs and plays tones in a sequence. Resets the round counter and generates a new random sequence for the user to remember. |
winSequence(); | Plays a sequence of tones, turns all of the LEDs on, then waits for the player to press a button. If a button is pressed, restarts the game. |
loseSequence(); | Plays a sequence of tones, turns all of the LEDs on, then waits for the player to press a button. If a button is pressed, restarts the game. |
Coding Challenges
| Challenge | Description |
|---|---|
| Change the difficulty of the game | Change the difficulty of the game by changing how fast the player has to press each button or by increasing or decreasing the number of rounds needed to win.
Note that if you increase the number of rounds to be larger than 16, you will need to change the size of the “buttonSequence” array (it is set at the top of the code in a line that looks like this: int buttonSequence[16];.
|
| Change the sound effects | Try changing the sequence of notes that play when you start, win or lose the game. |
| 2-Player mode | Ready for a real coding challenge? Try changing the code so that two players can play head-to-head. |
Troubleshooting
| Problem | Solution |
|---|---|
| One of the LEDs isn’t lighting up | Make sure your LED is flipped around in the right direction. If the LED still doesn’t work, try wiggling the resistor and the wires that connect to the LED. |
| The buzzer is too loud or too quiet | Turn the potentiometer to adjust the volume |
| One of the buttons isn’t working | Carefully check your wiring for each button. One leg of the button should connect to a pin on the RedBoard; the other leg should connect to the ground rail on the breadboard. |
| None of the buttons or LEDs is working | Make sure you don't have 5V and GND mixed up. Double check that you have a GND connection from the RedBoard to the GND rail on the breadboard. |
| Still not working? | Jumper wires unfortunately can go "bad" from getting bent too much. The copper wire inside can break, leaving an open connection in your circuit. If you are certain that your circuit is wired correctly and that your code is error-free and uploaded, but you are still encountering issues, try replacing one or more of the jumper wires for the component that is not working. |