SparkFun Inventor's Kit Experiment Guide - v4.1
 Joel_E_B,
  bboyho
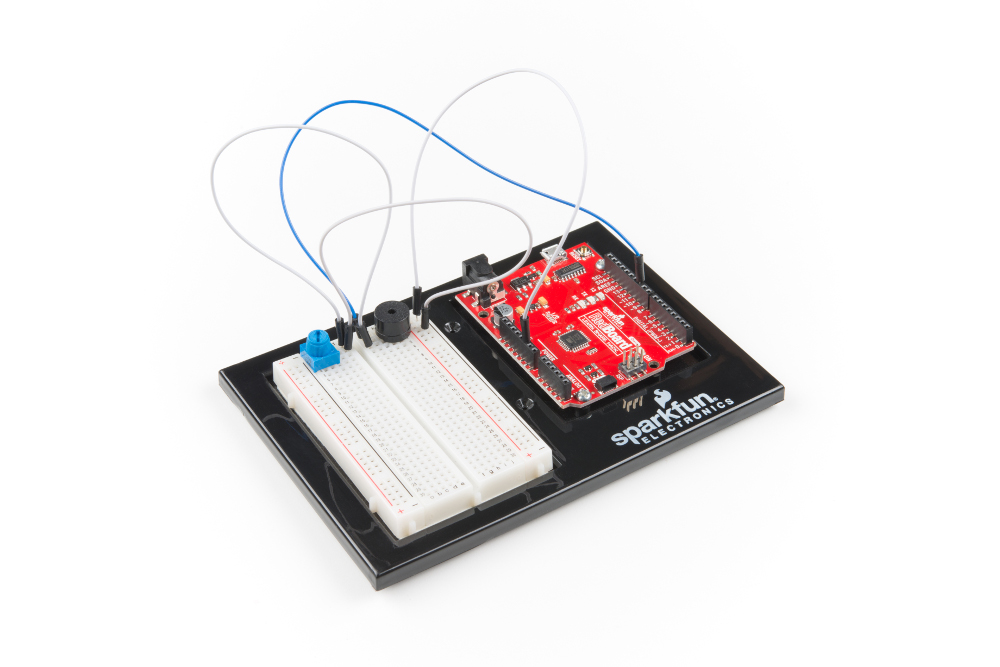
Circuit 2A: Buzzer
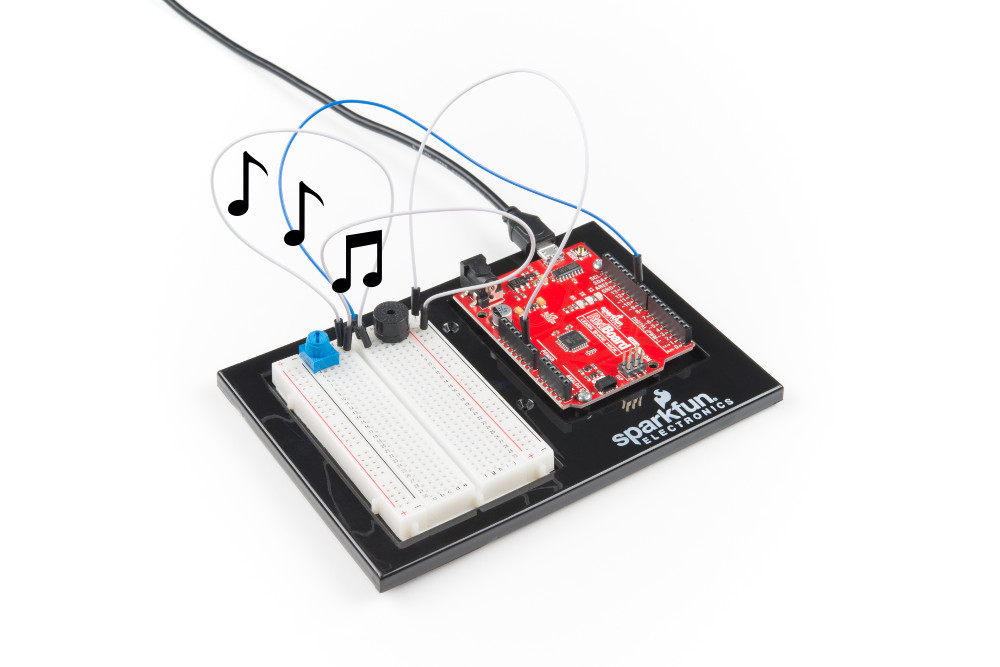
In this circuit, you'll use the RedBoard and a small buzzer to make music, and you'll learn how to program your own songs using arrays.
Parts Needed
Grab the following quantities of each part listed to build this circuit:

New Components
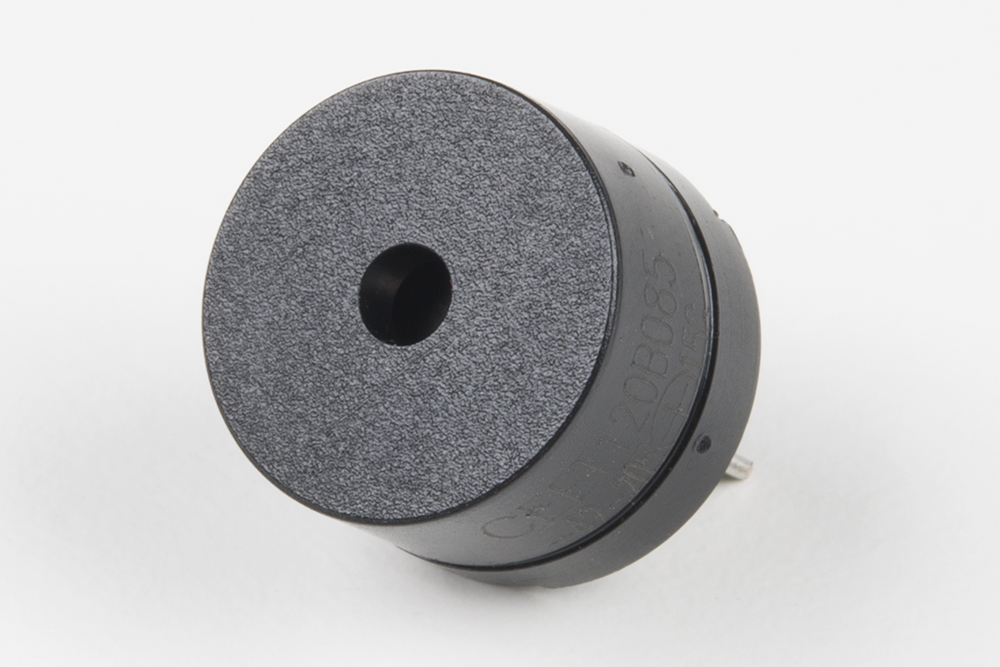
Buzzer
The buzzer uses a small magnetic coil to vibrate a metal disc inside a plastic housing. By pulsing electricity through the coil at different rates, different frequencies (pitches) of sound can be produced. Attaching a potentiometer to the output allows you to limit the amount of current moving through the buzzer and lower its volume.
New Concepts
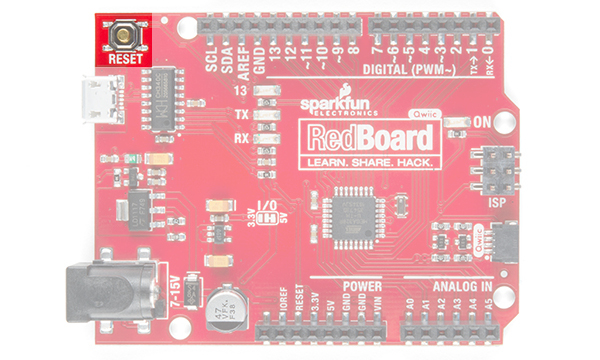
Reset Button
The RedBoard has a built-in reset button. This button will reset the board and start the code over from the beginning, running what is in setup() and then loop().
Tone Function
To control the buzzer, you will use the tone function. This function is similar to PWM in that it generates a wave that is of a certain frequency on the specified pin. The frequency and duration can both be passed to the tone() function when calling it. To turn the tone off, you need to call noTone() or pass a duration of time for it to play and then stop. Unlike PWM, tone() can be used on any digital pin.
Arrays
Arrays are used like variables, but they can store multiple values. The simplest array is just a list. Imagine that you want to store the frequency for each note of the C major scale. We could make seven variables and assign a frequency to each one, or we could use an array and store all seven in the same array, as shown below. To refer to a specific value in the array, an index number is used. Arrays are indexed from 0. For example, to call the first element in the array, use array_name[0];; to call the second element, use array_name[1]; and so on.
| Musical Note | Frequency (Hz) | Using Variables | Using an Array |
|---|---|---|---|
| A | 220 | aFrequency | frequency[0] |
| B | 247 | bFrequency | frequency[1] |
| C | 261 | cFrequency | frequency[2] |
| D | 294 | dFrequency | frequency[3] |
| E | 330 | eFrequency | frequency[4] |
| F | 349 | fFrequency | frequency[5] |
| G | 392 | gFrequency | frequency[6] |
Hardware Hookup
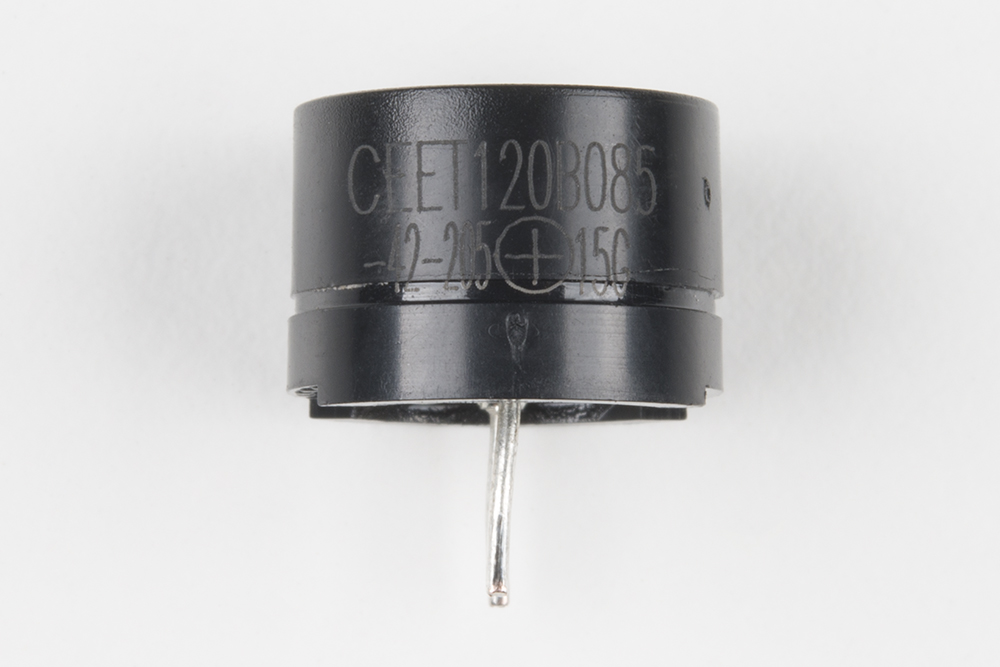
| Polarized Components | Pay special attention to the component’s markings indicating how to place it on the breadboard. Polarized components can only be connected to a circuit in one direction. |
The buzzer is polarized. To see which leg is positive and which is negative, flip the buzzer over and look at the markings underneath. Keep track of which pin is where, as they will be hard to see once inserted into the breadboard. There is also text on the positive side of the buzzer, along with a tiny (+) symbol.

Volume Knob
All of the circuits in Project 2 make use of a potentiometer as a rudimentary volume knob. Notice that only two of the potentiometer's legs are used in these circuits. In these instances, the potentiometer is acting as a variable resistor, limiting the amount of current flowing to the speaker and thus affecting the volume as you turn the knob. This is similar to the current-limiting resistor used to limit current to the LED in circuit 1A --- only this time the resistance is variable.
Ready to start hooking everything up? Check out the circuit diagram and hookup table below to see how everything is connected.
Circuit Diagram
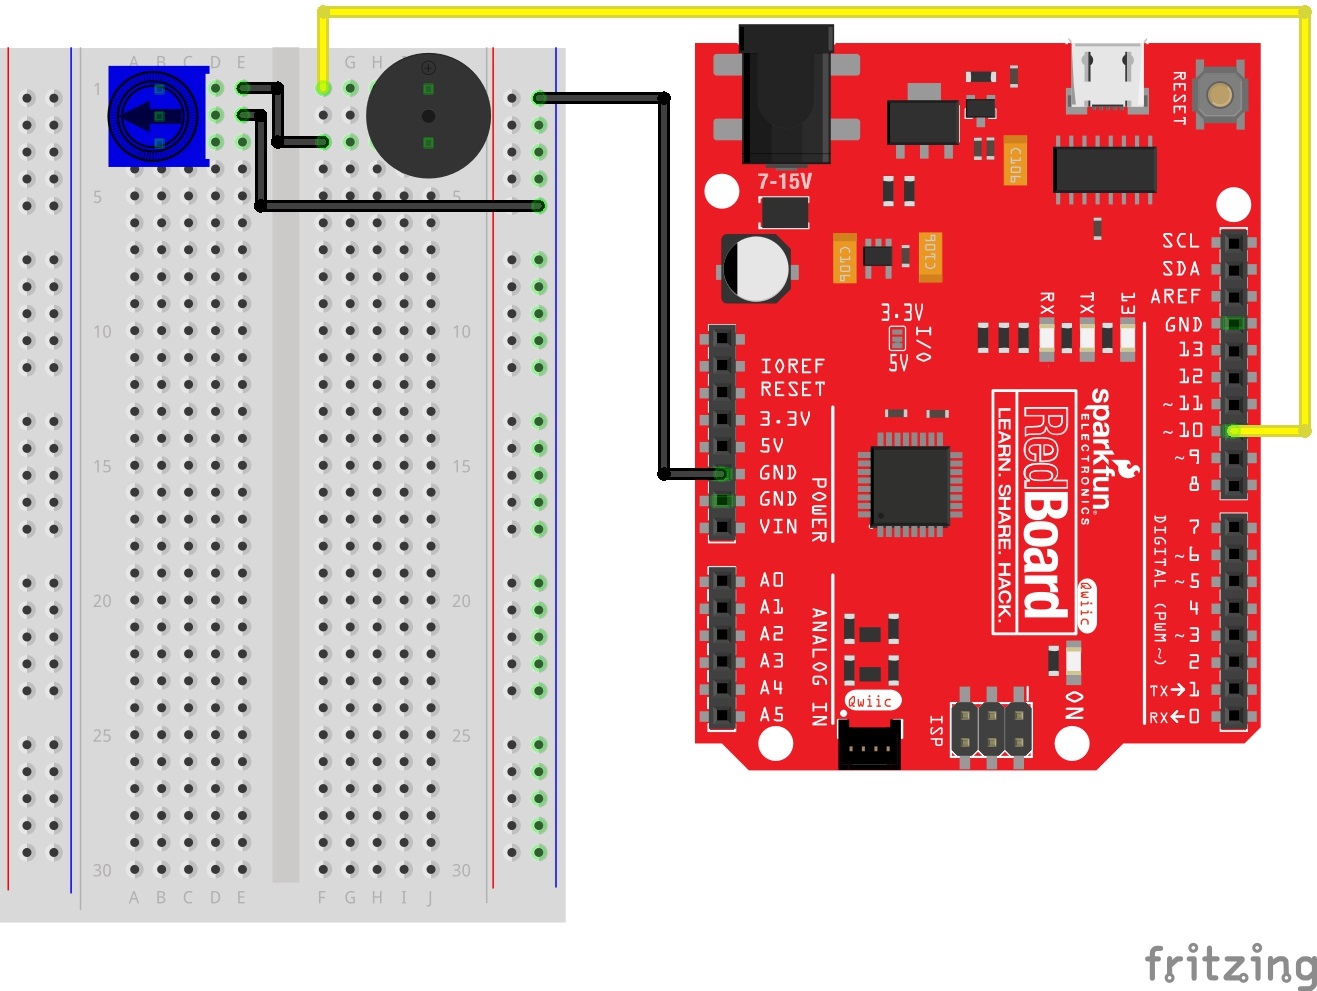
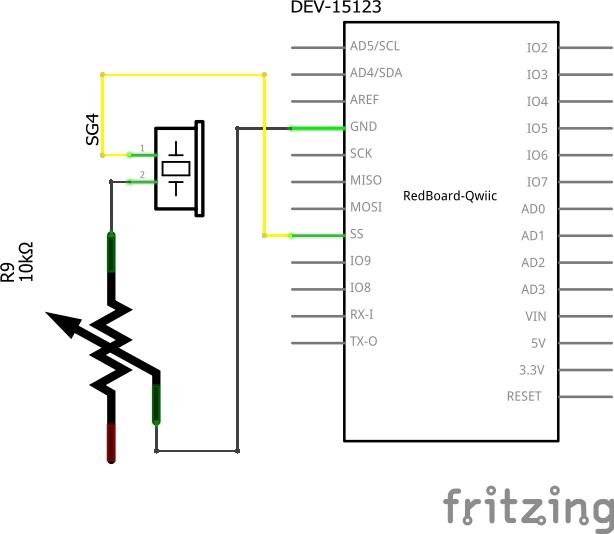
Having a hard time seeing the circuit? Click on the image for a closer look.
Hookup Table
| Component | RedBoard | Breadboard | Breadboard | Breadboard |
|---|---|---|---|---|
| Buzzer | J1 (Buzzer + ) | J3 (Buzzer - ) | ||
| Potentiometer | B1 | B2 | B3 | |
| Jumper Wire | GND | GND Rail ( - ) | ||
| Jumper Wire | Digital Pin 10 | F1 | ||
| Jumper Wire | E2 | GND Rail ( - ) | ||
| Jumper Wire | E1 | F3 |
Open the Sketch
To open the code, go to: File > Examples > SIK_Guide_Code-master > SIK_Circuit_2A-Buzzer
You can also copy and paste the following code into the Arduino IDE. Hit upload, and see what happens!
language:cpp
/*
  SparkFun Inventor’s Kit
  Circuit 2A - Buzzer

  Play notes using a buzzer connected to pin 10

  This sketch was written by SparkFun Electronics, with lots of help from the Arduino community.
  This code is completely free for any use.

  View circuit diagram and instructions at: https://learn.sparkfun.com/tutorials/sparkfun-inventors-kit-experiment-guide---v41
  Download drawings and code at: https://github.com/sparkfun/SIK-Guide-Code
*/

int speakerPin = 10;               //the pin that buzzer is connected to

void setup()
{
  pinMode(speakerPin, OUTPUT);    //set the output pin for the speaker
}

void loop()
{

  play('g', 2);       //ha
  play('g', 1);       //ppy
  play('a', 4);       //birth
  play('g', 4);       //day
  play('C', 4);       //to
  play('b', 4);       //you

  play(' ', 2);       //pause for 2 beats

  play('g', 2);       //ha
  play('g', 1);       //ppy
  play('a', 4);       //birth
  play('g', 4);       //day
  play('D', 4);       //to
  play('C', 4);       //you

  play(' ', 2);       //pause for 2 beats

  play('g', 2);       //ha
  play('g', 1);       //ppy
  play('G', 4);       //birth
  play('E', 4);       //day
  play('C', 4);       //dear
  play('b', 4);       //your
  play('a', 6);       //name

  play(' ', 2);       //pause for 2 beats

  play('F', 2);       //ha
  play('F', 1);       //ppy
  play('E', 4);       //birth
  play('C', 4);       //day
  play('D', 4);       //to
  play('C', 6);       //you

  while (true) {}     //get stuck in this loop forever so that the song only plays once
}


void play( char note, int beats)
{
  int numNotes = 14;  // number of notes in our note and frequency array (there are 15 values, but arrays start at 0)

  //Note: these notes are C major (there are no sharps or flats)

  //this array is used to look up the notes
  char notes[] = { 'c', 'd', 'e', 'f', 'g', 'a', 'b', 'C', 'D', 'E', 'F', 'G', 'A', 'B', ' '};
  //this array matches frequencies with each letter (e.g. the 4th note is 'f', the 4th frequency is 175)
  int frequencies[] = {131, 147, 165, 175, 196, 220, 247, 262, 294, 330, 349, 392, 440, 494, 0};

  int currentFrequency = 0;    //the frequency that we find when we look up a frequency in the arrays
  int beatLength = 150;   //the length of one beat (changing this will speed up or slow down the tempo of the song)

  //look up the frequency that corresponds to the note
  for (int i = 0; i < numNotes; i++)  // check each value in notes from 0 to 14
  {
    if (notes[i] == note)             // does the letter passed to the play function match the letter in the array?
    {
      currentFrequency = frequencies[i];   // Yes! Set the current frequency to match that note
    }
  }

  //play the frequency that matched our letter for the number of beats passed to the play function
  tone(speakerPin, currentFrequency, beats * beatLength);
  delay(beats * beatLength);  //wait for the length of the tone so that it has time to play
  delay(50);                  //a little delay between the notes makes the song sound more natural

}

/* CHART OF FREQUENCIES FOR NOTES IN C MAJOR
  Note      Frequency (Hz)
  c        131
  d        147
  e        165
  f        175
  g        196
  a        220
  b        247
  C        262
  D        294
  E        330
  F        349
  G        392
  A        440
  B        494
*/
What You Should See
When the program begins, a song will play from the buzzer once. To replay the song, press the reset button on the RedBoard. Use the potentiometer to adjust the volume.
Program Overview
Inside the main loop:
- Play the first note for x number of beats using the play function. a. (Inside the play function:) Take the note passed to the play function and compare it to each letter in the notes array. When you find a note that matches, remember the index position of that note (e.g., 6th entry in the notes array). b. Get a frequency from the frequency array that has the same index as the note that matched (e.g., the 6th frequency). c. Play that frequency for the number of beats passed to the play function.
- Play the second note using the play function
...and so on.
Code to Note
| Code | Description |
|---|---|
Character Variables:void play( char note, int beats) | The char, or character, variable to store character values. For example, in this sketch, the play() function gets passed two variables, a character variable that represents the mucial note we want to play and an integer variable that represents how long to play that note. A second array takes the character variable and associates a frequency value to it. This makes programming a song easier as you can just reference the character and not the exact frequency. |
Tone Function:tone(pin, frequency, duration); | The tone() function will pulse power to a pin at a specific frequency. The duration controls how long the sound will play. Tone can be used on any digital pin. |
Declaring an Array:arrray_name[array_size]; or arrray_name[] = {array elements}; | To declare an array, you must give it a name, then either tell Arduino how many positions the array will have or assign a list of values to the array. |
Calling an Array:array_name[index #]; | To call one of the values in an array, simply type the name of the array and the index of the value. You can use a variable instead of a number in between the square brackets. Don't forget the index starts at 0, not 1, so to call the first element, use array_name[0];. |
Coding Challenges
| Challenge | Description |
|---|---|
| Change the tempo of the song | Experiment with the beatLength; variable to change the tempo of the song. |
| Make your own song | Try changing the notes to make a different song. Spaces " " can be used for rests in the song. |
Troubleshooting
| Problem | Solution |
|---|---|
| The song is too quiet or too loud | Turn the potentiometer to adjust the volume. |
| No sound is playing | Try pressing the reset button on the RedBoard. If that doesn’t work, check your wiring of the buzzer. It's easy to misalign a pin with a jumper wire. |