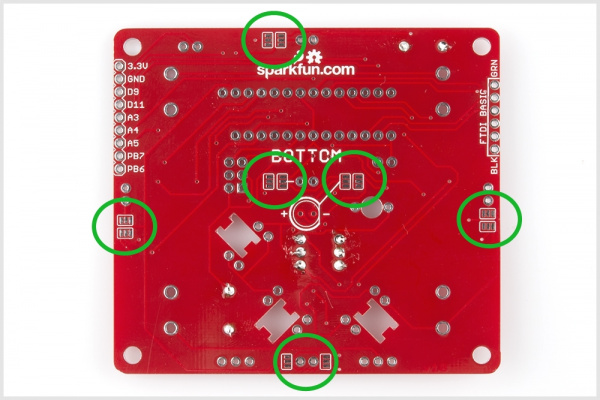
Simon Tilts Assembly Guide
Troubleshooting LEDs
Failing LEDs? Don’t fret, there is an easy way to fix it! The most common cause of a failing LED is incorrect polarity. We have designed a special trick into the Simon Tilts PCB. You can simply cut the two traces and close two jumpers. This will swap the polarity without having to remove the LED.
First, find the solder jumpers next to the LED you are trouble-shooting. There are two jumpers per LED. They are located on the bottom side of the PCB, near each LED.
Each jumper has a small trace connecting the middle pad to the default polarity setting. The small trace is sometimes difficult to see, but it is a thin stripe of metal that should show up as a lighter color red. Using a hobby knife (aka x-acto knife), cut the default traces:
Using your soldering iron, close a jumper between the middle pad and the other outside pad:
The polarity of the traces running to that LED should now be swapped, and your LED should be lighting up.


