Simblee Concepts
This Tutorial is Retired!
This tutorial covers concepts or technologies that are no longer current. It's still here for you to read and enjoy, but may not be as useful as our newest tutorials.
 SFUptownMaker
Introduction
The Simblee module by RFDigital is intended to make embedded devices using Bluetooth Low Energy connections easier for everyone: hardware hackers, app developers, students, makers, engineers, and anyone else who wants to leverage their smartphone via BLE.
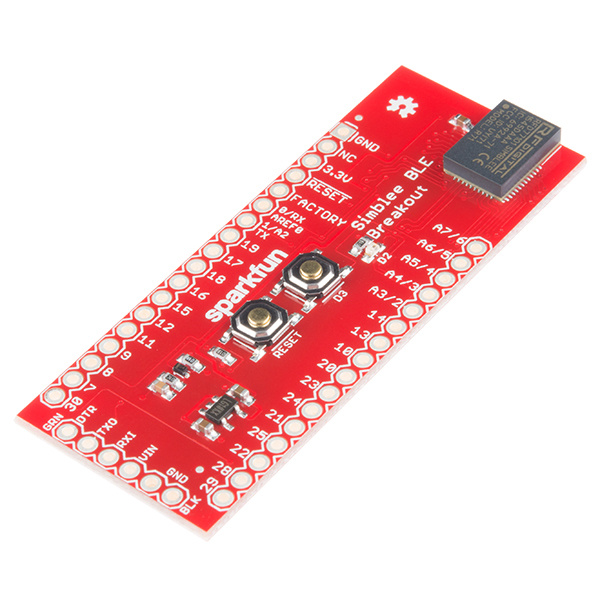
SparkFun Simblee BLE Breakout - RFD77101
WRL-13632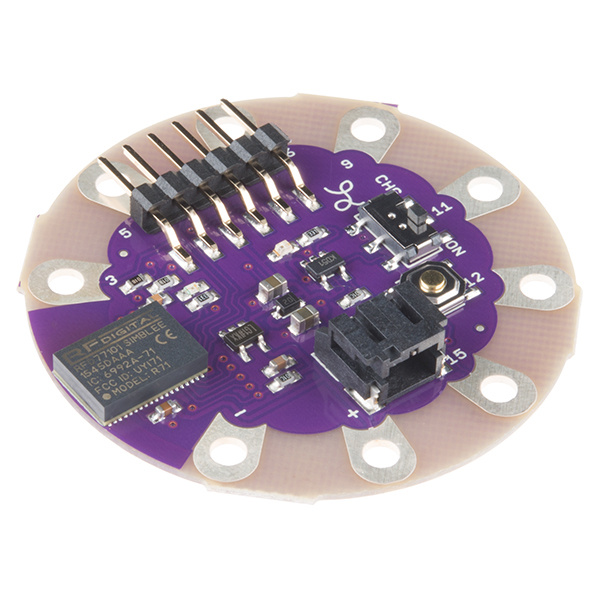
LilyPad Simblee BLE Board - RFD77101
DEV-13633Historically, using a smartphone with an embedded project has meant learning to develop applications for smartphones, a daunting requirement. RFDigital has made this easier by moving the application development into the Arduino environment. When you write your sketch defining the behavior of the embedded portion of the Simblee, you'll also add a couple of functions below the old familiar setup() and loop() calls that tell the Simblee app running on your mobile device what the custom front end for this particular situation should look like.
SparkFun has made two boards using the Simblee: a LilyPad board for sewable applications and a standard breakout board for general use. We also sell the official RFduino Simblee breakout, the RFduino Simblee starter kit, and a number of RFDuino shield products which are compatible with both the official Simblee breakout and our breakout.
This tutorial will introduce you to some of the generic principles involved in developing a project with the Simblee module.
Required Materials
- Buttons -- We'll be wanting to send signals into the application from hardware, so you'll definitely want buttons. This assortment is nice because it's breadboard compatible and the buttons have a nice, big, color-coded surface.
- LEDs -- We'll also be sending signals out to the outside world, and if you can light an LED, you can use that signal to do anything. This assortment includes several types of LED, including the common cathode RGB LED we'll be using later, as well as the resistors you'll need to limit the drive current.
- Jumper Wires -- Of course, you'll need some jumper wires to hook everything up.
- Breadboard -- And, a breadboard. I suggest this one, since its length will make it easier to insert a Simblee board as well as build a circuit with which to interface.
- Header pins -- If you've bought a Sparkfun Simblee Breakout board, you'll need to add some header pins so you can insert it into your breadboard.
- Alligator clips -- If you're using a LilyPad Simblee Board, alligator clips are the way to attach them to the circuit you're building up on the breadboard.
Suggested Reading
Obviously, we're going to have to make some assumptions about prior knowledge during these lessons. If you aren't sure you're comfortable with any of the topics below, here's your chance to review them before continuing on with the tutorial.
- LEDs -- Obviously, you'll want to understand how LEDs work, since we'll be using LED as a stand-in for other devices during our tutorials.
- Resistors -- This segment of our resistor tutorial has good coverage on using an LED to limit the current through an LED. This is more important for the Simblee than for most other boards, as the drive current capability out of the Simblee pins is lower than on most similar development boards.
- Breadboards -- We're going to assume you're building your circuit up on a breadboard. That's the easiest way to do it.
- Soldering -- If you bought a Simblee Breakout Board, you're going to have to solder some pins to it to use it in a breadboard. In addition to the general soldering tips in our main soldering tutorial, our Pi Wedge B+ Hookup Guide has some really great tips on soldering pins to a breakout board.
- Logic levels -- The Simblee board uses 3.3V signals, rather than 5V, and it's important that you understand the distinction to avoid damaging your Simblee.