Photon Remote Water Level Sensor
Introduction
With the advent of cheap Microcontrollers (MCUs), and especially WiFi-MCUs of late, custom DIY automation of many monotonous tasks and telemetry (remote data collection) is now easily possible.
In this tutorial, we are going to automate a pump for a well based on a remote measurements of a water tank and send weather warnings based on atmospheric pressure readings, as well as collect a bunch of other data. This same type of system could easily be adapted for automated farm/garden watering or other things that need to be turned on and off when some condition is met (like lights in a warehouse/greenhouse at certain times), measured via remote telemetry.
The Problem
My friend, Andre, owns a CSA farm in Boulder, CO called Jacob Springs Farm. They make some tasty meat, milk, and eggs, so, if you're local, check them out.

They aren't legally allowed to run a city water line to the property, so they use a well and their own storage tanks. The pump for the well is manually turned on or off using a twist timer (which is actually only rated for 50% of the pump's current load), and typically they have no idea how much water is in the tanks (unless they're empty). I've heard hilariously tragic stories of people being in the shower and having the water run out during winter. They have to run out to the barn, all soaped up and in their towel, turn on the water, and wait for the water heater to fill up and heat so they can finish their shower. Other times the water runs out while preparing dinner or doing dishes, and the low water pressure makes for slow going.
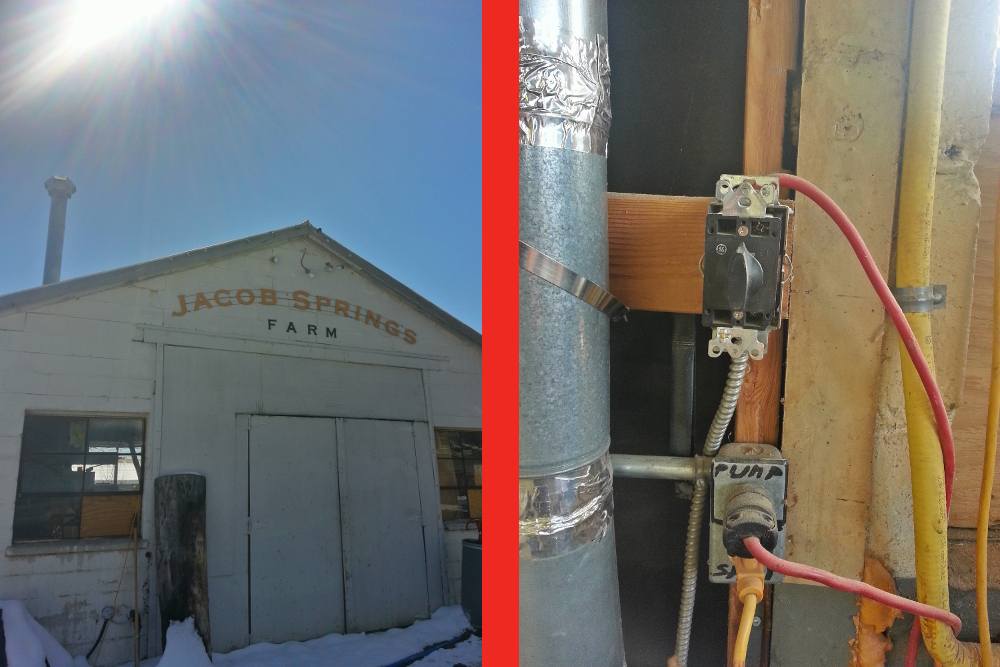
The water tanks are on one corner of the property (the highest elevation), far from any power outlets, and the pump for the well is at the other end. In order to manage the water system for the farm, I've developed this system that measures the water height with an ultrasonic sensor and controls the pump from that data. While I was at it, I added some extra environmental sensors.
Required Materials
This project is two-fold: remote telemetry (measurements) coupled with automated weather warnings, and remote control/automation of a hefty (2 hp) pump. To follow along with this tutorial, you'll need the following products and tools:
Pump Remote Control Box
For the automation of the pump, you will need:
- 1 contactor to turn on/off the pump, rated for the pump load (3hp, 2200W in this case, but choose the contactor with an appropriate horsepower rating for your application), or a relay if the load is light enough
- 10A relay to control the contactor
- Particle Photon WiFi MCU to control the relay
- Photon ProtoShield
- female headers
- male-male jumper wires
- 5 V power supply for the photon
- box to hold the photon and relay
- PIR sensor to check if someone is near the control box/contactor
- 10 k resistor for the PIR
- a few mounting screws (5), I used #8 1-1/4" drywall screws, a DIN rail is more professional
- appropriate wiring for your loads (check here for max amperage for different wire gauges) -- I used about 2 ft of 18 AWG for control of the contactor, and about 5ft of 10 AWG for wiring leading to the pump

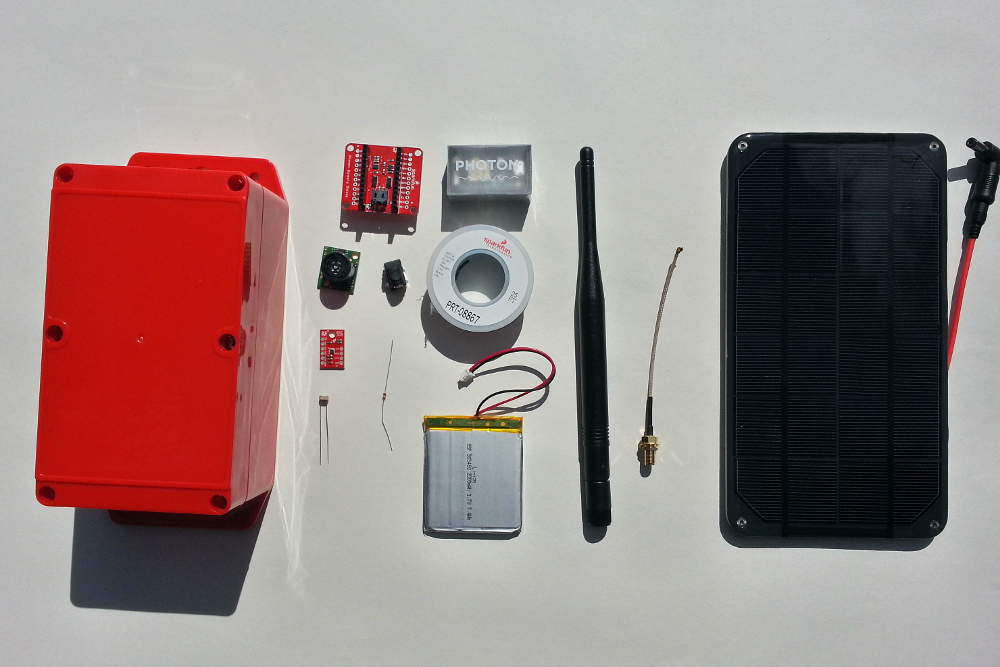
Remote Telemetry Box (water height, etc)
The other half of the project is remote data collection. For this, you will need:
- Particle Photon WiFi MCU
- SMA to u.FL cable (may not be necessary if you can get wifi reception without the antenna)
- Duck Antenna (may not be necessary if you can get wifi reception without the antenna), you can also use a cantenna or yagi antenna for longer-range reception
- Photon Battery Shield
- LiPo battery (I used 2000 mAh, but you can go higher or lower capacity depending on budget and how often you want to take measurements)
- solar cell (I used 3.5 W but that's overkill, just to be safe -- if trying to save money, you could use the 2 W)
- CdS photocell
- 1 k resistor for use with the photocell
- BME280 pressure/humidity/temperature sensor
- MaxSonar EZ3 ultrasonic range finder (measures water height), although I recommend the waterproof HRXL for robustness
- box to hold it all
- hookup wire (22 AWG)
- a few mounting screws (2), I used #8 1-1/4" drywall screws
- some twine or wire to hold the solar panel down
Here's a wish list containing all the SparkFun parts used in this project:
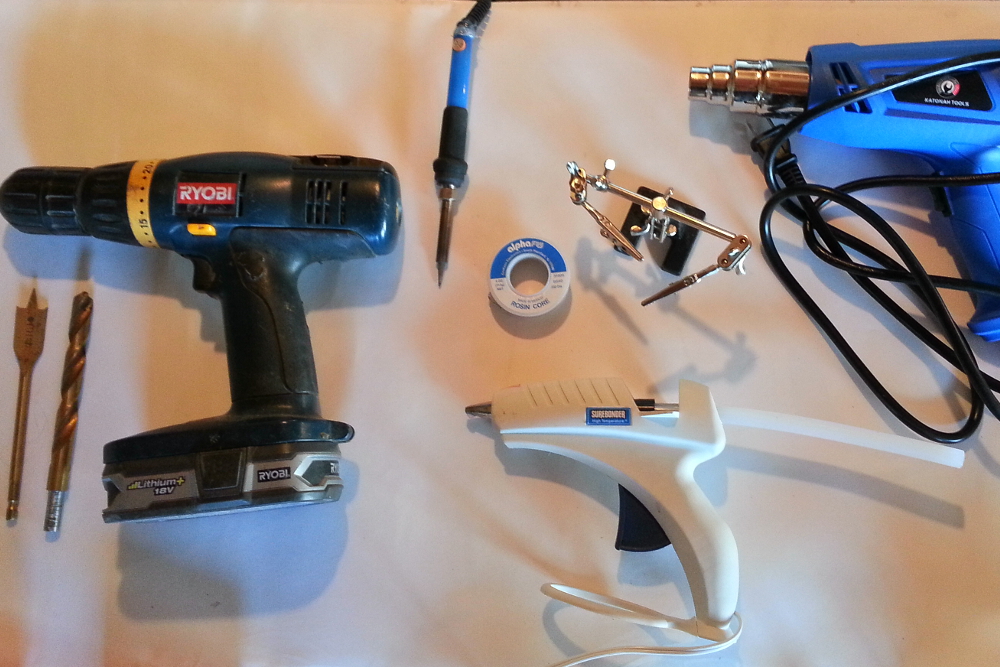
Tools
- Drill
- drill bits: 3/4", 5/8", 1/2", 1/8"
- soldering iron, solder, optional: third hand, copper sponge (for cleaning soldering iron tip)
- wire strippers
- hot glue gun and hot glue
- heat gun for shrink wrap (can use hair dryer in a pinch)
- screw driver
- two pairs needle-nosed pliers
- exacto knife
- tape measure
- sledge hammer for driving a grounding rod into the ground

Other Supplies
- Gore-Tex® repair patch kit (I sourced locally at REI, but also available here)
- acetone or other solvent to remove adhesive from Gore-Tex® patch (may not need this for the Simms patches)
- 2 PG-7 cable glands
- silicone
- small glass piece, I got mine from Hobby Lobby
- AC cord with bare leads for testing contactor
- aluminum foil (for shielding the ultrasonic sensor from static from the plastic water tank)
- grounding rod for grounding the aluminum foil housing (I used 1/2" 10' EMT conduit)

Suggested Reading
Before embarking upon this tutorial, you may find the following links useful: