LilyPad ProtoSnap Plus Hookup Guide
 MikeGrusin,
  Gella
Gella 
Setting Up Arduino
Now that you've explored the board's features, it's time to upload some code! When you first install Arduino, it knows how to program a number of "standard" Arduino-compatible boards. Since the LilyPad USB Plus is a newer LilyPad microcontroller, you will need to manually add it to this list by following the steps below. You'll only have to do this once to add the board to Arduino.
1. Add SparkFun Boards to Arduino's Preferences
Start the Arduino IDE software (version 1.8 or higher) and open the Preferences window by choosing File > Preferences from the menu.
Now copy the below text and paste it into the "Additional Boards Manager URLs" text box:
https://raw.githubusercontent.com/sparkfun/Arduino_Boards/master/IDE_Board_Manager/package_sparkfun_index.json
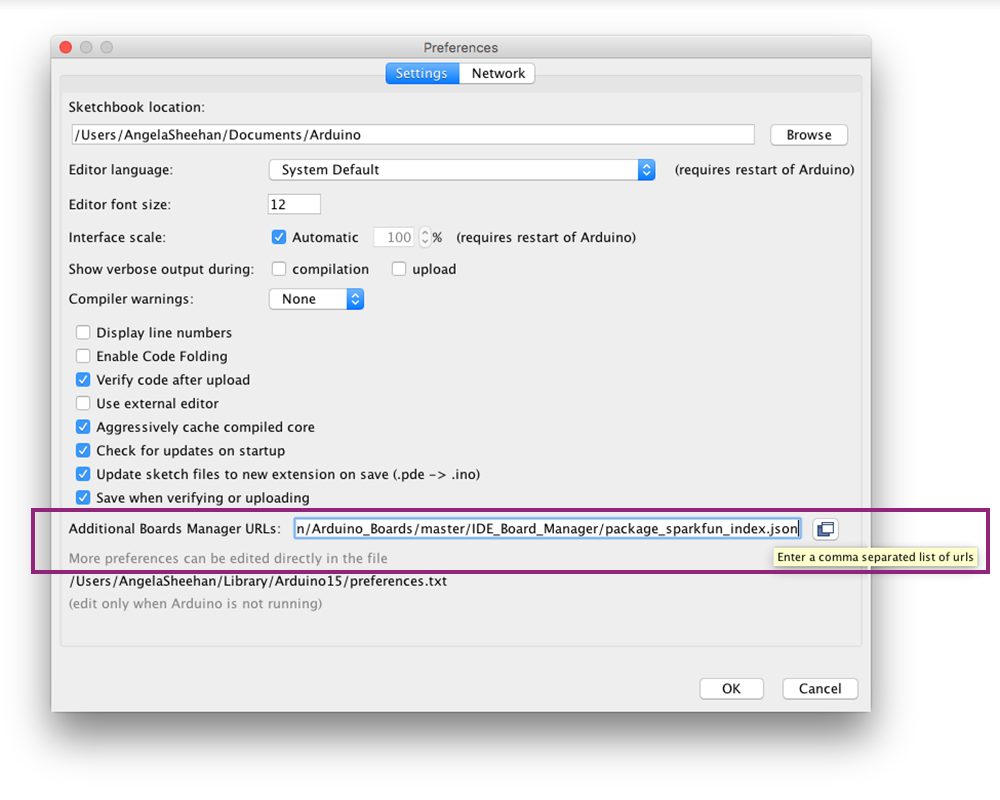
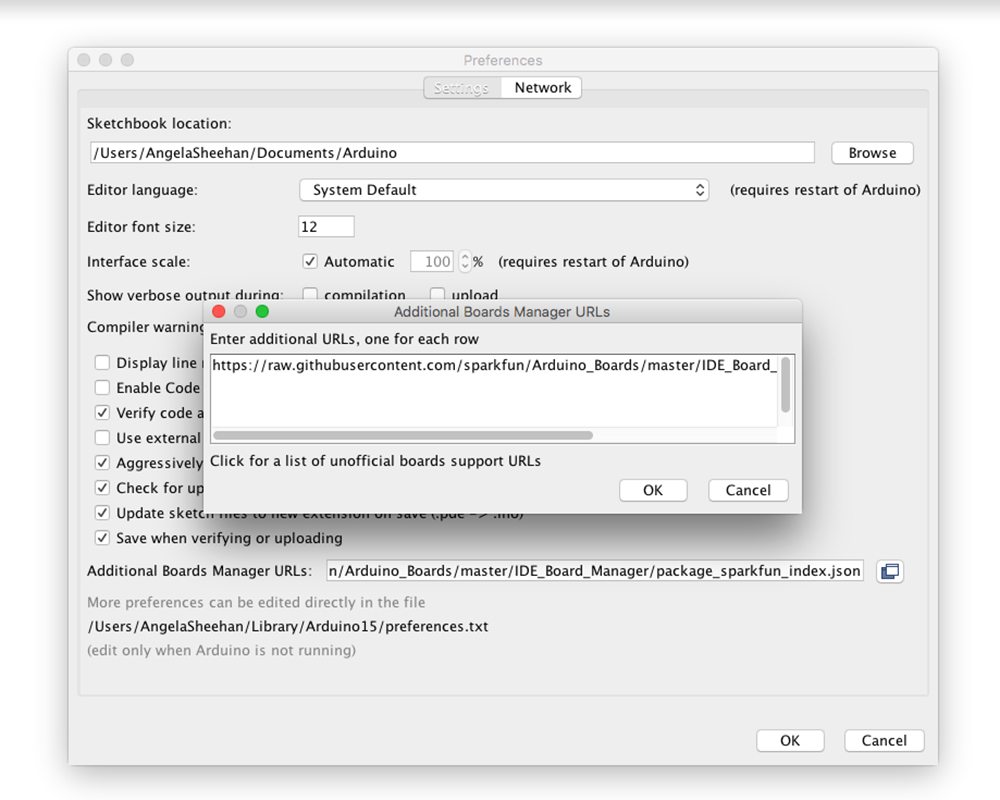
When you're done, click the "OK" button.
2. Install SparkFun AVR Boards
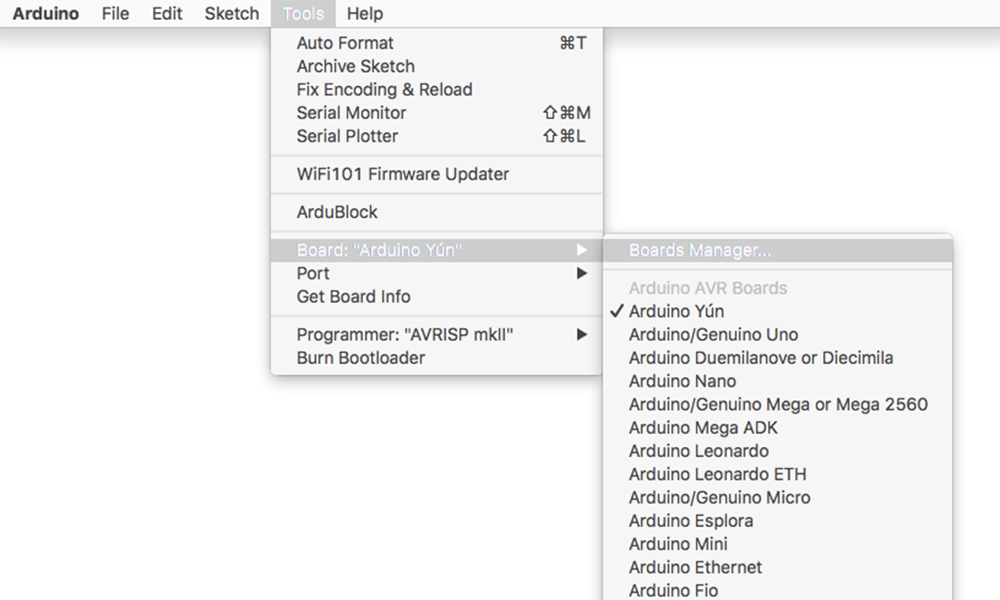
Next, you'll add the LilyPad USB Plus through Arduino's Boards Manager Menu. Open the Boards Manager by choosing Tools > Board > Boards Manager... (The Boards Manager option is at the very top of the list of boards; you may need to scroll up to see it.)
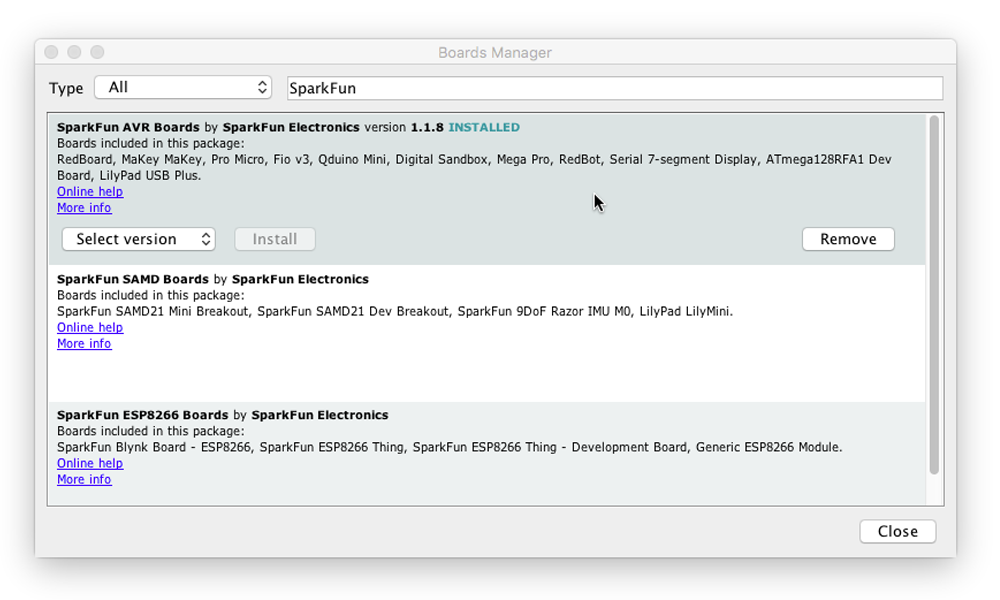
When the Boards Manager window opens, it will present a long list of options. Type "sparkfun" (without quotes) into the "Filter your search" box at the top of the window. This will shrink the list down to SparkFun's options.
You should see several entries. Look for the one labeled SparkFun AVR Boards by SparkFun Electronics.
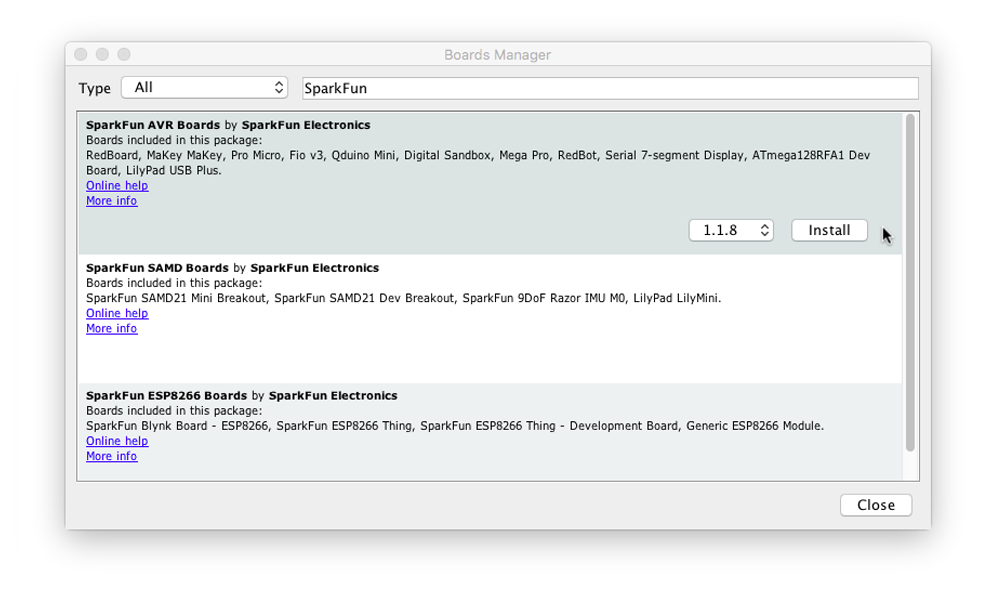
Click anywhere in the SparkFun AVR Boards box. A version number and an "Install" button will appear. Click the install button. This will download and install the extension. If you have already installed the SparkFun AVR Boards support, update to the latest version (LilyPad USB Plus and example code is included in 1.1.8 and higher).
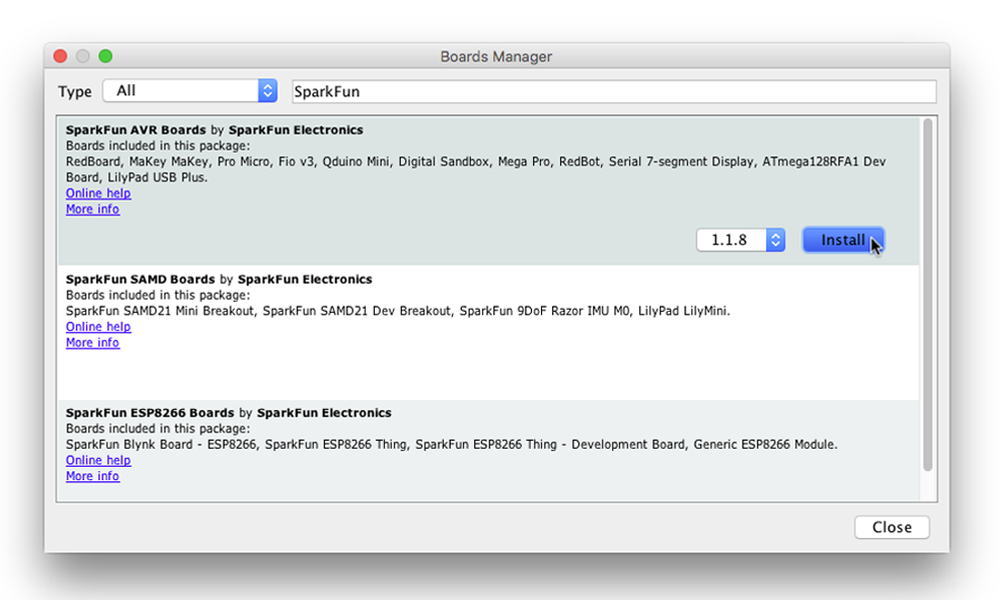
If everything worked, a blue "INSTALLED" note should appear next to the SparkFun AVR Boards title. You're ready to start programming.