LilyPad ProtoSnap Plus Hookup Guide
 MikeGrusin,
  Gella
Gella 
Uploading Code
Once you've installed the LilyPad USB Plus extensions to Arduino, you're ready to start programming the board!
Note that you won't have to install the extensions again, but you will need to perform the below three steps every time you want to program the board. These three steps are:
2. Select "LilyPad USB Plus" from Arduino's "Board" menu
3. Select "LilyPad USB Plus" from Arduino's "Port" menu
Let's go over the three steps in detail:
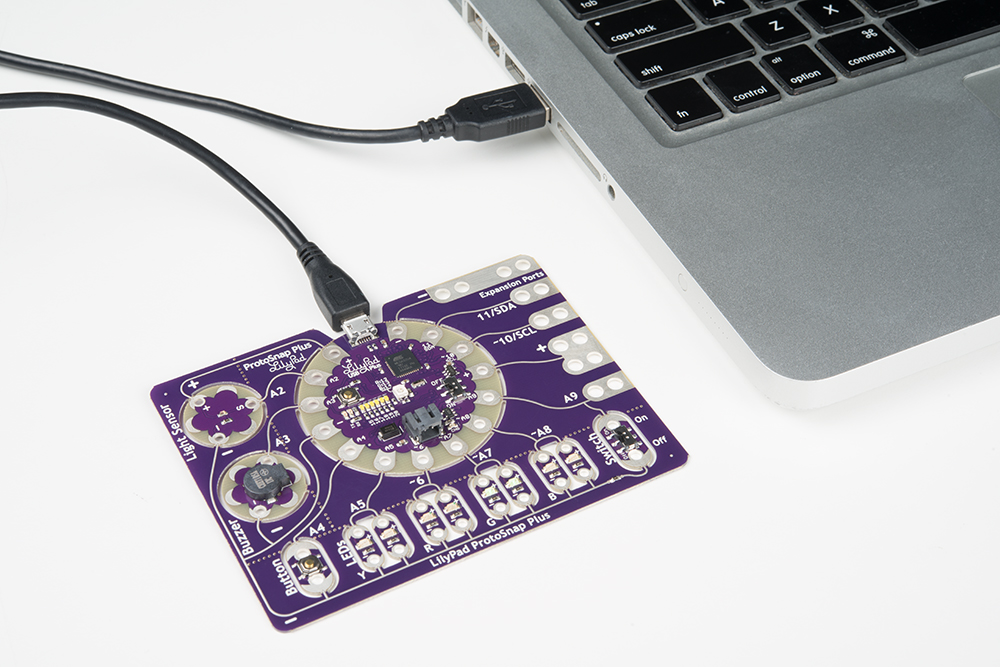
1. Connect the LilyPad ProtoSnap Plus to Your Computer
Place the LilyPad ProtoSnap Plus on a clean, non-metal work surface. Connect the LilyPad ProtoSnap Plus to a USB port on your computer using a micro-B USB cable. The cable can only be inserted one way, and should snap in securely.
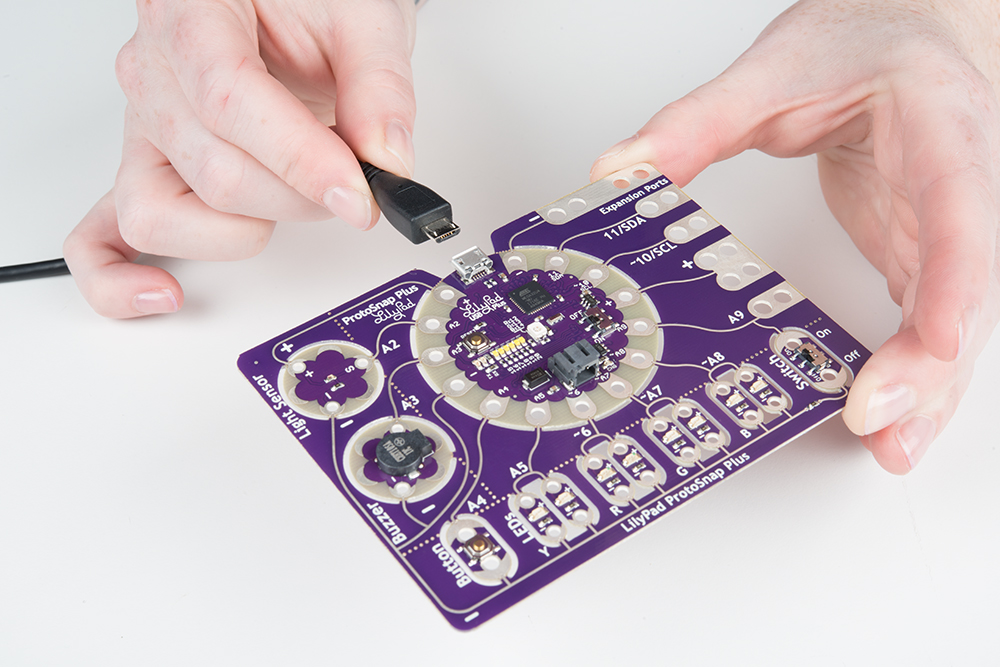
Slide the switch on the LilyPad USB Plus to the ON position. You will not be able to upload code to the board if it is set to the OFF position.

2. Select LilyPad USB Plus from the Board Menu
If the Arduino board support was installed correctly, "LilyPad USB Plus" option will be available in the Tools > Board list under the SparkFun AVR Boards group. Open the menu and select LilyPad USB Plus. Depending on how many boards are already in the list, you may need to scroll down a bit to get to it. A dot (Windows) or check mark (Mac) will show next to the board in the menu when it is selected, and it will show next to Board in the Tools menu.

3. Select LilyPad USB Plus from the Port Menu
Arduino needs to know which port your LilyPad USB Plus is attached to so it can program it. Whenever you plug a USB device into your computer, your computer will assign it a port number. This used to be difficult to determine, but this board has a handy feature that identifies itself. Go to the Tools > Port menu, and select the port that has "LilyPad USB Plus" next to it.
On Windows ports are listed as COM##; on a Mac or Linux machine they will be "/dev/cu.usbmodem####". Your screen may look different than the image below, depending on what operating system you are using, but all should show LilyPad USB Plus next to the port address.

Uploading Code
To review, once you've:
- Connected the LilyPad ProtoSnap Plus to your computer using a USB cable.
- Selected the board type ("LilyPad USB Plus" NOT "LilyPad Arduino USB").
- Selected the COM port.
You are ready to upload code! Let's upload some code to try it out:
Load the "Blink" example from the menu File > Examples > 01.Basics > Blink, and click the "Upload" button (the large round button with the right arrow in it). This is a very simple example program; it just blinks a LED on and off once per second.

Arduino will compile the code, then send it to the LilyPad USB Plus via the USB cable. While the code is uploading, the built-in LED will blink to signal the code is transferring. When the code finally runs, the RGB LED at the center of the board will slowly blink green. Success!
If this all works, congratulations! You're all set up and ready to prototype with the LilyPad ProtoSnap Plus. Check out our activity guide for more information on writing your own code to prototype for the ProtoSnap Plus:
LilyPad ProtoSnap Plus Activity Guide
Troubleshooting: Error Messages on Upload?
If you are using a Mac and get an error message like the following:
Board LilyPad USB Plus (platform avr, package SparkFun) is unknown
It is possible that old Arduino versions left over after updates are interfering with the LilyPad USB Plus support installation. If you want to clear out this old information, follow these steps:
- Open Arduino's "Preferences" window.
- At the bottom of the window will be a link to your preferences file. Click on it and it will open a finder window.
- In the finder window, look for an "Arduino15" folder and delete it.
- Now open a finder window and open your personal folder (the one with your login name and a house icon next to it). Look for an "Arduino" folder (possibly in "Documents"). If the "Arduino" folder contains a "Hardware" folder, delete it. Your Arduino installation is now clean. Restart Arduino and repeat the LilyPad installation instructions from the previous page.