IoT Power Relay
 SFUptownMaker
 Introduction
In this tutorial, we'll show you how to host a webpage on the ESP32 Thing that will allow you to set times for a power relay to be turned on or off.
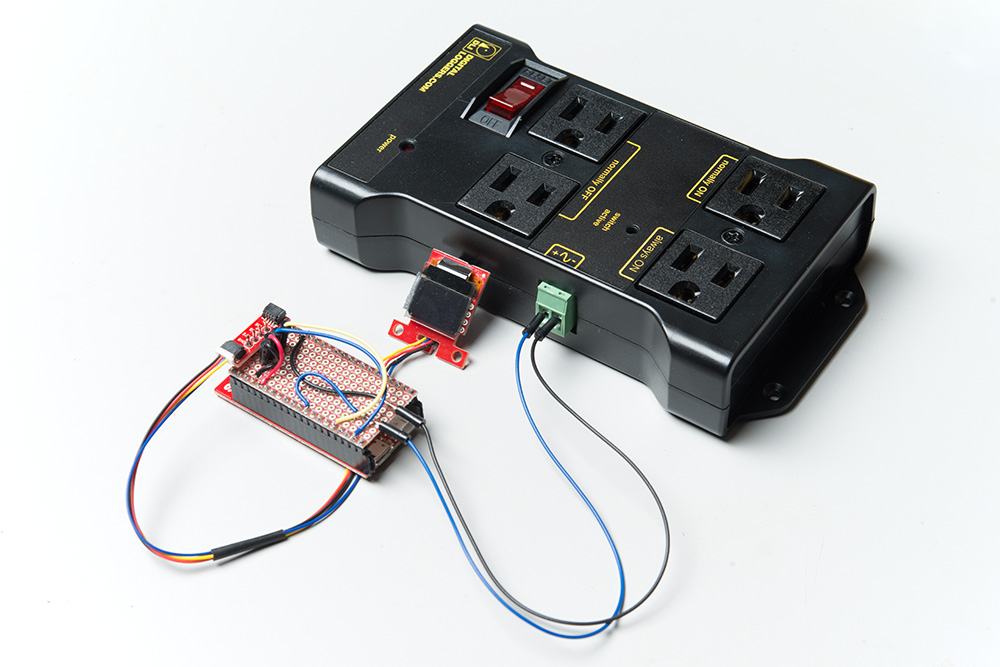
It utilizes our ESP32 Thing, IoT Power Relay, and the Qwiic Micro OLED screen to create a smart outlet that can maintain a weekly schedule for powering any AC powered load you want to cycle regularly.
Required Materials
Hardware
To follow this project, you will need the following materials. Depending on what you have, you may not need everything on this list. Add it to your cart, read through the guide, and adjust the cart as necessary.
Software
You will need the Arduino IDE with the ESP32 software support package installed. In addition, you'll need to download the IoT_Power_Relay code from GitHub. Visit the links to access the installs and code as well as more information on installing board support for the ESP32 in Arduino.
Tools
You will need a good soldering iron, solder, general soldering accessories, and a screw driver to follow along.


Suggested Reading
Before undertaking this project, there are a few tutorials that you may want to review. If you aren't familiar with the Qwiic system, we recommend reading here for an overview.
| Qwiic Connect System |
We also recommend the following tutorials.