GNSS Correction Data Receiver (NEO-D9S) Hookup Guide
 bboyho,
  PaulZC
NEO-D9S and NEO-D9C > Example 2: L-Band Corrections with NEO-D9S
From the menu, select the following: File > Examples > Examples from Custom Libraries | SparkFun u-blox GNSS_v3 > > NEO-D9S_and_NEO-D9C > Example2_LBand_Corrections_with_NEO-D9S.
Add Decryption Keys and Valid Dates
In the secrets.h tab, copy the PointPerfect keys and insert the current (i.e. currentDynamicKey[]) and next keys (i.e. nextDynamicKey[]) between each quote where it says "<ADD YOUR L-Band or L-Band + IP DYNAMIC KEY HERE>". Calculate the current and next key GPS weeks based on the expiry date as stated in the Arduino Library Overview for the ZED-F9P configuration. Then adjust the current and next key dates.
language:c
const uint8_t currentKeyLengthBytes =   16;
const char currentDynamicKey[] =        "<ADD YOUR L-Band or L-Band + IP DYNAMIC KEY HERE>";
const uint16_t currentKeyGPSWeek =      2245; // Update this when you add new keys
const uint32_t currentKeyGPSToW =       0;

const uint8_t nextKeyLengthBytes =      16;
const char nextDynamicKey[] =           "<ADD YOUR L-Band or L-Band + IP DYNAMIC KEY HERE>";
const uint16_t nextKeyGPSWeek =         2249; // Update this when you add new keys
const uint32_t nextKeyGPSToW =          0;
Upload Code
When ready, select the correct board definition from the menu (in this case, Tools > Boards > SparkFun ESP32 IoT RedBoard). Then select the correct COM port that the board enumerated to (in this case, it was COM13). Hit the upload button.
What You Should See
Open the Arduino Serial Monitor at 115200 baud. If all is well, you should see the following output indicating that the NEO-D9S received the UBX-RXM-PMP correction data and ZED-F9P has decrypted the data! In this case, the NEO-D9S had a multiband antenna pointing up towards the sky from SparkFun HQ's rooftop. Watch the accuracy converge and decrease to a smaller number. Depending on what satellites are in view, it may take a little time before you reach the RTK floating or fixed solution.
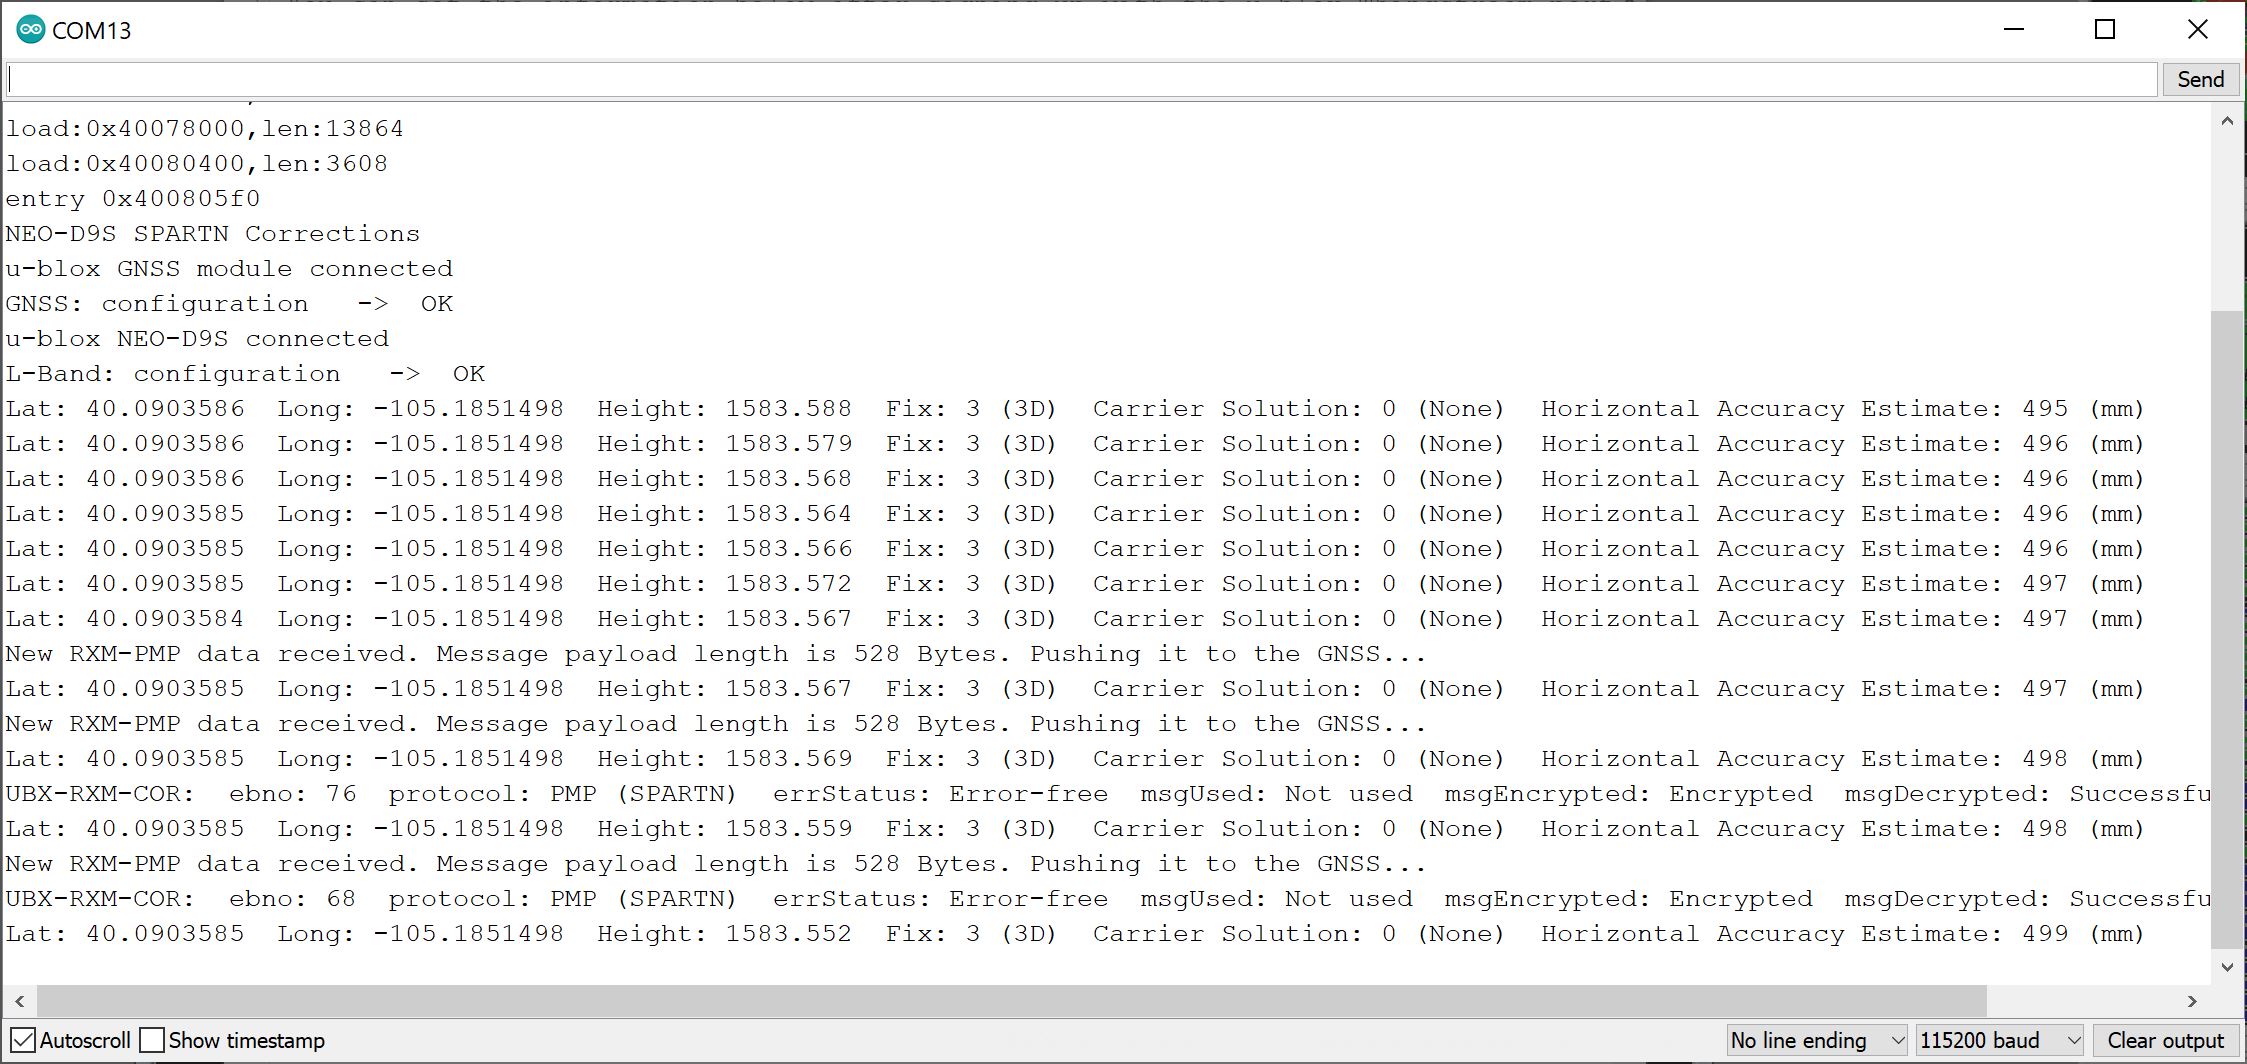
Below is the output once the RTK Fixed Solution was achieved. You will notice that the values converged to a point with a horizontal accuracy of about 20mm.

u-blox GNSS connected
GNSS: configuration  =>  ERROR!
u-blox NEO-D9S connected
L-Band configuration  =>  OK