Getting Started with the Raspberry Pi Zero 2 W
Introduction
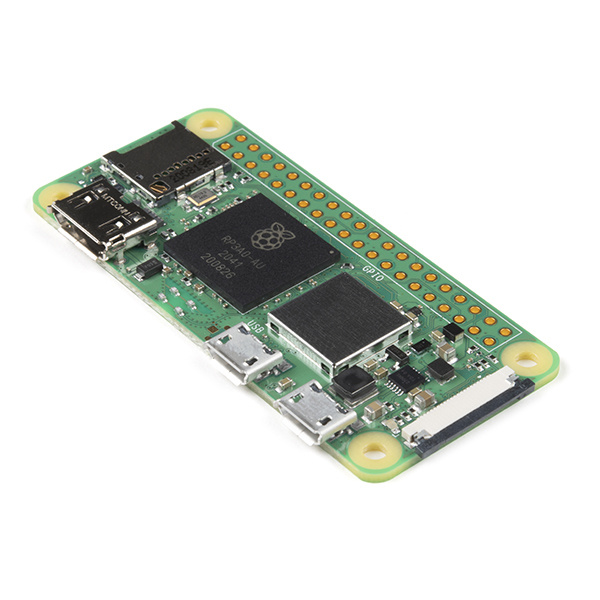
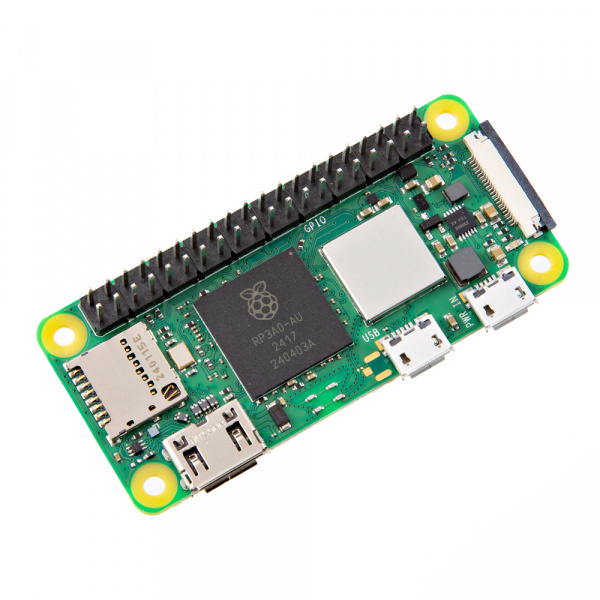
The latest entry into the immensely popular Raspberry Pi Single Board Computer (SBC) catalog, the Raspberry Pi Zero 2 W, provides an upgraded drop-in replacement to the Pi Zero W powered by a quad-core 64-bit Arm Cortex-A53 CPU. This guide highlights the improvements in hardware on the Pi Zero 2 W, how to set it up in a desktop configuration as well as installing and the basics of using the Raspberry Pi OS.
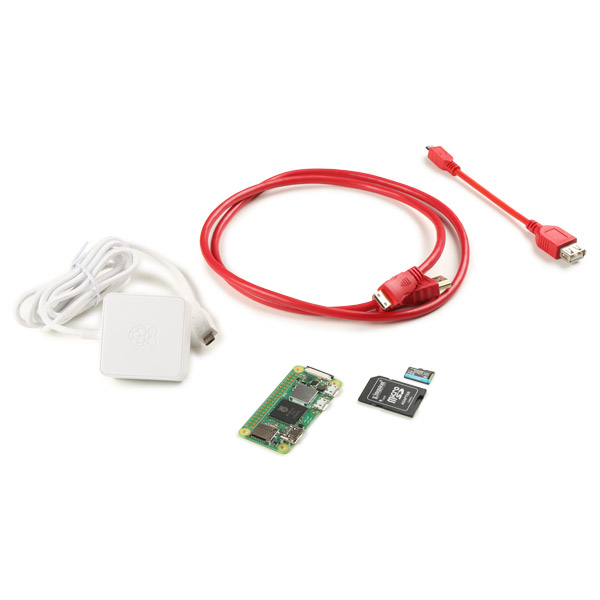
The Raspberry Pi Zero 2 W Basic Kit provides the bare bones of a Pi Zero 2 W setup. The kit includes a Pi Zero 2 W, Raspberry Pi 12.5W Micro-USB Power Adapter, mini HDMI cable, USB OTG cable and a 64GB MicroSD Card with adapter.
Required Materials
This guide assumes users have the Pi Zero 2 W Basic Kit so if you do not have the kit, make sure you have the necessary accessories (power adapter, mini HDMI cable, USB OTG cable or USB hub & a microSD card). Along with the Basic Kit, you will need a monitor (or TV), keyboard, mouse and USB hub (for more than one USB device) to follow this tutorial. Users in need of a keyboard/mouse combo may want to consider the Logitech K400 Plus Wireless Touch Keyboard.
Suggested Reading
Users unfamiliar with the concepts covered in the tutorials below may want to read through them before continuing with this guide:
Single Board Computer Benchmarks
SD Cards and Writing Images
Raspberry gPIo
Raspberry Pi SPI and I2C Tutorial
Hardware Overview
In this section we'll explore the hardware present on the Pi Zero 2 W and, where relevant, compare it to the previous version and other Rapsberry Pi SBCs.
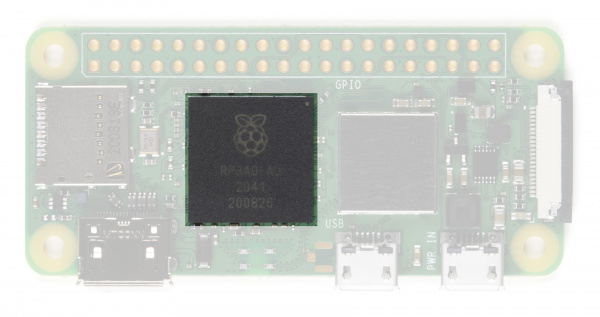
Raspberry Pi RP3A0 SiP
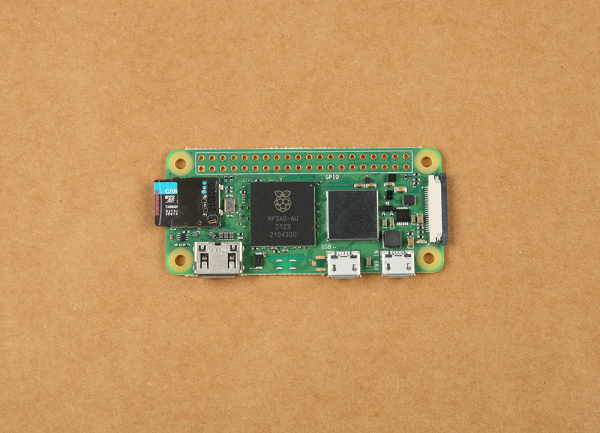
The Pi Zero 2 W features an upgraded RP3A0 system-in-package (SiP) incorporates a quad-core 64-bit Arm Cortex-A53 CPU, clocked at 1GHz The SiP integrates a Broadcom BCM2710A1 die with 512MB of LPDDR2 SDRAM. The processor provides the Raspberry Pi Zero 2 W with 40% more single-threaded performance, and five times more multi-threaded performance, than the original single-core Raspberry Pi Zero.
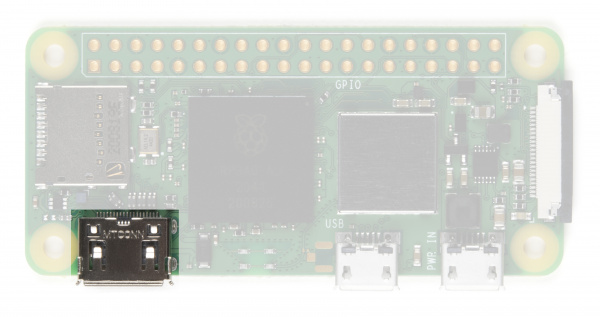
Mini HDMI
Unlike the previous models of the Raspberry Pi which use a standard HDMI connector, the Zero uses a mini HDMI connector to save space. To connect the Zero to a monitor or television, you will need a mini HDMI to HDMI adapter or cable.
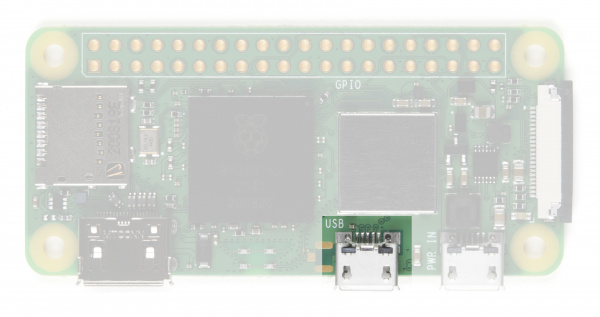
USB On-the-Go
The Raspberry Pi 3 and other models have traditionally had 2-4 standard size female USB connectors, which allowed for all variety of devices to connect including mice, keyboards, and WiFi dongles. Again to save space, the Zero has opted for a USB On-the-Go (OTG) connection. The Pi Zero uses the same Broadcom IC that powered the original Raspberry Pi A and A+ models. This IC connects directly to the USB port allowing for OTG functionality, unlike the Pi B, B+, 2 and 3 models, which use an onboard USB hub to allow for multiple USB connections.
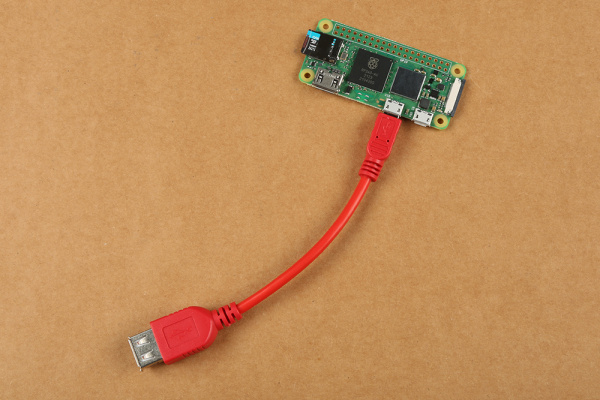
To connect a device with a standard male USB connection, the Basic Kit includes a USB OTG cable. Plug the microUSB end into the Pi Zero, and plug your USB device into the standard female USB input.
For use with other standard USB devices, we recommended that you use a powered USB hub. Wireless keyboard and mouse combos work best as they have one USB dongle for both devices.
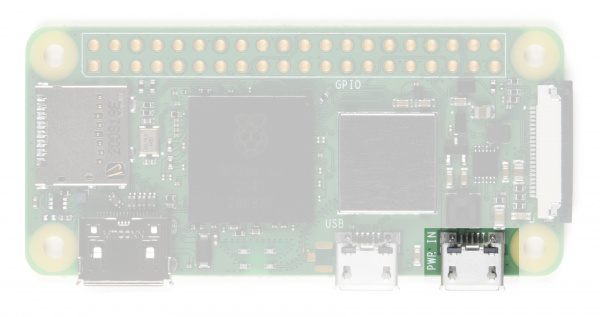
Power
Like other Pis, power is provided through a microUSB connector. Voltage supplied to the power USB should be in the range of 5-5.25V.
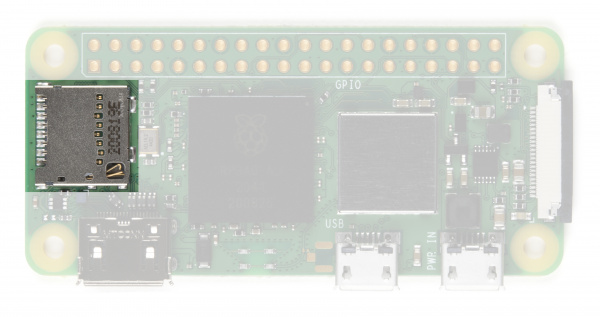
microSD Card Slot
Another familiar interface is the microSD card slot. Insert your microSD cards that contains your Raspberry Pi image file here.
WiFi and Bluetooth
The Raspberry Pi Zero 2 W offers 2.4GHz 802.11 b/g/n wireless LAN and Bluetooth 4.2, along with support for Bluetooth Low Energy (BLE), and modular compliance certification. This frees up many of the connections that would have been made over USB, such as a WiFi dongle and a USB keyboard and mouse if substituting a Bluetooth keyboard/mouse.
Camera Connector
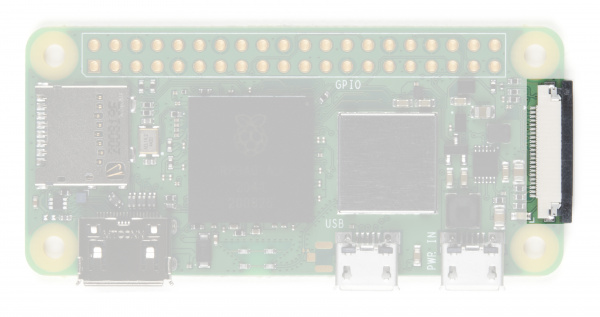
The Raspberry Pi Zero V1.3+ and all Zero Ws have an onboard camera connector. This can be used to attach the Raspberry Pi Camera module. However, the connector is a 22pin 0.5mm and different than the standard Pi. You will need a different cable to connect the camera to the Pi Zero W.
GPIO
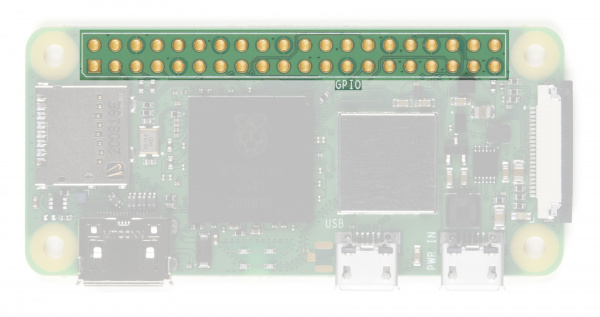
As with all other models of the Raspberry Pi, the Pi Zero 2 W includes a 2x20 set of GPIO pins broken out offering functionality such as SPI, I2C, digital I/O, PWM, etc. If you are using the GPIO header, you may want to consider soldering headers to it.
Choosing and installing an OS
Before powering on your Pi Zero 2 W you'll need to flash an image of the Raspberry Pi OS (or if you prefer, a third party operating system that work with Raspberry Pi) to the microSD card included with the Basic Kit. The Raspberry Pi Foundation created a great tool called the Raspberry Pi Imager that makes downloading and flashing an OS image a microSD card simple. This section briefly goes over how use that tool to upload an image of the Raspberry Pi OS on your microSD card.
Raspberry Pi Imager
The Raspberry Pi Imager tool makes selecting and writing an image of a Raspberry Pi-compatible operating system to a microSD card way easier than it was in the past. All you need to do is select the OS and storage device and the tool takes care of the rest. Download the tool from Raspberry Pi's software page here:
Once the tool is downloaded and installed on your computer, follow the steps below to complete the image installation:
- Insert the microSD card and SD adapter into the appropriate port on your computer.
- Open the Raspberry Pi Imager.
- Click the Choose OS button to select your preferred Operating System (this tutorial will use the default Raspberry Pi OS).
- Click the Choose Storage button and select your microSD's drive location.
- Click Write.
Writing the OS to the microSD card can take a few minutes depending on which version was selected and the speed of the port/microSD card. Once the write is finished, the tool should automatically perform the software ejection for the microSD card so you can remove it once the process completes.
Hardware Assembly
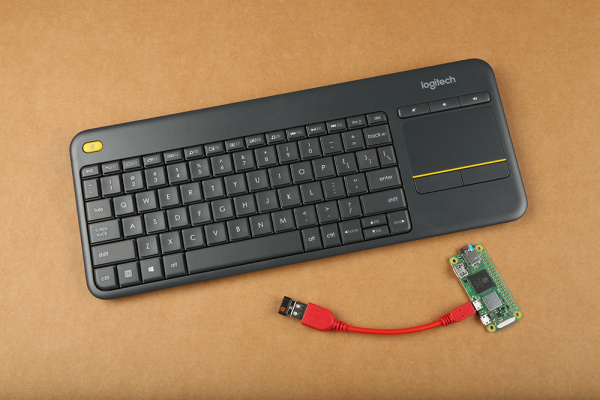
With an OS written to the microSD card, we can start connecting everything up. We used the Logitech K400 Plus Wireless Touch Keyboard to keep all the input devices tied to a single USB connection. Note, this keyboard is not included with the SparkFun Raspberry Pi Zero 2 W Basic Kit.
Insert the microSD card
Plug the microSD card into the microSD socket on the Pi Zero 2 W.
Connecting Peripheral Devices
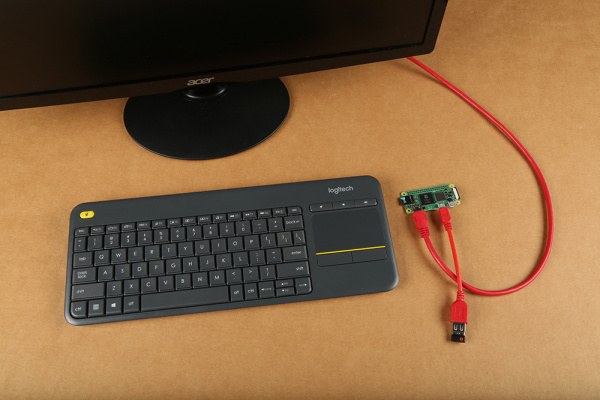
Next up, connect any peripheral equipment to the Pi. Most users will need at least a monitor and keyboard/mouse to get started with the Pi.
USB OTG Cable
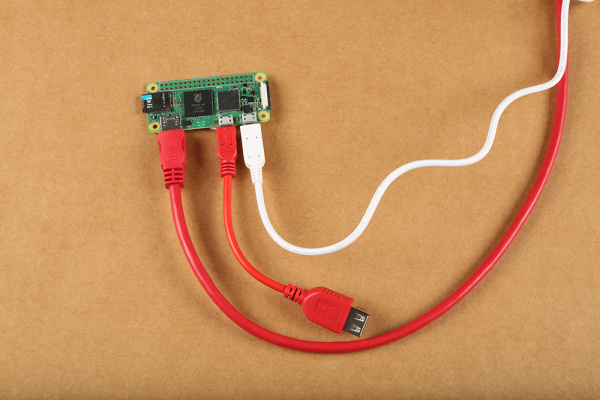
Plug the USB OTG cable into the microUSB connector labeled USB on the Pi. This provides a standard USB connection for devices like a keyboard or mouse. A USB hub or extender is required if you need to connect multiple USB devices to your Pi Zero 2 W.
Keyboard and Mouse
You can use the USB OTG cable to plug in a Keyboard/Mouse. For this tutorial we used the Logitech K400 Plus Wireless Touch Keyboard as it has one USB dongle for both devices. For use with other standard USB devices, it is recommended that you use a powered USB hub.
Monitor
Plug in the miniHDMI cable included with the Basic Kit to the miniHDMI connector on the Pi Zero 2 W. Connect the other end of the cable to the HDMI port on your monitor or TV.
Power Supply
With everything connected and the microSD card inserted, connect the power supply to the microUSB connector labeled PWR IN and the Pi should start booting up.
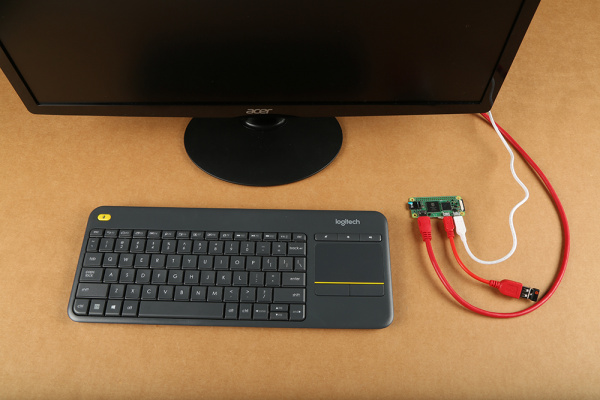
Completed Setup
With everything connected, your setup should look similar to the photo below:
Connecting Hardware
The steps above provide the basics to get the Pi Zero 2 W up and running but we've barely scratched the surface of the potential of this little computer. The 2x20 GPIO header on the Pi provides access to a host of additional functionality so users who wish to take advantage of that will want to solder a set of headers like these to it.
Users looking to do some breadboard prototyping with the Pi Zero 2 W may want to use the Pi Wedge and these tutorials to use the GPIO pins:
Preassembled 40-pin Pi Wedge Hookup Guide
Raspberry gPIo
Headless Raspberry Pi Setup
If you want to use any SparkFun Qwiic devices with your Pi Zero 2 W, take a look at the SparkFun Qwiic SHIM or Qwiic SHIM Kit or Qwiic Starter Kit for Raspberry Pi:
Qwiic SHIM for Raspberry Pi Hookup Guide
Qwiic SHIM Kit for Raspberry Pi Hookup Guide
Finally, the camera connector allows you to connect a Raspberry Pi camera. Be aware, the connector is a 22pin 0.5mm and different than the standard Pi and needs a different cable to connect the camera to the Pi Zero 2 W.
Headless
If you prefer a "headless" setup with no monitor, keyboard or mouse; the tutorials below can help (note, headless setups are much more advanced than a standard setup):
Headless Raspberry Pi Setup
How to Use Remote Desktop on the Raspberry Pi with VNC
Using the Raspberry Pi OS
Now that you've gotten your board up and running let's go over some basics of the Raspberry Pi OS. This section covers how to use the Pi via HDMI out to a monitor.
Raspberry Pi OS
The Raspberry Pi OS is Linux based (to be specific it is a port of Debian Bullseye with the Raspberry Pi Desktop). Don't let that scare you too much. Gone are the days of having to remember lots of commands or that you need to type :wq to save and exit your text editor. The OS runs a desktop Graphical User Interface (GUI) similar to Windows or MacOS, and, while you will probably want to learn a few basic commands and shorcuts, you can usually get away with not using them.
Initial Boot
The first boot of the Pi with a fresh install of the OS takes a few minutes and the Pi will most likely restart at least once. Once the OS finishes initial setup, you should be greeted by a desktop setup similar to the image below:
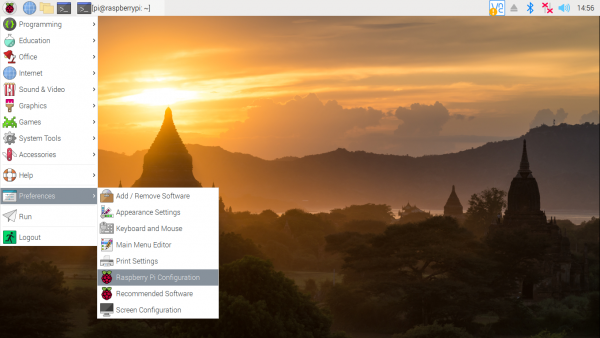
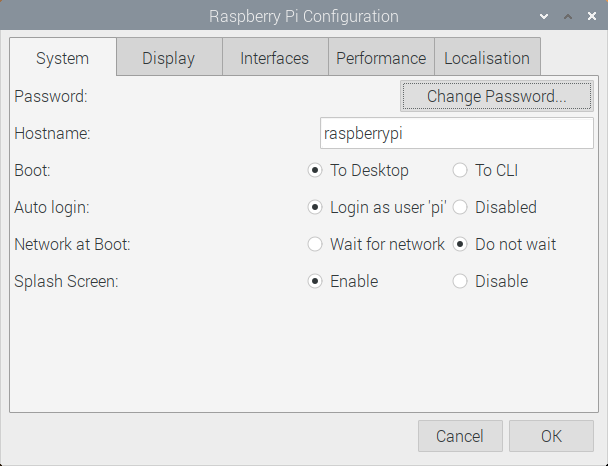
Follow the set up wizard to configure the location settings, set a new password, connect to WiFi, update the system and packages and more settings on the Pi. You can skip some of these steps but we strongly recommend at least setting the location and setting a new password. If you ever need to go back and update the settings, open them by going to the Raspberry Pi Start Menu > Preferences > Raspberry Pi Configuration.
This opens a pop up allowing you to update the region, monitor, keyboard, password, as well as turn on any peripheral interfaces like SPI and I2C.
Update Software
In case you skipped the step in the set up wizard or need to update software packages in the future, we can update the software package on the Pi through the Command Line Interface (CLI). Access it by opening the terminal and type the following and hit Enter:
language:bash
sudo apt-get update
This command tells the Pi to retrieve the latest package information and tells the package manager what needs updating.
sudo(also known as super user) is a command that you will see a lot, specifically with high security commands. It temporarily allows the user (if you’re not already logged in as root) the ability to run these commands if your user name is in a list of users ('sudoers').apt-getis the package manager andupdateis the command we are giving it.
This downloads and upgrades all packages on the system and may take a while.
Shutdown/Reboot
The desktop includes a standard shutdown button in the desktop main menu but you can also tell the Pi to shutdown through the CLI using this command:
language:bash
sudo shutdown -h now
shutdownas you may guess, shuts down the machine.nowtells it do perform the action immediately (15would tell the machine to shutdown in 15 minutes).
To reboot the Pi through the CLI send this command:
language:bash
sudo shutdown -r now
Raspberry Pi Safe Reboot and Shutdown Button
Other Useful Linux Commands
A few other useful commands for use in the terminal command line:
pwd- Print Working Directory, if you not sure what folder you are in this will tell you where you are in the filesystem.ls- List, this will show you the contents of the folder. To show all files, including hidden ones, typels -ato show all files/folders. Alternatively, typingls -alwill show you all files/folders as well as their permission settings.cd- this is how you change directories.cd foldernamewill move you to that folder.cd ..will back you up one level.cd ~will take you back to your home directory.passwd- this will allow you to change your passwordman- this stands for manual. Type man before a command to get a summary of how to use it.nano- this will open a basic text editor that is fairly easy to use.
Troubleshooting
Having issues getting the Raspberry Pi to work? Check out this sticky note from the Raspberry Pi Foundation's forum for basic troubleshooting.
Having problems with a piece of SparkFun hardware designed for the Raspberry Pi and interfacing it? Try checking out the SparkFun forums to see if we can assist.
Resources and Going Further
At this point your Pi Zero 2 W should be acting similar to any other computer. From here, you can teach yourself the finer points of Linux, learn Python, program the GPIO pins, setup a Minecraft™ server, build a network storage system, game console, or media center, or just surf the web.
For more information about the Pi Zero 2 W or Raspberry Pi in general, check out these resources:
- Raspberry Pi Zero 2 W Product Brief
- Raspberry Pi Software
- Raspberry Pi Resource Page
- Raspberry Pi Foundation
- Getting Started with the Raspberry Pi
- Raspberry Pi Documentation
- Raspberry Pi Projects
- Pi Foundation Forums
Looking to make the Raspberry Pi Zero W a dongle? Check out the Pi Zero USB Stem:
Need some inspiration? Check out these tutorials and projects.
