Getting Started with Necto Studio
Programmer and Debugger Configuration
CODEGRIP Suite
The CODEGRIP Suite is the software application associated with the CODEGRIP programmer product line. It is used to:
- Find and connect with available programmers through USB and/or WiFi
- Configure the target MCU
- Enable the power on a programmer to a target
- Detect, write, read, erase, reset, and flash a target MCU
To get started with your CODEGRIP programmer, it is recommended you reference the Quick Start Guide linked on the associated product page. For more details on the programmer, users can refer to the User Manual, also linked on the associated product page.
Installation
The first time users run Necto Studio, it will attempt to download and install the CODEGRIP Suite.
NOTE: On Windows PCs, if users experience an issue downloading CODEGRIP Suite due to a Error:UnknownNetworkError error, their computer may be missing a Microsoft Visual C++ 2010 Runtime Library.
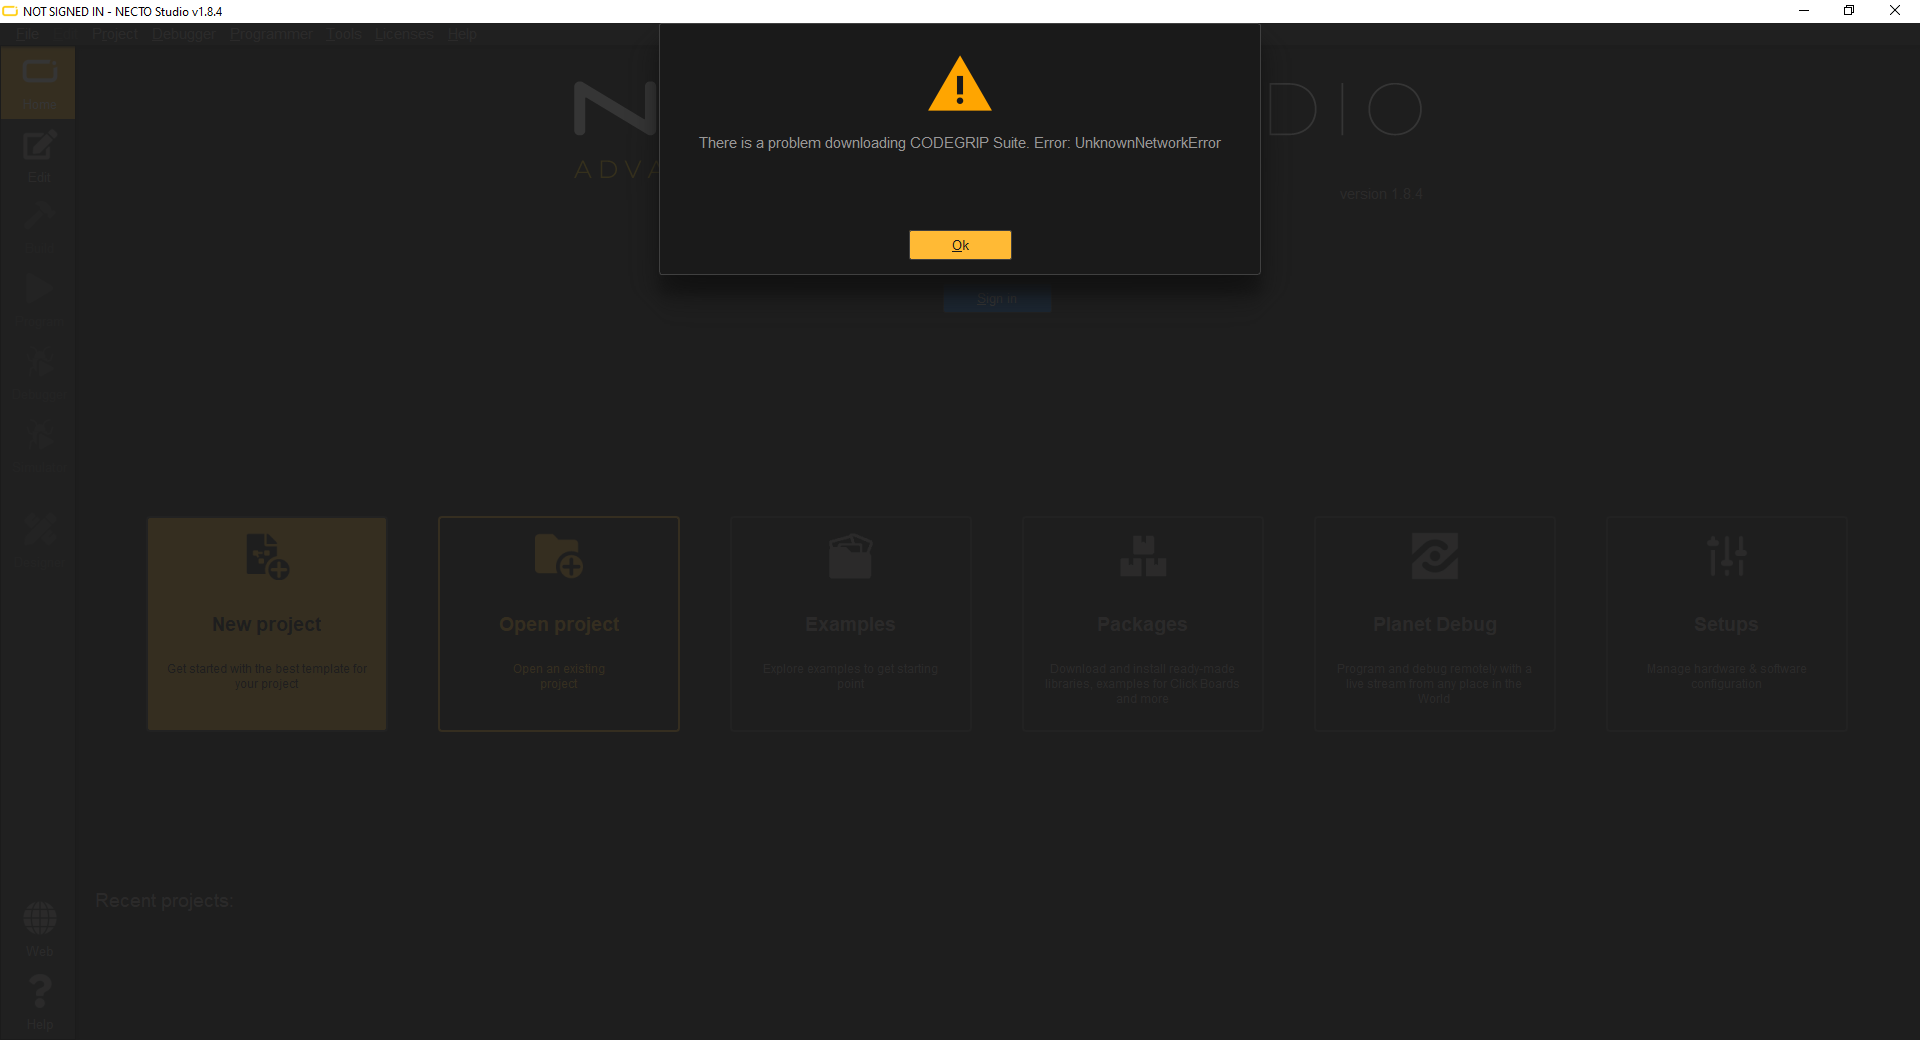
Error:UnknownNetworkError error. (Click to enlarge)
To install the missing Microsoft Visual C++ 2010 Runtime Library, download the vcredist_x64.zip file (or click the button below), extract the folder, and execute the contained installation setup file vcredist_x64.exe.
Users can also download the CODEGRIP Suite installation software from:
- www.mikroe.com/setup/codegrip
- CODEGRIP programmer product page
For more information, check out the Software Installation section.
Scan and Connect
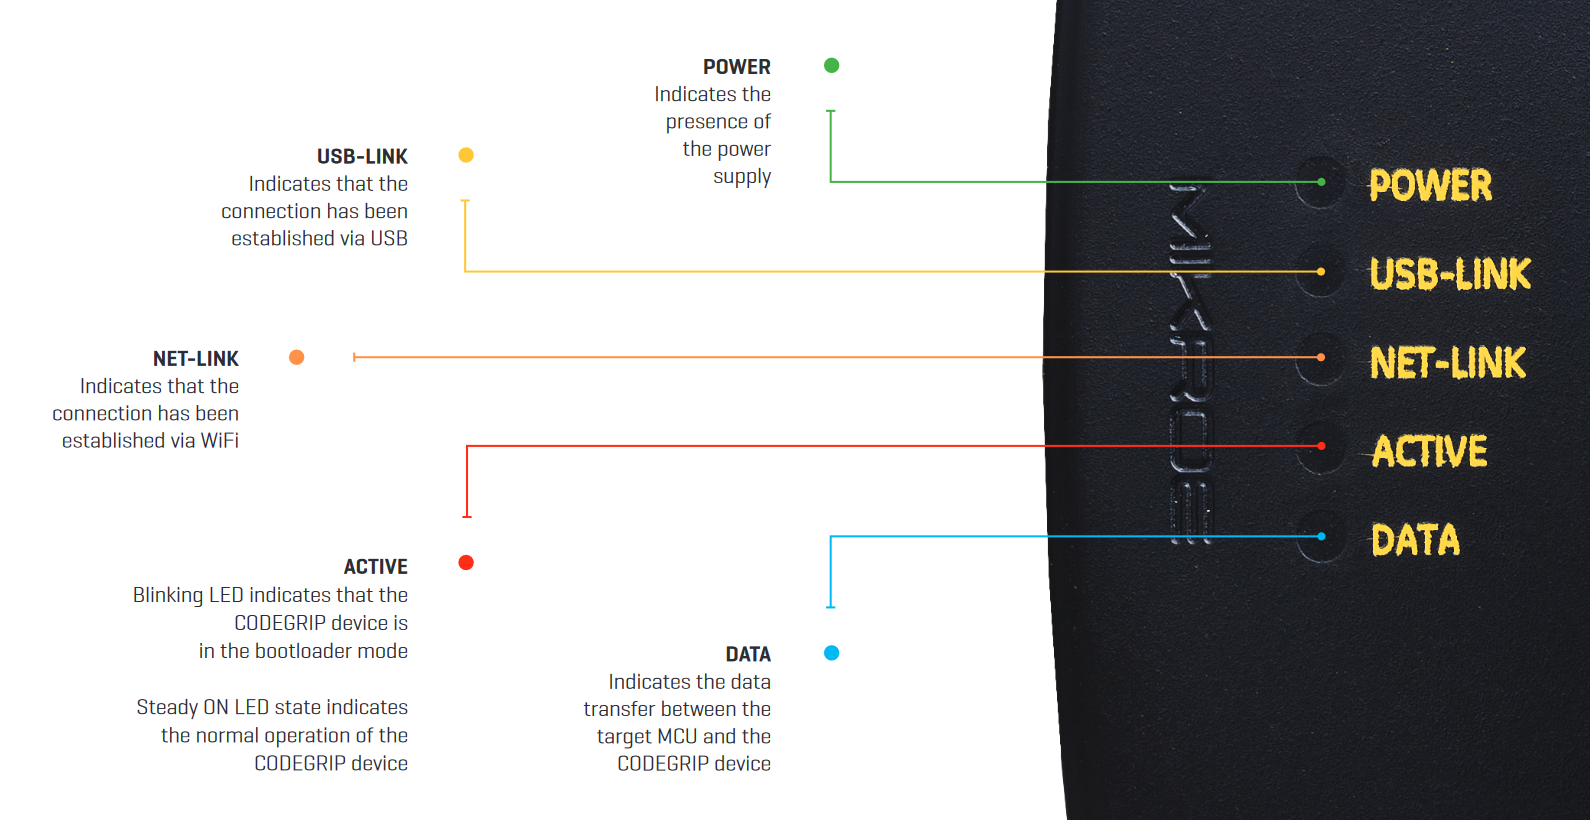
Connect the CODEGRIP programmer to a computer using the included USB-C cable (and adapter, in necessary). If everything is connected properly, the POWER, ACTIVE, and USB LINK LED indicators on the device will turn on. When the ACTIVE LED indicator stops blinking, the CODEGRIP is ready.
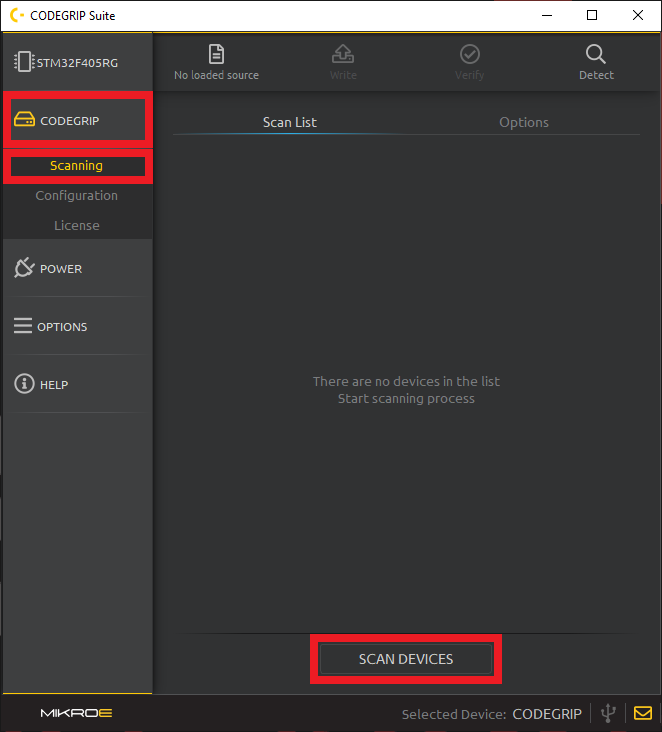
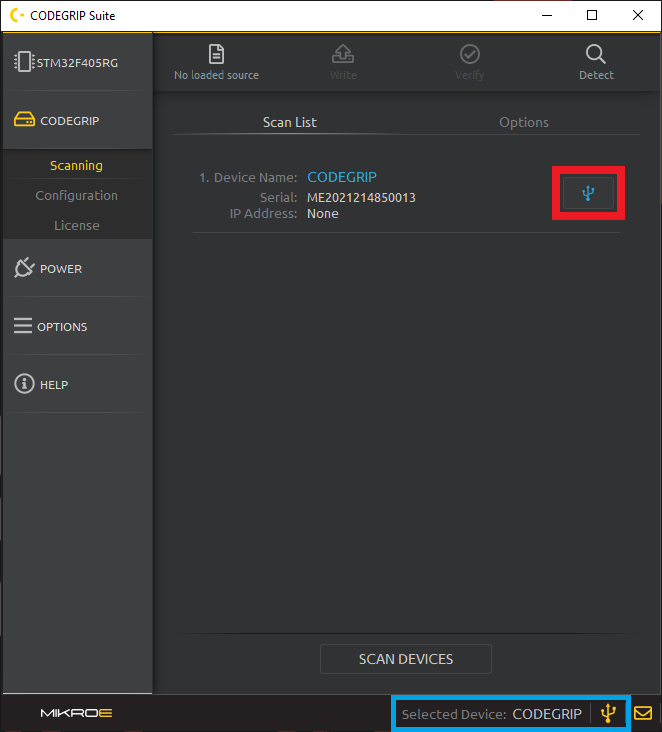
Open the CODEGRIP menu and select the newly unfolded Scanning menu item. Click the SCAN DEVICES button to get a list of available CODEGRIP devices.
To connect with your CODEGRIP through a USB cable click the USB Link (icon) button. The USB Link indicator will turn yellow upon successful connection.
Target Configuration
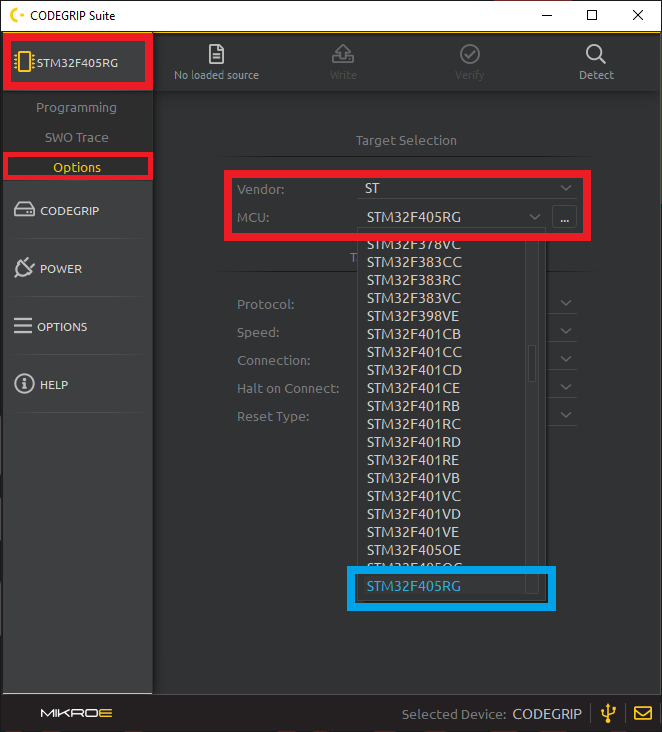
Open TARGET menu and select the Options menu item. Set up target MCU either by selecting Vendor: first or by directly entering MCU: name in the drop-down list. To narrow down the list of available MCUs, start typing the name of the MCU manually.
The list will be dynamically filtered while typing.
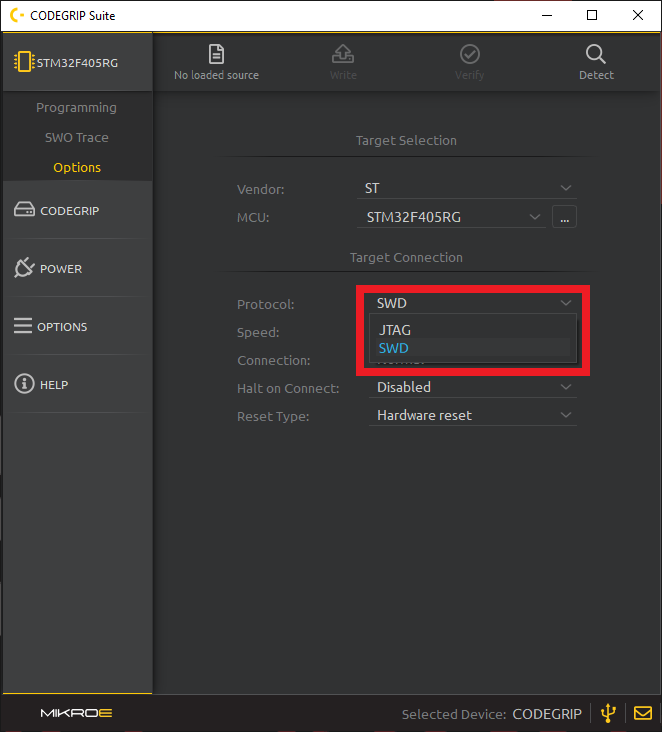
Then select the programming protocol to match your hardware setup. Options are SWD or JTAG.
Enabling Power
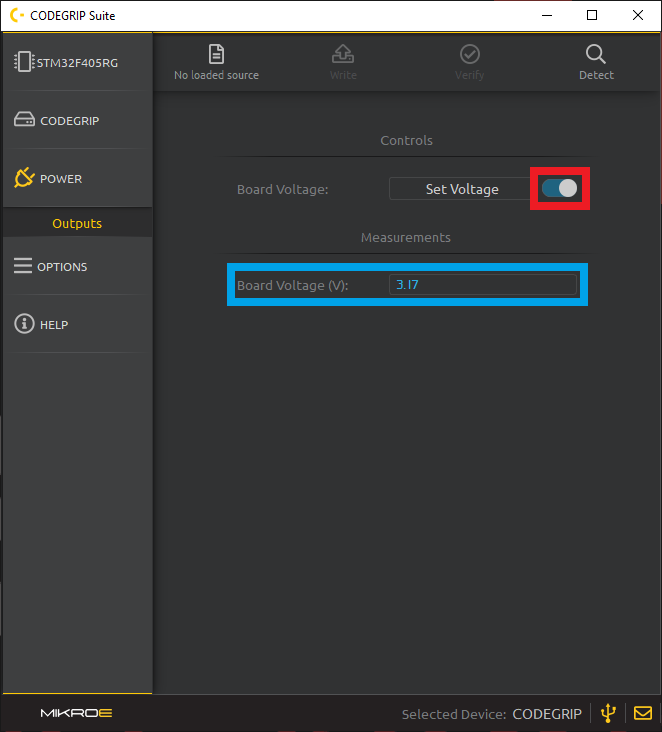
Open the POWER menu and select the newly unfolded Outputs menu item. Click the Set Voltage button to configure the power output of the programmer.


Once the output voltage has been configured, users can toggle the button to the right to enable the power output. If configured and enabled properly, Board Voltage (V): under the Measurements section will display the voltage output from the programmer.
Detect
Confirm the communication with the target MCU by clicking the Detect button located on the Shortcuts bar. A small pop-up window will display the confirmation message.

Programming
Load the *.bin or *.hex file by using the Browse button.
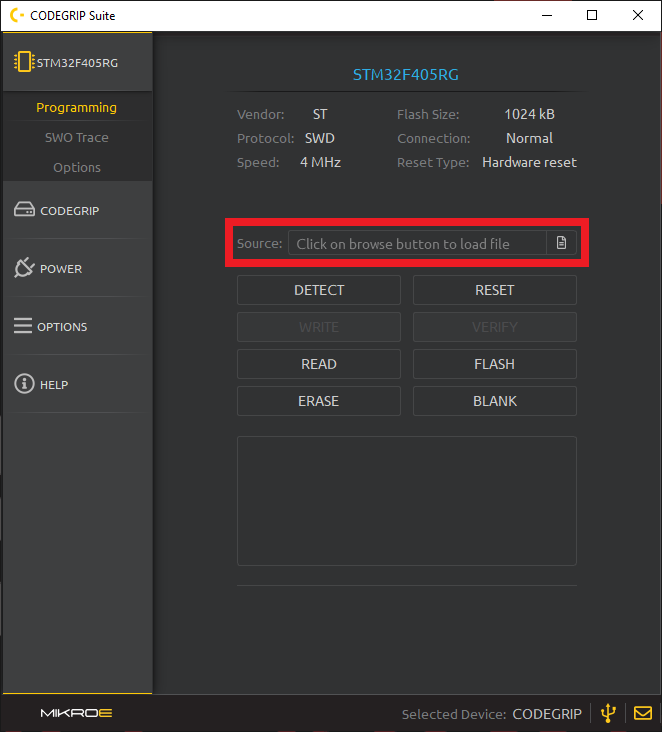
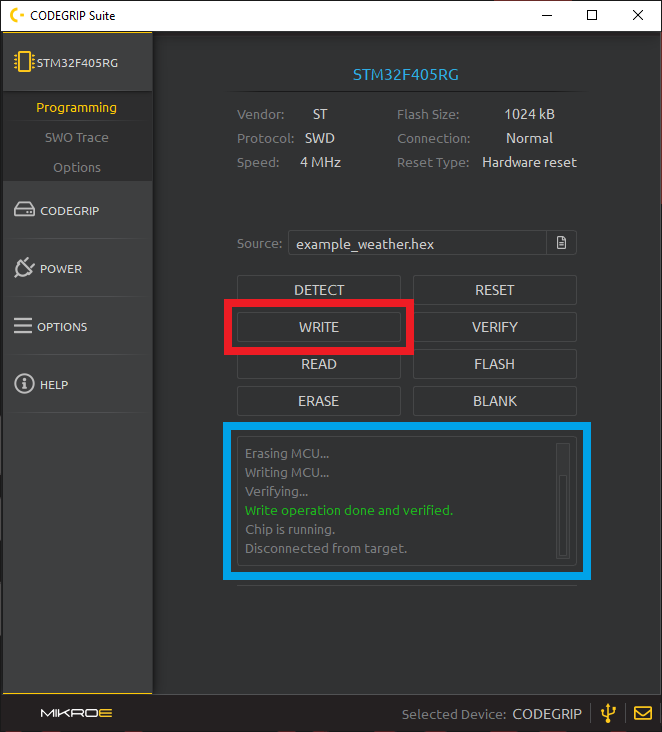
Click the WRITE button to program the target MCU. The progress bar will indicate the programming process, while the programming status will be reported in the message area.
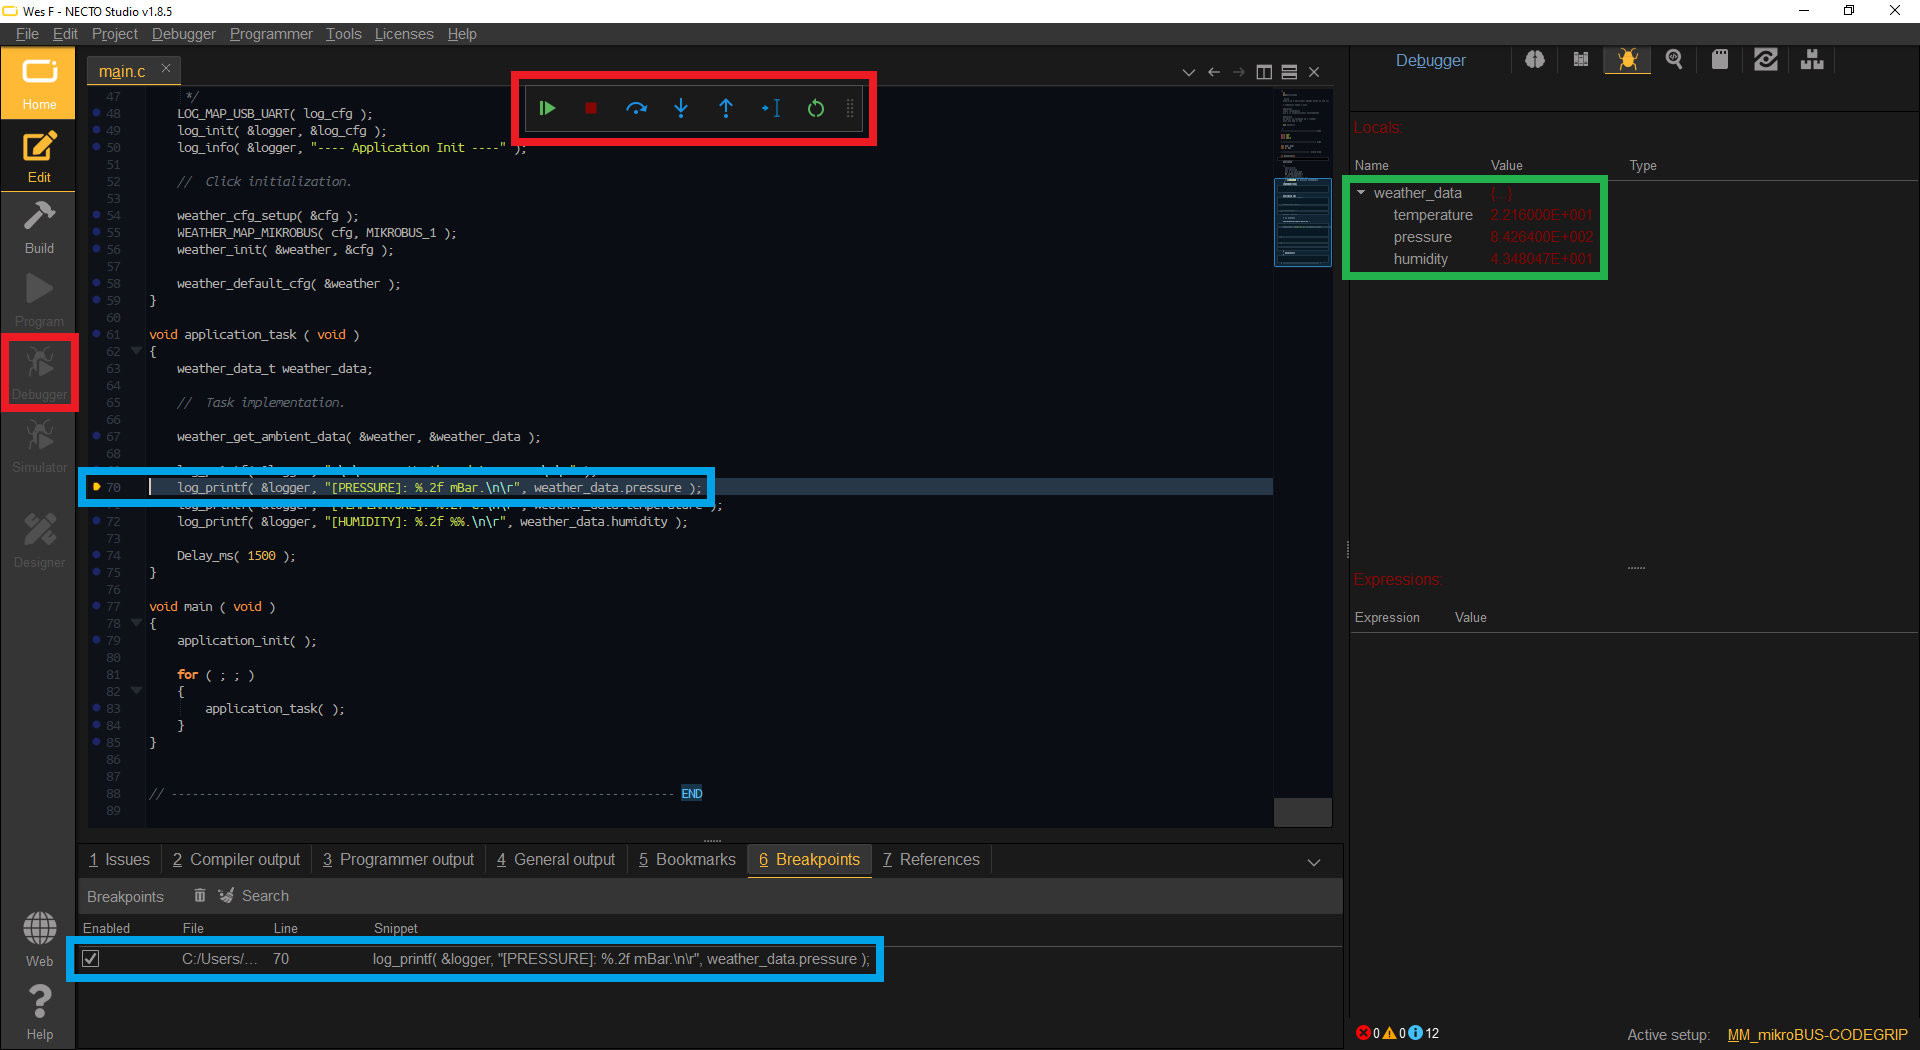
Debugging in Necto Studio
Instead of programming the MCU separately through CODEGRIP Suite, users can also program a project directly from Necto Studio.
- Users will need to configure the programmer through CODEGRIP Suite, up until the detect step above
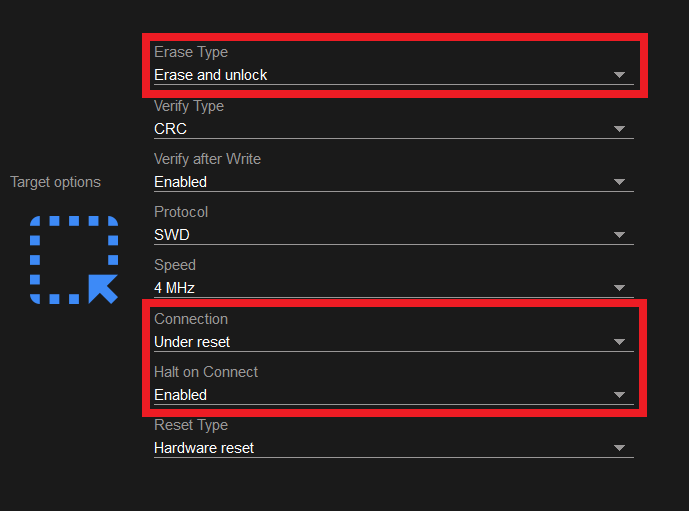
- When creating the hardware configuration, the CODEGRIP programmer's target options must set to the following parameters:

- The target MCU must be powered, this can be configured through the CODEGRIP Suite or the MCU can be powered from an external power source
If setup properly, users only need to click on the Program button. This target option configuration, also allows users to access the debugger in Necto Studio. Like most debuggers, users can step trough instruction steps, set breakpoints, step-in/out of loops, check values, etc. to help locate issues in the project's code execution.