Getting Started with Necto Studio
Introduction
Necto Studio
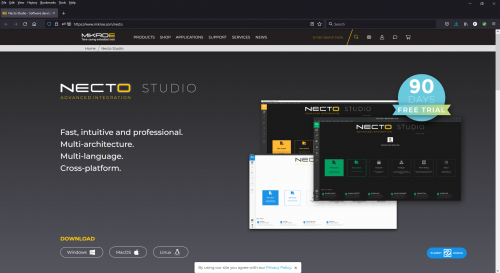
Necto Studio is a productive cross-platform integrated developing environment provided by MikroElektronika and is available on Windows, Linux, and macOS. It includes C compilers, mikroSDK 2.0, package manager, and USB or WiFi Debugger capabilities with flexible licensing options. The development environment features intelligent code completion, auto-close brackets, and drag and drop visual elements.
Users can find their favorite Click Board library and working example through the Package Manager. Users will also be notified about new versions of installed packages, and easily update in one click.
MikroElektronika even provides first-time users with the longest time trial on the market - Get fully unlocked, feature-rich NECTO for three months, and explore it to the most delicate details before purchase!
For more information about NECTO Studio, please visit the product page.
mikroSDK
mikroSDK 2.0 makes application code portable and reusable on many different platforms and architectures, with virtually no code changes. It is a collection of open-source software libraries with unified API and software development tools. Everything you need to start developing, and prototyping cross-platform embedded applications, including Click board™ applications and GUIs for embedded devices.
mikroSDK 2.0 is open-source, and it’s natively supported in NECTO Studio. The video below, is a brief overview of how to use the mikroSDK:
Additional Resources:
Required Materials
To get started, users will need a few of items listed below. (You may already have a some of these items; read through the guide and modify your cart accordingly.)
To program a STM32 processor board (recommended) through Necto Studio, users will need a JTAG programmer. Below are programmers that are compatible with the Necto Studio software.
MIKROE mikroProg for STM32
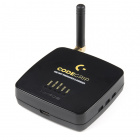
PGM-19104MIKROE CODEGRIP for STM32
PGM-19105Optional Hardware
Users may also need some soldering equipment and a JTAG header to connect the programmer to the board.
Weller WLC100 Soldering Station
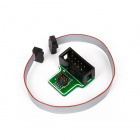
TOL-14228MIKROE 50-100mil Adapter
PGM-19220Suggested Reading
Like our Qwiic connect system, mikroBUS™ socket is a standardized interface for the MIKROE Click boards™. Click on the banner below for more information.
For users who aren't familiar with the following concepts, we also recommend reading the following tutorials before continuing.
ARM Programming
Getting Started with MicroMod
Designing with MicroMod
MicroMod mikroBUS™ Carrier Board Hookup Guide
Software Installation
NOTE: Users will need administrative privileges on their computer's OS to install Necto Studio and the associated software for the MCU programmers.
To install Necto Studio, users will need to download the installation software for their computer's OS from MikroElektronika's Necto Studio product page. *(Users can also find link to the installation software from the mikroSDK GitHub repository's wiki page.)
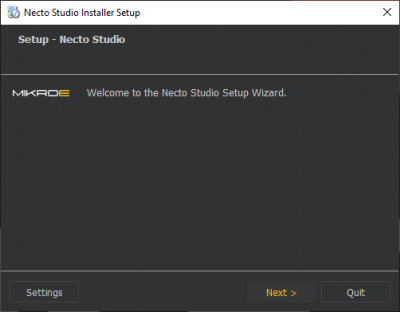
Once downloaded, execute the installation software and go through the setup steps (Click on images to enlarge):
- Execute the installation software from the location that the file was downloaded to
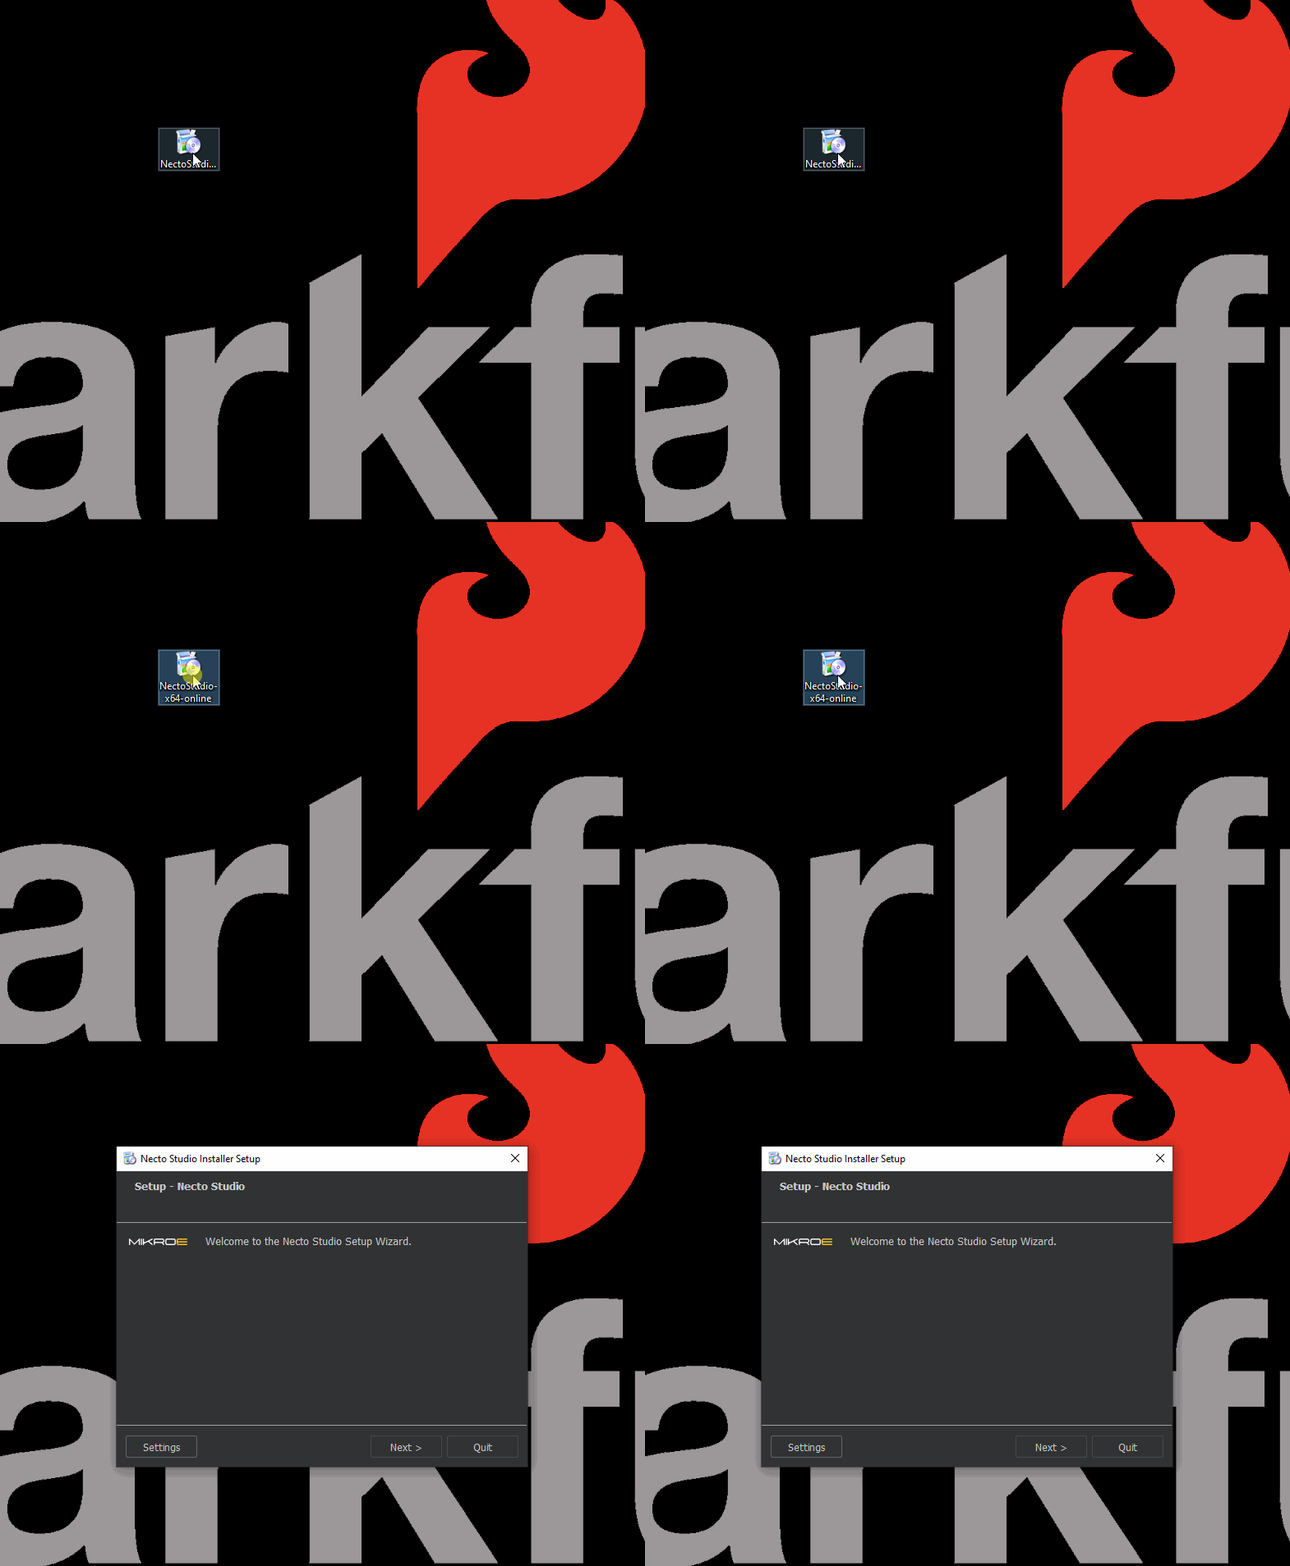
Executing the downloaded installation file. (Click to enlarge) - Click the Next > button to configure the software installation
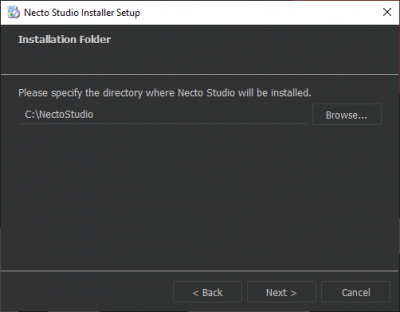
- Enter the directory for the Necto Studio to be installed; then click Next >
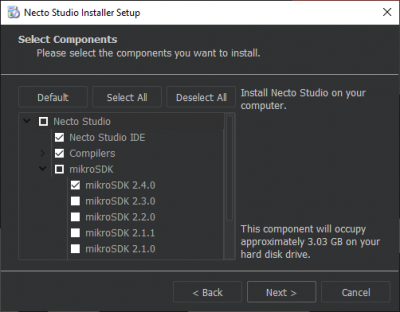
- Select the components to install; then click Next >
- We recommend, at minimum, selecting the following components:
- Necto Studio IDE
- Compilers
- ARM
- mikroSDK
- 2.4.0 (or latest)
- We recommend, at minimum, selecting the following components:
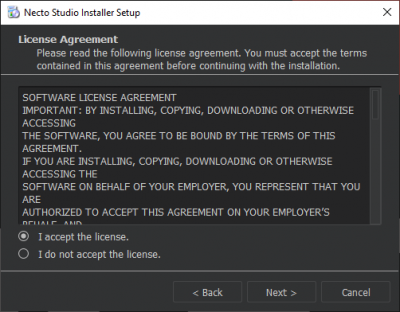
- Read the License Agreement, accept or decline the license, and then click Next >
Note: Users will need to accept the terms, if they wish to continue the installation process
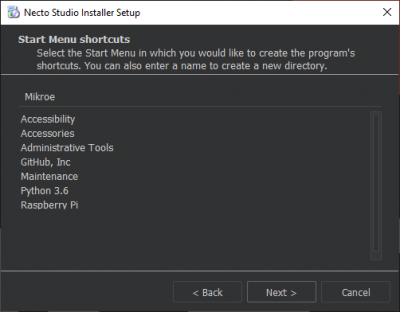
- Enter the where the software shortcut should be saved; then click Next >
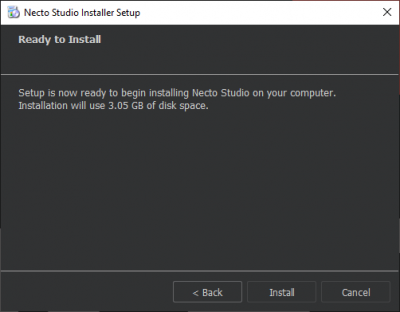
- Once the setup has been configured, users can initiate the installation by clicking the Install button
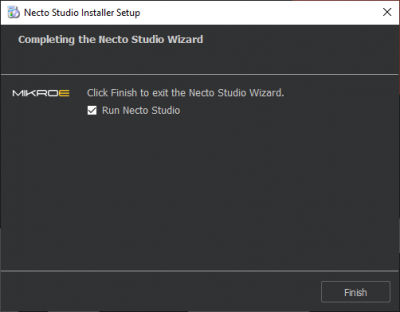
- Once the installation has completed; click the Finish button
CODEGRIP Suite
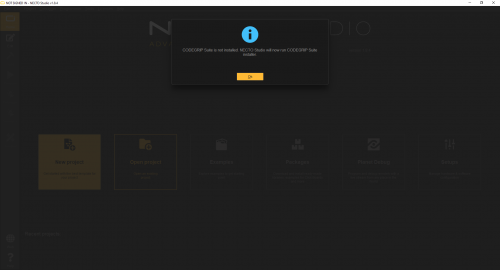
The first time users run Necto Studio, it will attempt to download and install the CODEGRIP Suite. (The computer will need to be connected to the internet for the installation software to be downloaded.)
Click the Ok button to proceed and then follow the prompts below (Click images to enlarge):
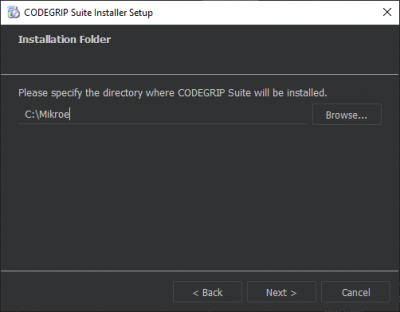
- Enter the directory for the Necto Studio to be installed; then click Next >
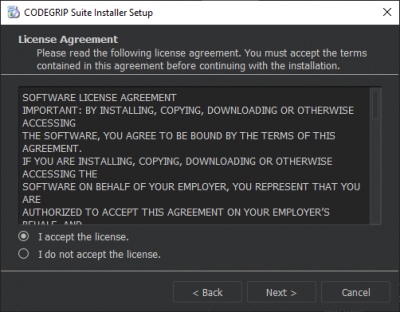
- Read the License Agreement, accept or decline the license, and then click Next >
Note: Users will need to accept the terms, if they wish to continue the installation process
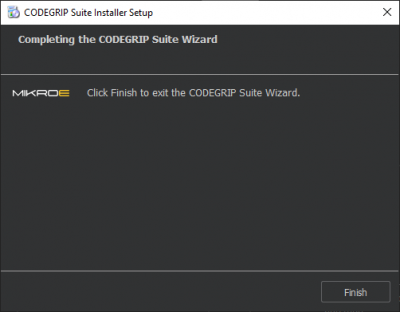
- Once the installation has completed; click the Finish button
Installation Error
On Windows PCs, if users experience an issue downloading CODEGRIP Suite due to a Error:UnknownNetworkError error, their computer may be missing a Microsoft Visual C++ 2010 Runtime Library.
Error:UnknownNetworkError error message. (Click to enlarge) To install the missing Microsoft Visual C++ 2010 Runtime Library, download the vcredist_x64.zip file (or click the button below), extract the folder, and execute the contained installation setup file vcredist_x64.exe.
Then, follow the installation prompts. After the Microsoft Visual C++ 2010 Runtime Library installation is complete, users can restart Necto Studio. The prompt for the CODEGRIP Suite installation will pop up again.
Alternatively, users can install the CODEGRIP Suite separately. However, the Microsoft Visual C++ 2010 Runtime Library is still necessary for users to login to their account in the User Account and Compiler License section.
Download CODEGRIP Suite
Users can still download and install the CODEGRIP Suite installation software separately:
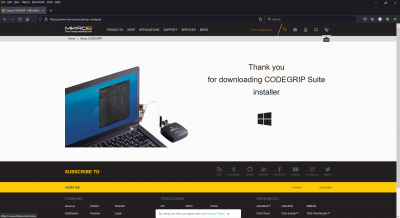
- www.mikroe.com/setup/codegrip
Click on the link above this image. If successful, a thank you page will be displayed. (Click to enlarge)
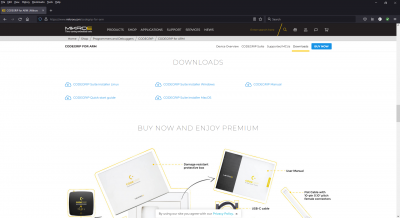
- CODEGRIP programmer product page
Scroll down to the Downloads section of the product page for the associated programmer. (Click to enlarge)
Once downloaded, execute the installation software and go through the setup steps mentioned above.
mikroProg Suite
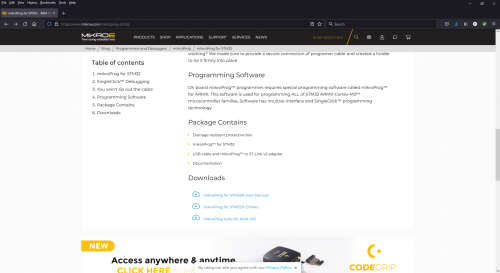
Users with a Windows OS, will have the option to utilize the mikroProg programmer instead of the CODEGRIP programmer (the mikroProg is only compatible on Windows PCs). The installation software for the mikroProg Suite can be downloaded from the product page of the associated programmer:
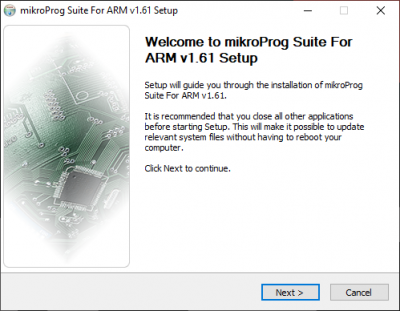
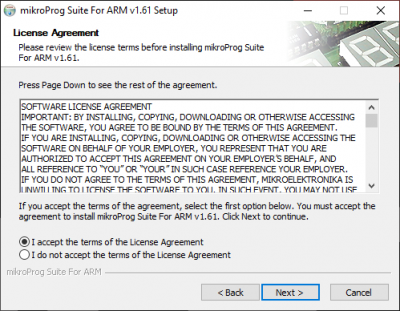
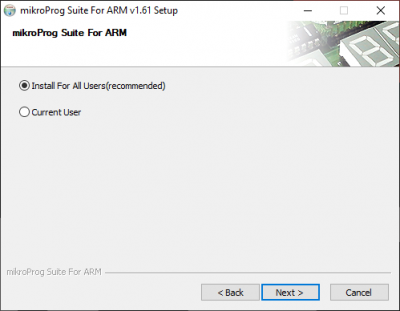
Once downloaded, extract and execute the installation software and go through the setup steps (Click on images to enlarge):
- Execute the installation software from the location that the file was downloaded to
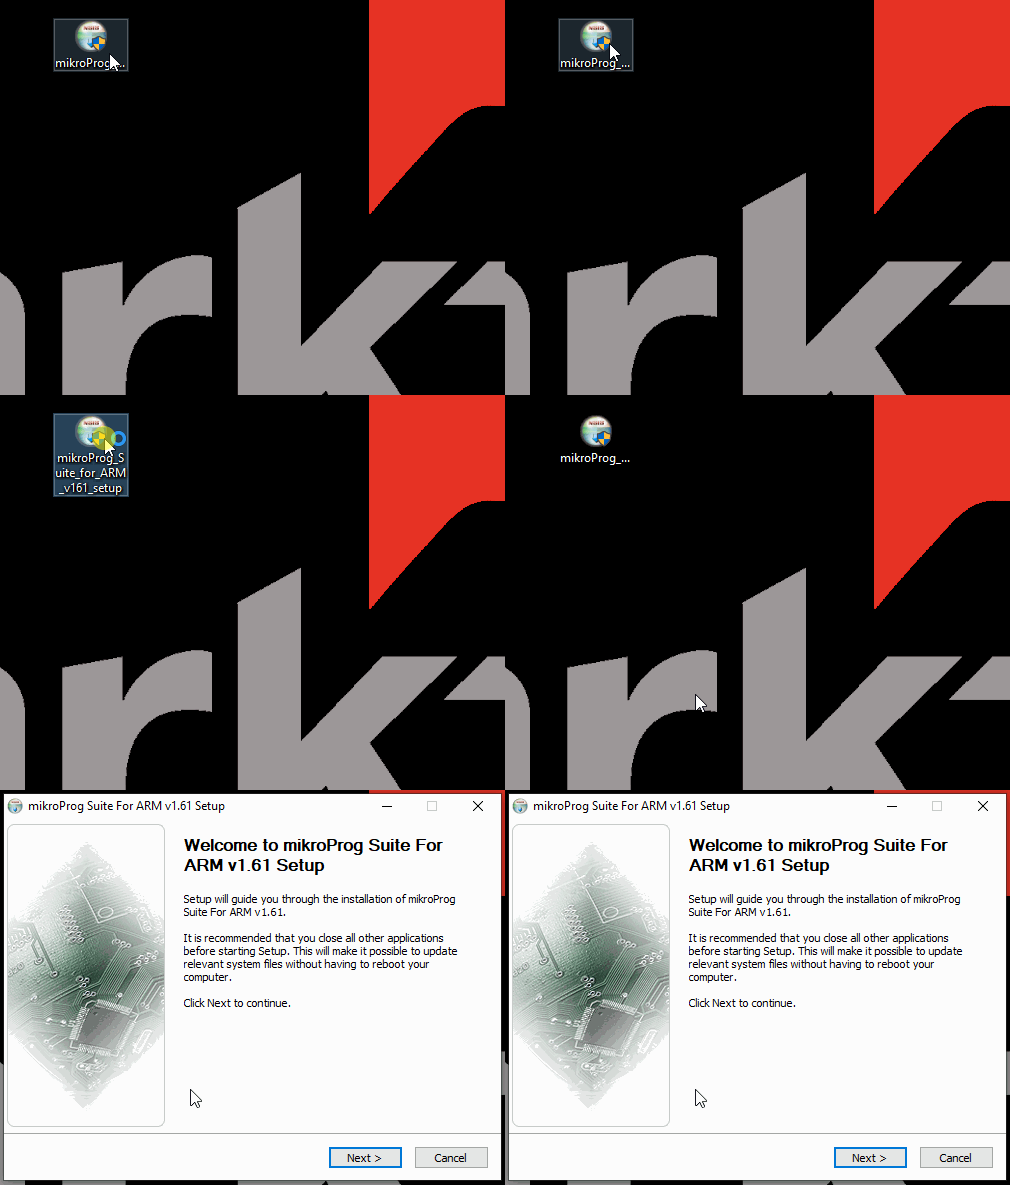
Executing the downloaded installation file. (Click to enlarge) - Click the Next > button to configure the software installation
- Read the License Agreement, accept or decline the license, and then click Next >
- Select the user access; then click Next >
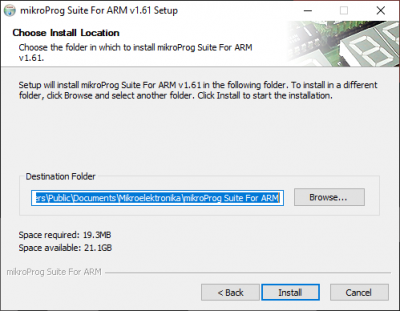
- Enter the directory for the mikroProg Suite to be installed; then click Next >
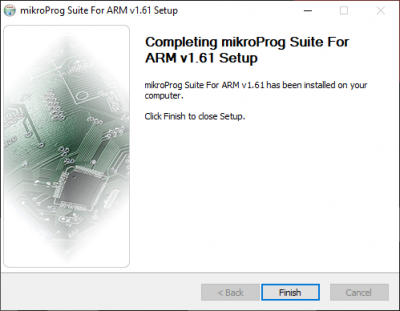
- Once the installation has completed; click the Finish button
Home Page Layout
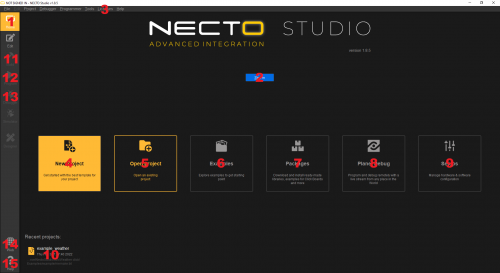
When users open the Necto Studio application, they will be brought to the Home Page. Below is a brief overview of the page layout:
The numbers below correspond with the numbers in the image above:
- Home button - Brings users back to the **Home Page*
- Sign In button
- Displays the login page for users to enter their account credentials.
- Users can also register a new account from this page.
- Once users are logged in, this button will be replaced by their profile name.
Licensesdrop down menu - Location of the Manage licenses menu option, where users can activate, deactivate, and purchase compiler licenses- New Project button - Use to create a new project
- Open Project button - Open a project
- Examples button - Open a project from available examples of installed libraries
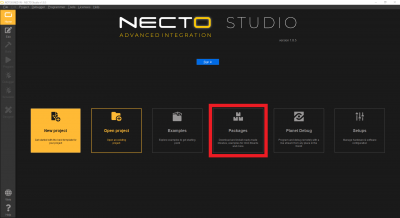
- Packages button - Find and install libraries from the Package Manager page
- Planet Debug button - Allows users to debug a project from a remote hardware setup (paid service)
- Setups button - Create, manage, and configure hardware setup(s) from the My Setups page
- List of recent projects - Opens recently saved projects
- Build button - Used to build opened project and will output a compiled
*.hexfile for the selected hardware setup - Program button - Used to program a project to a hardware setup, once it has been successfully built and compiled, through a compatible programmer
- Debugger button - Used to debug a project on a hardware setup with a compatible programmer
- Web button - Opens internal web browser
- Help button - Opens Help page
User Account and Compiler License
To utilize Necto Studio, users will need to register an account and activate a compiler license.
User Account
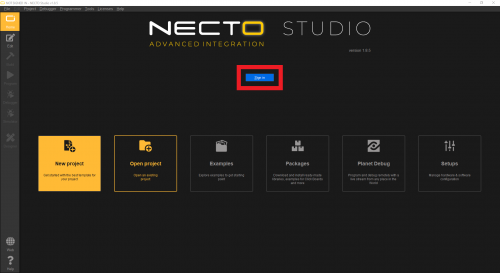
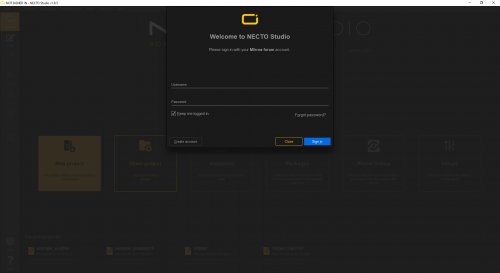
Users will need an account to activate their compiler license. These user accounts are also tied to the MikroElektronika forum. From the Necto Studio home page, click on the Sign In button and a dialog box will pop up; where users can sign in or register as a new user.
New Users
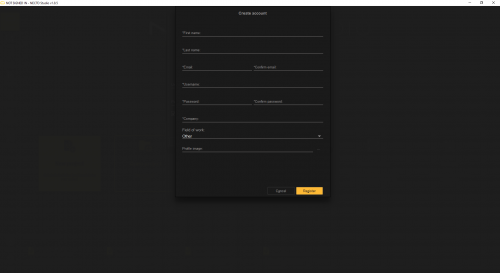
To register as a new user account, click on the Create Account button. Then enter your user information in to the registration form and click the Register button to create your account.
Sign In
Enter your credentials into the sign in dialog box; then, click on the Sign In button.
- Make sure to enter your
usernameand not the email address registered to the account.
NOTE: On Windows 10 PCs, if users experience the following, their computer may be missing a Microsoft Visual C++ 2010 Runtime Library.
- Aren't able to sign-in due to a network issue while they are connected to the internet.
- Aren't able to download CODEGRIP Suite due to a
Error:UnknownNetworkErrorerror:
Error:UnknownNetworkErrorerror. (Click to enlarge)
To install the missing Microsoft Visual C++ 2010 Runtime Library, download the vcredist_x64.zip file (or click the button below), extract the folder, and execute the contained installation setup file vcredist_x64.exe.
Compiler License
MikroElectronika offers new users 90-day trial license, but users will eventually need to purchase a compiler license if they wish to continue utilizing Necto Studio after the trial period has ended.
Purchase License
A compiler license can be purchased from MikroElektronika's Necto Studio product page, from the Manage licenses drop down menu on Necto Studio, or from the product category page of available compiler licenses.
Click here to head to the Necto Studio product page and purchase a compiler license. (Click to enlarge)
Activate Trial License
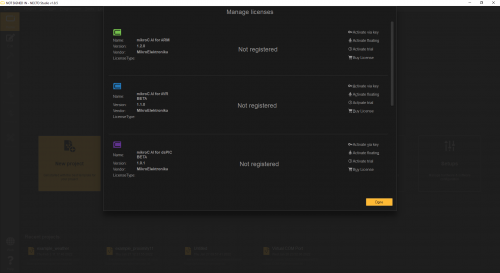
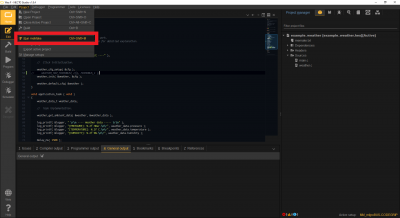
To activate a compiler license, click on License > Manage licenses from the drop down menu and a dialog box will appear. From the dialog box, find the appropriate compiler license and select the activation method. Users will be given the following options:
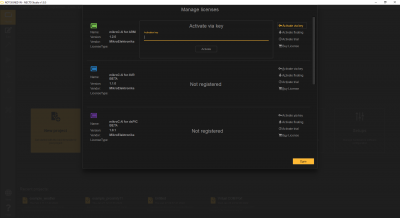
- To activate a permanent license click on the Activate via key button. Enter your license key and then click on the Activate button.
Activation key entry, when the Activate via key option is selected. (Click to enlarge)
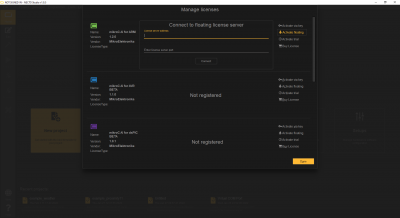
- To activate a floating (or network) license, click on the Activate floating button. Enter the network address and port for the license; then click on the Activate button.
Network key entry, when the Activate floating option is selected. (Click to enlarge)
- If users are accessing the license remotely, they may need to VPN onto the network hosting the license.
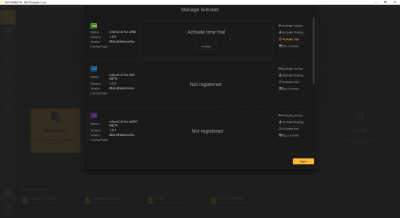
- New users can activate a trial license, click on the Activate trial button; then click on the Activate button.
Activation button, when the Activate trial option is selected. (Click to enlarge)
- Users can also purchase a compiler license by clicking on the Buy License button.
Necto Studio's internal web browser, displaying the compiler license purchase options from the Necto Studio product page. (Click to enlarge)
Setup - Hardware Configuration
Similar to selecting a board from the Board Manager in the Arduino IDE, users will create a Setup for a specific board and processor configuration in Necto Studio. Users will need to sign in and activate a compiler license for the SDK to build a Setup. MikroElektronika has a tutorial video on their Youtube channel for this process:
Otherwise, users can also follow the steps below to create their setup (Click images to enlarge):
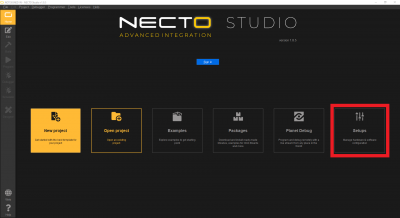
- From the Home page, select the Setups box
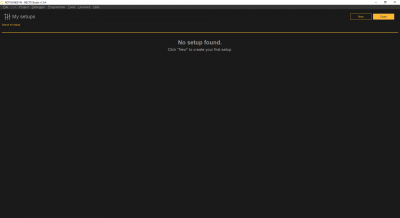
- Click the New button on the My Setups page
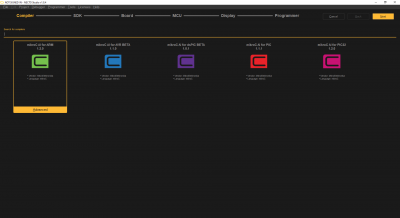
- Select a compiler on the Compiler page
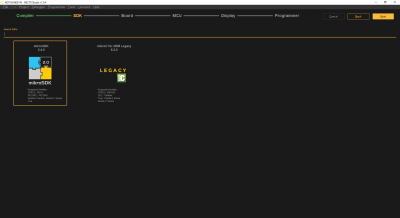
- Select the SDK on the SDK page
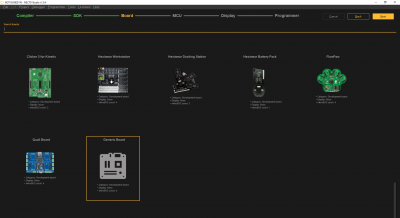
- Select the board on the Board page
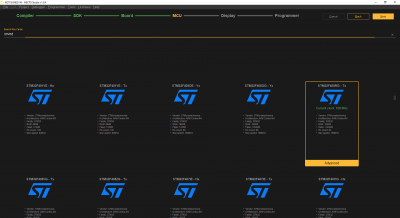
- Select the microcontroller on the MCU page
- Select display on the Display page
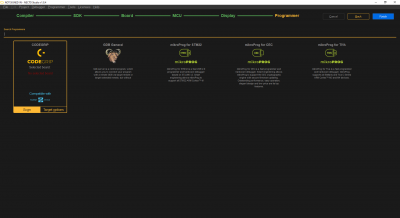
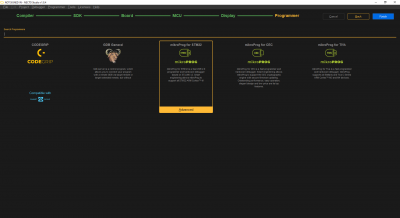
- Select the appropriate programmer on the Programmer page
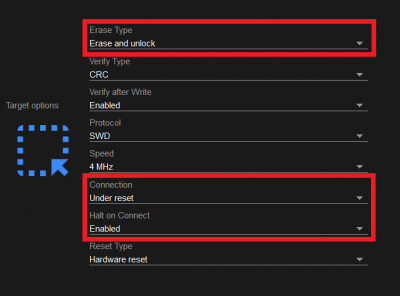
- We recommend users select the following target options for the CODEGRIP programmer, if they wish to program the target MCU directly from Necto Studio:
- Click the Done and then Finish buttons
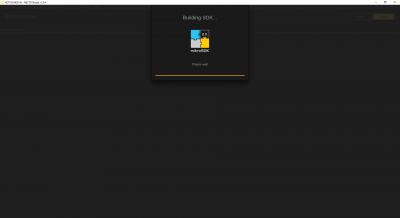
Users will then see the progress configuration and SDK build:
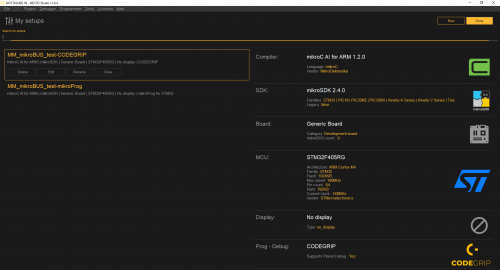
Once completed, users will be taken back to the My Setups page:
- Users should now see that their hardware configuration has been added to the setup list on the left column.
- These setups can be copied, modified, removed, and renamed (we recommend users rename their setup for organization purposes).
- In the right column, users will find a summary of the hardware configuration for the selected setup (from the left column).
Package Manager - Click Libraries
Similar to using a library from the Library Manager in the Arduino IDE, users will need to install a library for their Click Board™ through the Package Manager in Necto Studio. MikroElektronika has a tutorial video on their Youtube channel for this process:
Otherwise, users can also follow the steps below to install a library (Click images to enlarge):
- From the Home page, select the Packages box
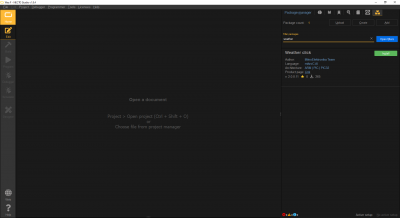
- This will take users to a blank project page with the Package Manager window open the righthand side. Within the Package Manager window, users can search, upload, create, open libraries that are hosted on MikroElektronic's Libstock repository. Once found, users can install a library into Necto Studio by clicking the Install button
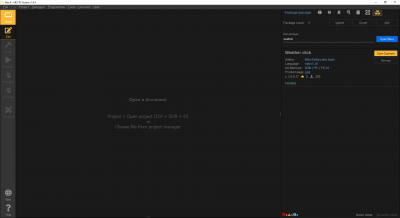
- Like Arduino's libraries, MikroElektronika's libraries also contain an example file. To open an example for a library, click on the Open Example button after the library has been installed in Necto Studio
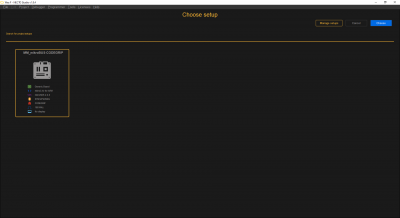
- Opening an example will create a new project. Therefore, users will need to select a hardware setup for the project
Projects - Start and Build
Starting a Project
Similar to a sketch in the Arduino IDE, a project is used to organize the code and hardware configuration in Necto Studio. Users can start a new project, open an existing project, open a recently saved project, and use a project from a library example through the home page.
Below, are the options for starting a project (Click on the images to enlarge):
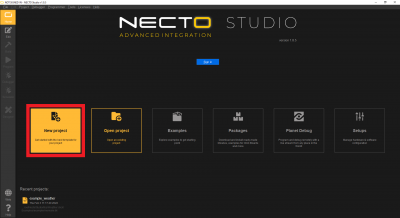
- New Project
- Click on the New Project button
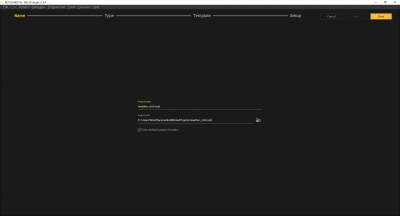
- Give the project a name and select a directory to save it on the Name page; then click on the Next button
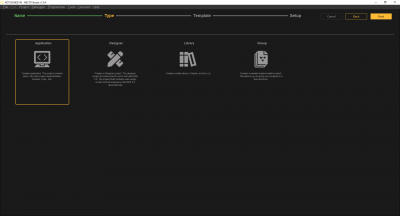
- Select the project type from the Type page; then click on the Next button
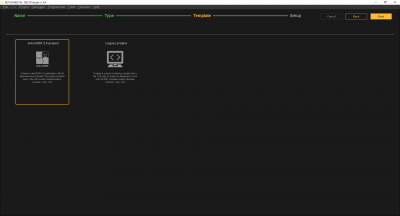
- Select an SDK from the Template page; then click on the Next button
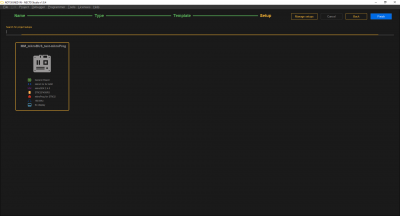
- Select a hardware configuration from the Setup page; then click the Finish button
- Alternatively, use the Manage setups to create or modify a hardware configuration from the My Setups page
- Open Project
- Click on the Open Project button
- Find and open the project file
- Examples
- Click on the Examples button
- Select the example project from one of the available library examples
- Select a hardware configuration from the Choose setup page and then click the Choose button
- Alternatively, use the Manage setups to create or modify a hardware configuration from the My Setups page
Modifying the Hardware Setup
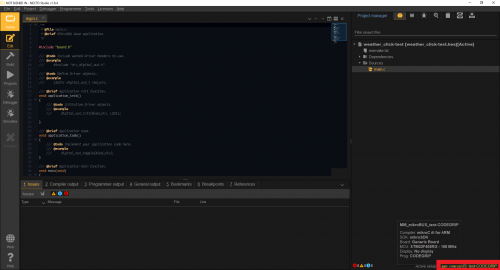
Just as in the Arduino IDE, users can change the hardware configuration. From the project page, users can modify the project's hardware configuration by clicking on highlighted the Active setup.
Build - Compiling a *.hex File
In order to compile a *.hex file to program a MCU, users will need to build the project. Users just need to click on the Build button, but it would be best to run meMake to optimize the project build (Click the images to enlarge):
- meMake is a simplified build system designed to get the most out of your CPU designed by parallelizing jobs to decrease the compile and linking times. Run meMake to optimize your project build
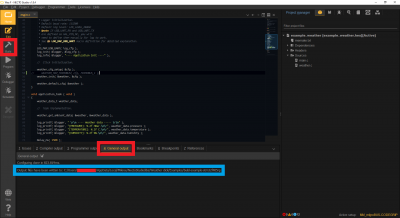
- To compile the project code, users only need to click the Build button. Once the build is complete, the compiled
*.hexfile can be found in the directory (it might be located in a hidden folder) listed under theGeneral Outputtab
NOTE: Users who select a Generic board in their hardware setup, may run into a compilation error. This error is because the pins for the Generic board are undefined, by default. Users will need to declare the pins utilized by their code for the build to compile.
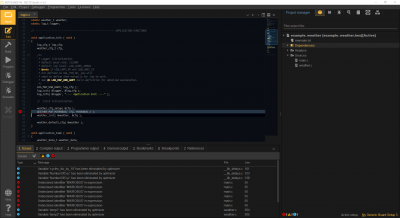
The compile error for a generic board with undeclared pins. (Click to enlarge)
Programmer and Debugger Configuration
CODEGRIP Suite
The CODEGRIP Suite is the software application associated with the CODEGRIP programmer product line. It is used to:
- Find and connect with available programmers through USB and/or WiFi
- Configure the target MCU
- Enable the power on a programmer to a target
- Detect, write, read, erase, reset, and flash a target MCU
To get started with your CODEGRIP programmer, it is recommended you reference the Quick Start Guide linked on the associated product page. For more details on the programmer, users can refer to the User Manual, also linked on the associated product page.
Installation
The first time users run Necto Studio, it will attempt to download and install the CODEGRIP Suite.
NOTE: On Windows PCs, if users experience an issue downloading CODEGRIP Suite due to a Error:UnknownNetworkError error, their computer may be missing a Microsoft Visual C++ 2010 Runtime Library.
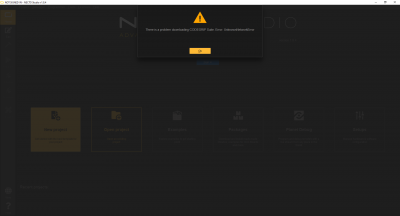
Error:UnknownNetworkError error. (Click to enlarge)
To install the missing Microsoft Visual C++ 2010 Runtime Library, download the vcredist_x64.zip file (or click the button below), extract the folder, and execute the contained installation setup file vcredist_x64.exe.
Users can also download the CODEGRIP Suite installation software from:
- www.mikroe.com/setup/codegrip
- CODEGRIP programmer product page
For more information, check out the Software Installation section.
Scan and Connect
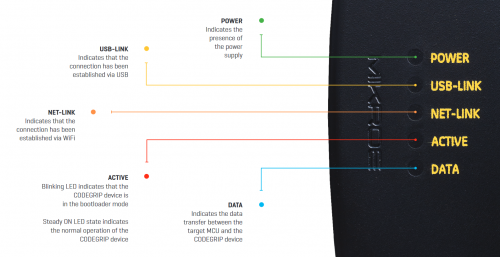
Connect the CODEGRIP programmer to a computer using the included USB-C cable (and adapter, in necessary). If everything is connected properly, the POWER, ACTIVE, and USB LINK LED indicators on the device will turn on. When the ACTIVE LED indicator stops blinking, the CODEGRIP is ready.
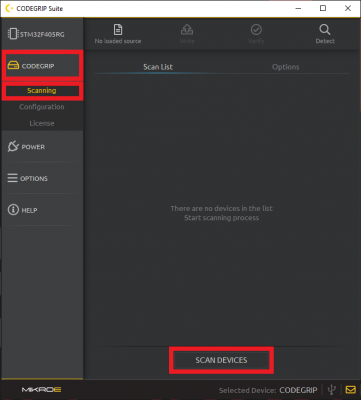
Open the CODEGRIP menu and select the newly unfolded Scanning menu item. Click the SCAN DEVICES button to get a list of available CODEGRIP devices.
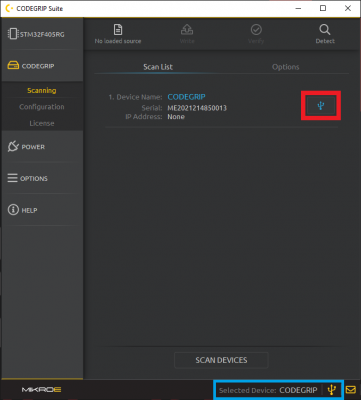
To connect with your CODEGRIP through a USB cable click the USB Link (icon) button. The USB Link indicator will turn yellow upon successful connection.
Target Configuration
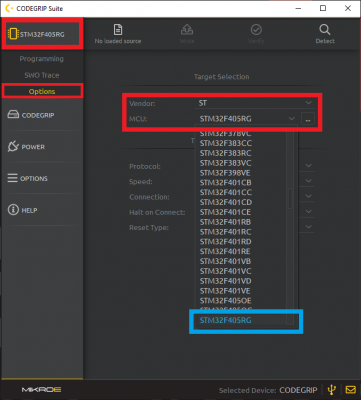
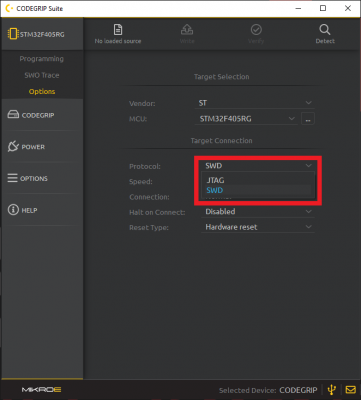
Open TARGET menu and select the Options menu item. Set up target MCU either by selecting Vendor: first or by directly entering MCU: name in the drop-down list. To narrow down the list of available MCUs, start typing the name of the MCU manually.
The list will be dynamically filtered while typing.
Then select the programming protocol to match your hardware setup. Options are SWD or JTAG.
Enabling Power
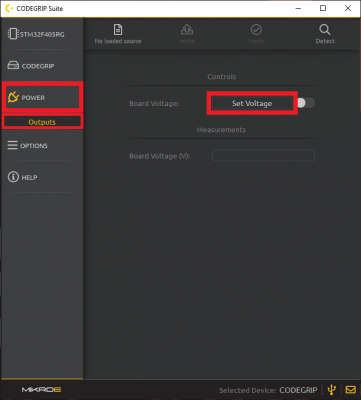
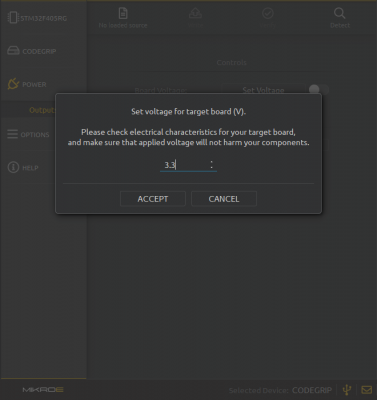
Open the POWER menu and select the newly unfolded Outputs menu item. Click the Set Voltage button to configure the power output of the programmer.
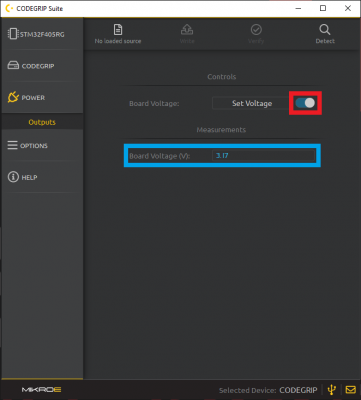
Once the output voltage has been configured, users can toggle the button to the right to enable the power output. If configured and enabled properly, Board Voltage (V): under the Measurements section will display the voltage output from the programmer.
Detect
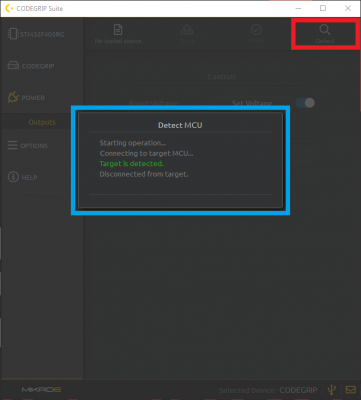
Confirm the communication with the target MCU by clicking the Detect button located on the Shortcuts bar. A small pop-up window will display the confirmation message.
Programming
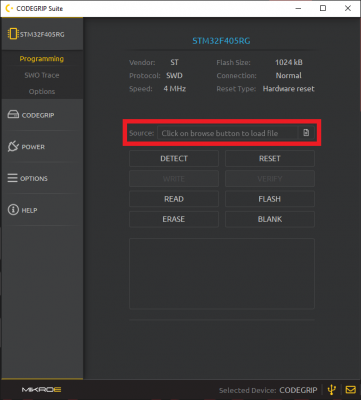
Load the *.bin or *.hex file by using the Browse button.
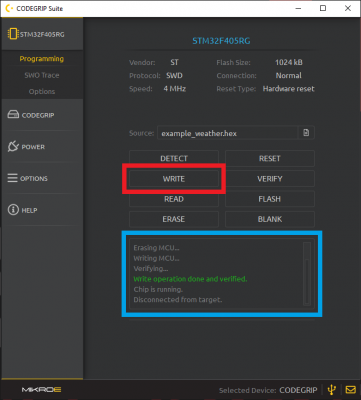
Click the WRITE button to program the target MCU. The progress bar will indicate the programming process, while the programming status will be reported in the message area.
Debugging in Necto Studio
Instead of programming the MCU separately through CODEGRIP Suite, users can also program a project directly from Necto Studio.
- Users will need to configure the programmer through CODEGRIP Suite, up until the detect step above
- When creating the hardware configuration, the CODEGRIP programmer's target options must set to the following parameters:
- The target MCU must be powered, this can be configured through the CODEGRIP Suite or the MCU can be powered from an external power source
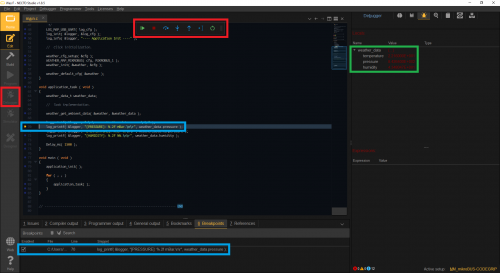
If setup properly, users only need to click on the Program button. This target option configuration, also allows users to access the debugger in Necto Studio. Like most debuggers, users can step trough instruction steps, set breakpoints, step-in/out of loops, check values, etc. to help locate issues in the project's code execution.
Troubleshooting Tips
Below, we have also included some troubleshooting tips for issues that you may come across.
- One of our employees compiled a great list of troubleshooting tips based on the most common customer issues. This is the perfect place to start.
- Users looking for technical assistance, can click on this link. There users can get started with posting a topic in MikroElektronika forum.
- For commercial businesses, MikroElektronika also offers a Premium Technical Support package, which can be purchased from their website.
Sign-in or CODEGRIP Installation Issues
On Windows 10 PCs, if users experience an issues signing in to Necto Studio or come across an Error:UnknownNetworkError error message, their computer may be missing a Microsoft Visual C++ 2010 Runtime Library.
Error:UnknownNetworkError error message. (Click to enlarge) To install the missing Microsoft Visual C++ 2010 Runtime Library, download the vcredist_x64.zip file (or click the button below), extract the folder, and execute the contained installation setup file vcredist_x64.exe.
Example Code Compilation Error
Users who select a Generic board in their hardware setup, may run into a compilation error. This error is because the pins for the Generic board are undefined, by default. Users will need to declare the pins utilized by their code for the build to compile.
No Power from the CODEGRIP Programmer
To detect a target MCU, it must be at least powered and have the SWD pins connected to the programmer. If the MCU has to be powered by the CODEGRIP programmer, users can enable it through the CODEGRIP Suite.
Remote Debugging
To learn more about configuring a remote debugging setup at your home, check out this blog post. For more information on Planet Debug, check out MikroElektronika's Planet Debug services page.
Source: Planet Debug services page
Resources and Going Further
For more on the Necto Studio and the mikroSDK, check out the links below:
