Edison Getting Started Guide
 jimblom,
  HelloTechie
Setting Up the Console
After you've checked out the Arduino side of the Edison, a great place to start learning about its more unique features is by interacting with the console. The console provides access to the Linux environment. You can use it to connect your Edison to a WiFi network, to write C++ programs with the vi editor, or run Python scripts.
Connecting to the FTDI Port
The Arduino Expansion Board, Edison Mini Breakout, and the SparkFun Console Blocks all route the console UART out through an FTDI chip, which converts serial to USB.
If you haven't already, plug your Edison into the base board and power your base board (in most cases by hooking up the USB OTG port). Then connect the base board's debug port to your computer via a USB cable. Each of these boards have two micro-B USB ports, make sure you plug into the correct one!
Make sure you have the FTDI drivers installed. If you need any help, check out our How to Install FTDI Drivers tutorial.
Opening Up a Serial Terminal Emulator
The next step is to open up your favorite terminal emulator software on your computer. If you don't have a favorite, check out our Serial Terminal Basics tutorial.
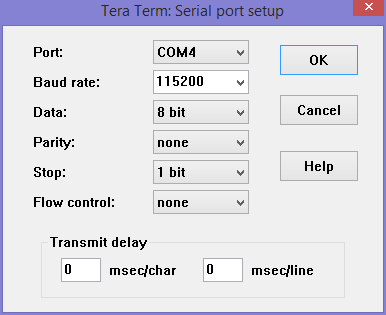
Make sure the new COM port for your base board is correctly set. You'll also need to set the baud rate to 115200bps (8-N-1).
After you've opened up the serial port, try hitting enter a couple times. If all goes well, the Edison should respond with a login prompt.
The default Edison login is root. There is no password...yet. You can run passwd, if you want to set one now, but it will be wiped out when/if you update the firmware image.