Dialog ULP WiFi DA16200 R3 Shield Hookup Guide
Example 1: Baud Rate Shenanigans
If this is your first time using Arduino IDE, library, or board add-on, please review the following tutorials.
Now that we have the nitty-gritty out of the way, let's look at a few use cases for our Shield.
In this first example, we're going to show you how to change the baud rate to manage serial communications. For boards that have a second hardware UART available, you'll be able to operate at the default baud rate. For other boards, like those based around the ATmega328 (like the RedBoard Qwiic), softwareSerial has a difficult time reading data sent at the higher baud, and it's recommended to lower the baud rate down to 9600 using the ATB command, and then changing the softwareSerial baud down from 115200 to 9600. This example will show you how to do that.
To begin with, copy and paste the code below into a fresh Arduino sketch.
language:c
#include<SoftwareSerial.h>

#define RX1 8
#define TX1 9
#define RTC_PWR_KEY 4

#define SOFTWARE_SERIAL_BAUD 115200
//#define SOFTWARE_SERIAL_BAUD 9600

SoftwareSerial WiFiSerial(RX1,TX1); //Configure SoftwareSerial

void setup() {
  Serial.begin(9600);
  WiFiSerial.begin(SOFTWARE_SERIAL_BAUD); //Set SoftwareSerial baud


  //Enable DA16200 Module RTC power block
  pinMode(RTC_PWR_KEY,OUTPUT);
  digitalWrite(RTC_PWR_KEY,HIGH);

  Serial.println("DA16200 AT Command example sending/receiving commands\n");


  //Listen for ready message ("+INIT:DONE")
  byte count = 0;
  String msg = "";
  while(count<20)
  {
    while(WiFiSerial.available())
    {
      msg += char(WiFiSerial.read());
    }
    if(msg.length() > 5) break;
    count++;
    delay(100);
  }
  msg = msg.substring(3,msg.length());

  if(msg.length()>5)
  {
    Serial.println("Expecting: \"INIT:DONE,(0 or 1)");
    Serial.println("Received: " + msg);
  }
  else
  {
    Serial.println("Failed to receive initialization message\n");

    Serial.println("Make sure the baud rate for WiFiSerial matches the baud rate\n" \
                   "saved to the DA16200. You can also perform a factory reset by\n" \
                   "pressing and holding the GPIOA7 button for ~5s, which will\n" \
                   "reset the baud rate back to 115200");
  }

  Serial.println("\nTry entering \"?\" or \"help\" to print out the list of AT commands\n" \
                 "\nIf the received text is unreadable, try changing the baud rate to\n" \
                 "9600 with the command \"ATB=9600\" in the terminal. Next, update the\n" \
                 "example code by setting SOFTWARE_SERIAL_BAUD to 9600 baud and trying again.\n");
}

void loop() {
    while(Serial.available())
    {
      WiFiSerial.print(char(Serial.read()));
    }

    while(WiFiSerial.available())
    {
      Serial.print(char(WiFiSerial.read()));
    }
}
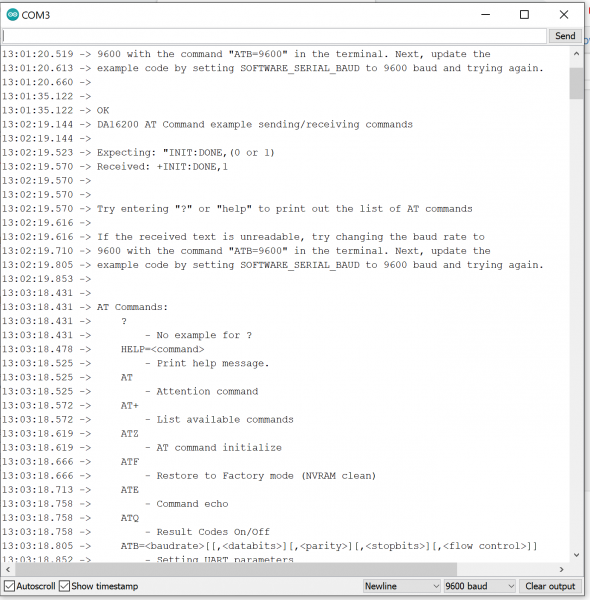
Set your Board and Serial Port, and then upload the sketch to your Arduino. Then open the serial monitor. You'll begin to see output.
If you type "?" or "help" it will print out all of the AT commands. However, at the higher baud rate of 115200 there's a lot of receive errors on a 328 board. To fix this, send the baud rate command for 9600 - "ATB=9600" and you should get an "OK" response. Once that's done you can go back to sketch and comment out the #define SOFTWARE_SERIAL_BAUD 115200, uncomment the line below that defines the software serial baud for 9600, and then re-upload the sketch.
Make sure the baud rate on the serial monitor is set to 9600 and then try typing "?" or "help" again.
