SparkFun Satellite Transceiver Kit - Swarm M138 Hookup Guide
 PaulZC
Python User Interface
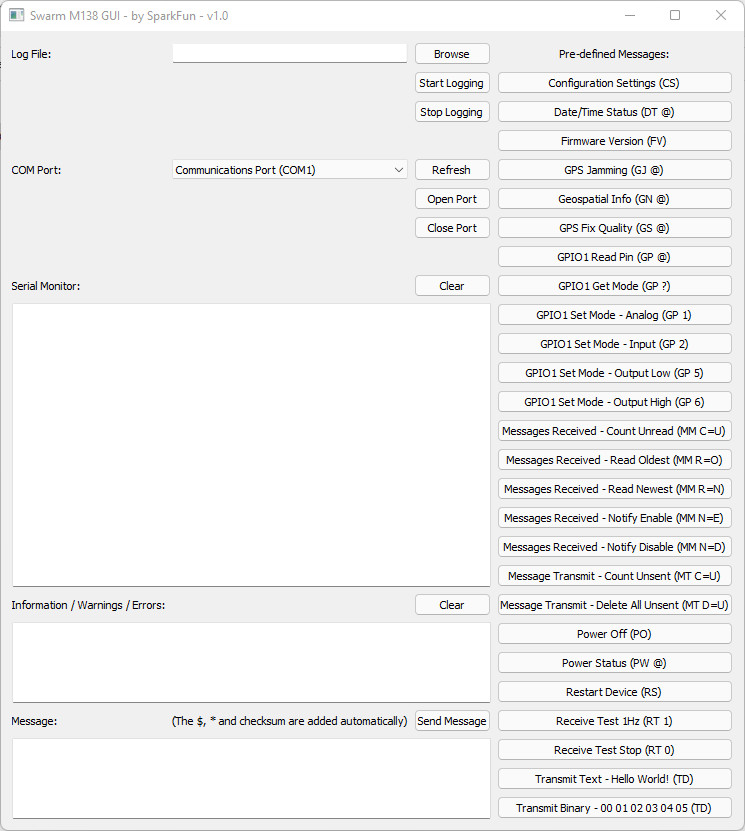
We've written a Python3 PyQt5 GUI (Graphical User Interface) to let you get up and running with the M138 modem. You can find the source code and executables in the dedicated GUI repo on GitHub.
You will find full installation instructions in the repo.
Don't panic! The GUI will take a few seconds to open. Select the correct port from the drop-down list, click Open Port and away you go!
Click any of the pre-defined message buttons to send that message to the modem. Or enter your own message in the Message window and click Send Message to send it.
The modem message interface uses the same format as NMEA GNSS messages. They always start with a dollar and end with an asterix and a two character checksum. To make life easy, the GUI adds the $, * and checksum characters automatically. You do not need to include those!
The Modem manual contains the full list of modem commands and messages.
You can test the communication interface by pressing the “Configuration Settings (CS)” button. The Modem’s Device ID and Name will be displayed on the serial monitor in the format:
$CS DI=<dev_ID> ,DN=<dev_name>*xx
The next step is to place the device in an outdoor location with a clear view of the sky, away from any sources of RF noise. Once the device is set up outdoors, use the “Receive Test 1Hz (RT 1)” predefined message in the Python3 GUI to measure the background RSSI. The background RSSI measurements will be updated once every second and represent the noise floor in the testing environment. The measured background RSSI value should be between -95 and -105 dBm for reliable communication on the network. A lower, more negative, value is preferred.
The Modem will not be able to reliably communicate with the satellites if the reported background RSSI value is > -93 dBm. Try moving the device to a different testing location to observe how the measured value changes.
After confirming that the background RSSI is within the specified range, the next step is to queue some message packets on the Modem for transmission. The quickest way to queue messages for transmission is to use the predefined messages in the GUI shown at the bottom of the list. The message packets will be queued for transmission for a default hold time of 48 hours after which they will be discarded if not transmitted.
The message packet hold time is user configurable for each transmission command. Please refer to the Swarm M138 Modem’s Product Manual for more information, and for a full description of available commands.
The queued transmission packets will be transmitted when a satellite passes over the device’s location and beacons the Modem. The next satellite pass over your location can be predicted using the Swarm Satellite Pass Checker. There is also a YouTube video available that describes the pass checker’s functionality in more detail available here.
To know if a satellite is attempting to communicate with the Modem, ensure that the “Receive Test 1Hz (RT 1)” command is enabled. Observe the serial monitor for satellite beacons in the format:
$RT RSSI=<rssi_sat>,SNR=<snr>,FDEV=<fdev>,TS=<time>,DI=<sat_id>*xx
The Modem will attempt to transmit queued message packets after receiving the satellite beacons. Each successful transmission will be acknowledged by the satellite and will be displayed on the serial monitor in the format:
$TD SENT RSSI=<rssi_sat>,SNR=<snr>,FDEV=<fdev>,<msg_id>*xx
The transmitted data packet will then be visible on the Swarm Hive shortly after transmission.