SparkFun Satellite Transceiver Kit - Swarm M138 Hookup Guide
Contributors:
Ell C,  PaulZC
PaulZC Hardware Hookup - Breakout Pins
Want to connect the Breakout to your Arduino microcontroller board? You can absolutely do that too!
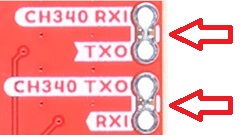
By default:
- The modem TXO breakout pin is connected to the CH340 RXI via a split pad jumper
- Likewise, the modem RXI is connected to CH340 TXO
You will need to open the jumper links on the back of the board when connecting the TXO and RXI pins to an Arduino board.
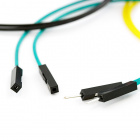
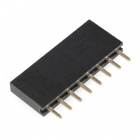
You will probably need: break away headers and jumper wires. 2-pin jumpers will be useful for re-linking the CH340 connections later.


Connect:
- GND to GND / 0V on your Arduino board
- VIN to 5V on your Arduino board
- It is possible to connect VIN to 3.3V if your Arduino board can deliver enough current when the modem transmits
- Please see Current Draw below for more details.
- TXO to the Serial / UART RX input on your Arduino board
- RXI to the Serial / UART TX output on your Arduino board
The TXO and RXI signals are 3.3V.
If you are using an old Arduino Uno or similar with 5V I/O pins, you will need to use a logic level converter to convert the signals to 3.3V.