SAMD51 Thing Plus Hookup Guide
 Englandsaurus
Arduino Examples
In this section, we will run a few simple sketches to verify and demonstrate the board's functionality.
Using the Arduino IDE
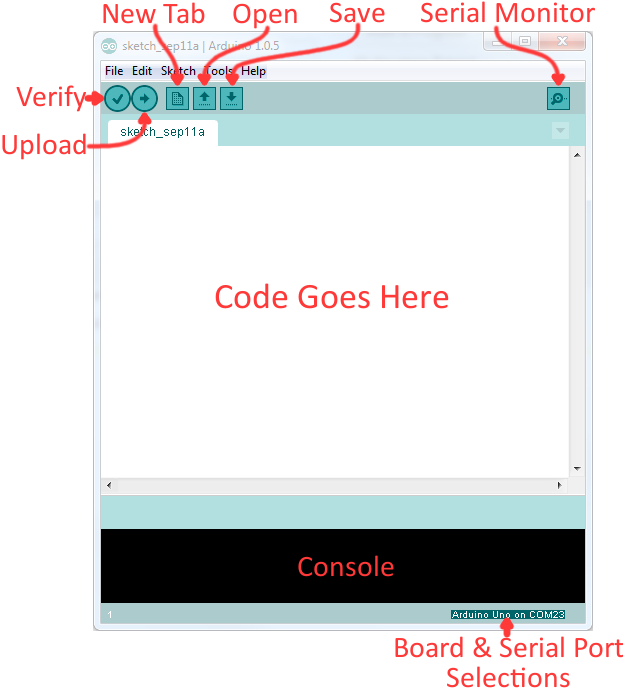
Now it's finally time to upload code to your SAMD51 Thing Plus in the Arduino software. Once you open up the application, you'll be presented with a window that looks a little something like this:
Before we can send the code over to the SAMD51 Thing Plus, there are a couple of adjustments we need to make.
Select a Board
If you haven't already selected the proper board from the Arduino IDE setup section earlier, we will go over it again. This step is required to tell the Arduino IDE which of the available Arduino boards, we are using. Go up to the Tools menu, hover over Board, and be sure to select the SparkFun SAMD51 Thing Plus from the drop-down list.

Select a Serial Port
The bootloader is what allows us to load code over a simple USB interface. To upload code, you will need to manually enter bootloader mode by rapidly double-tapping the reset button. The board will remain in bootloader mode until power cycles, which happens automatically after uploading code.
Double-tapping the reset button to enter bootloader mode.
On the SAMD51 Thing Plus, the there are a clues to if it is in bootloader mode:
- The D13 LED indicator will be a solid blue (may appear to be slowly fading or blinking).
- Board will show up under a different COM port; make sure you select this COM port after the board in the bootloader mode.
- The board will appear as a USB mass storage device under the name 51THINGBOOT.
Next up we need to tell the Arduino IDE which of our computer's serial ports the SAMD51 Thing Plus is connected to. Navigate back up to the Tools > Port menu. The port menu may magically know which of your ports (if you have more than one) is the SAMD51 Thing Plus board. On a Windows machine, the serial port should come in the form of COM#. On a Mac or Linux machine, the port will look like /dev/cu.usbmodem####.
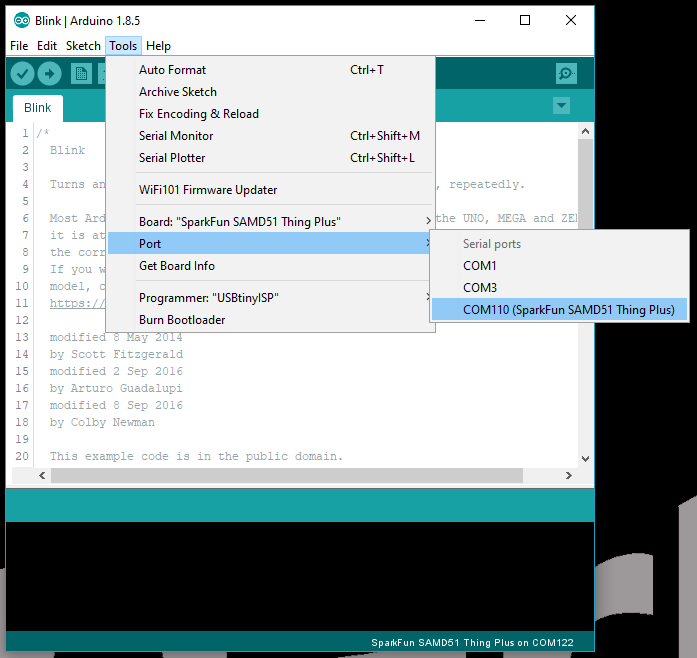
Once you find it, select it! If you've got more than one port, and you're not sure which of the serial ports is your SAMD51 Thing Plus, unplug it for a moment and check the menu to see which one disappears.
Example 1: Uploading Blink
In this example we will go over the basics of the Arduino IDE and upload a sample code. This is a great way to test the basic functionality of any board to make sure it is working.Example 1: Blink
Blink Sketch
Code written for the Arduino IDE are referred to as sketches. All code in Arduino is C based. Let us upload a Blink sketch to make sure our new RedBoard setup is totally functional. Go up to the File menu in Arduino, then go to Examples > 01.Basics > Blink to open it up.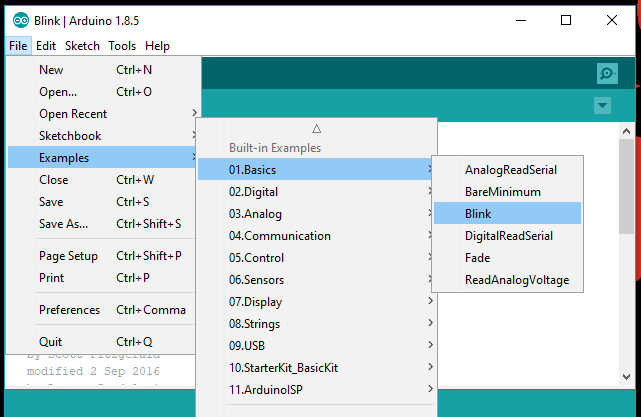
Screen shot of Blink sketch selection.
Upload!
With all of those settings adjusted, you're finally ready to upload some code! Click the Upload button (the right-pointing arrow) and allow the IDE some time to compile and upload your code. It should take around 30 seconds for the process to complete. When the code has uploaded, you should see something like this in your console window: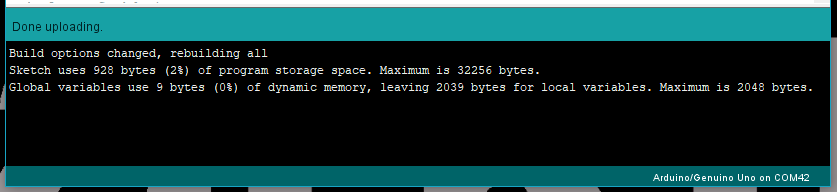
Screen shot of upload complete.
And if you look over to the SAMD51 Thing Plus, you should see the blue LED turn on for a second, off for a second, on for a second, off for a second...ad infinitum (at least until it loses power).
If you want to adjust the blink speed, try messing with the "1000" value in the delay(1000); lines. You're well on your way to becoming an Arduino programmer!
Something Wrong?
Uh oh! If you didn't get a "Done Uploading" message, and instead got an error, there are a few things we can double-check.If you got an avrdude: stk500_getsync(): not in sync: resp=0x00 error in your console window.
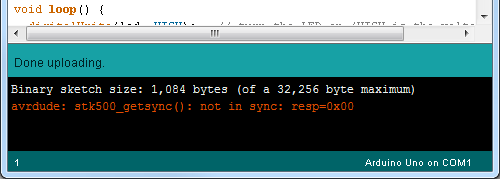
Screen shot of Error Message in the Console.
Either your serial port or board may be incorrectly set. Again, make sure SparkFUN SAMD51 Thing Plus is the board selection (under the "Tools > Board" menu). The serial port is usually the more common culprit here. Is the Serial Port correctly set (under the "Tools > Serial Port" menu)? Did the drivers successfully install? To double check your board's serial port, look at the menu when the board is plugged in, then unplug it and look for the missing port. If none of the ports are missing, you may need to go back to driver verification.