micro:climate Kit Experiment Guide
 bboyho,
  D___Run___
 Experiment 4: Reading the Soil Temperature
Introduction
When you are looking to put plants in the ground in spring, plant seed, or even track the temperature of your koi pond, you need a temperature sensor. But not just any temperature sensor...a waterproof one! In this experiment you will explore using the waterproof temperature sensor to measure ground temperature in a garden or pot.
Parts Needed
You will need the following parts:
- 1x micro:bit Board (Not Included with Kit)
- 1x Micro-b USB Cable (Not Included with Kit)
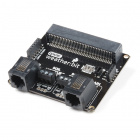
- 1x weather:bit Carrier Board
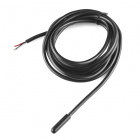
- 1x Waterproof Temperature Sensor
Didn't get the kit? Have no fear! Here are the parts you will need to complete this experiment. You may not need everything though depending on what you have. Add it to your cart, read through the guide, and adjust the cart as necessary.


micro:bit Board
DEV-14208Suggested Reading
- Temperature Sensor Datasheet - The nitty gritty details on the water proof temperature sensor
- Simple Sketch Video - Video demonstrating the use with Arduino
Hardware Hookup
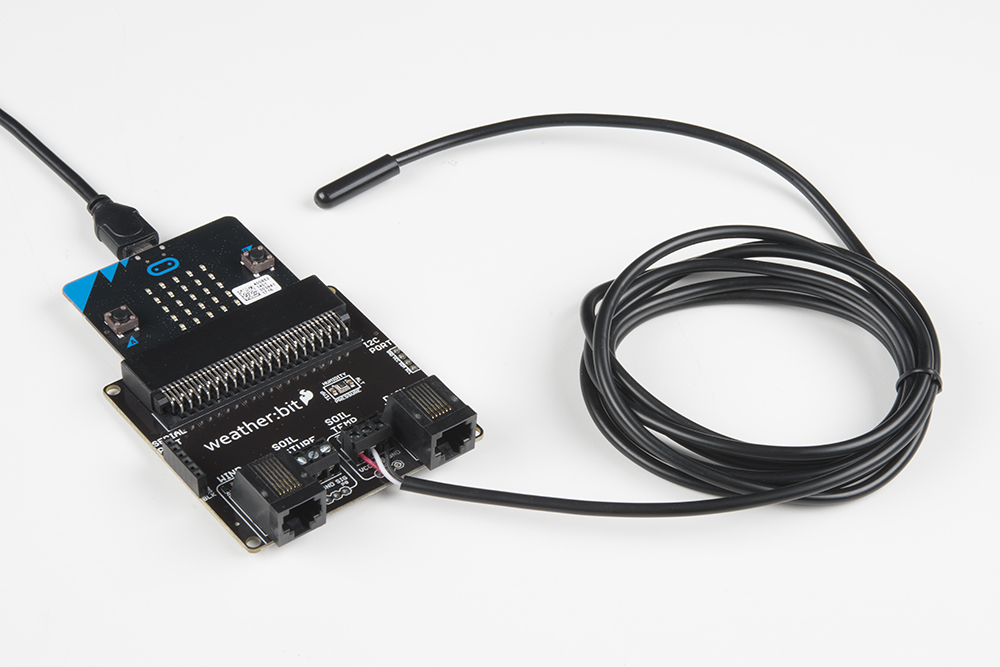
The hookup of this sensor is much easier with the weather:bit carrier board than with any other microcontroller. We have done a lot of the leg work for you!
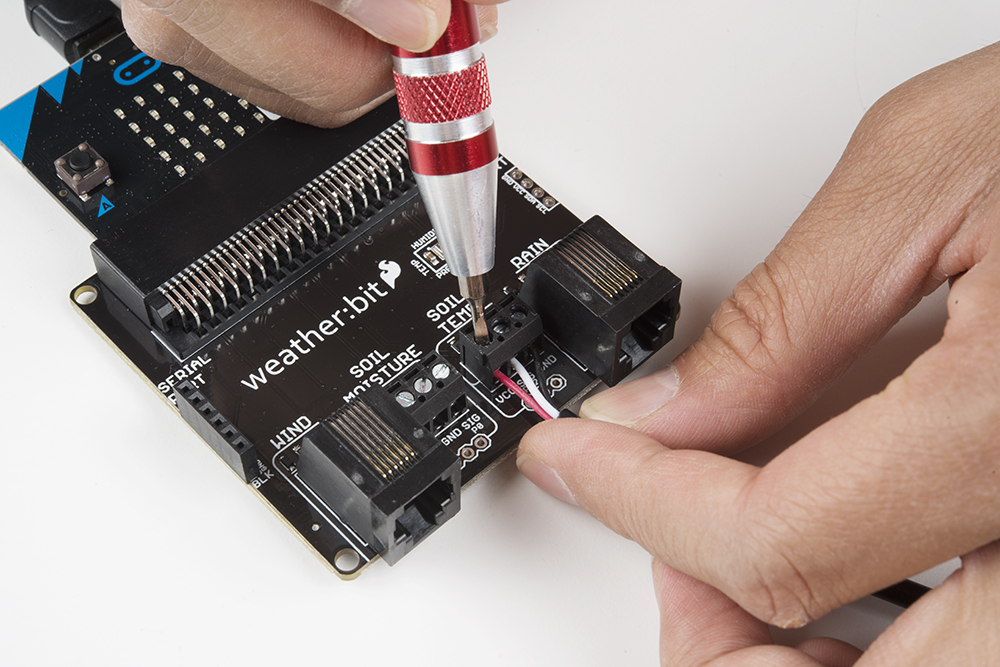
Find the screw terminals for the soil temperature on the weather:bit. Using your screwdriver, open the screw terminals a bit and insert the wires as shown in the photo below with the wires from left to right:
- Red to VCC
- White to SIG
- Black to GND
Running Your Script
Please open a browser window and navigate to https://makecode.microbit.org. This should open the MakeCode environment that you used to install the weather:bit extension.
Code to Note
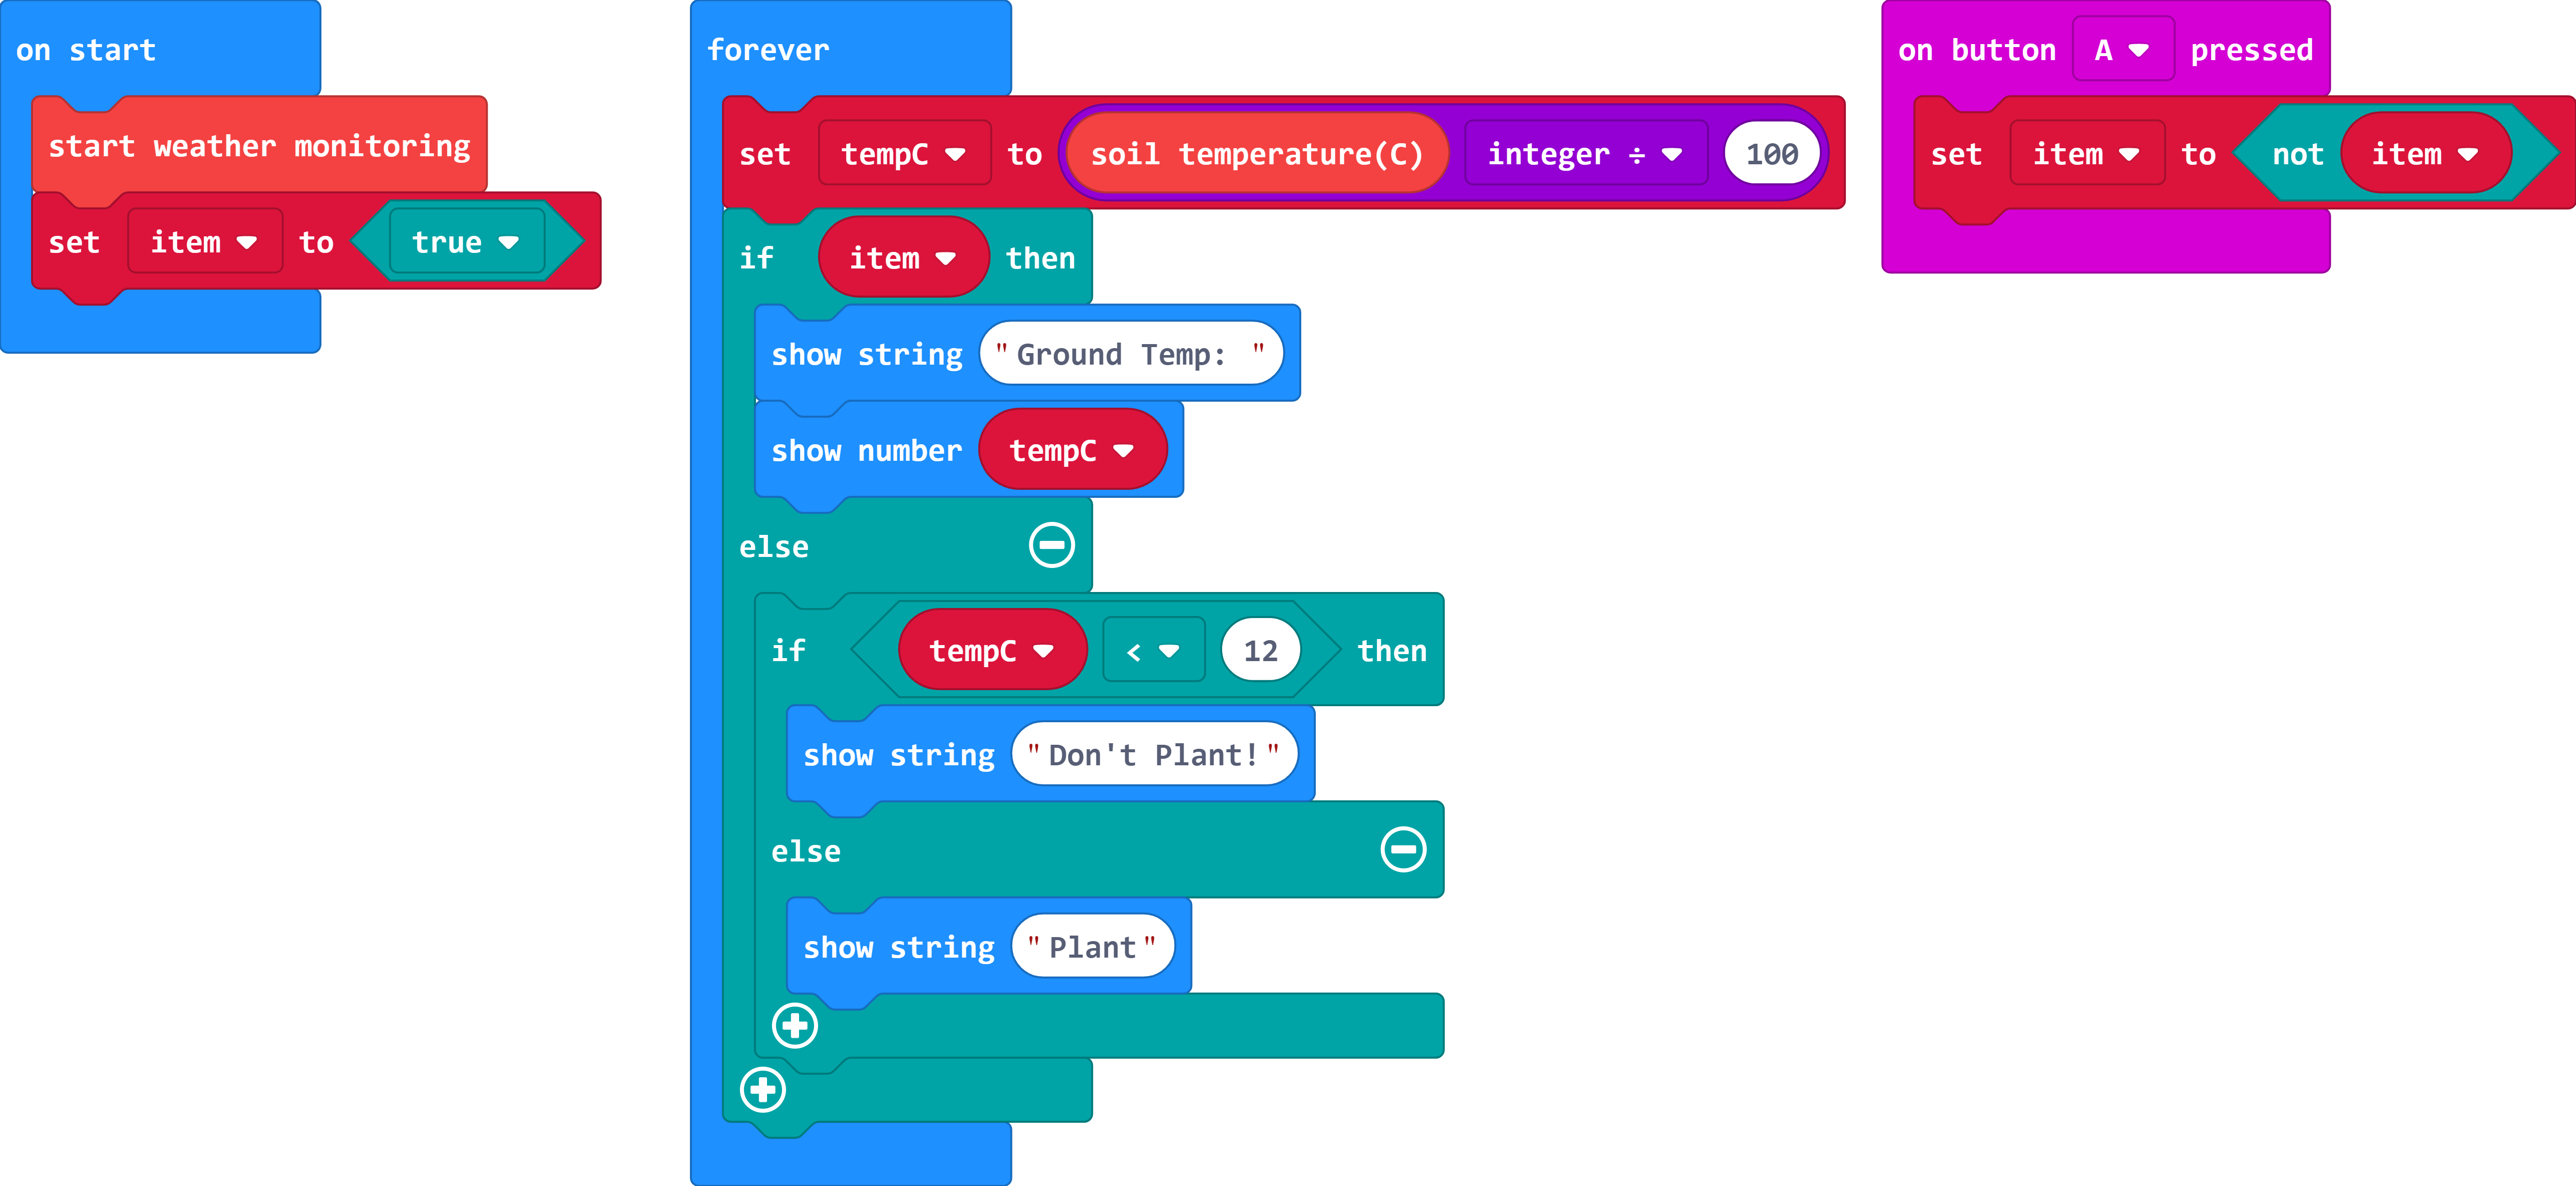
Soil Temperature
The Soil Temperature block returns the soil a value that you need to divide by 100 to get the temperature in Celcius. Like the data from the BME280 sensor in Experiment 1, this is to get you the most accurate temperature possible.
Set Item To
In this Set Item To block we use a boolean variable of true. You can then flip flop that variables to false when needed
Not
We use the not block to flip flop a boolean variable when needed. In this case when a button is pressed.
Show String
The Show String Block enables you to display a scrolling string of character across the LED array.
Show Number
As in previous experiments we use the show number block to display the temperature data from the soil temperature sensor.
What You Should See
As soon as you power up your micro:bit, you should see the ground temperature from the temperature sensor scrolling across the LED array in Celcius. If you press the A button, it will change what is scrolling to a "Plant" or "Don't Plant" depending on the temperature of the ground making it a useful tool for when to figure out when it is time to plant your tomato crop.
Troubleshooting
Odd temperature --- Make sure you are measuring with the end of the temperature sensor, that is where the actual sensor is.
Really odd temperature --- Double check your wiring and hookup!
Numbers still seem odd --- Check your math blocks! You may be missing an order of operation.