micro:climate Kit Experiment Guide
 bboyho,
  D___Run___
 Experiment 1: Reading the Temperature, Humidity and Pressure
Introduction
What comes to mind first when you hear the term "Atmospheric Conditions"? Well, other than the weatherman on the news, you probably think about temperature --- maybe humidity and even barometric pressure if you are a weather nerd like many of us at SparkFun. In this first experiment we will explore measuring those conditions using a micro:bit and the weather:bit carrier board.
Parts Needed
You will need the following parts:
- 1x micro:bit Board (Not Included with Kit)
- 1x Micro-B USB Cable (Not Included with Kit)
- 1x weather:bit Carrier Board
Didn't get the kit? Have no fear! Here are the parts you will need to complete this experiment. You may not need everything though depending on what you have. Add it to your cart, read through the guide, and adjust the cart as necessary.


micro:bit Board
DEV-14208Suggested Reading
- Getting Started with the micro:bit --- Basic hookup and programming of the micro:bit
Introduction to the BME280
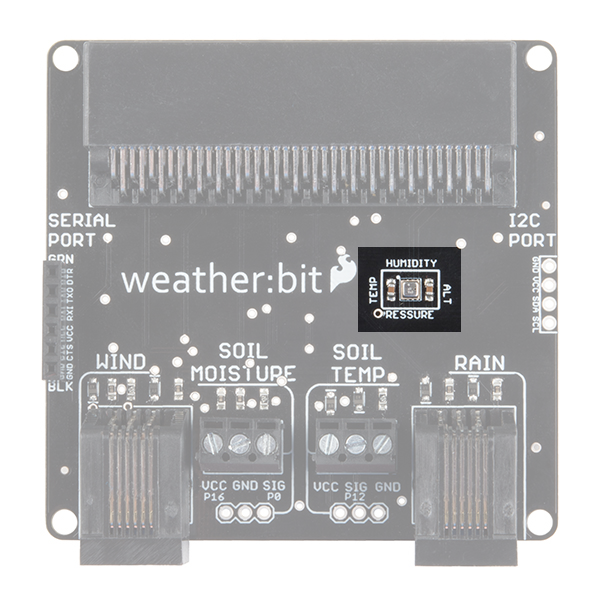
The BME280 Atmospheric Sensor is an easy way to measure aspects of the atmosphere around you, including pressure, humidity and air temperature. All of this is combined into a petite package that resides on the weather:bit.
The sensor operates on 3.3V and is super power-efficient, using as little as 5µA (that’s 1/1,000,000 of an amp!) when idling and less than 1mA when it’s taking measurements. This means you can operate the board on a battery, with little thought to major power issues.
In this experiment, you will work with the BME280 to read the temperature, pressure, and humidity of the room as well as your altitude based off of the atmospheric pressure.
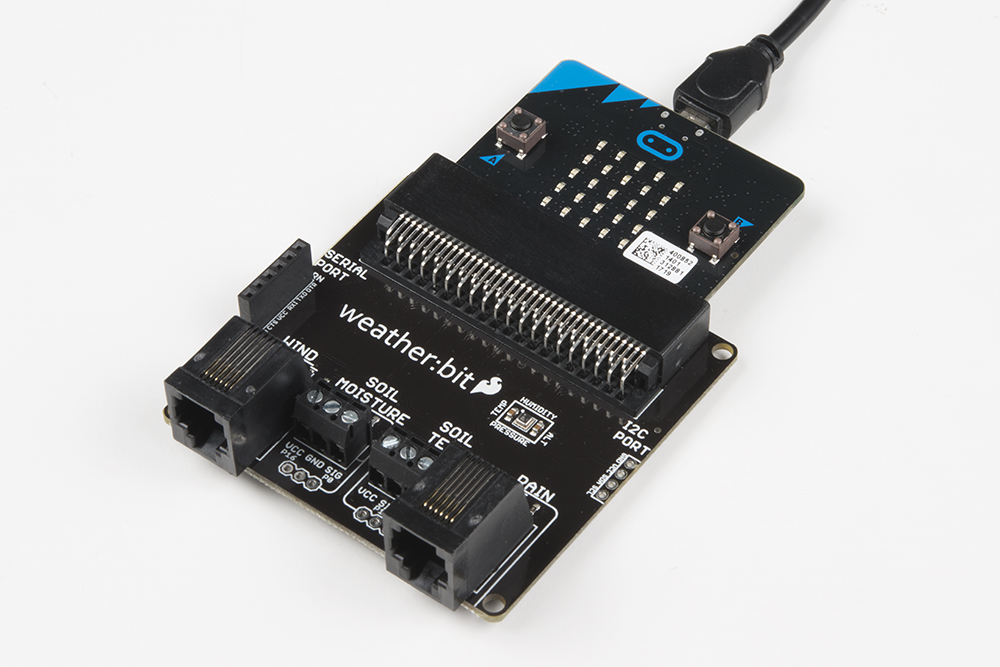
Hardware Hookup
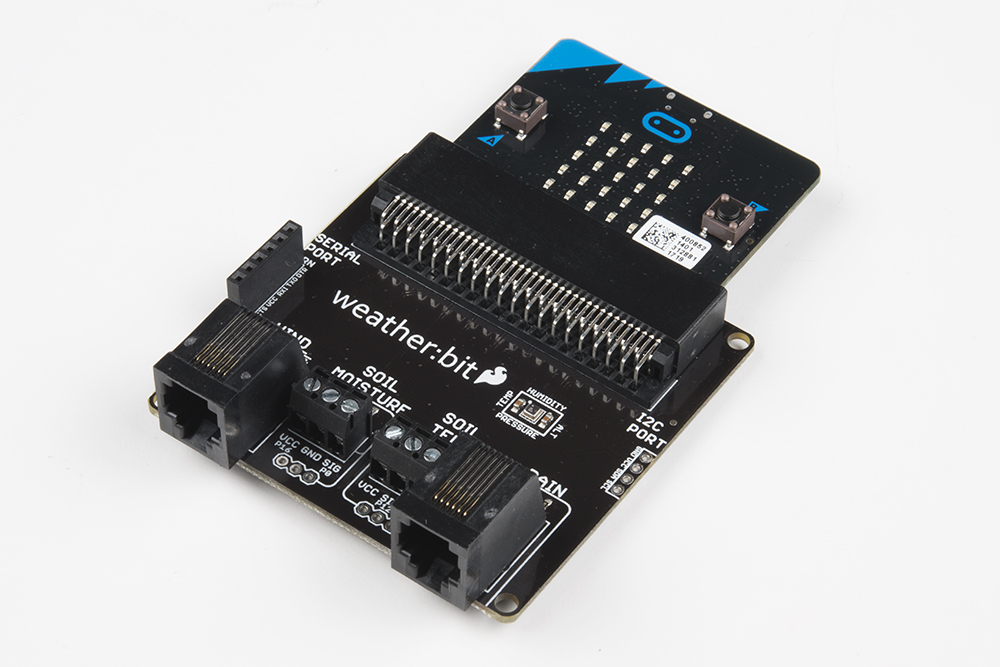
Since the BME280 is already on the weather:bit board, this should be pretty straightforward; you have one step in hooking everything up. Insert the micro:bit into the weather:bit carrier board with the LED array facing up as shown in the image below.
Running Your Script
We are going to use Microsoft MakeCode to program the micro:bit. Please open a browser window and navigate to https://makecode.microbit.org. This should open the MakeCode environment that you used to install the weather:bit extension.
Be sure to add the weather:bit extension as instructed in the Installing the weather:bit extension in MakeCode section of this tutorial.
Now, you can either download the following example script and drag and drop it onto your micro:bit, or use it as an example and build it from scratch in MakeCode.
Code to Note
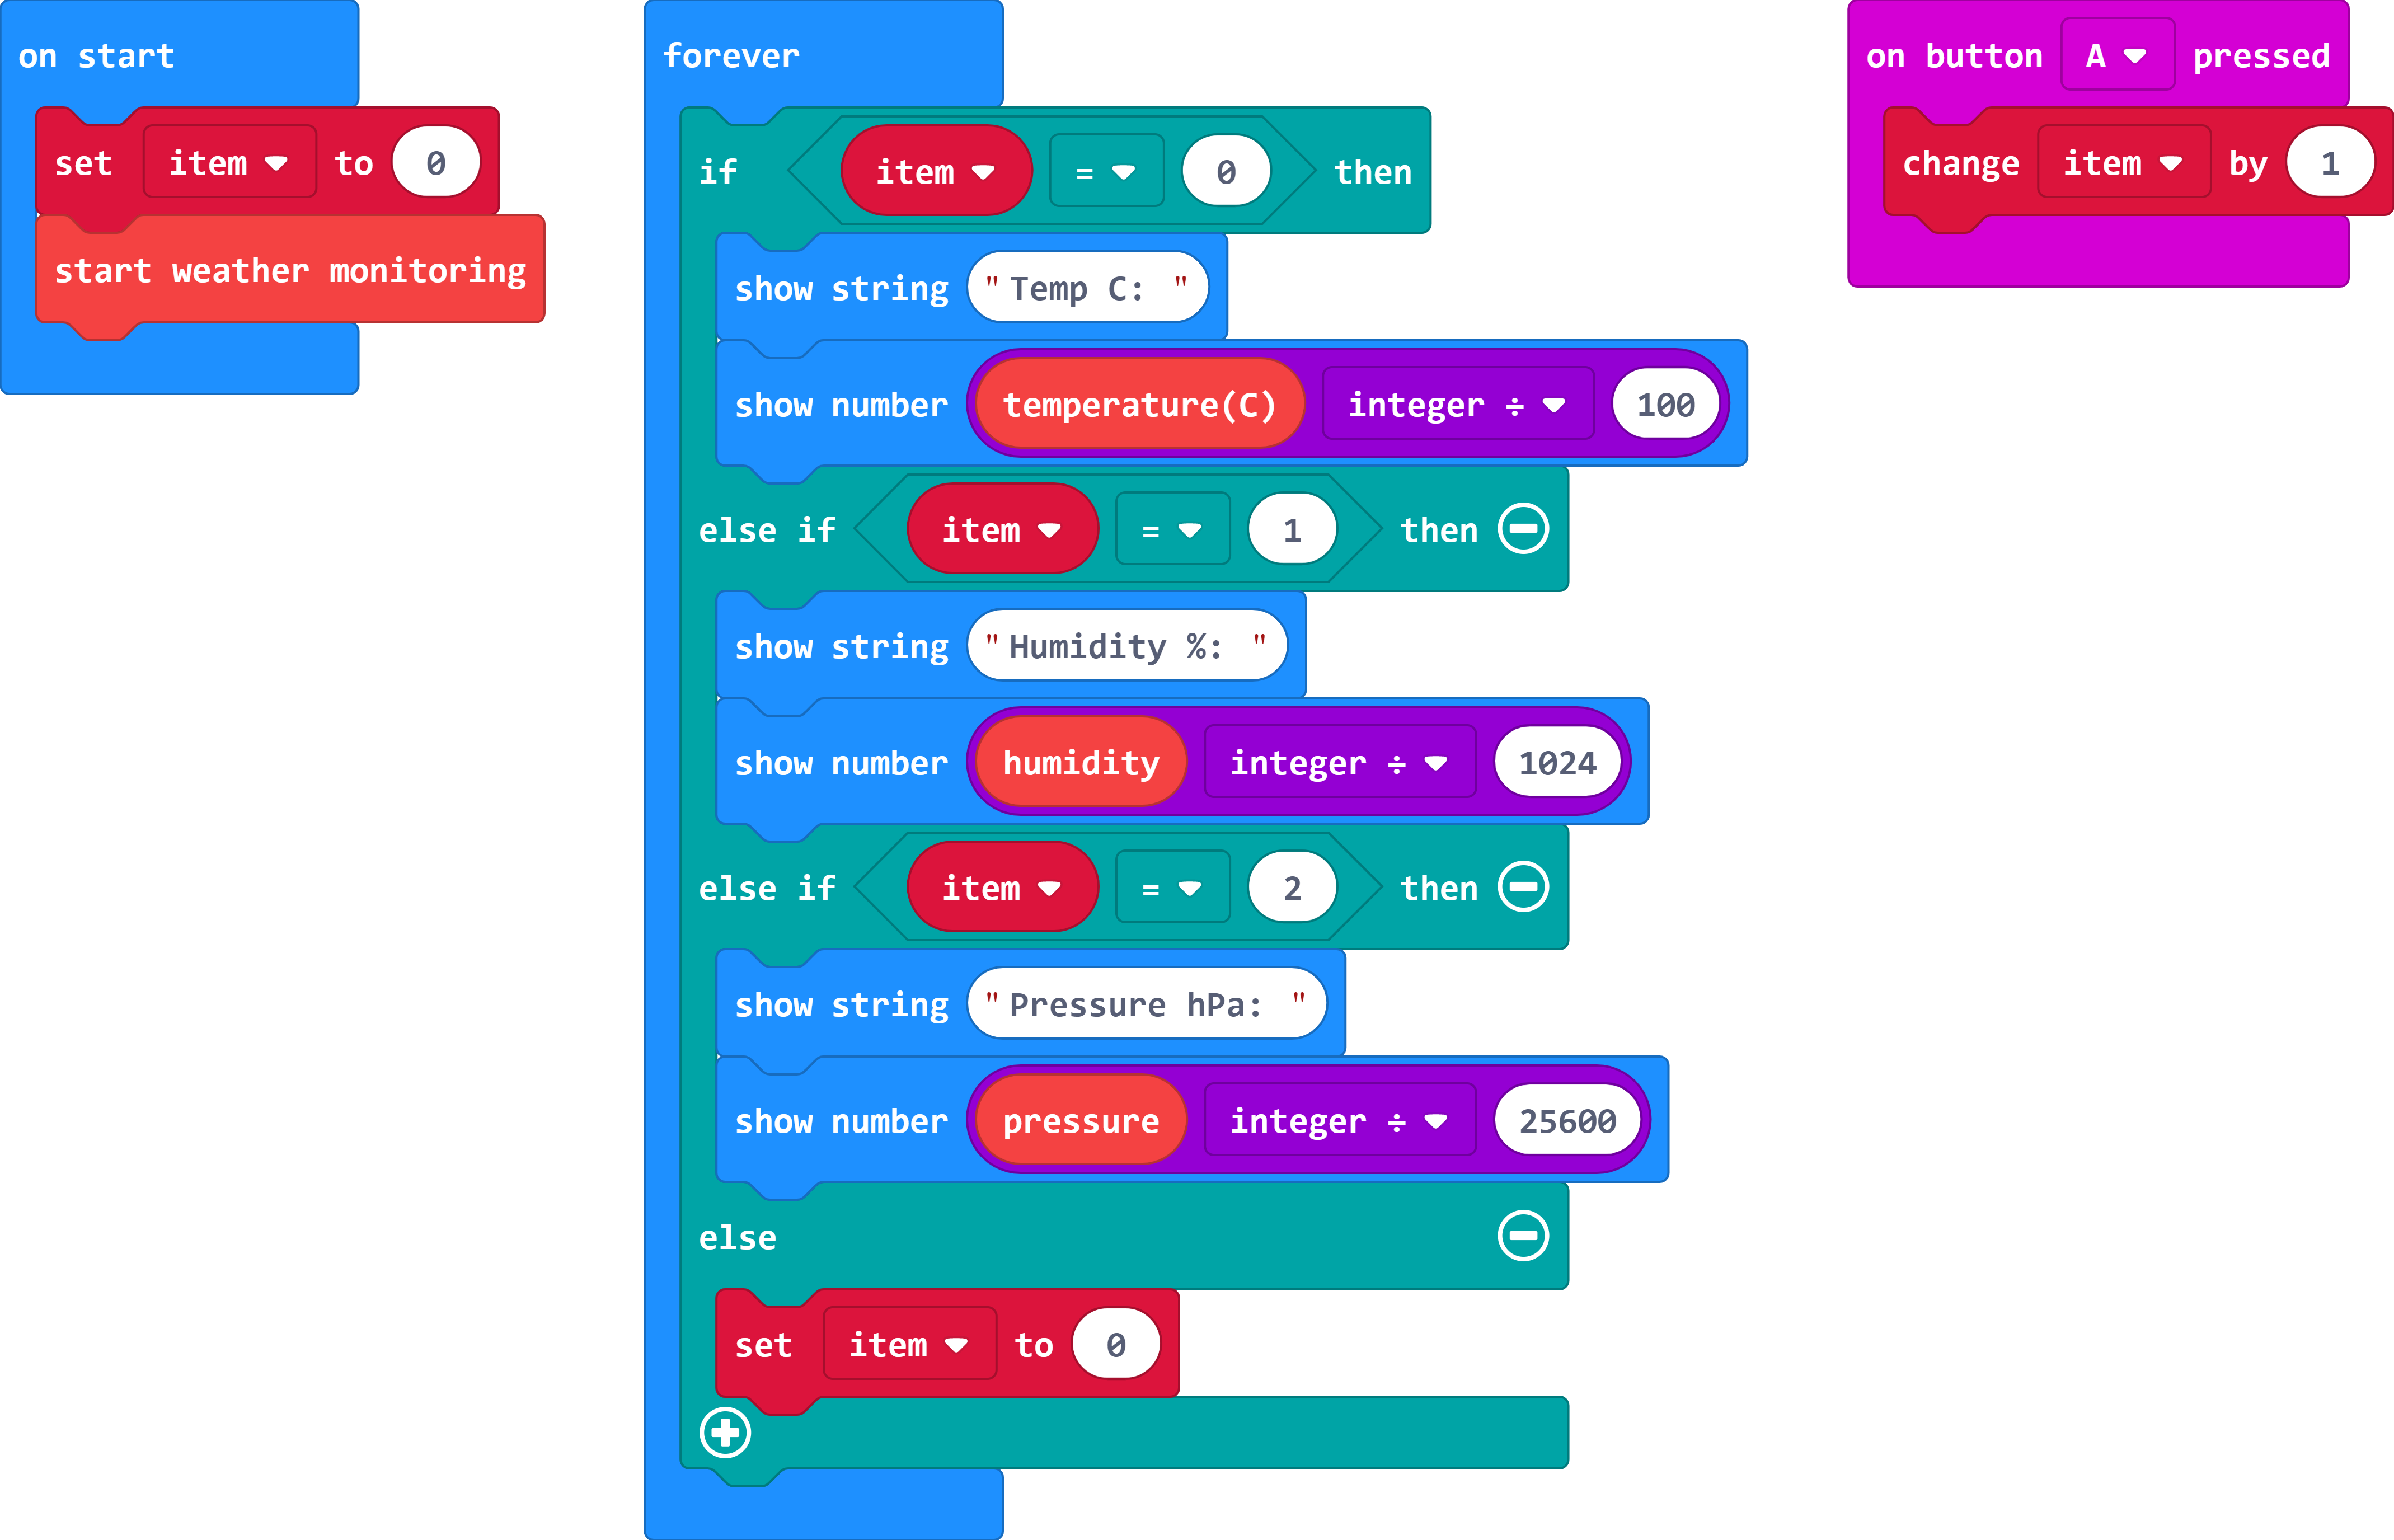
Start Weather Monitoring
When the script starts, we use this block to start or initiate the BME280 sensor and get it ready to take readings. Anytime you want to use the temperature, humidity, pressure or altitude blocks, you need to have this block in your on start block.
Set Item To
We use a variable called item to keep track of which data are being displayed on the LED array. If item is equal to 0, it shows the temperature; if 1, it shows the humidity; if 2, the pressure. If the variable goes over 2, we reset it to 0. We increment the variable by pressing the A button.
Temperature (°C)
This variable returns a number that you then have to divide by 100 to get the temperature in Celsius.
Humidity
This variable returns a number that you need to divide by 1,024 to get the relative humidity.
Pressure
This variable returns a number that you divide by 25,600 to get the atmospheric pressure in hPa.
Why All of the Math?
This is a good question! It all comes down to accuracy of the data that you receive. When the kit was initially released, MakeCode was not able to handle floating point numbers (numbers with decimal points). Which can be troublesome for getting really accurate readings from the BME280 with a single variable block. So, to as accurate of values as possible you have to do some math in the programming environment. We know, not fun! But, hey now you might pay attention in math class a bit more now. To prevent the output from displaying several decimal places on the LED array, we'll also used the integer divide block.
What You Should See
Once your code is loaded, you should start to see numbers scroll across the LED array on your micro:bit, beginning with the temperature in Celsius. If you press the left button on your micro:bit, the number will change to percent humidity; press it again, and it will be pressure. Pretty cool...well, hmmm...maybe warm?
Troubleshooting
weather:bit blocks not showing up --- Make sure you have a network connection and have added the extension to your MakeCode environment.
micro:bit not showing up --- Try unplugging the USB cable and plugging it back in. Also, be sure that you have the cable inserted all the way into your micro:bit.
atmospheric data seems odd --- Make sure that the BME280 is free from contact with sources of heat and/or moisture (for example, having your finger over the top of it).