MEMS Microphone Hookup Guide
 jenfoxbot
Arduino Software Example
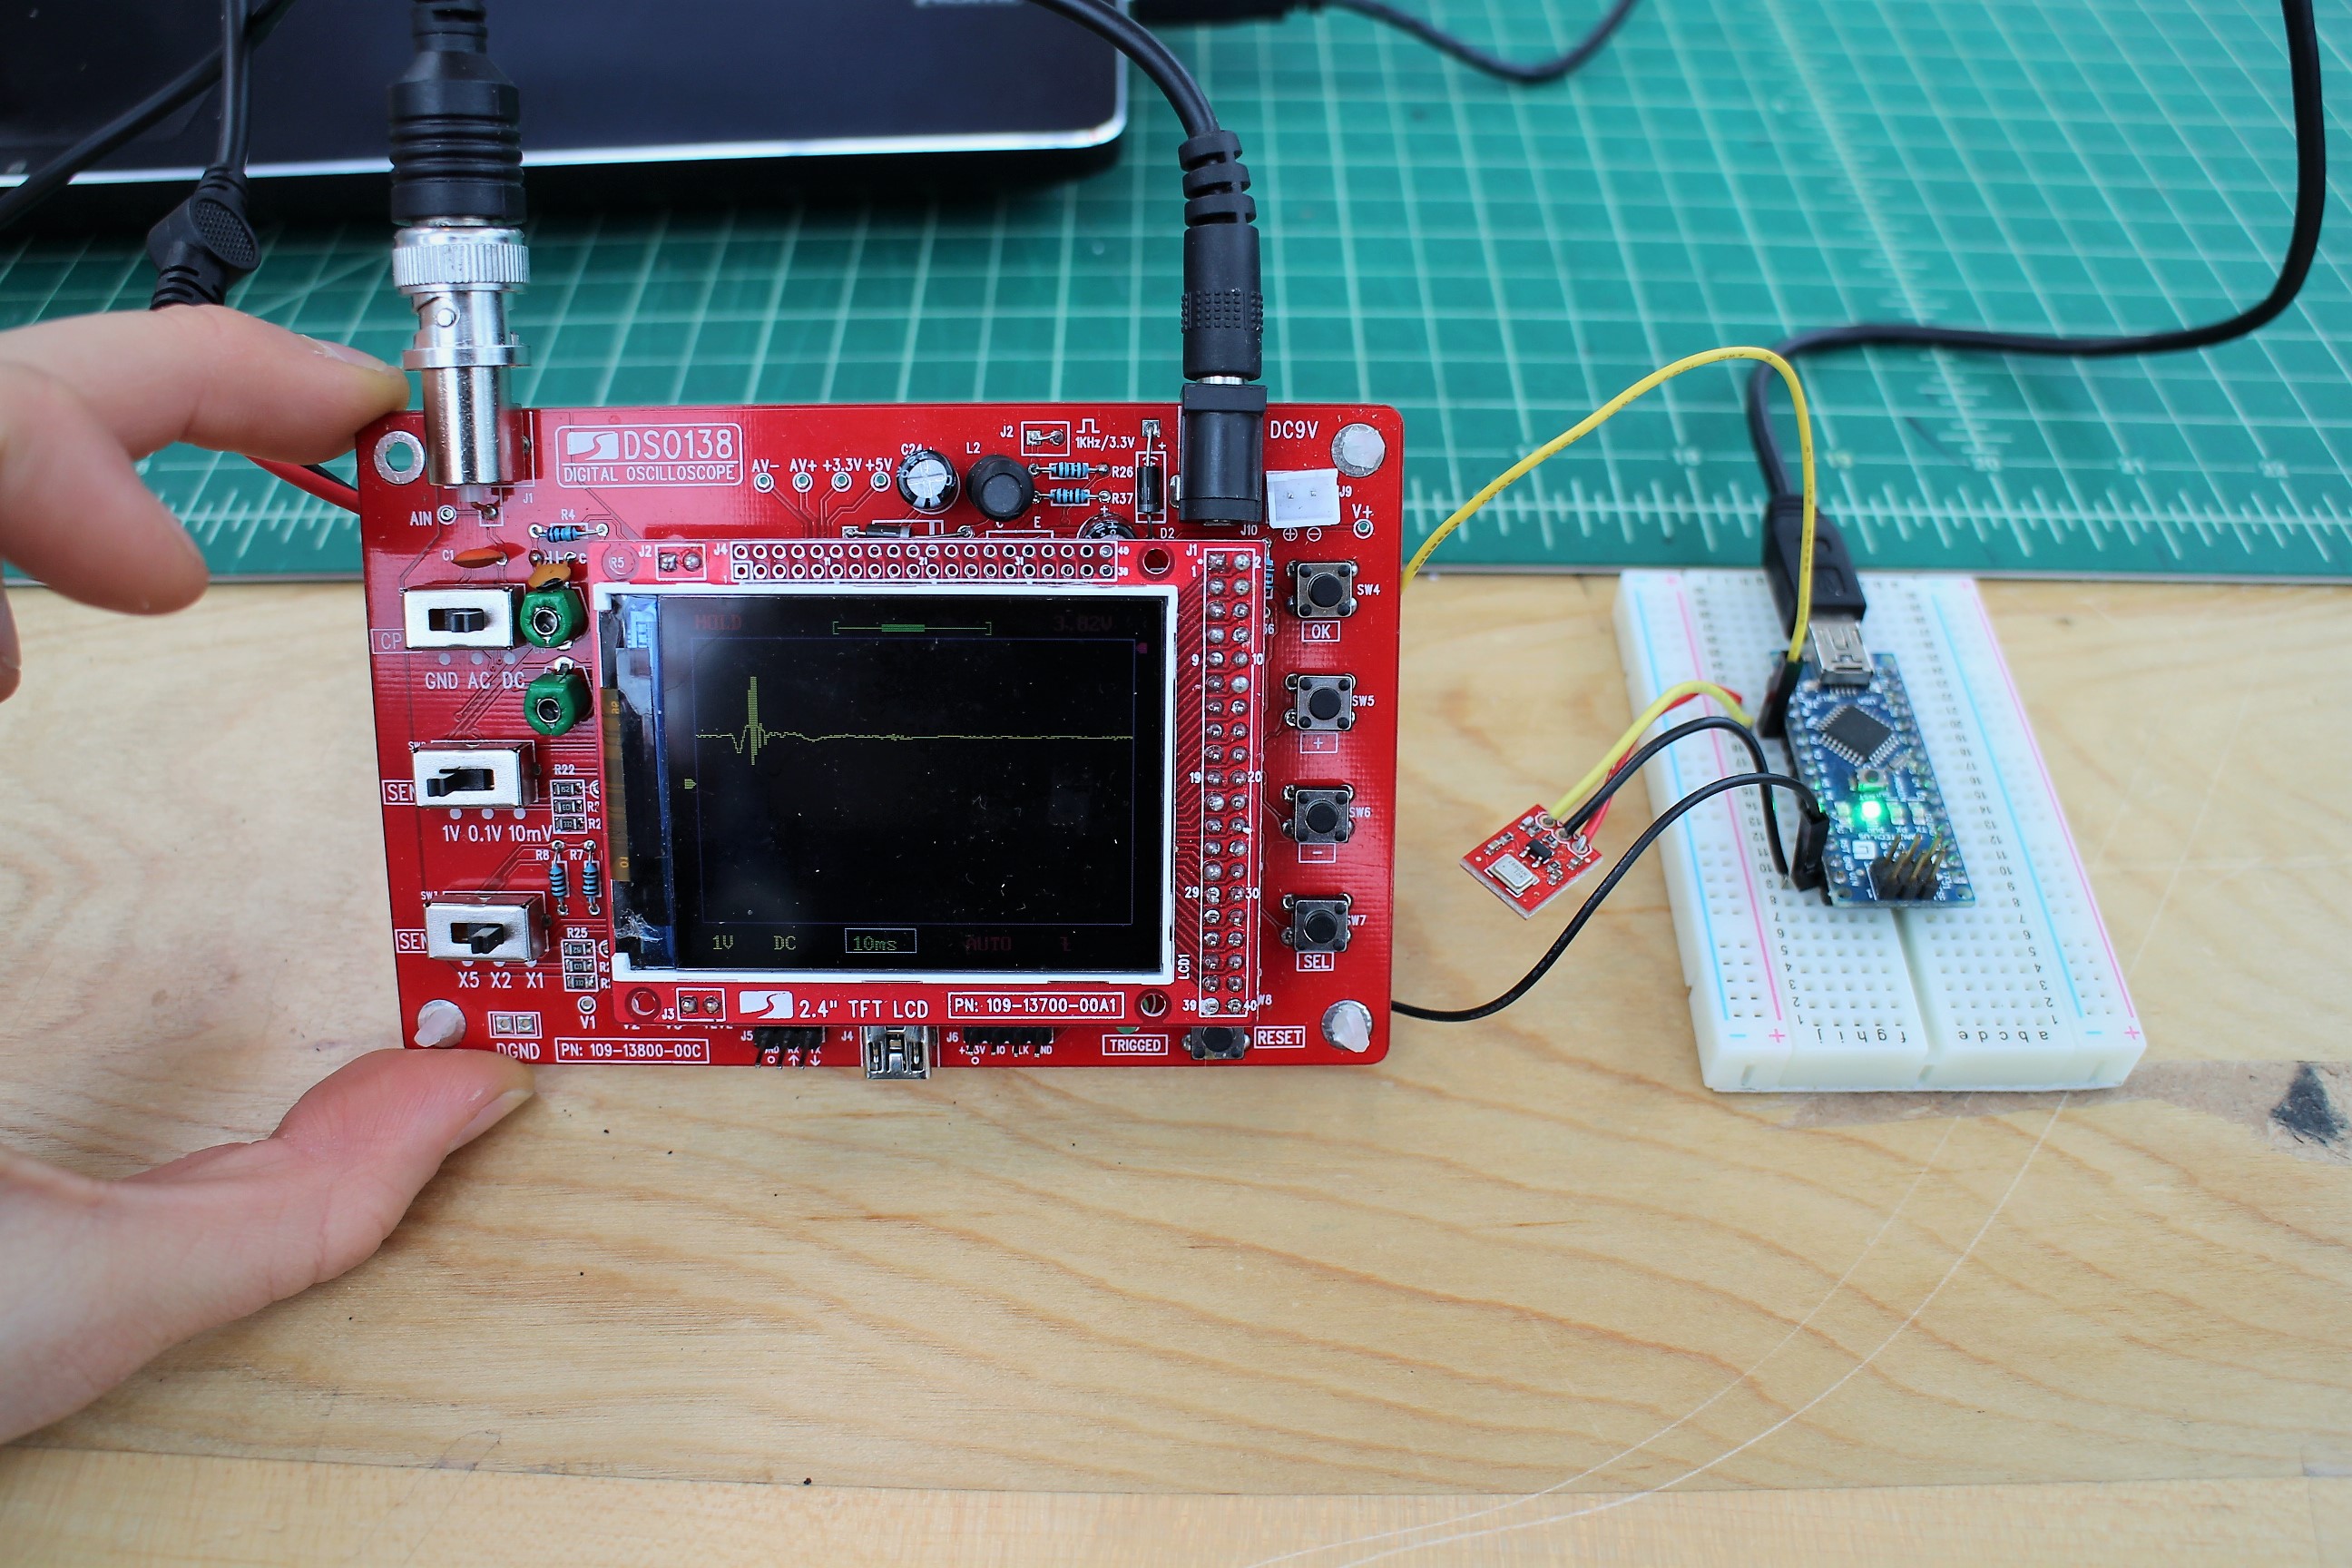
The ADMP401 signal output is a varying voltage. When all is quiet (shhhh), the AUD output will float at one-half the power supply voltage. For example, with a 3.3V power supply, the AUD output will be about 1.65V. In the photo below, the yellow marker on the left side of the oscilloscope screen marks the zero axis for the voltage (aka V = 0). The pulse is the AUD output of a finger snap close to the mic.
Converting ADC to Voltage
The microcontroller analog (ADC) input converts our audio signal into an integer. The range of possible ADC values depends on which microcontroller you are using. For an Arduino microcontroller with an ATmega328P, the analog resolution is 10-bits. This range is between 0 and 1023, so the resolution of our ADC measurement is 1024. To convert our analog measurement into a voltage, we use the following equation:

In our case, the ADC Resolution is 1024, and the System Voltage 3.3 V. We'll need to add this equation in our code to convert our ADC Reading into a voltage.
But Wait, What Are We Actually Measuring??
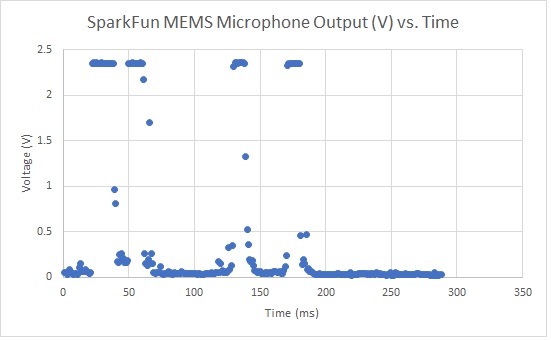
For many applications that deal with sound (which is a wave), we're mostly interested in the amplitude of the signal. In general, and for the sake of simplicity, a larger amplitude means a louder sound, and a smaller amplitude means a quieter sound (and the sound wave frequency roughly corresponds to pitch). Knowing the amplitude of our audio signal allows us to build a sound visualizer, a volume unit ("VU") meter, set a volume threshold trigger, and other cool and useful projects!
To find the audio signal amplitude, take a bunch of measurements in a small time frame (e.g. 50 ms, the lowest frequency a human can hear). Find the minimum and maximum readings in this time frame and subtract the two to get the peak-to-peak amplitude. We can leave it at that, or divide the peak-to-peak amplitude by a factor of two to get the wave amplitude. We can use the ADC integer value, or convert this into voltage as described above.
Example Code
/***************************
  Simple Example Sketch for the SparkFun MEMS Microphone Breakout Board

**************************/

// Connect the MEMS AUD output to the Arduino A0 pin
int mic = A0;

// Variable to hold analog values from mic
int micOut;

void setup() {
  Serial.begin(9600);

}

void loop() {
  // read the input on analog pin 0:
  micOut = analogRead(mic);

  // print out the value you read:
  Serial.println(micOut);

}Below is a simple example sketch to get you started with the MEMS microphone breakout board. You can find the code in the GitHub repo as well. The code, written for an Arduino microcontroller, includes a conversion equation from the ADC Reading to voltage, a function to find the audio signal peak-to-peak amplitude, and a simple VU Meter that outputs to the Arduino Serial Monitor. For a more visual output, you can also use the Serial Plotter.
Be sure to read the comments in the code to understand how it works and to adapt it to fit your needs. Select your Arduino board, COM port, and hit the upload button.
language:c
/***************************
 * Example Sketch for the SparkFun MEMS Microphone Breakout Board
 * Written by jenfoxbot <jenfoxbot@gmail.com>
 * Code is open-source, beer/coffee-ware license.
 */

// Connect the MEMS AUD output to the Arduino A0 pin
int mic = A0;

// Variables to find the peak-to-peak amplitude of AUD output
const int sampleTime = 50;
int micOut;

//previous VU value
int preValue = 0;

void setup() {
  Serial.begin(9600);
}

void loop() {
   int micOutput = findPTPAmp();
   VUMeter(micOutput);
}


// Find the Peak-to-Peak Amplitude Function
int findPTPAmp(){
// Time variables to find the peak-to-peak amplitude
   unsigned long startTime= millis();  // Start of sample window
   unsigned int PTPAmp = 0;

// Signal variables to find the peak-to-peak amplitude
   unsigned int maxAmp = 0;
   unsigned int minAmp = 1023;

// Find the max and min of the mic output within the 50 ms timeframe
   while(millis() - startTime < sampleTime)
   {
      micOut = analogRead(mic);
      if( micOut < 1023) //prevent erroneous readings
      {
        if (micOut > maxAmp)
        {
          maxAmp = micOut; //save only the max reading
        }
        else if (micOut < minAmp)
        {
          minAmp = micOut; //save only the min reading
        }
      }
   }

  PTPAmp = maxAmp - minAmp; // (max amp) - (min amp) = peak-to-peak amplitude
  double micOut_Volts = (PTPAmp * 3.3) / 1024; // Convert ADC into voltage

  //Uncomment this line for help debugging (be sure to also comment out the VUMeter function)
  //Serial.println(PTPAmp);

  //Return the PTP amplitude to use in the soundLevel function.
  // You can also return the micOut_Volts if you prefer to use the voltage level.
  return PTPAmp;
}

// Volume Unit Meter function: map the PTP amplitude to a volume unit between 0 and 10.
int VUMeter(int micAmp){

  // Map the mic peak-to-peak amplitude to a volume unit between 0 and 10.
   // Amplitude is used instead of voltage to give a larger (and more accurate) range for the map function.
   // This is just one way to do this -- test out different approaches!
  int fill = map(micAmp, 23, 750, 0, 10);

  // Only print the volume unit value if it changes from previous value
  while(fill != preValue)
  {
    Serial.println(fill);
    preValue = fill;
  }
}