LiPo Fuel Gauge (MAX1704X) Hookup Guide
 bboyho
Example 1: Simple Serial
In this example, we will be checking a single cell LiPo battery's voltage and the state of charge using the MAX17043. The output will be sent to the Serial Monitor.
Hardware Hookup
For this example we will use the following parts from the wishlist.
- 1x Reversible USB A to C Cable - 0.8m
- 1x SparkFun RedBoard Artemis Nano
- 1x Break Away Headers - Straight
- 1x SparkFun LiPo Fuel Gauge - MAX17043
- 1x Flexible Qwiic Cable - Female Jumper (4-pin)
- 1x LiPo Battery
- 1x JST Jumper 2 Wire Assembly
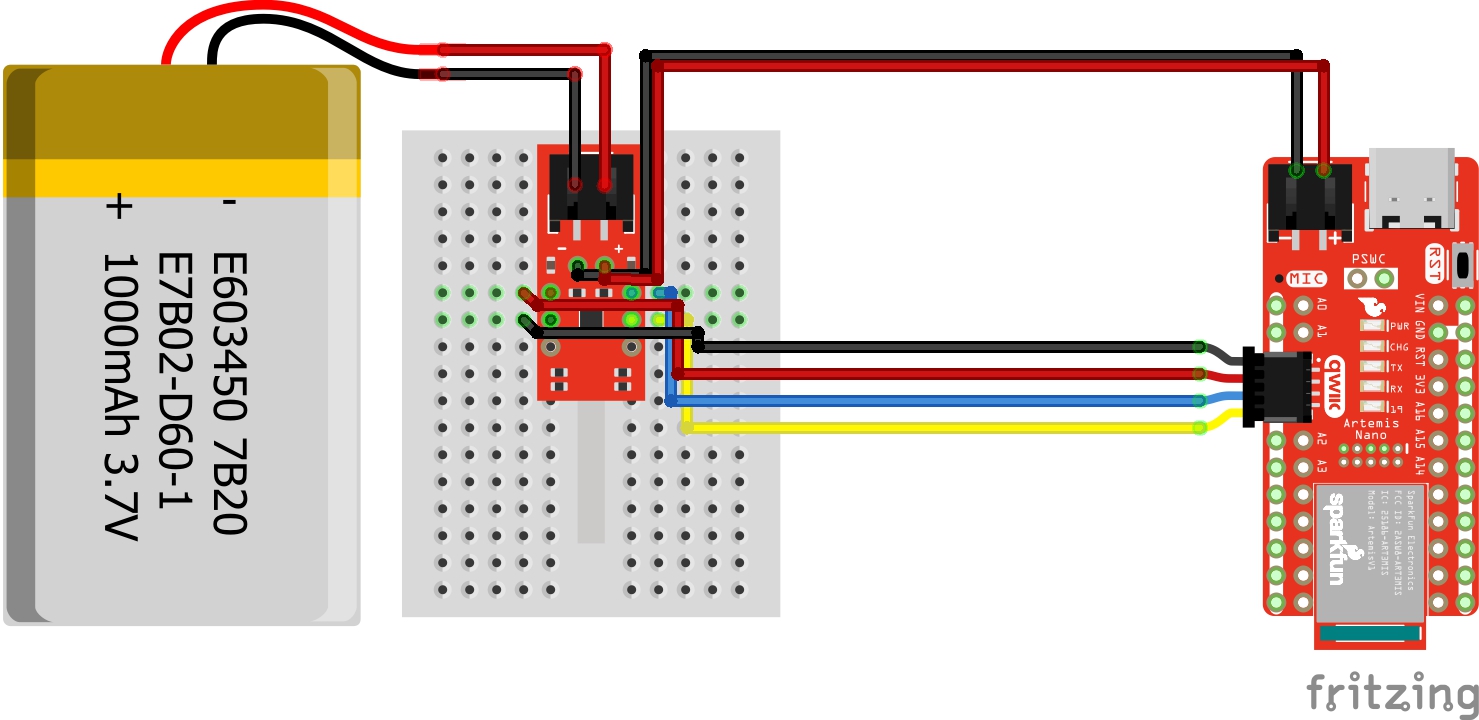
Solder and connect the circuit based on the following diagram as shown earlier. Instead of inserting the LiPo Fuel Gauge in a mini breadboard, you could connect the flexible Qwiic cable with female jumpers to the male break away headers that were soldered on the breakout board. For a more permanent connection, you could also cut the female jumpers, strip the Qwiic cable wires, and solder directly to the breakout board.
Upload Code
From the menu, select the following: File > Examples > SparkFun_MAX1704x_Fuel_Gauge_Arduino_Library > Example1_Simple. If you have not already, select your Board (in this case the RedBoard Artemis Nano), and associated COM port (in this case, COM27). Then hit the upload button.

SFE_MAX1704X lipo; by adding a single line comment (i.e. //. Then remove the single line comment line comment on the respective LiPo Fuel Gauge that you are using.
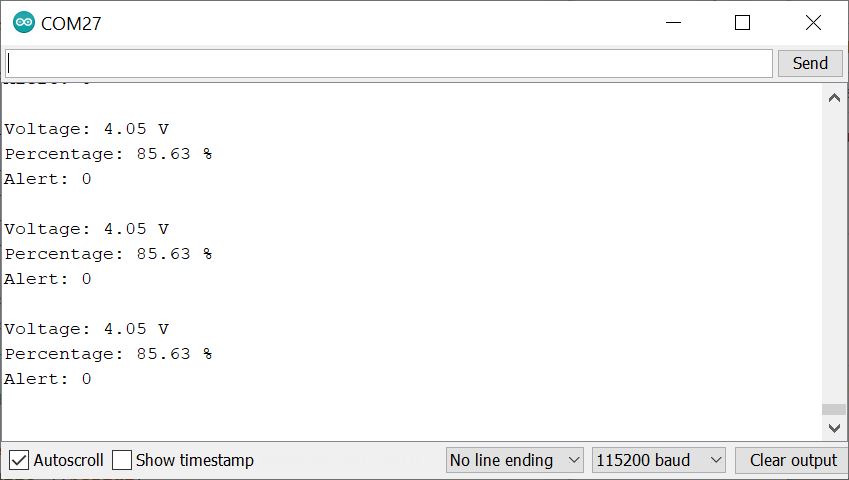
Open the Arduino Serial Monitor and set it to 115200 baud to view the serial output. You should see the voltage, battery percent, and alert flag. In this case, the single cell LiPo battery that was connected to the IC was almost fully charged and at about 4.20V. Since the battery was higher than the threshold that was set, the alert flag was not triggered and remained low.
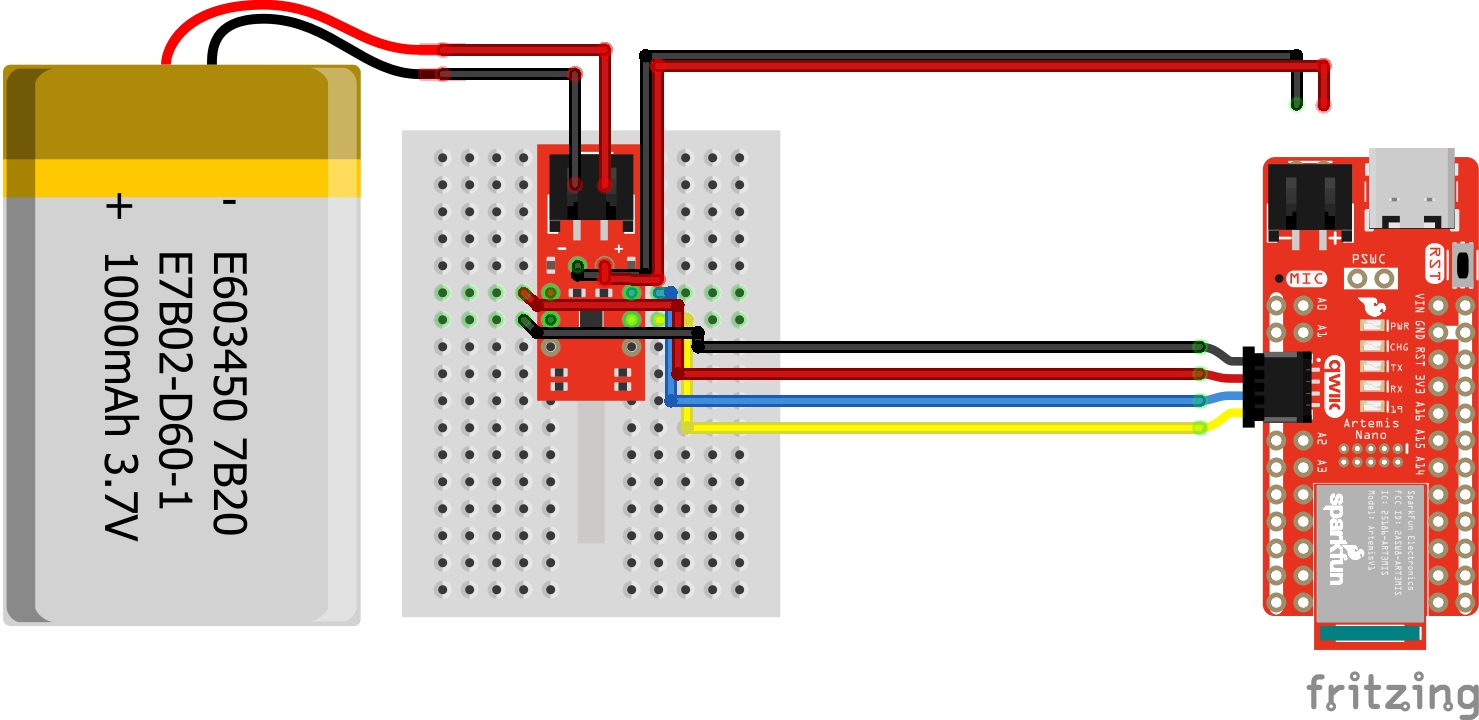
Depending on how your battery is connected to your system, the reading can be a bit misleading. When there is a dedicated LiPo battery charging circuit actively charging the single cell LiPo battery and the MAX1704X initially reads the battery, the values can be higher. Try disconnecting the LiPo battery from the microcontroller's VBATT pin and hitting the reset button on your microcontroller to restart the code. The image below shows both wires disconnected from the RedBoard Artemis Nano's JST connector since we would be using a 2-pin JST jumper wire.
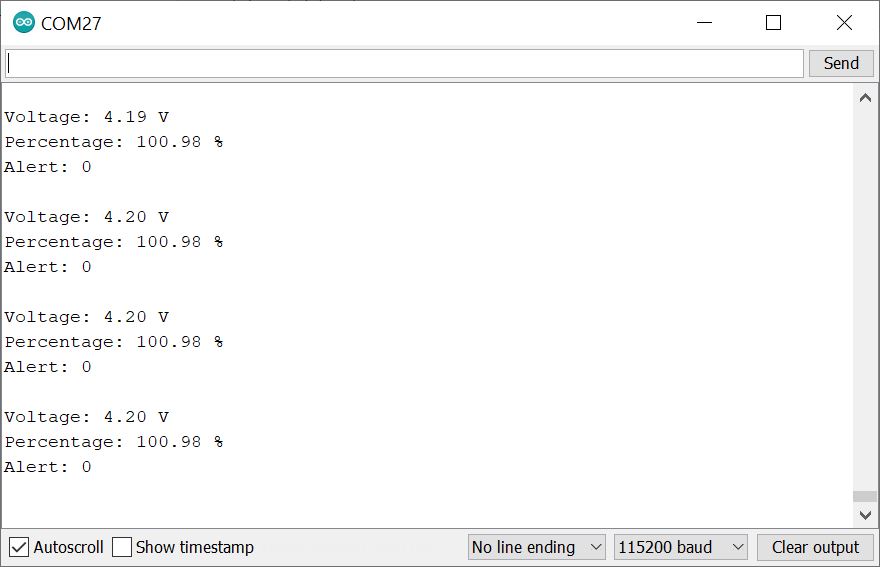
By reopening the Arduino Serial Monitor, you may see a different reading reflecting the current state of the single cell LiPo battery rather than the output voltage of the charge IC. The image below shows actual voltage and remaining charge. You may want to add a display and write additional code as an alternative to connecting to a computer's serial terminal.