How to Load MicroPython on a Microcontroller Board
 Shawn Hymel
pyboard
The pyboard is the official board of MicroPython, and it comes packed with a powerful ARM Cortex-M4 microcontroller.
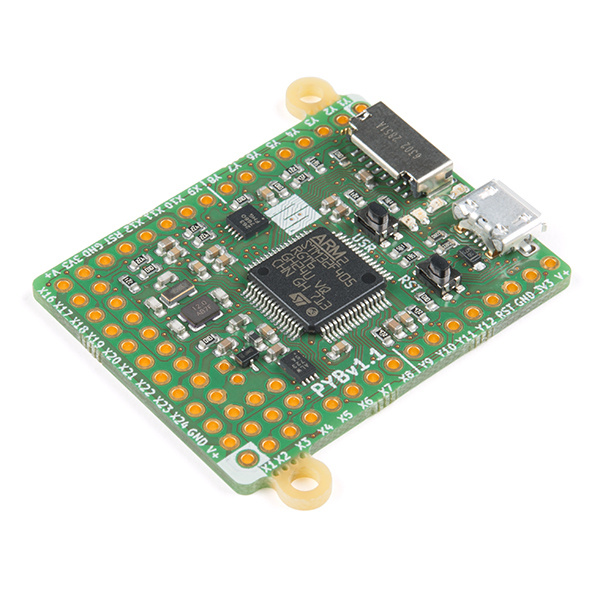
MicroPython pyboard v1.1
DEV-14412By default, the pyboard comes pre-loaded with the MicroPython interpreter, which means you can get started writing code for it as soon as you pull it out of its adorable case. The basic steps are:
- Plug the pyboard into your computer, and it should enumerate as a USB mass storage device.
- Navigate (e.g. using File Explorer or Finder) to the pyboard drive (likely called "PYBFLASH").
- Modify main.py with your code and save the file (overwrite the original main.py in the pyboard drive).
- Eject (unmount) the drive from your operating system (OS).
- Press the pyboard's reset (RST) button to start running your program.
Pyboard Hookup Guide
Update Firmware
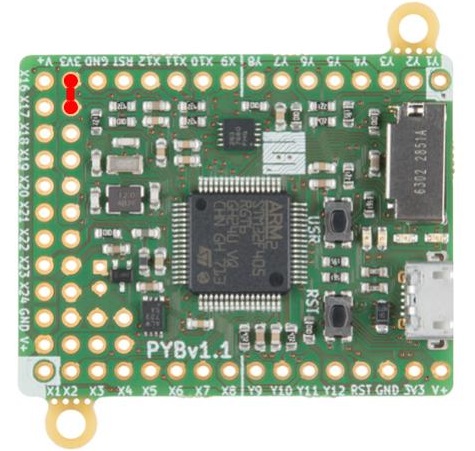
If you want to update the pyboard's interpreter, you will need to perform some extra steps. To begin, make sure power is disconnected from the pyboard. Use a piece of wire or a jumper to connect the P1 (DFU) and 3V3 pins together (connection is in red below).
Connect the pyboard to an available USB port on your computer. Next, download the firmware file:
- Find the version of your pyboard (e.g. PYBv1.0 or PYBv1.1), which should be written in white silkscreen on the board.
- Download the latest .dfu firmware file for your board from the MicroPython downloads page.
- Make sure you select a firmware from the section that lists your board version (e.g. PYBv1.1).
- You can see that there are different firmware versions under each pyboard version that have been compiled with different features (floating point, threading, etc.). When in doubt, download the standard firmware, as that is what the pyboard ships with.
With the firmware file downloaded, we will use dfu-util to flash the board with the new firmware. Installing dfu-util differs among operating systems (OS), so see below for your particular OS:
Windows
Windows makes it difficult to install non-signed drivers, so we need to use a special program to do that for us. Download and run the Zadig utility from this site.
Make sure that your pyboard is plugged in and in DFU mode (e.g. jumper P1 to 3V3). In Zadig, select Options > List All Devices. From the drop-down menu, select STM32 BOOTLOADER. It should recommend replacing the STTub30 driver with WinUSB, which is what we want. If you do not see this, select WinUSB as the replacement driver from the driver menu on the right.
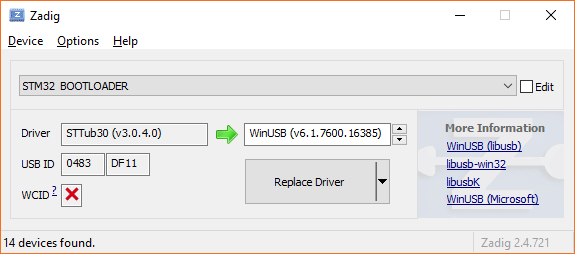
Click Replace Driver and you should get a pop-up telling you it was installed successfully. Close out of Zadig.
Next, we'll need to use dfu-util to upload the firmware. Head to the dfu-util site and download the latest release, which is 0.9 at the time of this writing (Aug. 2018). Alternatively, you can download dfu-util v0.9 directly by clicking on this link.
Unzip it, open a command prompt, and navigate to the unzipped folder. For example, if you saved and unzipped the file in your Downloads directory, that might be:
language:Batchfile
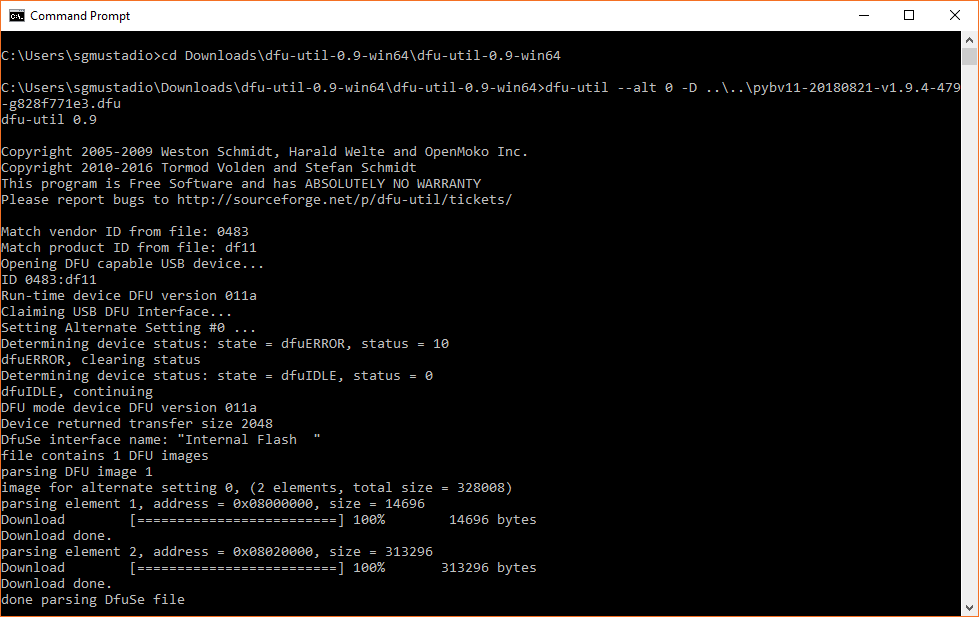
cd Downloads\dfu-util-0.9-win64\dfu-util-0.9-win64
To upload the firmware to the pyboard, run the following line, replacing \..\..\pybv11-20180821-v1.9.4-479-g828f771e3.dfu):
language:Batchfile
dfu-util --alt 0 -D <path to .dfu>
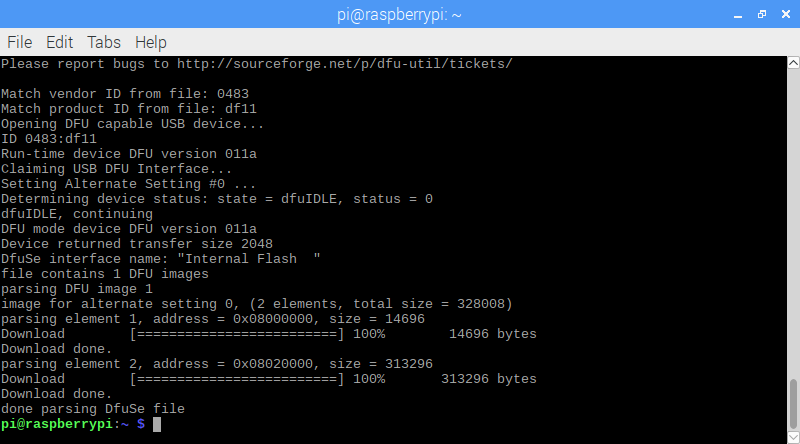
If the firmware was successfully uploaded, you should get a message that ends with done parsing DfuSe file.
macOS and Linux
If you are on macOS, you will need to first install Homebrew. From there, install dfu-util with:
language:shell
brew install dfu-util
If you are on a Debian-based Linux distribution, you can install dfu-util with:
language:shell
sudo apt-get install dfu-util
If neither of those options work, head to the dfu-util homepage to download the package, binaries, or source code.
With the pyboard plugged in and in DFU mode (e.g. jumper P1 to 3V3), run the following command, replacing \~/Downloads/pybv11-20180821-v1.9.4-479-g828f771e3.dfu.
language:shell
sudo dfu-util --alt 0 -D <path to .dfu>
If the firmware was successfully uploaded, you should get a message that ends with done parsing DfuSe file.
If you are having problems uploading the firmware or have multiple DFU devices plugged into your host machine, see the instructions on the pyboard GitHub repository for more information.
Test It
Even though the pyboard enumerates as a mass storage device (which allows you to modify main.py in its flash memory to write new programs), you can interact with REPL to test some basic commands. REPL stands for read, evaluate, print, loop, and it is essentially a simple, interactive shell that allows you to enter and execute one command at a time.
To communicate REPL, we will use the virtual serial port on our computer. If you are using macOS or Linux, the drivers should be already installed for you.
On macOS, enter the command:
language:shell
ls -l /dev/tty.usbmodem*
Or on Linux, enter the command:
language:shell
ls -l /dev/ttyACM*
You should see a statement showing the existence of the device file associated with pyboard. Write down or copy the full device file name.
On Windows, the story is a little different. Plug your pyboard into an available USB port. Open the Device Manager, and look for Ports (COM & LPT). Expand it, and you should see your pyboard listed. If you see "USB Serial Device," then the driver is installed and working. If you see a yellow exclamation mark (!), then you will need to install the driver manually. Right-click on the device and select Properties and click Install Driver.
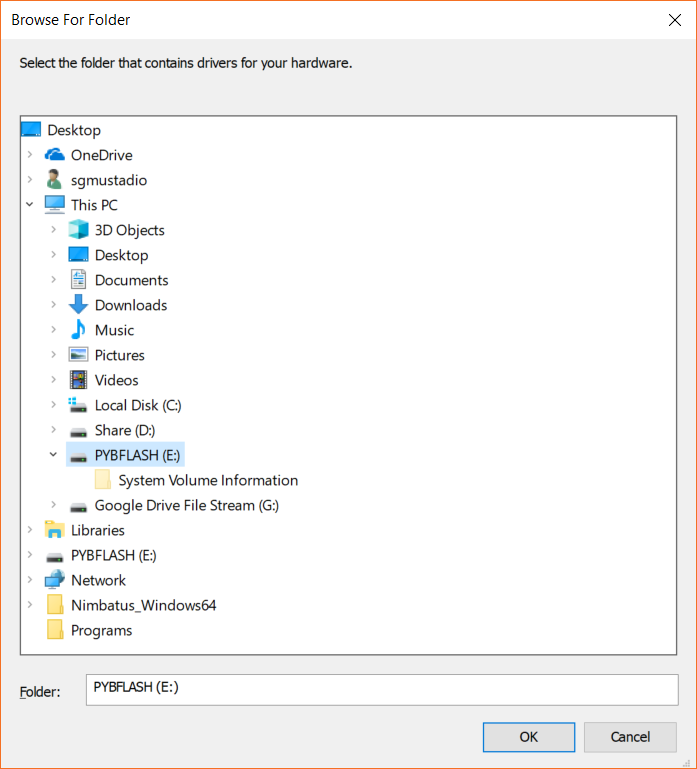
In the pop-up window, select Browse my computer for driver software. Click Browse to open a file explorer, and select the PYFLASH drive. Unless you deleted the flash memory of the pyboard, it should come with the driver .inf file stored in its flash.
Click OK and Next, and the driver should be installed for you. When it's done, you should see USB Serial Device listed under Ports (COM & LPT). You will also want to write down or copy the COM name (e.g. COM6). If you need further help with installing the driver on Windows, see this document.

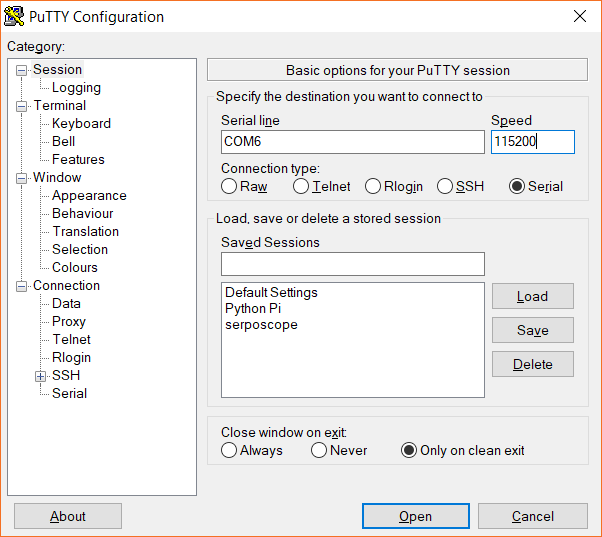
Regardless of your OS, download and install a serial terminal program for your operating system. Open it, and start a new serial connection with the COM name or device file location and a baud rate of 115200.
Press the enter key to get a REPL command prompt (>>>). Enter the following commands:
language:python
import pyb
led = pyb.LED(1)
led.on()
This should turn on one of the LEDs on the pyboard.

Enter the following command to turn it off:
language:python
led.off()
If you are able to control the LED, it means that MicroPython is up and running on your pyboard!