How to Load MicroPython on a Microcontroller Board
Introduction
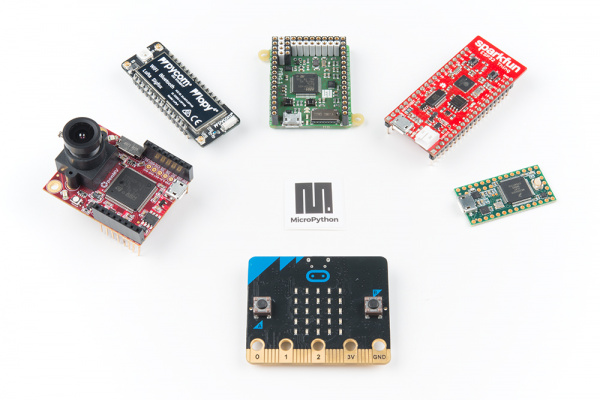
MicroPython is a subset of the Python 3 language that has been pared down to run efficiently on several microcontrollers. If you are familiar with Python or looking for a quick way to write code for a microcontroller (that isn't C/C++, Arduino, or assembly), MicroPython is a good option.
Some development boards, like the pyboard and micro:bit, are capable of running MicroPython out of the box. Others, like the Teensy or ESP32, will require that you load the MicroPython interpreter onto the board first before it will run your MicroPython code.
To use this guide, find your development board under the table of contents, navigate to that page, and follow the instructions to get MicroPython working on it.
pyboard
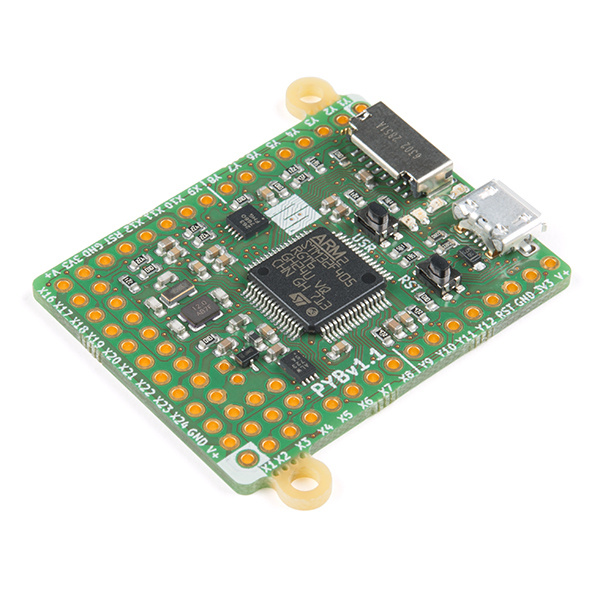
The pyboard is the official board of MicroPython, and it comes packed with a powerful ARM Cortex-M4 microcontroller.
MicroPython pyboard v1.1
DEV-14412By default, the pyboard comes pre-loaded with the MicroPython interpreter, which means you can get started writing code for it as soon as you pull it out of its adorable case. The basic steps are:
- Plug the pyboard into your computer, and it should enumerate as a USB mass storage device.
- Navigate (e.g. using File Explorer or Finder) to the pyboard drive (likely called "PYBFLASH").
- Modify main.py with your code and save the file (overwrite the original main.py in the pyboard drive).
- Eject (unmount) the drive from your operating system (OS).
- Press the pyboard's reset (RST) button to start running your program.
Pyboard Hookup Guide
Update Firmware
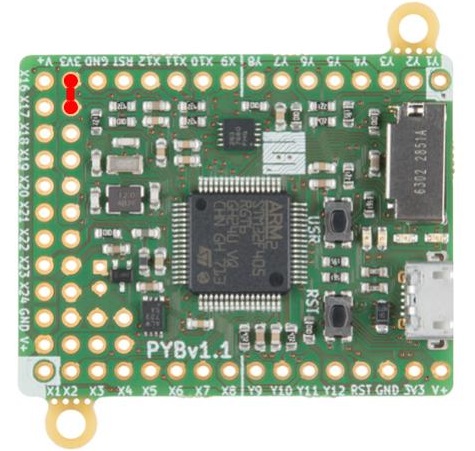
If you want to update the pyboard's interpreter, you will need to perform some extra steps. To begin, make sure power is disconnected from the pyboard. Use a piece of wire or a jumper to connect the P1 (DFU) and 3V3 pins together (connection is in red below).
Connect the pyboard to an available USB port on your computer. Next, download the firmware file:
- Find the version of your pyboard (e.g. PYBv1.0 or PYBv1.1), which should be written in white silkscreen on the board.
- Download the latest .dfu firmware file for your board from the MicroPython downloads page.
- Make sure you select a firmware from the section that lists your board version (e.g. PYBv1.1).
- You can see that there are different firmware versions under each pyboard version that have been compiled with different features (floating point, threading, etc.). When in doubt, download the standard firmware, as that is what the pyboard ships with.
With the firmware file downloaded, we will use dfu-util to flash the board with the new firmware. Installing dfu-util differs among operating systems (OS), so see below for your particular OS:
Windows
Windows makes it difficult to install non-signed drivers, so we need to use a special program to do that for us. Download and run the Zadig utility from this site.
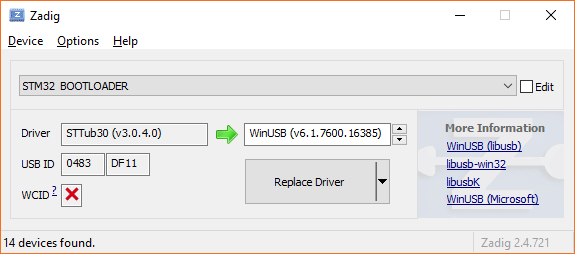
Make sure that your pyboard is plugged in and in DFU mode (e.g. jumper P1 to 3V3). In Zadig, select Options > List All Devices. From the drop-down menu, select STM32 BOOTLOADER. It should recommend replacing the STTub30 driver with WinUSB, which is what we want. If you do not see this, select WinUSB as the replacement driver from the driver menu on the right.
Click Replace Driver and you should get a pop-up telling you it was installed successfully. Close out of Zadig.
Next, we'll need to use dfu-util to upload the firmware. Head to the dfu-util site and download the latest release, which is 0.9 at the time of this writing (Aug. 2018). Alternatively, you can download dfu-util v0.9 directly by clicking on this link.
Unzip it, open a command prompt, and navigate to the unzipped folder. For example, if you saved and unzipped the file in your Downloads directory, that might be:
language:Batchfile
cd Downloads\dfu-util-0.9-win64\dfu-util-0.9-win64
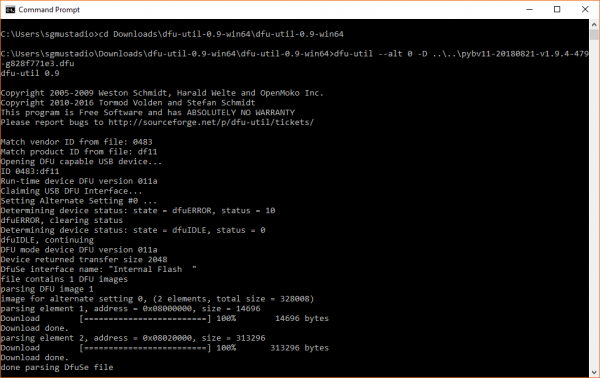
To upload the firmware to the pyboard, run the following line, replacing \..\..\pybv11-20180821-v1.9.4-479-g828f771e3.dfu):
language:Batchfile
dfu-util --alt 0 -D <path to .dfu>
If the firmware was successfully uploaded, you should get a message that ends with done parsing DfuSe file.
macOS and Linux
If you are on macOS, you will need to first install Homebrew. From there, install dfu-util with:
language:shell
brew install dfu-util
If you are on a Debian-based Linux distribution, you can install dfu-util with:
language:shell
sudo apt-get install dfu-util
If neither of those options work, head to the dfu-util homepage to download the package, binaries, or source code.
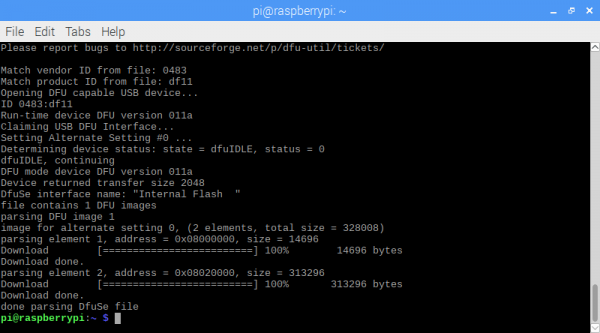
With the pyboard plugged in and in DFU mode (e.g. jumper P1 to 3V3), run the following command, replacing \~/Downloads/pybv11-20180821-v1.9.4-479-g828f771e3.dfu.
language:shell
sudo dfu-util --alt 0 -D <path to .dfu>
If the firmware was successfully uploaded, you should get a message that ends with done parsing DfuSe file.
If you are having problems uploading the firmware or have multiple DFU devices plugged into your host machine, see the instructions on the pyboard GitHub repository for more information.
Test It
Even though the pyboard enumerates as a mass storage device (which allows you to modify main.py in its flash memory to write new programs), you can interact with REPL to test some basic commands. REPL stands for read, evaluate, print, loop, and it is essentially a simple, interactive shell that allows you to enter and execute one command at a time.
To communicate REPL, we will use the virtual serial port on our computer. If you are using macOS or Linux, the drivers should be already installed for you.
On macOS, enter the command:
language:shell
ls -l /dev/tty.usbmodem*
Or on Linux, enter the command:
language:shell
ls -l /dev/ttyACM*
You should see a statement showing the existence of the device file associated with pyboard. Write down or copy the full device file name.
On Windows, the story is a little different. Plug your pyboard into an available USB port. Open the Device Manager, and look for Ports (COM & LPT). Expand it, and you should see your pyboard listed. If you see "USB Serial Device," then the driver is installed and working. If you see a yellow exclamation mark (!), then you will need to install the driver manually. Right-click on the device and select Properties and click Install Driver.
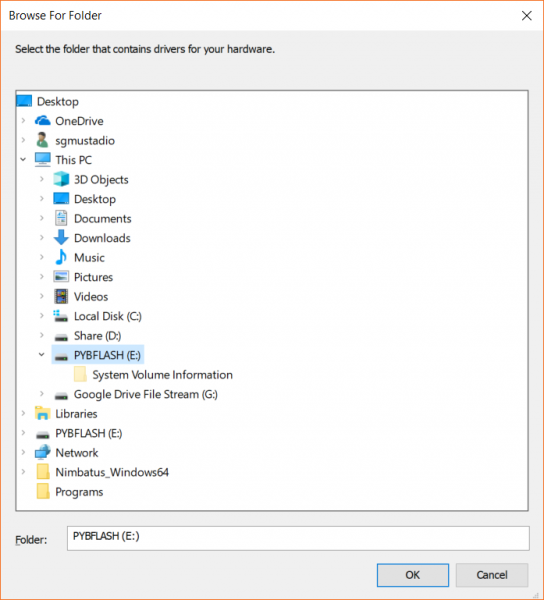
In the pop-up window, select Browse my computer for driver software. Click Browse to open a file explorer, and select the PYFLASH drive. Unless you deleted the flash memory of the pyboard, it should come with the driver .inf file stored in its flash.
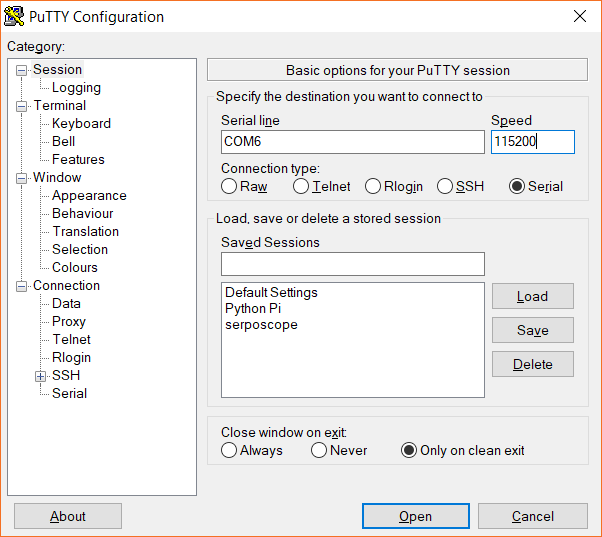
Click OK and Next, and the driver should be installed for you. When it's done, you should see USB Serial Device listed under Ports (COM & LPT). You will also want to write down or copy the COM name (e.g. COM6). If you need further help with installing the driver on Windows, see this document.
Regardless of your OS, download and install a serial terminal program for your operating system. Open it, and start a new serial connection with the COM name or device file location and a baud rate of 115200.
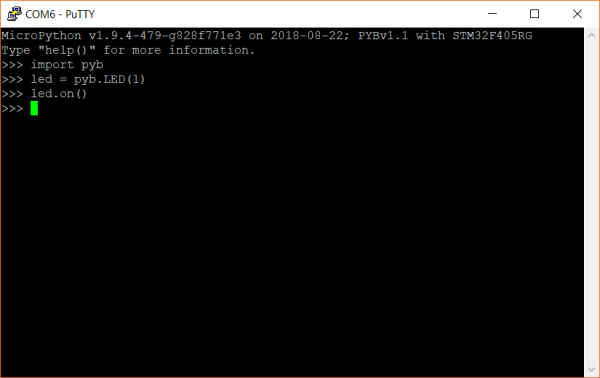
Press the enter key to get a REPL command prompt (>>>). Enter the following commands:
language:python
import pyb
led = pyb.LED(1)
led.on()
This should turn on one of the LEDs on the pyboard.
Enter the following command to turn it off:
language:python
led.off()
If you are able to control the LED, it means that MicroPython is up and running on your pyboard!
ESP32 Thing
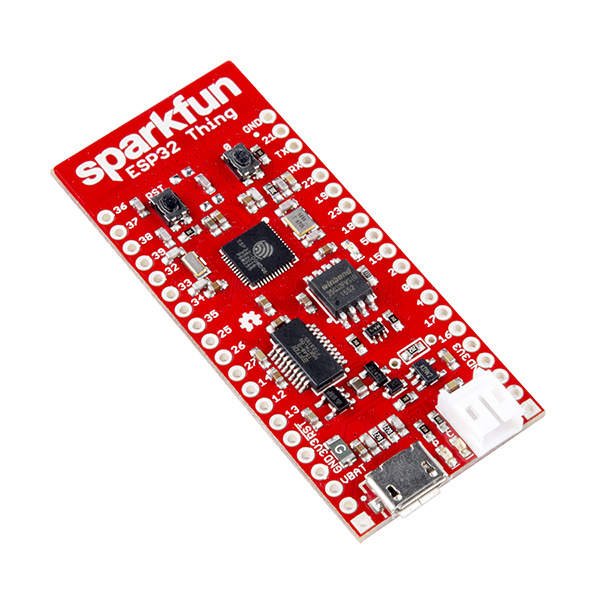
The SparkFun ESP32 Thing is based around Espressif's powerful ESP32 chip. It includes onboard WiFi, making it a perfect endpoint platform for Internet of Things (IoT) products and projects.
By default, the ESP32 Thing comes with the Arduino bootloader pre-installed. To get it to work with MicroPython, we will need to perform some extra steps.
Install FTDI Drivers
To communicate with the ESP32, the Thing board has an FTDI FT231x USB-to-Serial chip. Most versions of Linux and macOS come with the drivers necessary to talk to this chip. Windows users will need to install special drivers. If you need to install the drivers, refer to our How to Install FTDI Drivers tutorial.
To check if your driver is working, plug in your ESP32 Thing board into an available USB port (and make sure no other development boards or USB-to-Serial boards are plugged in).
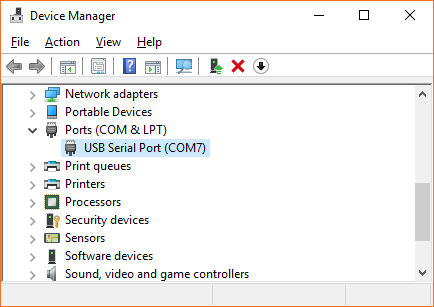
On Windows, open up the Device Manager, and look for the Ports category. Expand it, and if you see something labeled USB Serial Port, it means your FTDI driver is working properly.
On macOS, enter the command:
language:sh
ls -l /dev/tty.usb*
Or on Linux, enter the command:
language:sh
ls -l /dev/ttyUSB0
You should see a statement showing the existence of the /dev/tty.usbserial (or /dev/ttyUSB0) file. If you see "No such file or directory," that means the driver was not installed. If you run into any issues with drivers in Linux or macOS, refer to the FTDI VCP drivers page for more information.
Download the Latest MicroPython Firmware
Head to the MicroPython downloads page and download the latest "firmware for ESP32 boards." You will want the .bin file listed under standard firmware.
Update: This information appears to be outdated as the layout of the MicroPython website has changed. It has been suggested that users, now, use one of the "GENERIC: esp32-"blah-blah".bin" files listed under "Firmware built with ESP-IDF...".
(*As a heads up, we are not in control of the MicroPython webiste, so future changes may occur. Please, adapt as necessary for those changes.)
Install Python
To install MicroPython on the ESP32, we need to install full Python on our host machine. Weird, right? As it turns out, the esptool is a Python script that we'll run to upload the MicroPython interpreter to the ESP32.
Head to python.org and download the latest Python for your operating system. The esptool reportedly works with Python 2.7 and Python 3.4 (or newer). Follow the directions to install Python on your computer.
Install esptool
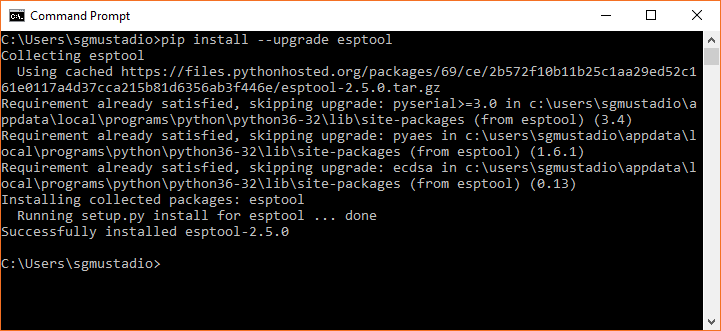
Open a command prompt and enter the following line:
language:shell
pip install --upgrade esptool
The pip utility should automatically download and install esptool for you.
Flash MicroPython
Make sure your ESP32 is plugged into your computer. If you are on Windows, open the Device Manager and find out which COM port or device file your ESP32 is associated with (mine is COM7 as per the image above).
Before flashing the firmware to the ESP32, we'll want to erase everything in the chip's flash memory. To that, enter the following command (replace <USB-to-Serial Port> with your particular port name, such as COM7 on Windows, /dev/tty.usbserial-<letters and numbers> on macOS, or /dev/ttyUSB0 on Linux):
language:shell
esptool.py --chip esp32 -p <USB-to-Serial Port> erase_flash
You should see some output explaining that the ESP32 has been erased and reset.
Next, flash the firmware with the following command (replace <USB-to-Serial Port> with your particular port name, and replace <path to .bin> with the location of your downloaded firmware file, such as ~/Downloads/esp32-20180822-v1.9.4-479-g828f771e3.bin):
language:shell
esptool.py --chip esp32 -p <USB-to-Serial Port> write_flash -z 0x1000 <path to .bin>
Once the firmware has been uploaded, you should see the message: "hash of data verified."
At this point, your ESP32 Thing should be running MicroPython.
Test It
Download and install one of the many available serial terminal programs. If you are on Windows, open the Device Manager and find out which COM port your ESP32 Thing is associated with (for example, COM7). On macOS, it will likely be /dev/cu.usbserial-<some letters/numbers>, and on Linux, it’s probably something like /dev/ttyUSB0.
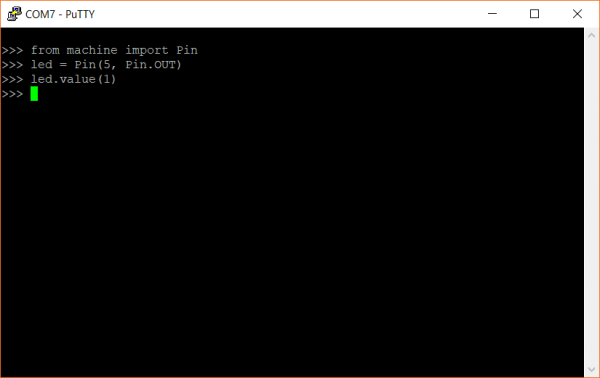
Open up your serial terminal program, and connect to your ESP32 Thing using the associated serial port and a baud rate of 115200. Press the enter key, and you should be presented with the MicroPython REPL command prompt (>>>). Enter the following commands:
language:python
from machine import Pin
led = Pin(5, Pin.OUT)
led.value(1)
This should turn on the LED attached to pin 5 on the ESP32 Thing board.
To turn off the LED, enter the following command:
language:python
led.value(0)
This simple test shows that you can control the ESP32 pins with MicroPython. You should be ready to start programming!
Teensy 3.x
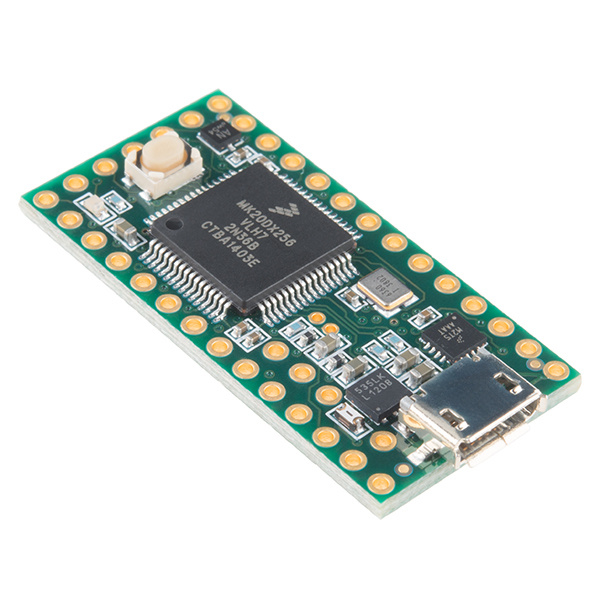
The Teensy is development platform that easily fits on a breadboard, can be programmed with the Arduino IDE, and offers many advanced features over most basic Arduino boards. It is well-loved among many embedded engineers and hobbyists for its powerful microcontroller while still being relatively inexpensive.
Teensy 3.2
DEV-13736As of the time of this writing (Aug. 2018), MicroPython is compatible with the following Teensy boards:
Note that while it is possible to install the ARM toolchain and build MicroPython on Windows, the instructions and scripts were written for Linux. As a result, they might work on macOS, and to use them on Windows, you will need something like the Cygwin environment. For now, the steps will be shown for Linux only (and only for certain Debian variants).
Install the ARM Toolchain
In a terminal, enter the following commands:
language:shell
sudo add-apt-repository ppa:team-gcc-arm-embedded/ppa
sudo apt-get update
sudo apt-get install -y gcc-arm-embedded
This should install the GCC ARM Embedded toolchain.
If you run unto any problems or want to download the packages (or source code), head to GNU Arm Embedded Toolchain page.
Build MicroPython for Teensy
Download the latest ZIP file from the MicroPython GitHub repository:
language:shell
wget https://github.com/micropython/micropython/archive/master.zip
Unzip the repository and navigate to the Teensy port directory:
language:shell
unzip master.zip
cd micropython-master/ports/teensy
Determine which Teensy board you are using (MicroPython has thus far only been ported to the Teensy 3.x variants). The BOARD argument will be set to one of the following:
- For Teensy 3.1 or 3.2, use
TEENSY_3.1 - For Teensy 3.5, use
TEENSY_3.5 - For Teensy 3.6, use
TEESNY_3.6
Since I tested this process with a Teensy 3.2 board, I will show TEENSY_3.1 in the following commands. Replace TEENSY_3.1 with the argument for your particular board.
language:shell
make BOARD=TEENSY_3.1
If you wish to create MicroPython build for a different board, call make clean first before calling make BOARD=TEENSY_3.x again.
For more information on how to build MicroPython for the Teensy, see the MicroPython Teensy wiki page.
Build the Teensy Flashing Tool
To upload the build MicroPython interpreter to the Teensy, we will use Paul Stroffregen's teensy_loader_cli tool (the repository for which can be found here). We need to download the repository, make it, and install it.
To start, install the libusb library:
language:shell
sudo apt-get install -y libusb-dev
If you have not already done so, head back to your home directory and delete the MicroPython master.zip file:
language:shell
cd ~
rm master.zip
Download and build the tool:
language:shell
wget https://github.com/PaulStoffregen/teensy_loader_cli/archive/master.zip
unzip master.zip
cd teensy_loader_cli-master
make
Install the tool to the local user's application directory:
language:shell
sudo cp teensy_loader_cli /usr/local/bin
Flash the Teensy
To avoid having to use sudo to upload programs to the Teensy, install the following udev rule:
language:shell
cd ~
wget http://www.pjrc.com/teensy/49-teensy.rules
sudo cp 49-teensy.rules /etc/udev/rules.d/
sudo udevadm control --reload-rules
Plug in your Teensy board to an available USB port (if it was already plugged in, unplug it first to allow udev to see it after reloading the new udev rules).
To flash the MicroPython firmware, determine which board you have and use the microcontroller name as the mcu argument for teensy_loader_cli:
- For Teensy 3.1 or 3.2, use
mk20dx256 - For Teensy 3.5, use
mk64fx512 - For Teensy 3.6, use
mk66fx1m0
Finally, we flash the built MicroPython firmware. Note that as I am using the Teensy 3.2 board, I will use mk20dx256 as the mcu argument. Change it to match your Teensy board.
language:shell
cd micropython-master/ports/teensy
teensy_loader_cli --mcu=mk20dx256 -w build/micropython.hex
After entering that last command, your terminal should wait for your Teensy to show up in bootloader mode. With the Teensy plugged in to your computer, press the reset button on the Teensy. After a few seconds, the Teensy's LED should flash twice rapidly, and the teensy_loader_cli command should finish executing in the terminal.
MicroPython should now be installed on your Teensy!
Test It
Install the minicom utility:
language:shell
sudo apt-get install minicom
Open a serial connection to REPL running on the Teensy:
language:shell
minicom -D /dev/ttyACM0 -b 115200
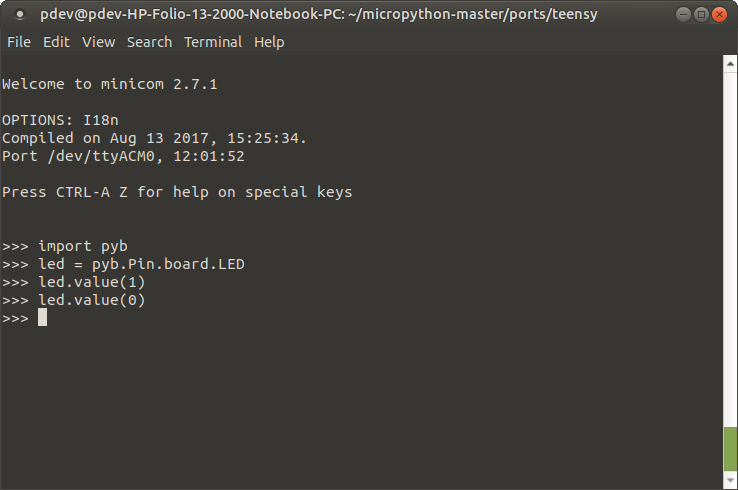
Press enter once to see the REPL command prompt (>>>). Enter the following commands:
language:python
import pyb
led = pyb.Pin.board.LED
led.value(1)
This should turn on the Teensy's LED. Turn it off with:
language:python
led.value(0)
Exit out of minicom by pressing Ctrl+A followed by pressing X. Press enter when you are asked if you really want to leave.
micro:bit
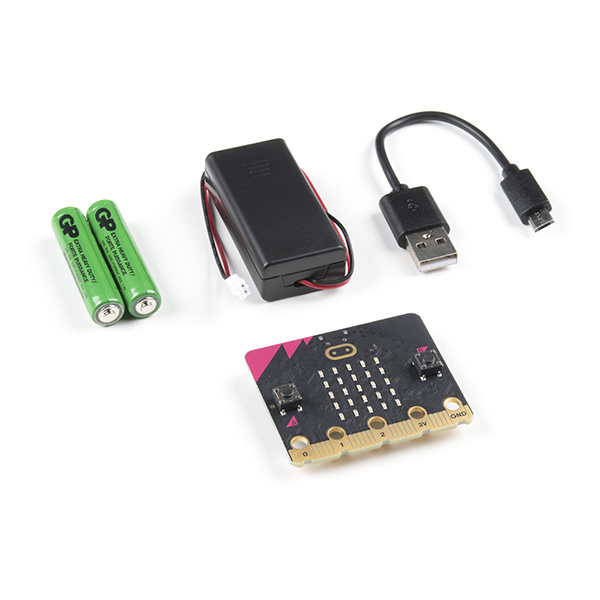
When it comes to the micro:bit, MicroPython is a great alternative to the graphical programming found on MakeCode, and it can be a good introduction to text-based programming (especially for students).
Loading MicroPython on to the micro:bit is easy. There are two main editors available: the Python online editor on microbit.org and the offline Mu editor application. The general idea is that your MicroPython code is bundled with the MicroPython interpreter in one file that gets uploaded to the micro:bit. As a result, we don't need to perform any special steps to load the MicroPython interpreter onto the micro:bit.
Online Editor
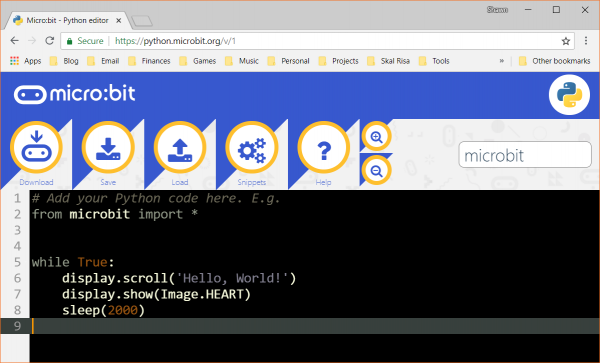
Head to python.microbit.org. You should see some default code. If not, copy in the following:
language:python
# Add your Python code here. E.g.
from microbit import *

while True:
    display.scroll('Hello, World!')
    display.show(Image.HEART)
    sleep(2000)
Click the Download button, and your computer should download a microbit.hex file (combination of MicroPython interpreter and your code).
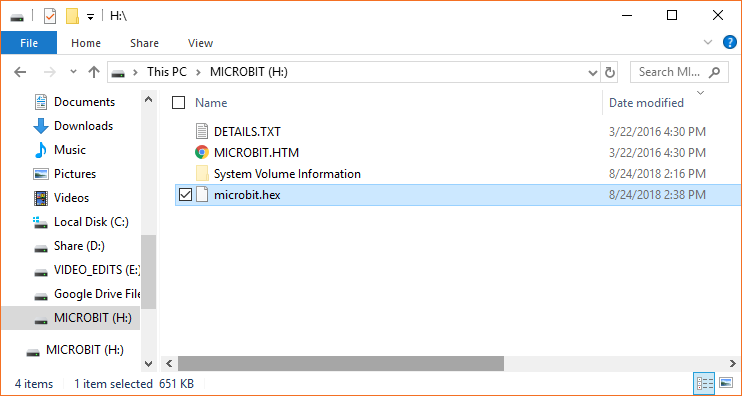
Plug in your micro:bit into an available USB port on your computer, and it should enumerate as a storage device (e.g. similar to a USB flash drive). Open a file explorer (or Finder), locate the downloaded .hex file, and copy it into the root directory of the micro:bit's drive.
Your micro:bit should automatically reboot and begin scrolling "Hello, World!" followed by a heart image.
Mu
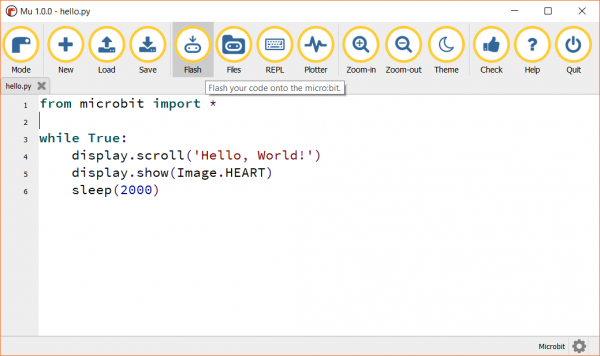
Download and install Mu from codewith.mu. Open the editor, and copy in the following code:
language:python
# Add your Python code here. E.g.
from microbit import *

while True:
    display.scroll('Hello, World!')
    display.show(Image.HEART)
    sleep(2000)
With the micro:bit plugged into your computer, press the Flash button to upload the code.
Your micro:bit should begin scrolling the phrase "Hello, World!" followed by a heart image.
Interacting with REPL
If you are on Windows, you will need to download and install the mbed serial driver. Follow the instructions on this site to download the driver executable. Note that you will need to have the micro:bit plugged in when you run the driver install program.
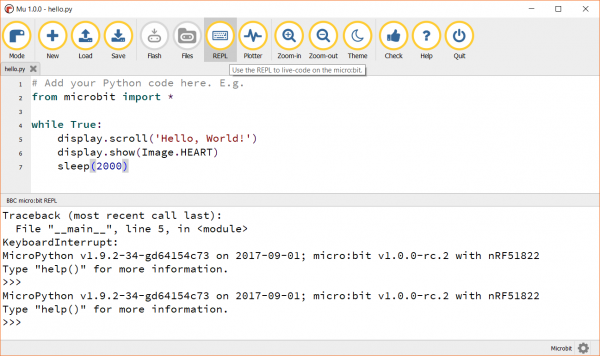
If you are using Mu, you can simply click the REPL button to bring up an interactive REPL terminal in the editor. This works even if you are running a program on the micro:bit.
If you are using the online editor, you will need to first upload a blank program to the micro:bit (i.e. delete all the code in the editor, download a .hex file, and copy it to the micro:bit). Most code will cause the micro:bit to stop responding to serial events, so we upload a blank program to prevent this. You can use a Serial terminal program to interact with REPL.
Windows
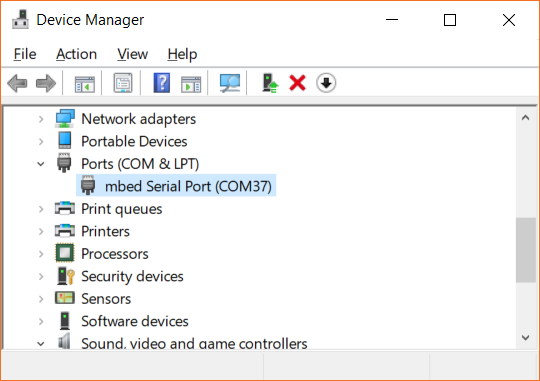
Open up the Device Manager, and look for the Ports category. Expand it, and note the COM number listed next to mbed Serial Port.
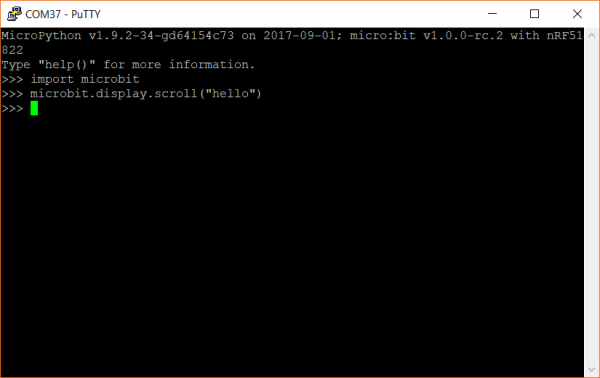
Using a serial terminal program (such as PuTTY or Tera Term), connect to the micro:bit using your COM port (e.g. COM37) and a baud rate of 115200.
macOS
Plug in the micro:bit and open a terminal. Enter the following command:
language:shell
ls /dev/cu.*
You should see a list of serial devices; look for the one with usbmodem (e.g. /dev/cu.usbmodem1422). Use the screen or minicom commands to open a serial connection with the microbit. For example (replace usbmodem1422 with the device file associated with your micro:bit):
language:shell
screen /dev/cu.usbmodem1422 115200
Linux
Install a serial terminal program, such as screen or minicom. Plug in your micro:bit and find the name of its associated device file with:
language:shell
dmesg | tail
You should see that the micro:bit was assigned to a particular file, such as /dev/ttyUSB0). Connect to the micro:bit with the device file (replacing ttyUSB0 with the name of the device file associated with your micro:bit) and a baud rate of 115200:
language:shell
screen /dev/ttyUSB0 115200
You can use any number of other serial terminal programs instead of screen, if you wish.
Test It
In your serial terminal program, you should see the REPL prompt (>>>). Enter the following commands:
language:python
import microbit
microbit.display.scroll("hello")
You should then see the word "hello" flash across your LED array!
Getting Started with MicroPython and the SparkFun Inventor's Kit for micro:bit
Pycom LoPy4
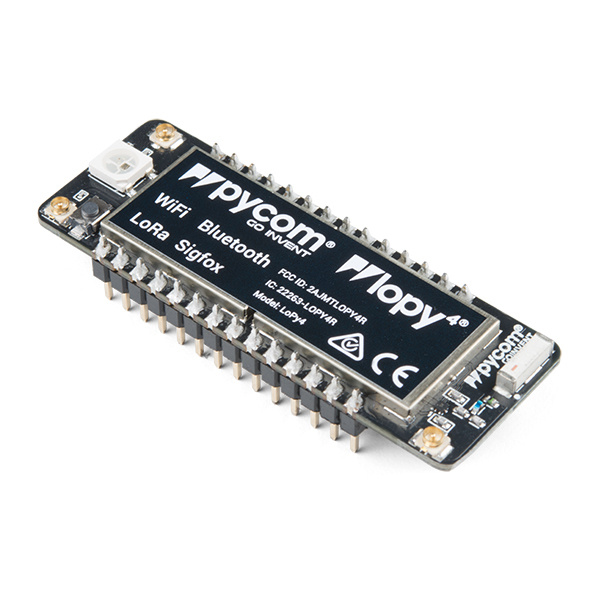
The Pycom LoPy4 is a combination of wireless radios (WiFi, Bluetooth, LoRa, SigFox) and a MicroPython development platform that helps users get started making their own Internet of Things (IoT) endpoints.
Pycom LoPy4 Development Board
WRL-14674Update Firmware
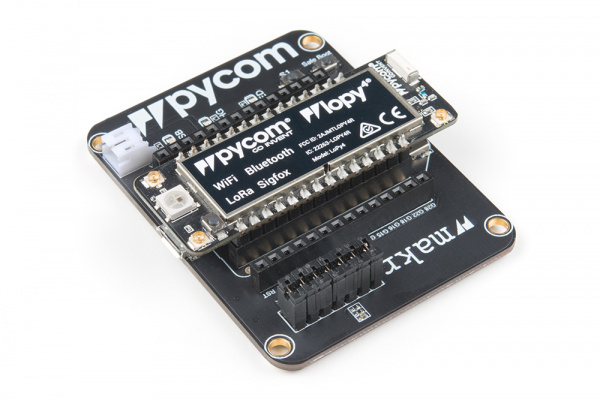
To load firmware onto the LoPy4, you will need to purchase a Pycom Expansion Board 3.0.
While it's not required, Pycom recommends that you update the firmware on the Expansion Board by following these steps.
With the Expansion Board disconnected from your computer, connect the LoPy4 to the expansion board, and then plug in a USB cable to the Expansion Board.
Navigate to Pycom's Updating Firmware page and download the firmware tool for your operating system (links at the top of the page). Run the program and follow the instructions to install Pycom's firmware update tool.
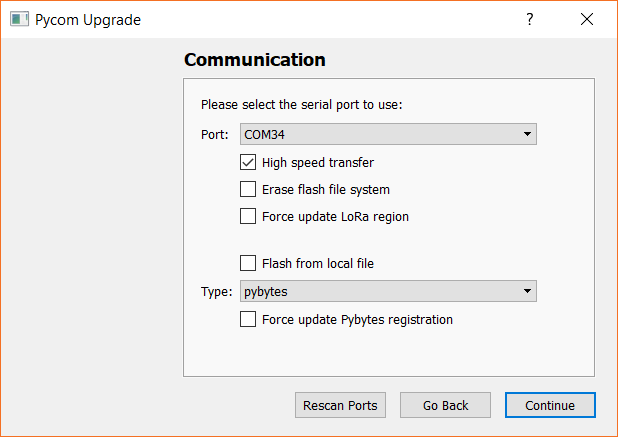
Run the tool, and follow the on-screen instructions to connect to your LoPy4 board. Make sure that the serial port is selected correctly (leave the other options as default).
If you would like to use the Pybytes IoT platform, head to the Pybytes site, make an account, and copy in the activation key when asked. Otherwise, feel free to skip that step (the firmware will install regardless of whether you provided a Pybytes key or not).
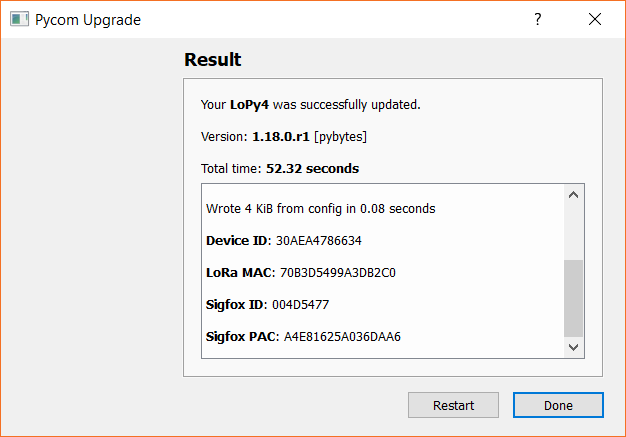
Once the update is complete, you should see a "successfully updated" message.
Test It
Download and install a serial terminal program of your choosing. If you are on Windows, open the Device Manager and find out which COM port your LoPy4 is associated with (mine is COM34). On macOS, it will likely be /dev/cu.usbserial-<some letters/numbers>, and on Linux, it's probably something like /dev/ttyUSB0.
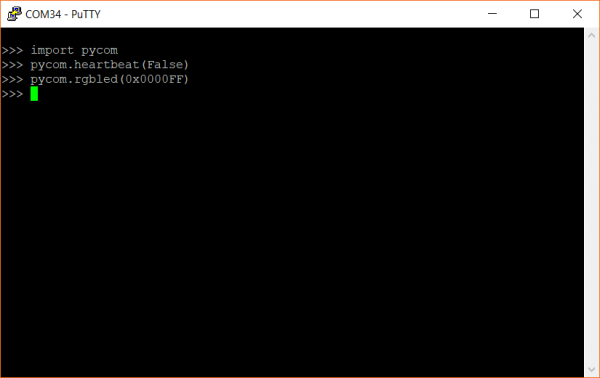
Open up your serial terminal program, and connect to your LoPy4 using the associated serial port and a baud rate of 115200. Press the enter key, and you should be presented with the MicroPython REPL command prompt (>>>). Enter the following commands:
language:python
import pycom
pycom.heartbeat(False)
pycom.rgbled(0x0000FF)
This should turn the onboard LED to blue.
Enter the following command to turn it off:
language:python
pycom.rgbled(0x000000)
If you were able to turn the LED on and off, it means that MicroPython is running on your Pycom board! Pycom also makes a plugin named Pymakr for the Atom and Visual Studio Code IDEs that you can use to develop MicroPython for the LoPy4 (and other Pycom boards). To learn more about Pymakr, see this page. Pycom has a MicroPython example for Pymakr that you can see here to help you get started.
OpenMV M7 Camera
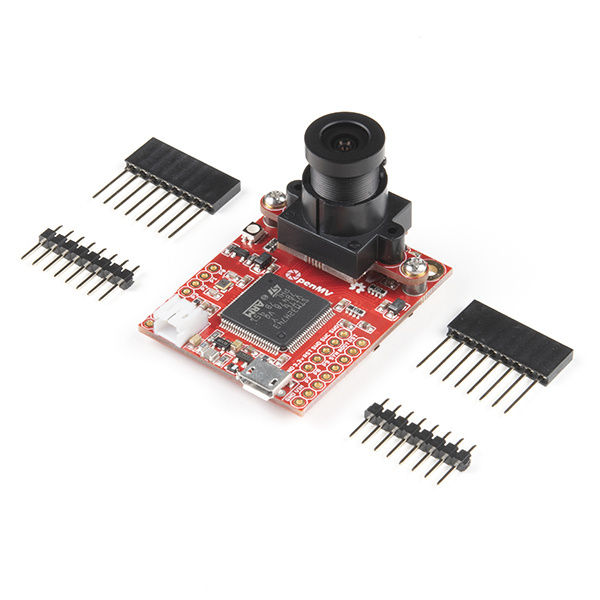
The OpenMV is a development platform with an integrated camera that lets you create computer vision projects. Out of the box, it comes loaded with the MicroPython interpreter, so you don't need to load anything onto the M7 or H7.
OpenMV Cam H7
SEN-15325Update Firmware
OpenMV recommends that you use the OpenMV IDE to develop applications for the M7, which is probably a good thing, considering it allows you to make updates to your code while and watch a live camera feed. If you would like to update the firmware (which includes the MicroPython interpreter), it is recommended that you do so through the OpenMV IDE.
Head to the OpenMV Downloads page and click to download the IDE for your operating system. Install it, accepting all the default options. If you are on Windows, you will likely be asked to install one or more USB drivers.
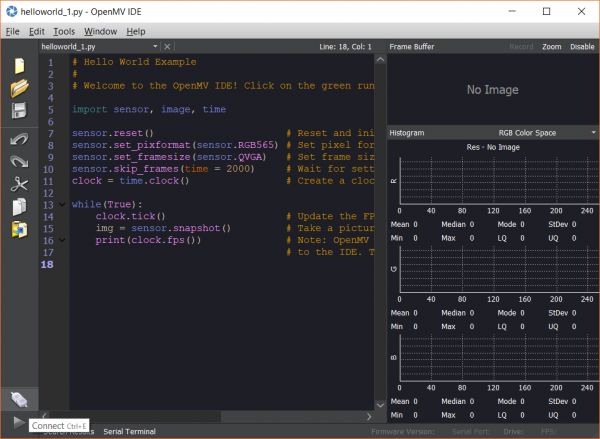
Open the OpenMV IDE and connect the M7 to your computer. Click the Connect button in the bottom-left corner of the IDE to open a connection to your M7.
Make sure your computer is connected to the Internet, and if your M7's firmware is out of date, you'll get a pop-up asking you to update it. Click OK to automatically start the update process. If you don't want to save any files that you've stored on the M7, click Yes when asked about erasing the internal file system (otherwise, click No).
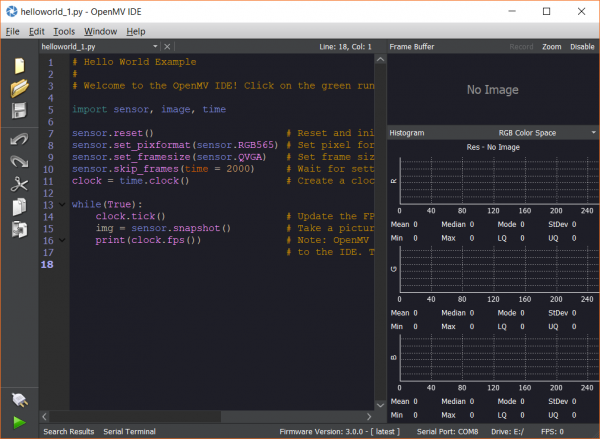
Once the flashing process is complete, you should see that the reported firmware (bottom right of the IDE) has been updated to reflect the most recent version (it should also say [ latest ]).
Test It
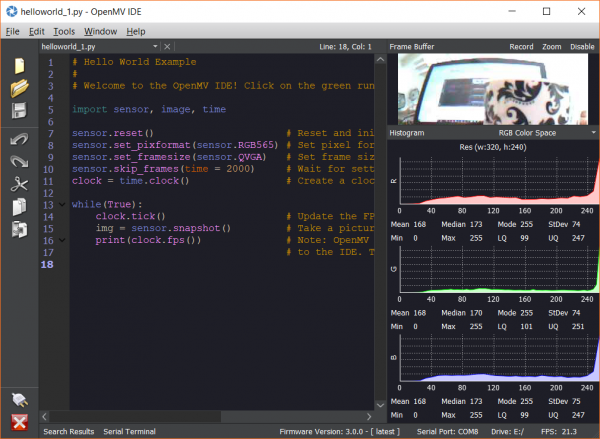
By far the easiest way to begin developing on the M7 is to use the OpenMV IDE. When you first open it, you should see some example code (named helloworld_1.py). Click the Play button (bottom left of the IDE), and you should get a live video stream from the camera (don't forget to remove the lens cap!) along with real-time color histogram updates.
If you don't want to use the OpenMV IDE, then there are a number of ways you can interact with the camera. The first is by opening up a file explorer/finder and browsing to the enumerated drive while the M7 is plugged in (likely called USB DRIVE). Here, you will find a few files that reside in the M7's flash memory. If you modify main.py, you can change the code that runs on the M7. When you save changes (overwriting the original main.py), the M7 will automatically restart and begin running the code in main.py.
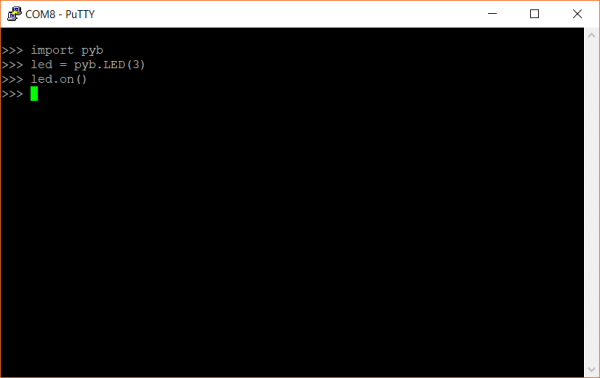
Alternatively, you can open a serial connection to the M7 using your choice of serial terminal programs. Find the device port number or device file (for example, Device Manager in Windows might show something like COM8, macOS might show /dev/cu.usbserial-<some letters/numbers>, or Linux might show /dev/ttyUSB0). Open a connection with a baud rate of 115200, and press enter to see the MicroPython REPL command prompt (>>>).
Enter the following commands:
language:python
import pyb
led = pyb.LED(3)
led.on()
This should turn on the blue LED on the M7.
Enter the following command to turn the LED off:
language:python
led.off()
This should hopefully show you the various ways to interact with the MicroPython interpreter on the OpenMV M7! To learn more about how to use the M7, see OpenMV's documentation page located at docs.openmv.io.
Resources and Going Further
MicroPython can be a great way to dive into programming on an embedded system (especially if you know Python already) or if you want to quickly make a project or prototype. If you want to dig deeper into MicroPython, here are some resources to help you out:
pyboard links:
- Pyboard Hookup Guide
- MicroPython downloads
- Zadig download
- dfu-util releases
- MacOS Homebrew
- pyboard GitHub Repo
- MicroPython Windows Setup
ESP32 Thing links:
- How to Install FTDI Drivers tutorial
- MacOS FTDI Drivers information
- MicroPython downloads
- Python.org
Teensy 3.x links:
micro:bit links:
Pycom LoPy4 links:
OpenMV M7 Camera links:

Looking to develop something with MicroPython? Check out these guides to get you started:
Getting Started with MicroPython and the SparkFun Inventor's Kit for micro:bit
Pyboard Hookup Guide
Check out Shawn's 4-part video series with the micro:bit. The projects have examples that use the accelerometer, combines the servo and temperature example, and sends a wireless message between two micro:bits with the radio extension. There are two additional videos using micro:bit with MicroPython.
