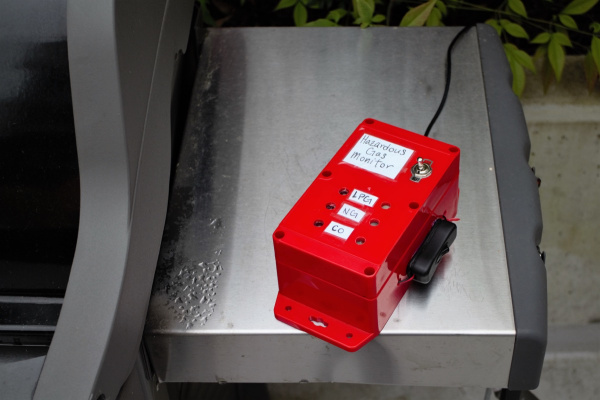
Hazardous Gas Monitor
Introduction
Phant is No Longer in Operation
As an example, try looking at the Photon Remote Water Level Sensor Tutorial which uses ThingSpeak.
Build a portable gas monitor to check for dangerous levels of hazardous gases in your home, community, or on the go and prevent your friends from lighting a cigarette during a gasoline fight.*
**Please note that this is solely a movie reference -- gasoline fights should probably be avoided in real life.*
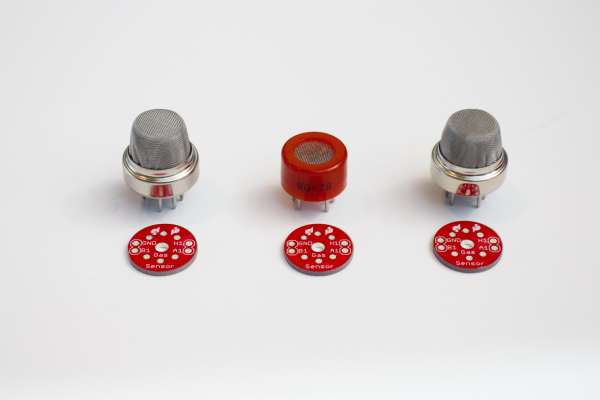
This tutorial shows you how to build a web-connected "canary" monitor for three hazardous gases: Liquid Propane Gas ("LPG"), Methane (aka natural gas), and Carbon Monoxide ("CO"). Using the Particle Photon microcontroller, the sensor readings are converted into parts-per-million ("PPM") and uploaded to the data.sparkfun.com web service.
Check out the video below to see the Hazardous Gas Monitor in action:
Helpful Background Info
- How to set up the Particle Photon.
- Pushing data to the data.sparkfun.com web server.
- New to relays? Check out this a handy reference.
- Here's a helpful overview on the N-Channel MOSFET.
- For powering the Photon, here's a thorough guide on the Photon Battery Shield.
- Highly recommended to peruse the datasheets for the three gas sensors.
Choosing a Battery
The gas sensors used in this project require a fair amount of current, about 0.17 mA each at 5V. To make the system portable, we'll need a high capacity battery. One easy, and affordable, option is to use four (rechargeable) AA batteries in series. These batteries will last about 4 hours.
Another option is to use a lithium ion battery ("LIB"). LIBs have a higher capacity than AAs, but typically run at a lower voltage. If you go with this option, you may need to include a correction factor when you calculate the sensor value or boost the battery voltage with a transistor or other component.
Here's a table that shows the approximate lifetime of a few different battery options.
If all of this sounds confusing, here's a more thorough tutorial.
Materials
To follow along with this tutorial, you'll need the following:
Microcontroller and Accessory Components
- Particle Photon microcontroller
- SparkFun Photon Battery Shield
- One 2000 mAh Polymer Lithium Ion Battery
- Surface Mount DC Barrel Jack
- Barrel jack to USB power supply cable
- One (1) Lamp Switch
- Optional: Male-to-Female JST connector cable
Gas Sensor Circuit
- One (1) Project Case
- One (1) 4 AA battery case
- Four (4) AA Rechargeable Batteries
- One (1) Toggle Switch (SPST switch)
- Piezo Buzzer
- Three (3) Red LEDs
- Three (3) 10 kΩ resistors
- One (1) PCB
- 22 Gauge stranded wire
- Optional: Electrical connectors (3-5)
LPG (MQ6) Gas Sensor
- MQ6 LPG Gas Sensor
- Gas Sensor Breakout Board
- One (1) 4.7 kΩ resistor
- One (1) 5V Voltage Regulator
Methane (MQ4) Gas Sensor
- MQ4 Methane Gas Sensor
- Gas Sensor Breakout Board
- One (1) 4.7 kΩ resistor
- One (1) 5V Voltage Regulator
Carbon Monoxide (MQ7) Gas Sensor
- MQ7 CO Gas Sensor
- Gas Sensor Breakout Board
- One (1) 4.7 kΩ resistor
- One (1) 5V Voltage Regulator
- One (1) 5V SPDT Relay
- One (1) 1N4148 Diode
- One (1) N-Channel MOSFET
- One (1) 10 kΩ potentiometer
- One (1) 10 kΩ resistor
Tools
- Soldering Iron
- Wire cutters/strippers
- Drill
- Screwdriver
- Epoxy (or hot glue)


