Galileo Getting Started Guide
This Tutorial is Retired!
This tutorial covers concepts or technologies that are no longer current. It's still here for you to read and enjoy, but may not be as useful as our newest tutorials.
 jimblom
Using the Terminal
What makes the Galileo truly unique is the fact that it has Linux running under the hood. You can interact with the Linux OS through the terminal, executing simple commands through a command-line interface. In comparison to uploading Arduino sketches, interacting with the Linux command line is a much more advanced skill, but this is as good a place as any to start learning.
There are two different ways to connect to the Linux terminal: over the 3.5mm stereo jack RS-232 port or over USB. The former requires a special cable (or two), and the latter requires you to upload a special Arduino sketch. We'll cover both on this page, there are pros and cons to each approach.
Both of these methods require that you have a terminal emulator installed on your computer. Check out our Serial Terminal Basics tutorial for our recommendations.
RS-232 Terminal
This method is safer, and easier, but it does require that you have some extra cables. The terminal interface on the Galileo is a 3.5mm stereo jack, like what you might plug headphones into. The three contacts on this connector break out ground, RX and TX. A specialized 3.5mm to DB9 RS-232 cable can help move the interface to a more common connector, and (assuming your computer doesn't have an archaic serial port) you may need a RS-232 to USB cable on top of that to interface the board with your computer.
Once the board is connected to your computer, open up a serial terminal program (like Tera Term for Windows or Cool Term for Mac). Set the serial port number, and change the baud rate to 115200 bps.
Check out the section below if you're not sure what to do with Linux.
Custom Arduino Sketch
If you don't have the weird 3.5mm RS-232 interface cables, never fear! You can upload an Arduino sketch to access the Linux terminal.
One warning here: this sketch does mess with some of the basic workings of the Galileo. You won't be able to upload another Arduino sketch unless you reset the board or run the few lines at the end of this section.
Copy the code below into your Arduino IDE. Then upload just as you did the Blink sketch. This is a slightly modified version of the code found in Intel's example code samples.
language:c
void setup()
{
  system("cp /etc/inittab /etc/inittab.bak");  // Back up inittab
  // Replace all "S:2345" with "S0:2345"'s (switching serial ports):
  system("sed -i 's/S:2345/S0:2345/g' /etc/inittab");
  // Replace all "ttyS1" with "ttyGS0"'s (switching serial ports):
  system("sed -i 's/ttyS1/ttyGS0/g' /etc/inittab");
  // Replace all "grst" with "#grst"'s to comment that line out:
  system("sed -i 's/grst/#grst/g' /etc/inittab");
  // Replace all "clld" with "#clld"'s to comment that line out:
  system("sed -i 's/clld/#clld/g' /etc/inittab");
  system("kill -SIGHUP 1");
}
void loop()
{

}
Once that's uploaded, you'll need to open up a separate serial terminal program (not the Serial Monitor). Set the serial port to the same as your Galileo, and set the baud rate to 115200. See the below section for help using Linux.
Once you're done using this version of the serial terminal, send this trio of commands to revert back to "Arduino mode":
language:c
rm /sketch/sketch.elf
cp /etc/inittab.bak /etc/inittab
kill -SIGHUP 1
Those will remove your terminal "Arduino sketch", revert back to the old init procedure, and reboot the init process. Your Galileo will revert back to the way it was, and you can upload an Arduino sketch once again.
Using the Linux Terminal
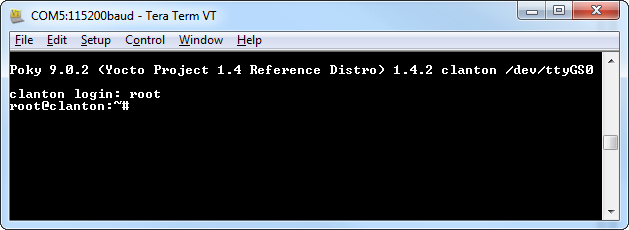
When you first open your Linux terminal, press enter. You'll the be prompted to log in, use the user name root (no password, by default). Welcome to the shell!
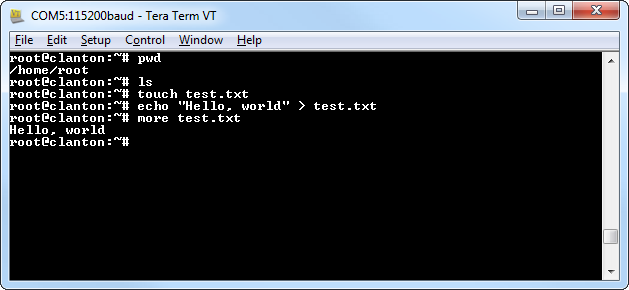
From here, the you can perform a variety of basic Linux commands. You can list directory contents with ls. Navigate directories with cd. Make directories with mkdir or create files with touch. There are, of course, more advanced Linux utilities to discover as well.
There are a wide range of Linux commands made available to the Galileo. For help discovering them check out these resources.
If you're feeling handicapped by some of the Linux commands that may be missing, check over to the next page, where we'll install the "bigger" Linux image. The bigger Linux image boots the Galileo off an SD card, and provides access to useful tools like SSH, Python, node.js, and OpenCV.