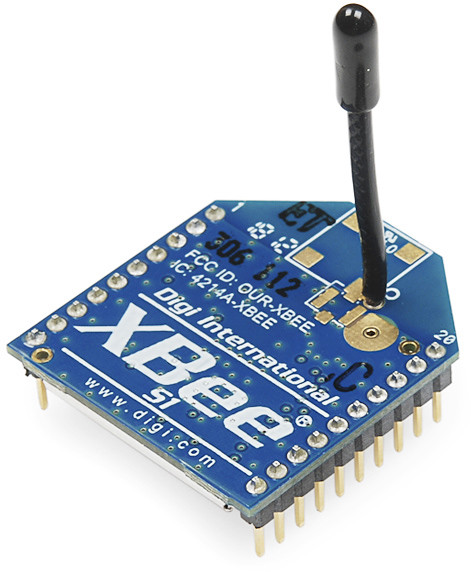
Exploring XBees and XCTU
Introduction
Is your project being dragged down by wires? Looking for an easy transition to wireless communication? If you want reliable, low-cost, bi-directional communication at moderate speeds, XBee may be the solution for you!
XBees are hugely popular wireless transceivers for a number of reasons. They're flexible -- they send and receive data over a serial port, which means they're compatible with both computers and microcontrollers (like Arduino). And they're highly configurable -- you can have meshed networks with dozens of XBees, or just a pair swapping data. You can use them to remotely control your robot, or arrange them all over your house to monitor temperatures or lighting conditions in every room.
Covered In This Tutorial
The pair of XBees alone won't get you very far. In most cases you'll want a separate module to interface with the XBee. You can use an XBee Shield to connect an XBee to your Arduino. Or you can use an XBee Explorer to connect an XBee to your computer.
The focus of this tutorial is to explain how to use an XBee Explorer with an XBee. There are a variety of Explorer boards, all designed to achieve the same purpose: to create a communication gateway between your computer and the XBee.
With an XBee Explorer connected between your computer and your XBee, and with the help of the X-CTU software, you can easily configure XBees, test connections, and pass data between your computer and remote XBees. We're going to show you how to do all of that in this tutorial!
Materials Required
XBees are really only useful if you have at least a pair of them. They need buddies to talk to! Hence, there's a lot of "2x" in this list of materials. To follow along with this tutorial, you will need the following materials. You may not need everything though depending on what you have. Add it to your cart, read through the guide, and adjust the cart as necessary.
- 2x XBees -- XBees exist in a variety of series, frequencies, and ranges. If you're just getting started with XBee, we highly recommend going with Series 1 (or Series 3 configured with the 802.15.4 protocol) models with a built-in antenna -- either with a trace antenna, wire antenna. You can also get one with a u.fl connector but you will need to get the appropriate external antenna.
- For more help picking an XBee, check out our XBee Buying Guide.
- 2x Explorers -- either the Explorer USB, Explorer USB Dongle, or Explorer Serial.
- These boards act as an interface between your computer and an XBee. They're used to configure your XBee and pass data to and from your computer.
- Depending on which explorer you have, you may also need a matching mini-B USB or serial cables.
- At least one computer with X-CTU installed.
- The latest version of X-CTU is available for both Mac and Windows!
Suggested Reading
Don't know what XBees to start with? Try checking out our buying guide to compare the different modules.
- XBee Buying Guide -- We highly recommend Series 1 XBee's, if this is your first time playing with them. If you're curious about other XBee classes, check out this guide!
This tutorial builds on some lower-level electronics concepts. If you're not familiar with the subjects below, we recommend checking out those tutorials first.
- Serial Communication -- XBee's communicate over a serial port. This tutorial will get you familiar with terms like "RX", "TX", "baud rates", "stop bits", and "parity".
- Serial Terminal Basics -- The X-CTU software we'll use has an integrated serial terminal called the "console". You can use your preferred terminal instead; if you don't have a preferred serial terminal, check out this tutorial.
- How to Install FTDI Drivers -- If you are using an FTDI to connect to the XBees, you'll need to install the appropriate drivers.
- Hexadecimal -- XBee configuration settings -- like addresses and network ID's -- are all programmed in hex. Base 16. If you don't know how to make numbers with 0-9 and A-F, check out this tutorial.

