Exploring XBees and XCTU
 jimblom,
  Toni_K
Troubleshooting
If your XBee's are giving you any trouble, here are some common problems and fixes we recommend:
- Can't Find Device -- If XCTU can't find your XBee, we recommend recovery or discovery.
- XBees Not Communicating Wirelessly -- If a pair of XBees are failing to communicate, we recommend resetting everything to default.
- Resetting XBees -- A trick to resetting your XBee (if you don't have a reset button).
Can't Find Device
Are you having a hard time "finding" an XBee? If you're "Add Device" process is being followed by a window like this:
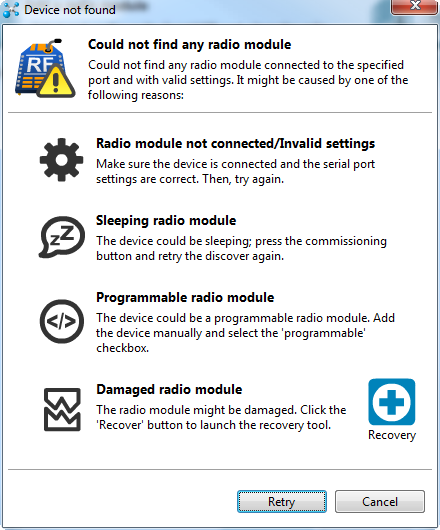
There are two options we recommend: discovery or recovery.
Discovery
The Discover radio devices tool is an extension of "Add devices". Open the discovery window by clicking the XBee/magnifying glass icon -- ![]() -- in the top-left.
-- in the top-left.
Once again you'll be prompted to select which communication port your XBee is connected to. Double check that you've selected the correct one (or even try multiple). The next window will present you with every, single serial setting available, and a whole lot of checkboxes:
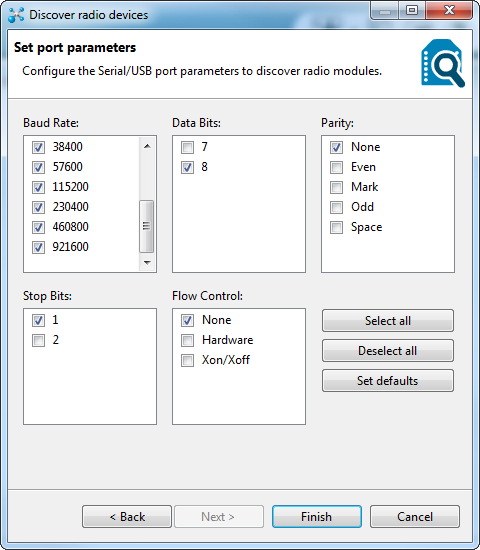
Most of the cases where your XBee is hiding it's because the baud rate has been altered. A quick fix for this is to select all possible baud rates in the discovery window, then click Finish. The discovery process works a lot like the add process except it tests out every selection you make in this window -- that means it will take a little longer to finish.
Hopefully you've found an XBee that was just configured to talk at a weird baud rate. If not you can select any of the other checkboxes as well, but it'll make for a longer and longer discovery process. Click every checkbox and you might be waiting upwards of an hour for your XBee to be discovered (permutations!).
If you're not having any luck with discovery, the next step is recovery.
Recovery
If your XBee seems bricked, don't worry! You can most likely recover it. To get to the recovery screen, click the Tools icon, and select XBee Recovery.

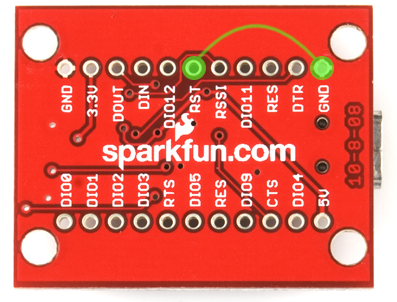
Once again, you'll need to select your COM port, and you'll also need to select the product family. This can be found on the bottom sticker of your XBee. If you're using a series 1 module, the family should be XB24. Beyond that you'll need to select a "Function Set" and "Firmware Version". For both of those you should be safe selecting the top-most values in the list.
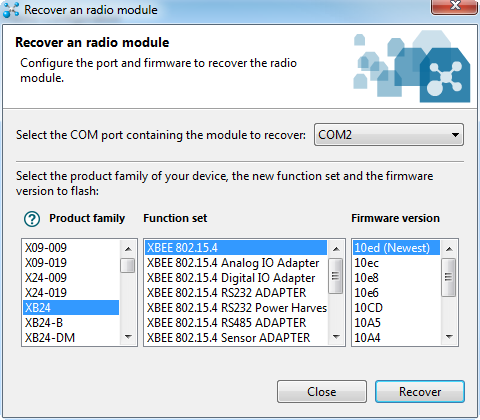
Once you've made all of those selections, click Recover.
The recovery process may take a few minutes. You'll be prompted to reset your XBee. If your Explorer has a reset button, simply press it when prompted, otherwise see the "Reset" section below.
During recovery, if XCTU can find your XBee it will. It'll also update the firmware, and set you back to the default settings. If you know what got your XBee bricked in the first place...maybe don't do that again.
XBee's Not Communicating, Reset to Defaults
If no matter what changes you make to the config settings your XBee's just won't communicate with each other, try resetting them both to the default values.
In the config tab, click the "Load default firmware settings" icon -- ![]() (not sure how to describe that icon). Then click Yes to confirm that you want to reset everything.
(not sure how to describe that icon). Then click Yes to confirm that you want to reset everything.
If you're presented with any red-backgrounded error notifications (like below), first try to refresh the value, by clicking the green icon -- ![]() .
.
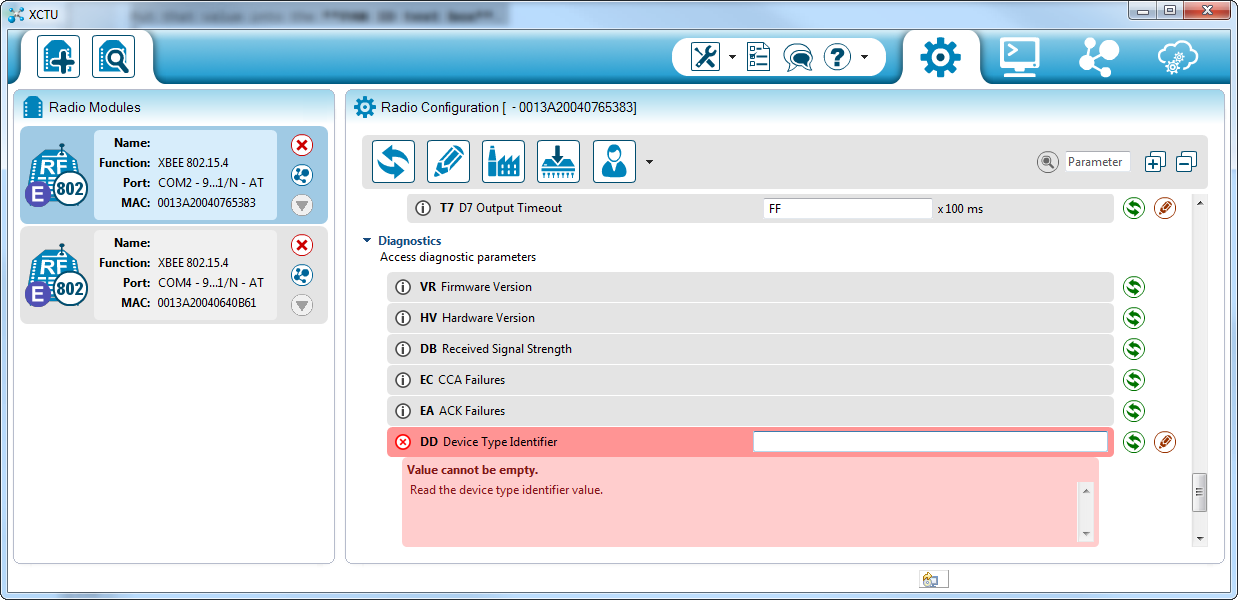
If that doesn't fix the error, you can probably get away with typing a "0" in that box (usually this pops up for properties like encryption keys or other values meant to be kept secret).
After you've loaded the default values, you still need to write the settings by clicking the big pencil icon above -- ![]() .
.
After defaulting both radios, the addresses, networks, and other settings should all be compatible. Try communicating over the console again.
Resetting Old (Pre-Reset Button) Explorers
When it's having trouble communicating with an XBee, XCTU may present you with a notification like this:
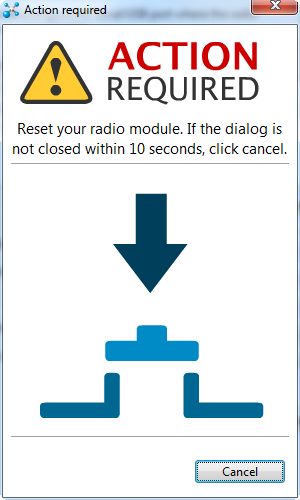
The USB explorers were revised in May 2014 to include a reset button, so resetting should be easily done on those newer boards. However, if you're using an older Explorer you'll have to use the "jumper method". Grab a piece of jumper wire and, when prompted with the "Action Required" window, briefly connect the RST pin to GND.
Short them together for about a second, and then remove the wire. If you've done it within the time window provided by XCTU, it should proceed to the next step. If not give it another try...it takes some practice.