Exploring XBees and XCTU
 jimblom,
  Toni_K
Starting With X-CTU
X-CTU is free software, provided by Digi (the manufacturer of XBee), which we use to configure and manage XBees, and test XBee networks. If you haven't already, head over to their website and download the latest release and follow their instructions to install the software.
Adding XBee's
Before continuing on, make sure you've plugged an XBee (correctly) into your Explorer, and have the Explorer plugged into your computer. When you installed the drivers for your Explorer it should have been assigned port number. You'll need that shortly.
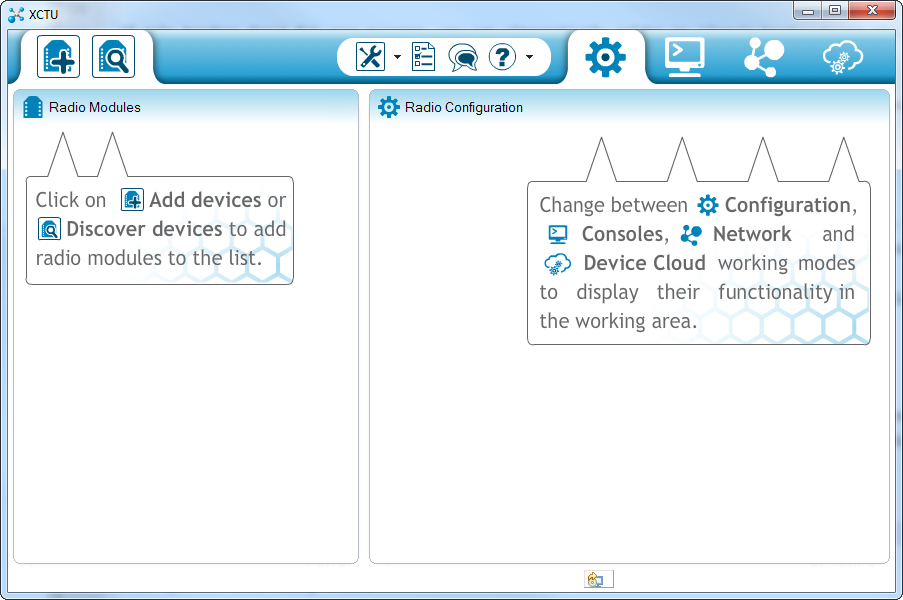
After initially opening X-CTU, you'll be presented with a window like this:
To add your XBee(s), click the "Add device" icon -- ![]() -- in the upper-left part of the window. That will prompt this screen to show up:
-- in the upper-left part of the window. That will prompt this screen to show up:
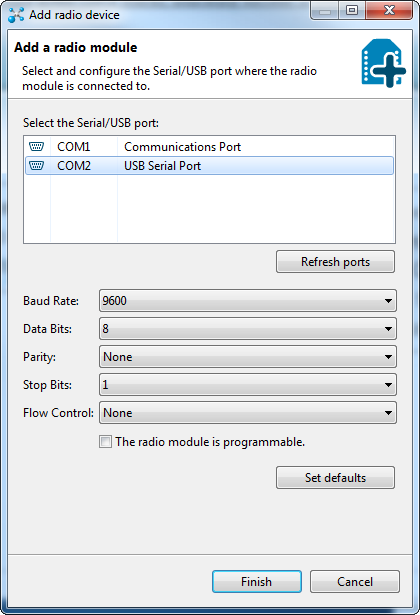
Select Your Communication Port
If you're lucky (or just don't have a lot of stuff connected to your computer) you may only have one option here. Otherwise, Windows users should look for the entry that says "USB Serial Port" and Mac users should look for something like "usbserial-XXXXXXXX", if you're using a USB XBee board. If you're using a Serial Explorer instead, pick the "Communications Port" option. If the Serial Explorer is not showing up, make sure the switch onboard is set to “On”!
This window also allows you to specify more specific serial characteristics like baud rate, data bits, and stop bits. Assuming this is the first time you've used your XBee, you can leave those settings alone. So make sure those values look just as they do in the image above and click Finish.
A "Discovering radio modules..." window will briefly scroll by, after which you should be presented with the original window, but with an addition to the "Radio Modules" section on the left. (If X-CTU failed to find a module, check out our troubleshooting page.)
Click that new module, and wait a few seconds as X-CTU reads the configuration settings of your XBee. You should then be presented with the entire configuration of your XBee. The image below shows an XBee Series 1 connected to the XCTU.
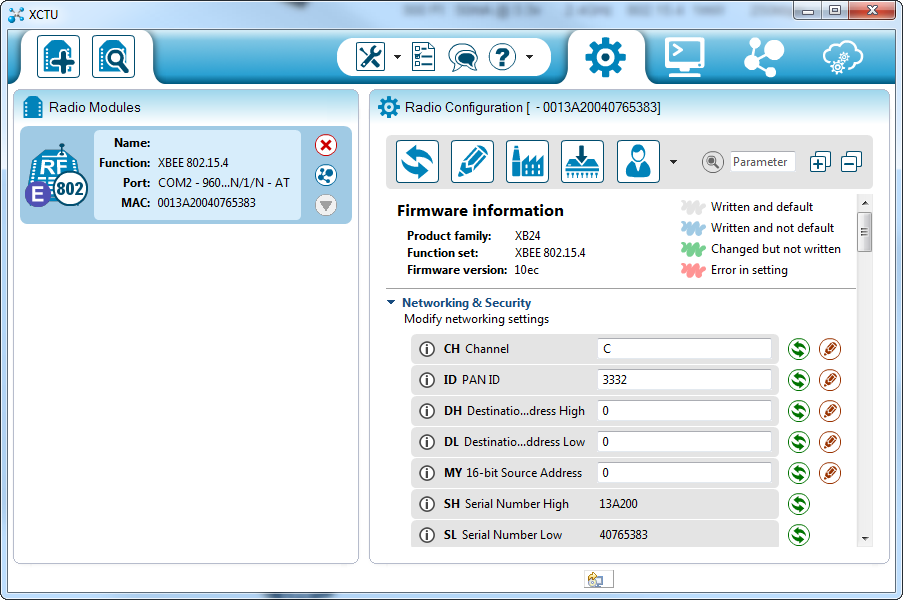
As you can see by scrolling down the right half, there are a lot of configuration settings available. We'll get to some of those later. For now, though, verify that the configurable settings visible in the screenshot above match those of your XBee:
- Channel = C
- PAN ID = 3332
- DH = 0
- DL = 0
- MY = 0
If your are using the XBee Series 3, you will need to follow the next section to configure the firmware for the 802.15.4 protocol (a.k.a. Series 1)!
Configuring XBee Series 3's to Legacy Series 1 Firmware
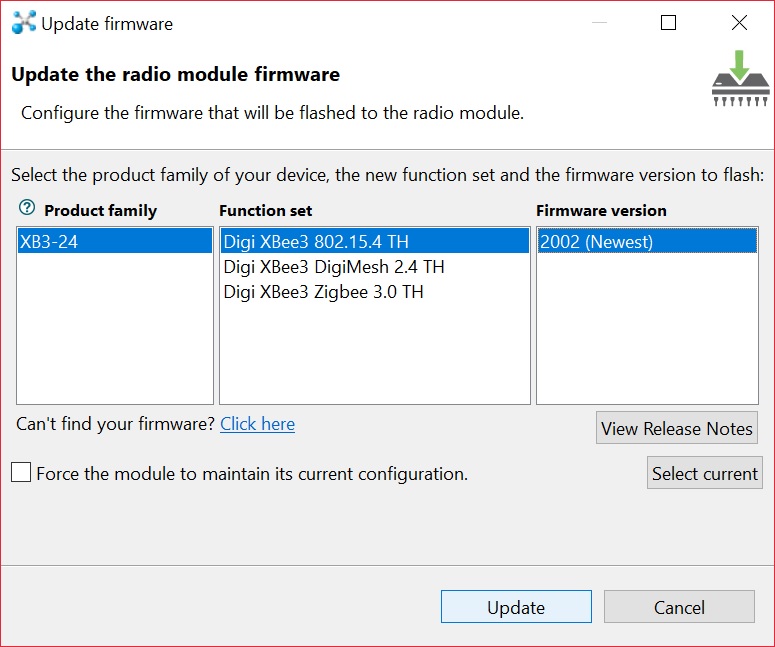
If you are working with an XBee Series 3, you will have a different configuration setting. To follow along in this tutorial, click on the update firmware button. If you are using the XBee Series 1, simply move to the next step to configure the XBees.
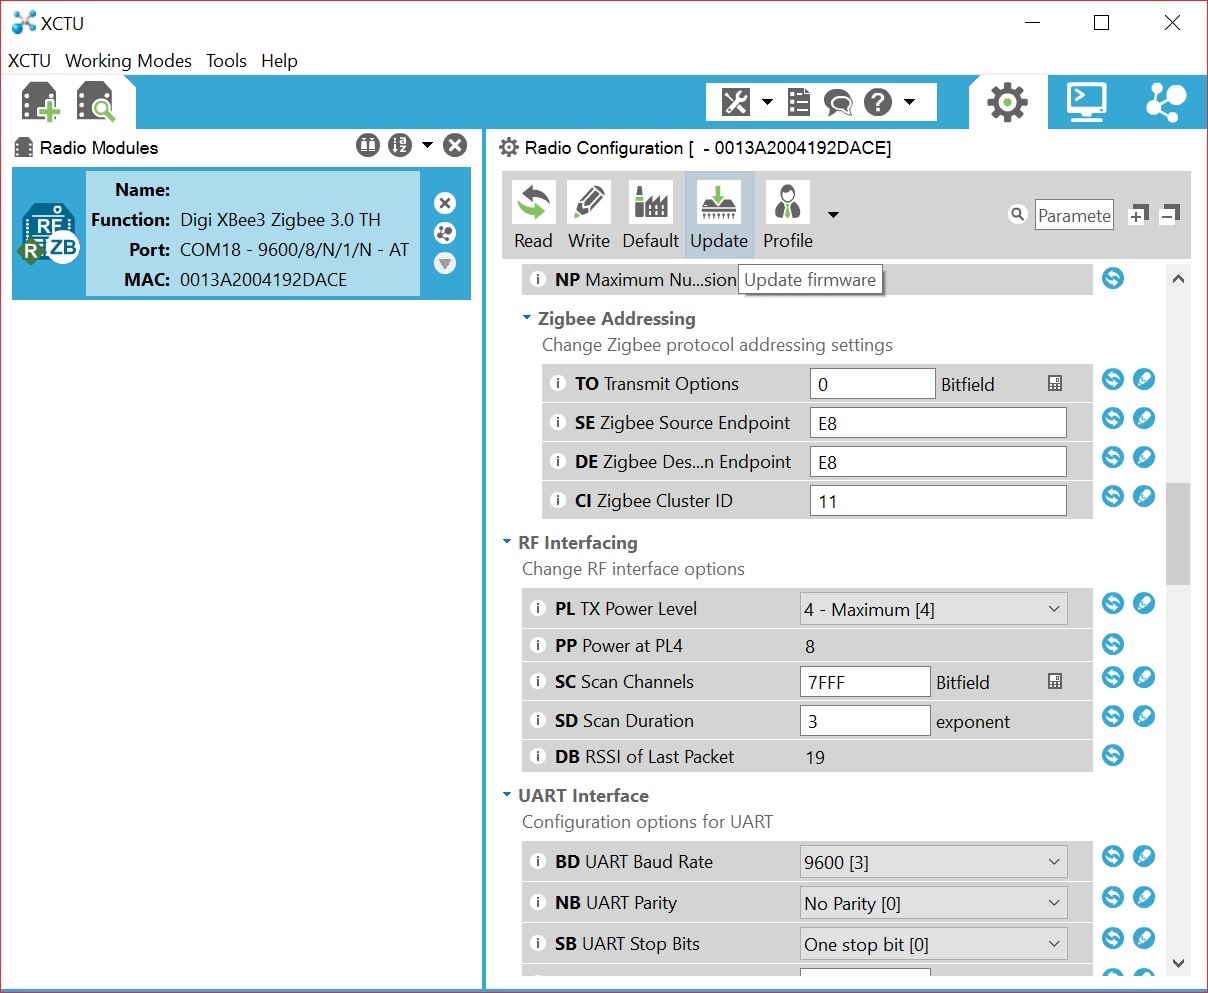
A window will pop up indicating the types of firmware available to flash. By default, it will be listed as the Digi XBee2 Zigbee 3.0 TH function protocol. You can select the legacy XBee Series 1 or legacy XBee Series 2 firmware. For the scope of this tutorial, we will be using the Digi XBee3 802.15.4 TH function set. You will then select the firmware version. In this case, it is 2002. When ready, click the Update button.
- Product Family = XB3-24
- Function Set = Digi XBee3 802.15.4 TH
- Firmware Version = 2002 (Newest)
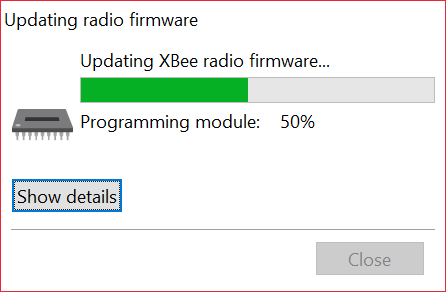
A window will pop up indicating that the XCTU is updating firmware. This can take a couple of seconds.
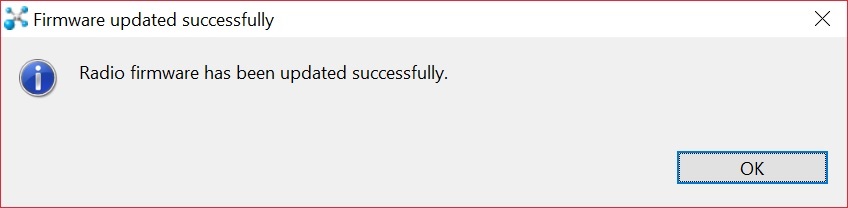
Once you are finished, you will be notified that the firmware was successfully flashed. Click OK to continue on.
Make sure to update the firmware on all the XBee nodes in your network with the same protocol. Otherwise, you will have issues sending data throughout your network. At this point, connect the second XBee Series 3 to your computer and repeat the process explained above to configure the firmware.

Do It Again
To test communication between your XBee's you'll need to connect your second XBee to a computer as well. That means doing the "Add device" dance one more time if you have not already.
If you have another computer available, you can install X-CTU on that as well and perform the same set up. You can certainly perform this test with both XBees connected to the same computer as well, just make sure you select the correct port number when you're adding the second XBee.
If you add a second XBee to the same computer, a second entry will be added to the "Radio Modules" list. Selecting either of those entries will show the configuration settings for that, specific XBee.
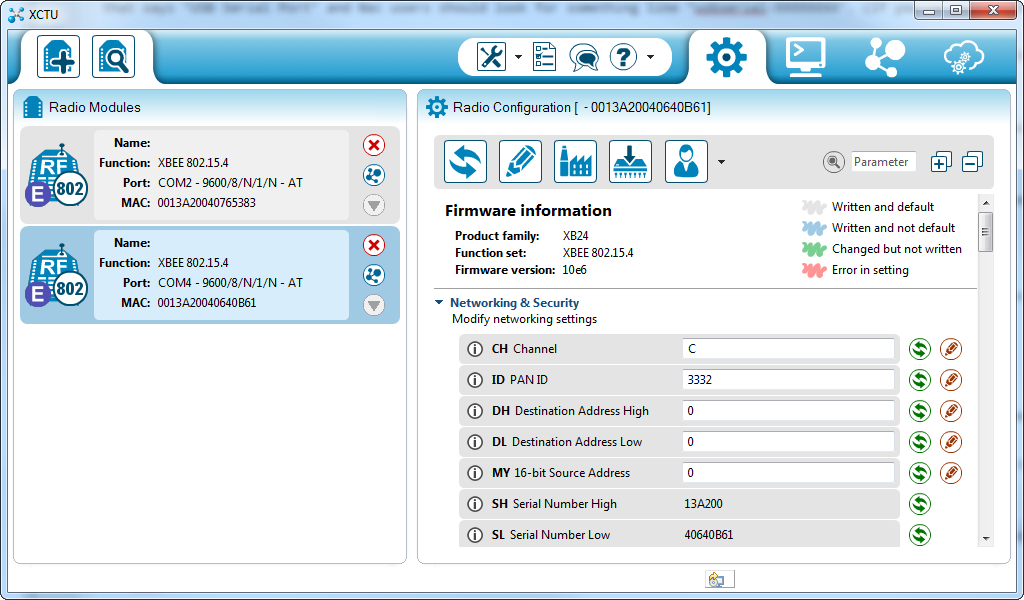
If you're ever unsure which XBee is which, try to match up the MAC numbers. These numbers are printed on a sticker on the bottom side of your XBee, and they're also listed in XCTU. (It's listed as the "Serial Number" high and low, and is un-modifiable.)
 |
 |
| Each XBee has a unique MAC address, printed on a sticker in the highlighted area. |
|
As with the last module, make sure all settings are defaulted to the same values. That'll make the next step possible.
- Channel = C
- PAN ID = 3332
- DH = 0
- DL = 0
- MY = 0
Quick and Easy Test
Click the "Switch to Consoles" icon -- ![]() -- in the upper-right part of the window. This will switch from the configuration tab to the console. We can use the console to send characters to an XBee, which will route that character over-the-air to any other XBee it's connected to.
-- in the upper-right part of the window. This will switch from the configuration tab to the console. We can use the console to send characters to an XBee, which will route that character over-the-air to any other XBee it's connected to.
If you have two XBees connected to your computer, you can switch between each radio's console by selecting the device on the left.
First, open a serial connection on each device by clicking the connect icon -- ![]() . The icon will change, and the border of the console will turn green.
. The icon will change, and the border of the console will turn green.
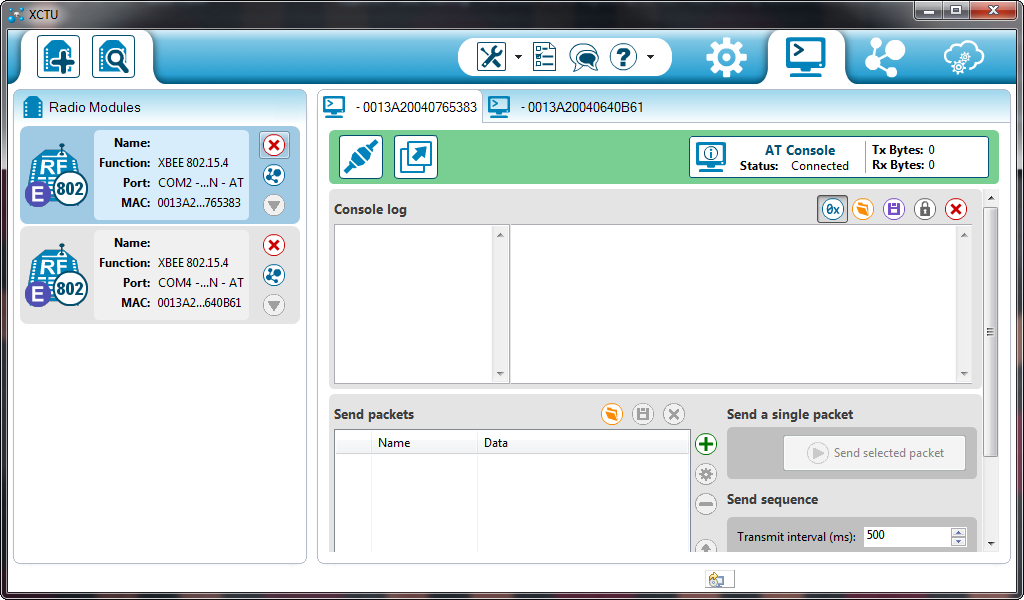
Next, click into the left half of the console, and type a letter or number. You should notice that character echoed in a blue font (the hexadecimal digits on the right represent the ASCII value). Now click into the other XBee's console. As long as it was open, you should see that same character, but red. Try typing a different character into the second XBee's console, and you should see it work the other way.
If that worked, then your XBees are configured to talk to each other! If not, check out the troubleshooting page.
That your XBees can talk to each other out of the box is no real surprise. They're all configured, by default, to be on the same network with the same addresses. That might be OK, but what if your neighbor is running an XBee-based robot control network, while you're trying to automate your house? Every time they try to roll a bot forward, your garage door might open! To be safe, you should configure your XBees to operate on a unique network. Fortunately, that, and most other XBee settings are easy to change. On to the next page!