Digital Sandbox Experiment Guide
 jimblom,
  bri_huang
13: Sound Detecting
\<Pitchman voice> Introducing the fabulously groundbreaking SOUND (Sandbox's Over/Under Nominal Decibels) System! Microphone check 1..2..1..2. With the SOUND you'll always have an adjustable sound level detector handy! \</Pitchman voice>
Background Information
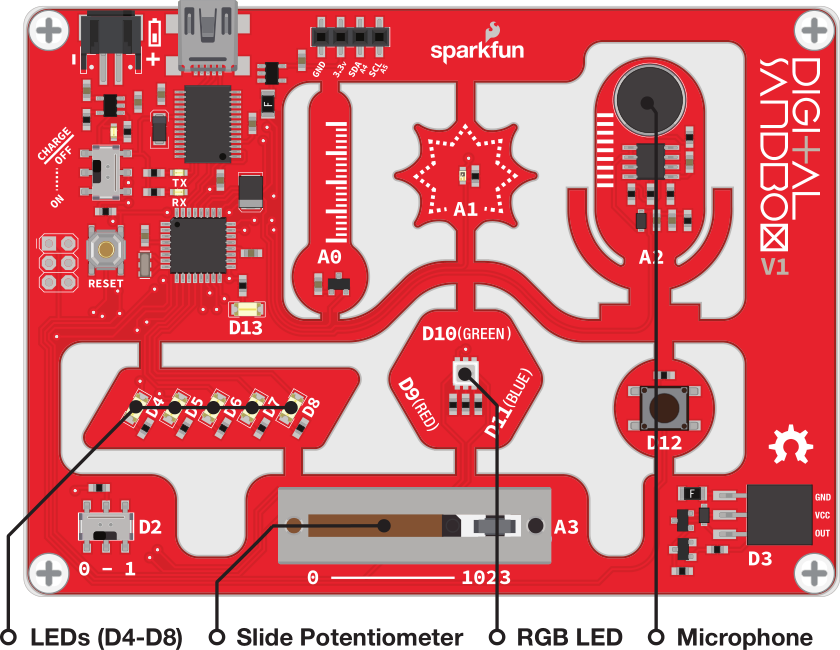
In this experiment we'll use the Sandbox's on-board microphone to measure volume levels and display them on the LEDs. The microphone produces a sound wave, which is just another analog voltage that we can measure. The louder the sound, the higher the amplitude of the wave and the larger the voltage.
Without a lot of complicated math and filters, sound can be a difficult thing to measure and react to. Using the Sandbox for voice recognition isn't quite possible, but it can be programmed pick out high volumes as long as it can sample the microphone input fast enough. We can use the slide potentiometer to set the sensitivity of the display.
Active Parts
Code Components
No new blocks to introduce this time. We'll be taking the analog input of pin A2 to read in the microphone level, and light up LEDs based on that value.
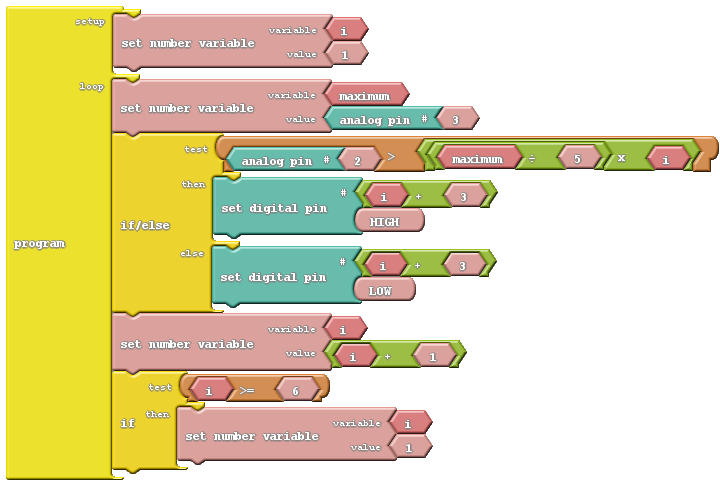
Do This
After arranging the blocks, upload the sketch and have a look at the LEDs. Are they bouncing to your voice? If not, try tapping on the mic.
To adjust the sensitivity of the volume meter, move the slide pot up or down. With the slider set to the far right, it'll take a really loud sound to make every LED turn on. But if you set the slider too low even the slightest noise will set the meter off.
Further Explorations
- Can you rewrite the sketch to use the RGB LED instead of the white LEDs? Make it turn red when the volume is really loud, and blue and/or green otherwise. Bonus points for using analog outputs!