Cellular Function Board - Blues Wireless Notecarrier
 El Duderino
Outboard Device Firmware Update
Now that we're familiar with routing data through the Notecard to notehub.io, we'll demo one of the Notecard's most unique features; outboard device firmware updates (DFU). Outboard DFU's allow the Notecard to upload firmware to a connected Processor Board remotely from any location with a cellular signal. In this section we'll use notehub and Arduino to upload a new sketch to an STM32 Processor v20.
Configure Notecard for Outboard DFU
The Outboard DFU setting should be enabled on your Notecard by default but if you want to make sure send the following request to it through the Notecard CLI: {"req":"dfu.status","on":true}.
Next, enable the Notecard to flash the STM32 Processor with the binary we'll create later with the card.dfu request. Since we're flashing the STM32 Processor, the request should look something like this: {"req":"card.dfu","name":"stm32","on":true}.
Generate the Firmware Binary
With Outboard DFU enabled, we need to generate and locate the binary file created by Arduino for the firmware to be uploaded to the STM32 Processor. Open the Arduino IDE and copy the code below into a blank sketch. Alternatively, you can find it in the examples folder of the Function Board's Hardware Github Repo.
language:c
/**
 * @file Example02_Outboard_DFU.ino
 * @brief This example performs an Outboard Device Firmware Update.
 * @copyright SPDX-License-Identifier: MIT
 * @author Alex Brudner, SparkFun Electronics
 * @date 2022-11-02
 * @note Based on the DFU example from Blues Wireless. See
 * https://github.com/blues/note-outboard-dfu
 *
 * ========== HARDWARE CONNECTIONS ==========
 * MicroMod STM32 Processor Board => MicroMod Main Board => MicroMod
 *  Function Board Blues Wireless Notecarrier
 *
 * Feel like supporting open source hardware?
 * Buy a board from SparkFun!
 *      MicroMod Function Board Blues Wireless Notecarrier
 *        | https://www.sparkfun.com/products/20409
 *      MicroMod STM32 Processor
 *        | https://www.sparkfun.com/products/16401
 *      MicroMod Main Board - Double
 *        | https://www.sparkfun.com/products/18575
 */

#include <Arduino.h>
#include <Notecard.h>

#define PRODUCT_UID "com.your-company.your-name:your_product"

int ledPin = LED_BUILTIN;

Notecard notecard;

void setup()
{
    pinMode(ledPin, OUTPUT);

    /* Begin Serial communications */
    Serial.begin(115200);
    Serial.println(F("Begin - MicroMod Notecarrier Example 02: Outboard DFU"));
    notecard.setDebugOutputStream(Serial);

    /* Begin Serial communications */
    Wire.begin();
    notecard.begin();

    /* Configure Notecard */
    J *req = notecard.newRequest("hub.set");
    JAddStringToObject(req, "product", PRODUCT_UID);
    JAddStringToObject(req, "mode", "continuous");
    JAddStringToObject(req, "sn", "stm32-micromod-v20-SN0001");
    notecard.sendRequest(req);

    /* Configure DFU settings */
    req = notecard.newRequest("card.dfu");
    JAddStringToObject(req, "name", "stm32-bi"); /* bi == boot inversion */
    JAddBoolToObject(req, "on", true);
    notecard.sendRequest(req);
}

void loop()
{
    /* Fast Blink LED while waiting for DFU. */
    Serial.println("Hello, world!");
    digitalWrite(ledPin, HIGH);
    delay(100);
    digitalWrite(ledPin, LOW);
    delay(400);
}
During verification, Arduino creates a temporary folder with this binary file along with other necessary metadata. On Windows, this is commonly in a filepath similar to: Users/"Your Username"/AppData/Local/Temp. When you open the Temp folder, you may have several folders titled arduino_build_######. If you can't find it there or use another operating system, Arduino prints the file location in the output data during the compilation step with "Verbose Output" enabled.
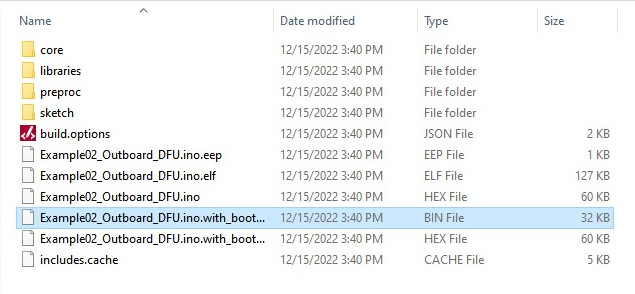
Open the folder containing the binary file, we'll need file location later. Alternatively, you can copy/paste it into a more easily accessible location.
Upload Binary to Notehub
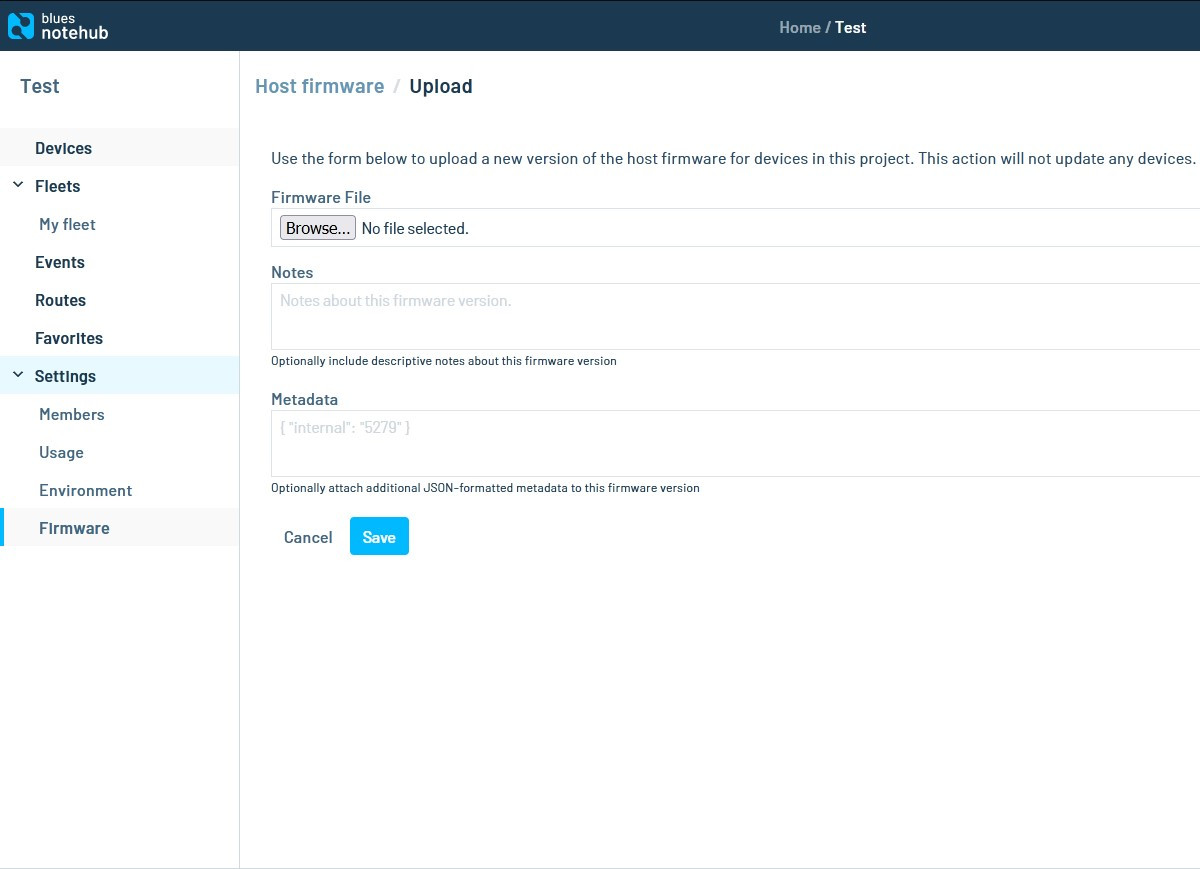
Now we need to upload the binary file of the firmware to Notehub.io. Log in to your Notehub account if you have not already and navigate to the "Firmware" option below "Settings". Click the Firmware File field and navigate to the firmware binary location and click "Open". This page also includes the ability to add any notes regarding the firmware update as well as any metadata you wish to include with it. We'll skip both of those for now in this demo.
With the firmware saved to Notehub, go back to the Devices page.
Update Device Firmware
Select your Notecard and select to the "Host Firmware" tab. Next, click the "Update" button on the far right of the screen and it should open a prompt asking you to confirm you want to update the firmware. Click "Proceed", select the firmware from the list (in our case it will only include the "Example02_Outboard_DFU" binary) and click "Apply".

Your Notecard should automatically start to try and update the new firmware. You can watch the status of the firmware update in the "Host Firmware" tab.
Now that you're familiar with how to perform Outboard DFU's, you can upload your own custom firmware to your Processor.