XBee3 Thing Plus Hookup Guide
 Alex the Giant, Ell C
REPL (Hello, World!)
One of the easiest ways to interact with MicroPython running on the XBee3 Thing Plus is to enter commands via the REPL over a serial connection. This can be extremely helpful if you want to test out various parts of code before writing them down in a (slightly more permanent) text document that is then uploaded to the XBee3 Thing Plus. Fortunately, XCTU offers a MicroPython Terminal in its Tools menu!
To start, connect the XBee3 Thing Plus to your computer using a USB micro-B cable. If you are on Windows, open the Device Manager and find out which COM port your XBee3 Thing Plus is associated with (for example, COM5). On macOS, it will likely be /dev/cu.usbserial-
Open up XCTU and load up your XBee3 Thing Plus as outlined in the Software Setup section. Make sure you have MicroPython REPL [4] selected under AP API Enable and make sure you've clicked the pencil button to write your changes to the XBee.
Accessing the MicroPython Terminal
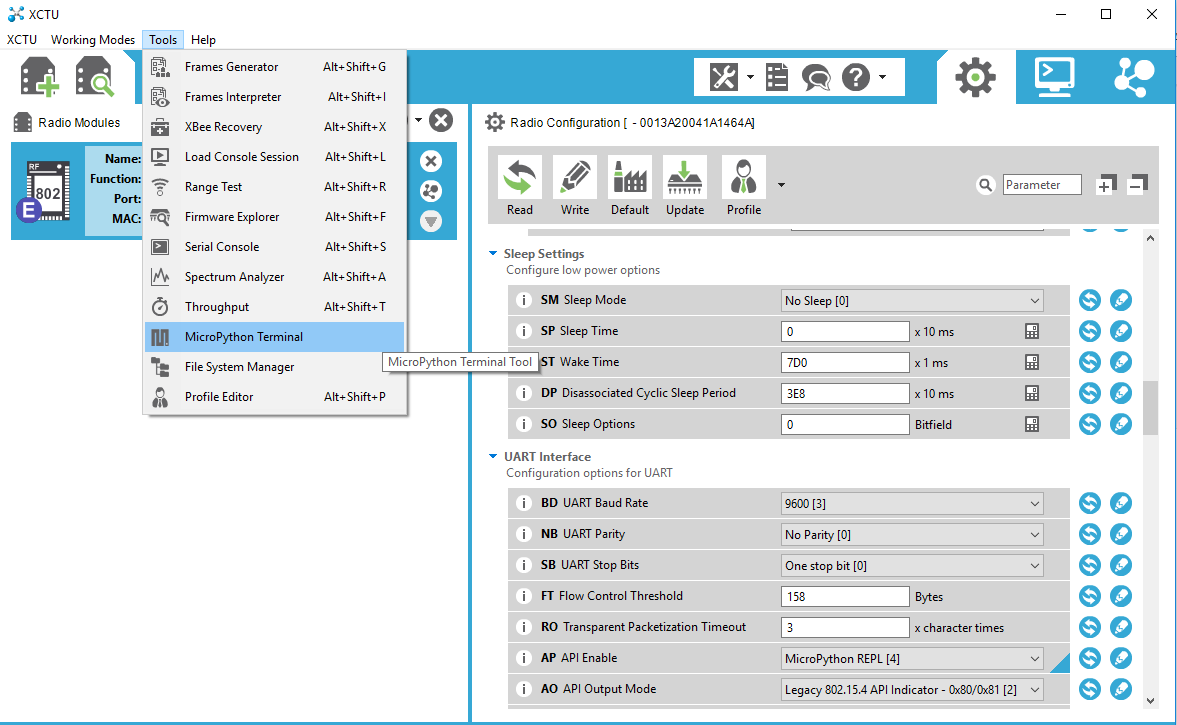
The XCTU provides a MicroPython Terminal under the Tools Menu:
Once you have the terminal window available, click on Configure and make sure you select the correct COM port. Most of this should be pre-populated, but double-checking never hurts.
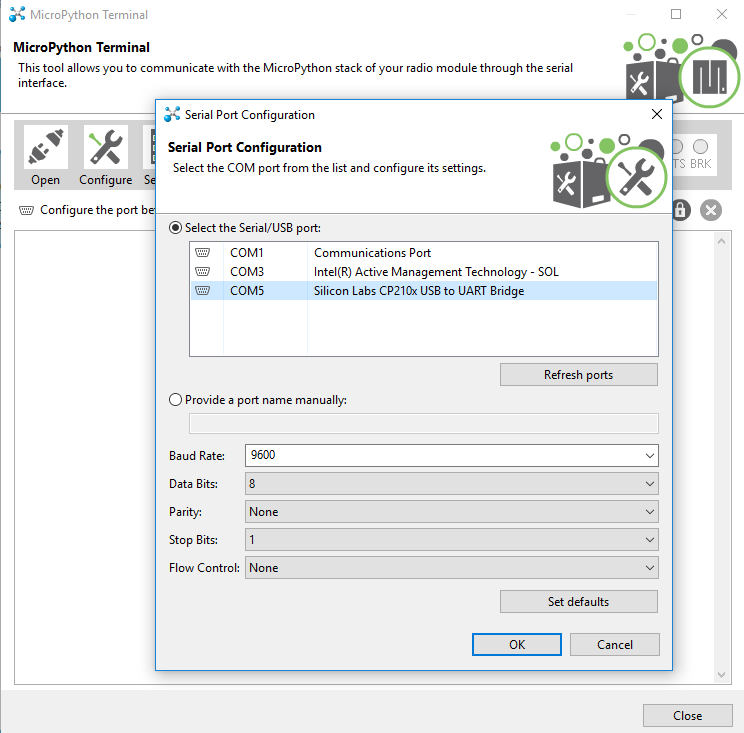
Once you're satisfied that everything is correct, click OK in the configuration window and the hit the Open button.
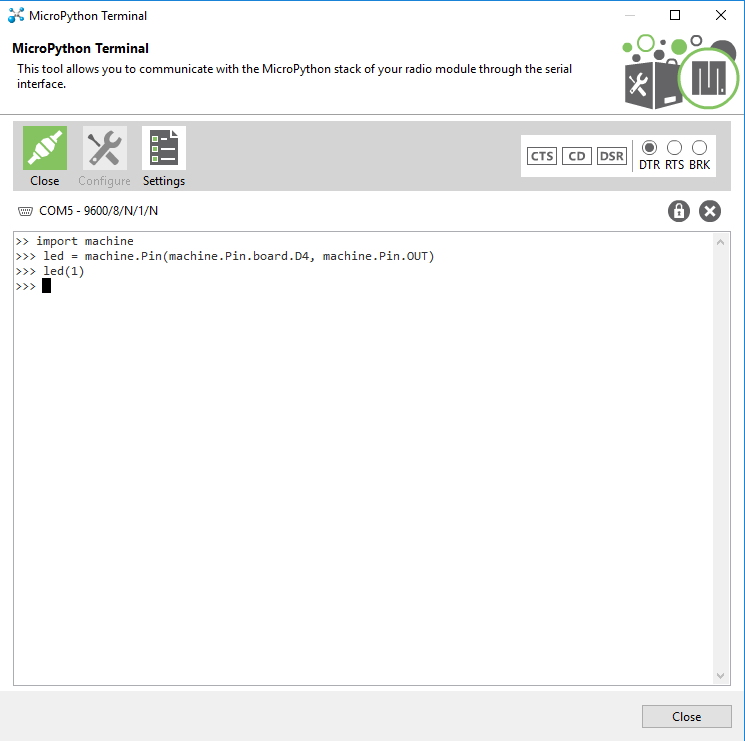
Once you have a connection, press enter once to get a REPL command prompt (>>>).
When you see that command prompt, enter the following commands one at a time:
language:Python
import machine
led = machine.Pin(machine.Pin.board.D4, machine.Pin.OUT)
led(1)
This should turn on the LED found on the XBee3 Thing Plus (the blue LED located at pin 4).

Type the following command to turn it off:
language:Python
led(0)
Code to Note:
The first thing we typed was import machine. machine is the MicroPython module that gives us control of the various general purpose input/output (GPIO) pins and special functions, such as I2C and interrupts. We use the keyword import to make all of the functions in the machine module available for us to use.
We then create a machine.Pin object and store it in the label led. When defining a machine.Pin object, we supply a number of arguments, including which pin number we want to use (the pin numbers can be found in white numbers on the side of the XBee3 Thing Plus) and how we want to use that pin (e.g. as an input or output).
Because we set the pin as an output (as given by machine.Pin.OUT), we can drive the pin to logic low (0 V) or logic high (3.3 V) by setting its value to 0 (logic low) or 1 (logic high). To drive the pin high, we write led(1). This has the effect of turning on the LED.
Similarly, we can turn the LED off with led(0), which sets the pin to 0 V.