XBee3 Thing Plus Hookup Guide
 Alex the Giant, Ell C
Experiment 1: AutoRunning MicroPython
As we saw above, it is easy to control an LED by individually calling commands in the REPL. Here we are going to write our code to a file, upload that file to the XBee3 Thing Plus, and then set up the XBee3 Thing Plus to auto-run the MicroPython code.
There's a caveat to writing code that automatically runs on the XBee3 Thing Plus. If your code contains a forever loop, the MicroPython interpreter will continue to run your code (forever!) which means we will never get a REPL prompt, should we want/need one. We're going to upload code that runs a forever loop, but checks for a Button 5 press. When it detects that button press, it will drop to REPL.
Code Part 1: Push Button, Get REPL
In your text editor of choice, enter the following code:
language:python
import machine
import sys
import utime

# Pin definitions
repl_button = machine.Pin(machine.Pin.board.D5, machine.Pin.IN, machine.Pin.PULL_UP)

# Wait for button 5 to be pressed, and then exit
while True:

    # If button 5 is pressed, drop to REPL
    if repl_button.value() == 0:
        print("Dropping to REPL")
        sys.exit()

    # Do nothing
    utime.sleep_ms(1)
Save the code with the name main.py.
Run It
In most configurations of MicroPython, there are two files stored on the microcontroller: boot.py and main.py. As soon as the microcontroller receives power (or directly after a reset), the code in boot.py will be run. Then, main.py will run. Note that once main.py finished executing, it will be run again (over and over again forever).
Within the File System Manager, we do not see boot.py or main.py; instead we will be uploading our own main.py file to the XBee.
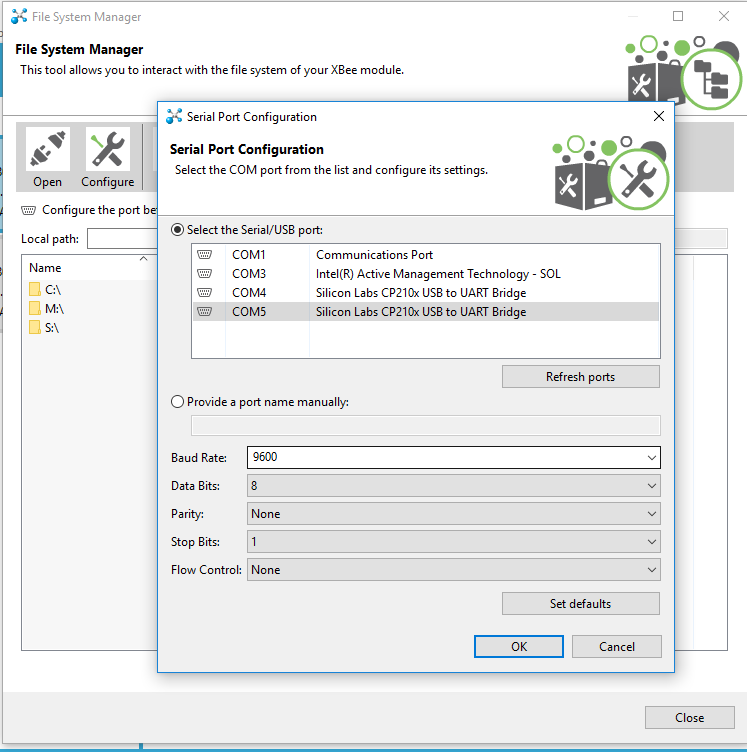
In XCTU, under Tools, select the File System Manager. Go ahead and click on the Configure button, make sure you have the correct port and baud rate selected, and then click OK.
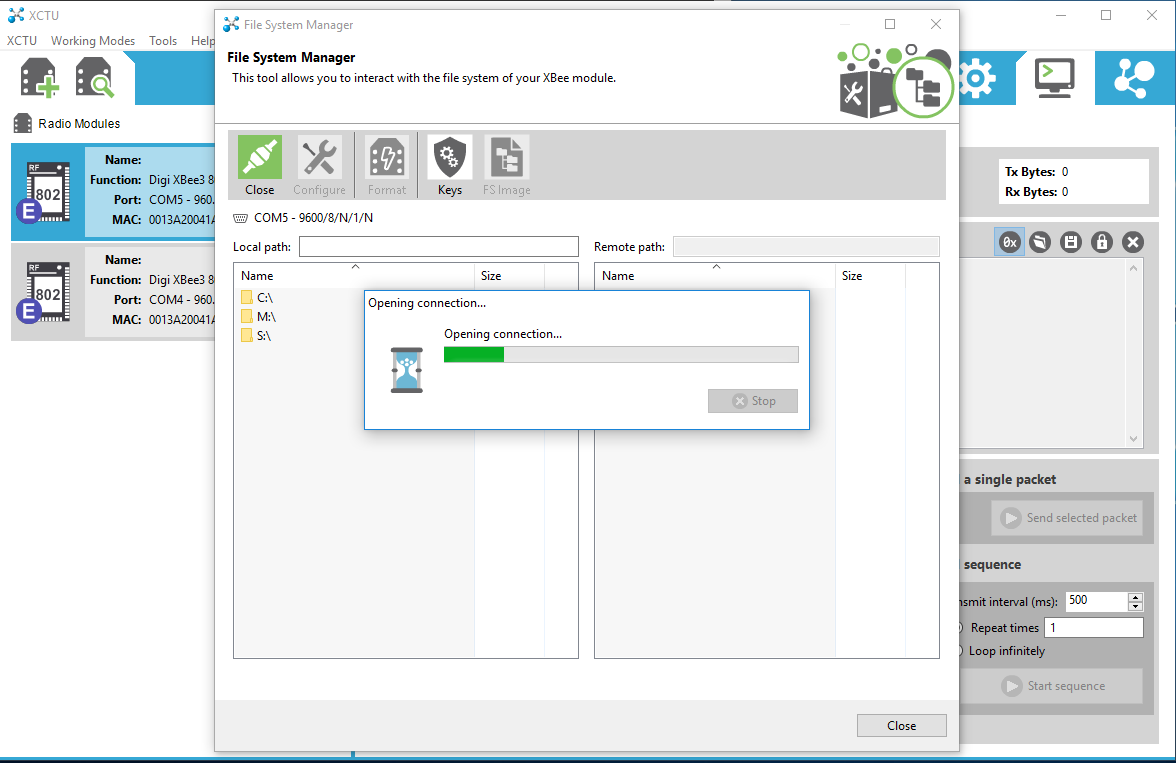
Next, click on the Open button, and once the connection is established, you should see your own file system on the left, and the XBee's file system on the right.
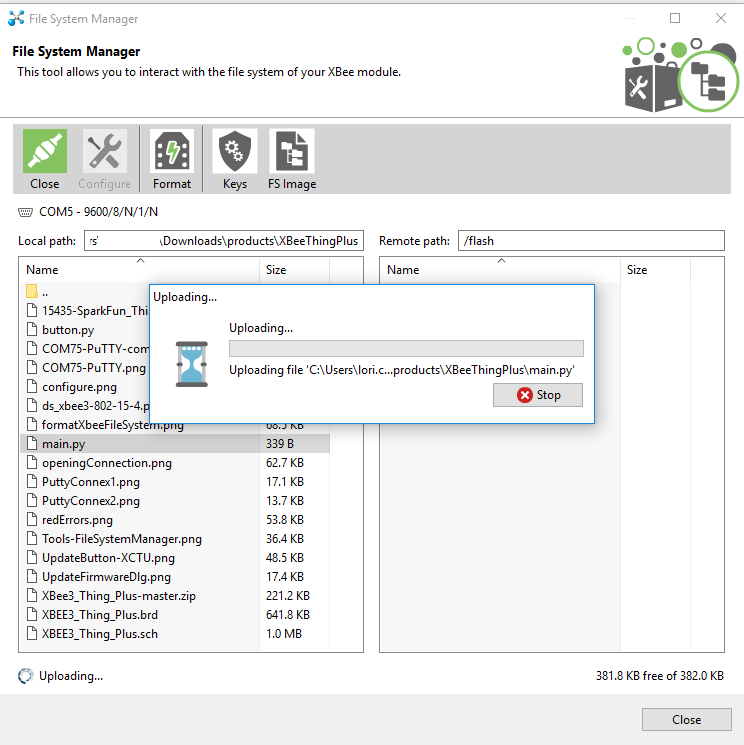
In the left side, navigate to your main.py file, and then drag that to the XBee's window on the right. The file will upload to the XBee!
Enable AutoRun
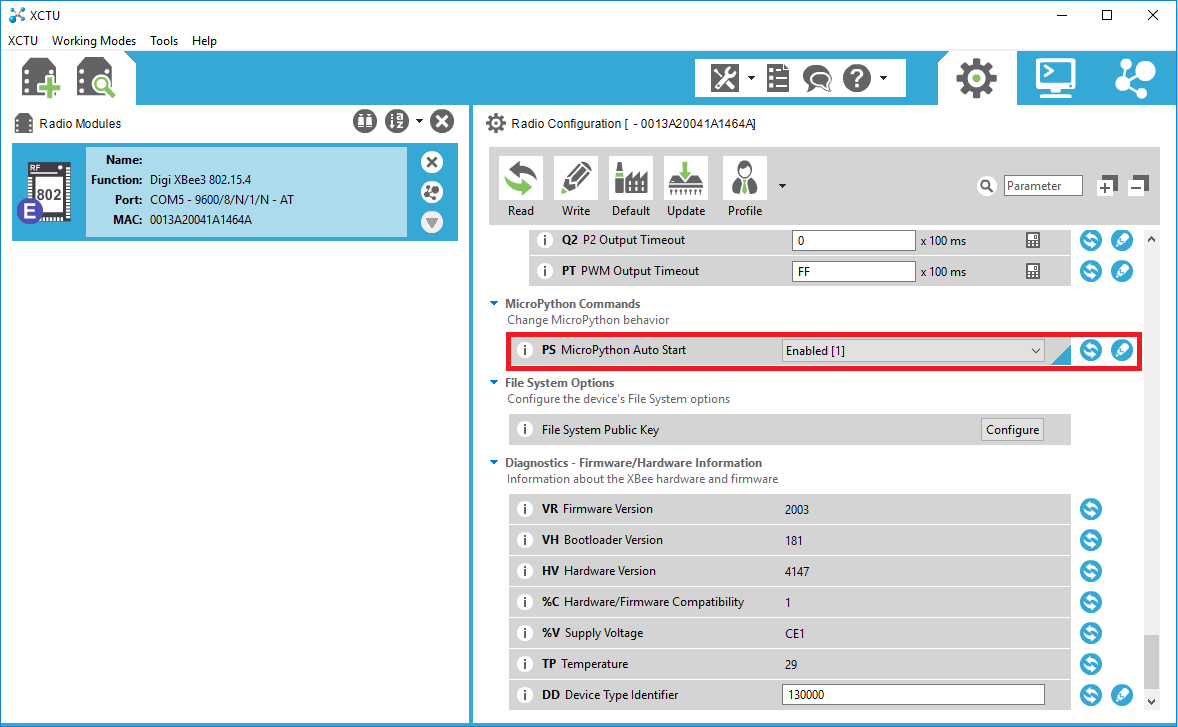
If you wish to have your main.py file automatically run on your XBee, you'll need to go back to XCTU and enable the MicroPython Auto Start. Make sure you click on the pencil button to write your changes to the XBee!
After uploading your code and enabling autostart, go ahead and hit the RST button on your XBee. Your code should now automatically start running. However, because our code simply exits on a button push, there is nothing to see here. Go ahead and hit the Close button on the top left to close the connection, and then exit out of this dialog.
Back in XCTU, select Tools->MicroPython Terminal. Again, verify that you have the correct COM port and baud rate selected, and then open the connection to your XBee. You should see a blank terminal window, and even if you try typing some characters, nothing should appear.
Press the 5 button on your XBee3 Thing Plus board.

As soon as you hit that button, you should see a message appear in your serial terminal saying "Dropping to REPL" followed by the MicroPython version number and a command prompt (>>>).

Code to Note
Our program is relatively simple. We first import the machine, sys, and utime modules. The machine module allows us to control connected hardware, like pins. The sys module gives us access to underlying interpreter values and the ability to exit out of our forever loop in main.py. Finally, the utime module allows us to get the local machine time (assuming we have a connected real-time clock) or tell our program to wait for a specified amount of time.
Much like in our REPL example, we create a machine.Pin object for pin 5, but we make it an input this time. We supply a third argument: machine.Pin.PULL_UP. This says that we want to enable the XBee's internal pull-up resistor for pin 5. This allows the voltage on pin 5 to stay at 3.3 V until we push the onboard button, which subsequently pulls the voltage on the pin down to 0 V. We can use this technique to determine if the button has been pressed.
Everything indented under while True: runs forever. Each line is executed sequentially before returning to the top of the while loop.
Within the loop, we check to see if the button has been pressed:
language:python
if repl_button.value() == 0:
    print("Dropping to REPL")
    sys.exit()
If it has, we print a message out to the serial terminal and then call sys.exit(), which raises a SystemExit exception. This will force the program to exit (and the MicroPython interpreter will perform any garbage collection or cleanup as necessary).
If no button push is detected, we tell the XBee to do nothing (sleep) for 1 ms:
language:python
utime.sleep_ms(1)
This process is repeated again within the while loop.
Code Part 2: Blinky
In a text editor, enter the following code:
language:python
import machine
import sys
import utime

# Pin definitions
repl_button = machine.Pin(machine.Pin.board.D5, machine.Pin.IN, machine.Pin.PULL_UP)
led = machine.Pin(machine.Pin.board.D4, machine.Pin.OUT)

# Blink forever
while True:

    # If button 5 is pressed, drop to REPL
    if repl_button.value() == 0:
        print("Dropping to REPL")
        sys.exit()

    # Turn LED on and then off
    led.value(1)
    utime.sleep_ms(500)
    led.value(0)
    utime.sleep_ms(500)
Save the code to your main.py file on your local file system (overwrite it).
Run It
Make sure you've closed out of the previous connection, and then upload your code via the File System Manager - exactly the same way you did in Code Part 1. You will want to overwrite or first delete the main.py file that exists on your XBee3 Thing Plus file system.
The onboard blue LED should begin blinking on and off every second. If it does not do so right away, push the RST button on the board.
Open up a MicroPython Terminal and connect to your XBee3 Thing Plus. Press and hold button 5 until the blinking LED stops. You should also see a REPL prompt appear.
Code to Note
This time, we combined parts from our first REPL example and our button example. We added the following part in the while loop:
language:python
led.value(1)
utime.sleep_ms(500)
led.value(0)
utime.sleep_ms(500)
Much like we saw in the REPL example, we turn the LED on with led.value(1) and turn it off with led.value(0). We sleep 500 ms between each action so that we can see the LED blinking.
At the top of our while loop, we added our "drop to REPL" button press code to make debugging or interacting with the XBee3 Thing Plus easier. Note that you need to hold down button 5 this time, as it can take over 1 second for one iteration of the while loop to complete. Execution needs to return to the beginning of the loop before checking for a button 5 press again.