WiFi Controlled Robot
Motor Wiring Test
Note: This example assumes you are using the latest version of the Arduino IDE on your desktop. If this is your first time using Arduino, please review our tutorial on installing the Arduino IDE. If you have not previously installed an Arduino library, please check out our installation guide.
Now that we have the robot put together, let's add some code! But before we get ahead of ourselves, let's test to make sure everything is working. The first thing we want to do is make sure the motors are working correctly. What we're looking for is that when we send a command, the wheels move in the correct direction. Specifically:
- Forward: Both wheels spin forward
- Reverse: Both wheels spin in reverse
- Left: Left wheel spins in reverse, right wheel spins forward
- Right: Left wheel spins forward, right wheel spins in reverse
If you haven't uploaded code to an ESP32 before, check out the hookup guide to learn how to program the ESP32 Thing in Arduino.
Once you have the board definitions installed, upload the following sketch to your ESP32:
language:cpp
/*
 * Alex Wende SparkFun Electronics
 * ESP32 Motor Wiring Test
 *
 * In this example we'll send motor commands to the Serial Controlled Motor Driver (SCMD)
 * to see how the motors respond based on the commands we send.
 *
 * Commands used:
 * "D\r\n" - Sends a disable command to stop the motors
 * "E\r\n" - Sends a enable command to turn the motors on
 * "M0F50\r\n" - Tells the motor driver to spin motor 0 forwards at 50% power
 * "M1R100\r\n" - Tells the motor driver to spin motor 1 in reverse at 100% power
 */

byte counter = 0;

void setup()
{
  Serial.begin(9600); // Initialize serial port to the SCMD's default baud rate
  delay(500);         // Wait a bit to make sure the SCMD is ready
}

void loop()
{
  if(counter == 0)
  {
    Serial.println("Sending Forward Command:");
    delay(50);
    Serial.print("D\r\n");
    delay(50);
    Serial.print("M0F50\r\n");
    delay(50);
    Serial.print("M1F50\r\n");
    delay(50);
    Serial.print("E\r\n");
  }
  else if(counter == 1)
  {
    Serial.println("Sending Reverse Command:");
    delay(50);
    Serial.print("D\r\n");
    delay(50);
    Serial.print("M0R50\r\n");
    delay(50);
    Serial.print("M1R50\r\n");
    delay(50);
    Serial.print("E\r\n");
  }
  else if(counter == 2)
  {
    Serial.println("Sending Left Command:");
    delay(50);
    Serial.print("D\r\n");
    delay(50);
    Serial.print("M0R50\r\n");
    delay(50);
    Serial.print("M1F50\r\n");
    delay(50);
    Serial.print("E\r\n");
  }
  else
  {
    Serial.println("Sending Right Command:");
    delay(50);
    Serial.print("D\r\n");
    delay(50);
    Serial.print("M0F50\r\n");
    delay(50);
    Serial.print("M1R50\r\n");
    delay(50);
    Serial.print("E\r\n");
  }

  counter++;
  if(counter > 3)
  {
    counter = 0;
  }
  delay(5000);
}
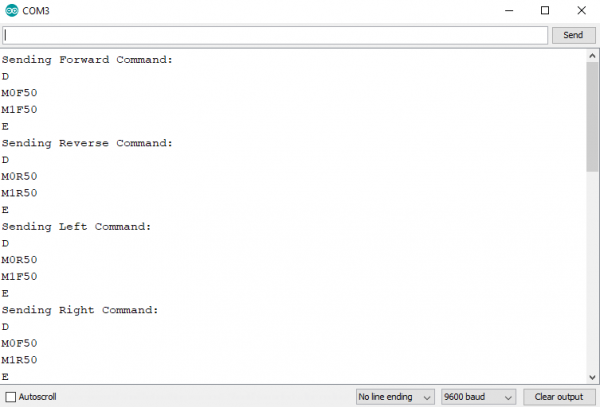
Once the code has uploaded, open up your serial terminal. Make sure the baud rate is set to 9600, and you should see messages like this:
Pay attention the messages stating which command was sent, and verify that what was sent reflects what happened. If nothing moves, make sure you have power connected correctly and your motors are connected to the SCMD, and that you set the baud rate to 9600 in your Arduino sketch (not just in the terminal window). If one (or both) motors spins in the opposite direction than it should, you can fix it by swapping the motor connections to the SCMD.
Another option is to correct it in software. If the forward command was sent but motor0 spins in reverse, replace M0F50\r\n with M0R50\r\n. Another possibility is if the forward/reverse commands work, but the left/right commands are backwards, swap the M0 and M1 in the left and right command blocks. If you need to make changes in the software, remember which ones need to be changed when we add code to the final example.
