SparkFun gator:log Hookup Guide
 Englandsaurus
 Introduction
Most of you probably have done a science experiment that required data of some sort to be recorded...
The gator:log is the perfect data logging tool for your next experiment. With the automation of the data collection process, gone are the days of rushing around with a pen and composition notebook to simultaneously record data and your observations. Now, you only need to sit back and observe your experiment (or just wait for it to complete, if no observations are necessary).
The gator:log allows a student(s) to focus more on the experiment than watching a thermometer or sensor readout. Additionally, the micro:bit can still be used to provide a graphical display for observing changes in data, when a sensor readout is required. If tied in conjunction with the gator:RTC, stop watches on time based experiments can become a thing of the past too (with the added benefit of more accurate timing results)!
This tutorial will show you how to get started using this gator:log with the gator:bit (v2) in the micro:bit development environment.
Required Materials
To get started, you'll need a micro:bit to control everything. Each of the products below includes a micro:bit, but the kit and bundle also include some additional accessories that you may want as well.

micro:bit Board
DEV-14208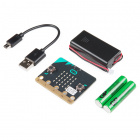
micro:bit Go Bundle
DEV-14336
SparkFun Inventor's Kit for micro:bit
KIT-15228To easily use the gator board ecosystem, a gator:bit (v2) will help breakout the necessary pins and you will also need alligator and/or banana cables to connect the gator:bit to the gator:log.
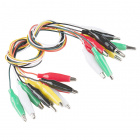


Banana to Banana Cable - Right Angle
CAB-15368(*These banana cables have a special diameter on the attachment points designed specifically for use with the micro:bit ecosystem. They may or may not be compatible with the banana cables used on your test equipment.)
Additionally, users will also need a µSD card and a µSD USB reader:
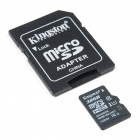
microSD USB Reader
COM-13004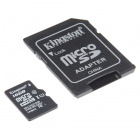
You may already have some of these materials, so feel free to modify your cart as necessary.
Suggested Reading
The gator:log is pretty straight forward to use in application. However, you may find the following concepts useful along the way.
Serial Communication
Serial Terminal Basics
OpenLog Hookup Guide
SparkFun gator:RTC Hookup Guide
If you aren't familiar with the micro:bit, we recommend reading here for an overview.
We would also recommend taking a look at the following tutorials if you aren't familiar with them.
Getting Started with the micro:bit
Getting Started with MicroPython and the SparkFun Inventor's Kit for micro:bit
How to Load MicroPython on a Microcontroller Board
SparkFun gator:bit v2 Hookup Guide
Hardware Overview
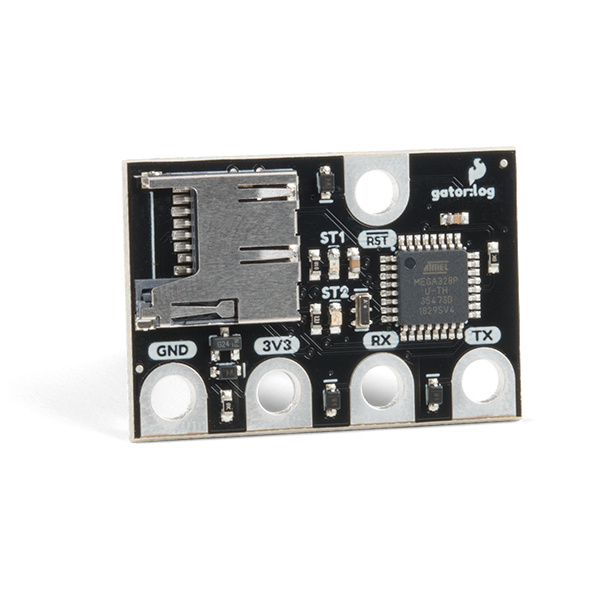
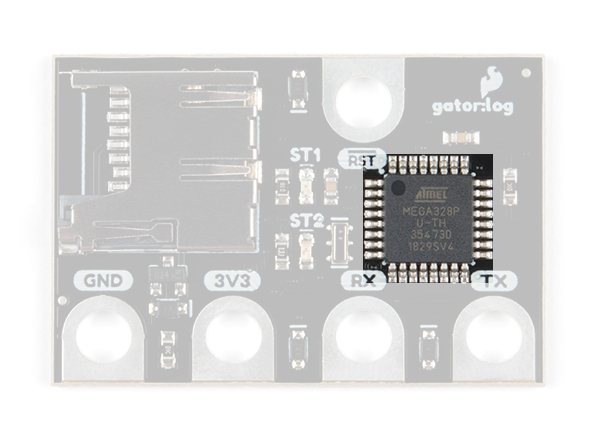
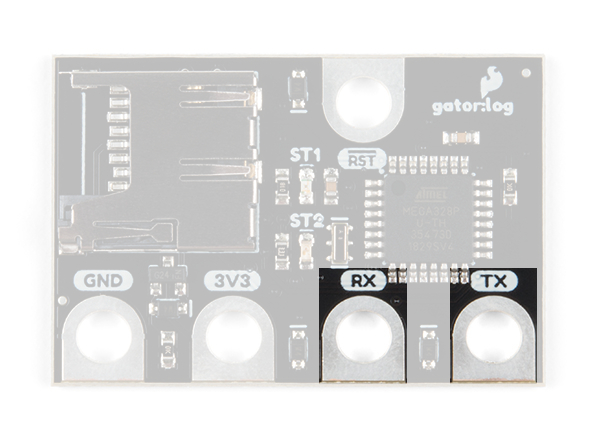
The gator:log consists of 5 pads for power, data, and an interrupt.
| Contacts | Direction | Description |
|---|---|---|
| GND | N/A | Ground: Reference voltage and ground loop. |
| 3.3V | In | Power: Provides 3.3V to the board. |
| RX | In | Data and commands are transmitted to the gator:log from an external microcontroller (i.e. micro:bit). |
| TX | Out | Data can be read from an SD card on the gator:log by an external microcontroller (i.e. micro:bit). |
| RST | In | Pin goes high or low based on if the gator:log needs to be initialized. |
Power
The specified operating voltage for the ATmega328 is between 1.8V - 5.5V. For use with the gator:bit (v2) and micro:bit, you should provide 3.3V through the 3V3 and GND pads to keep the logic levels consistent.

ATmega328P
The heart of the gator:log is an ATmega328P microcontroller. The ATmega328P is used to handle the incoming data and store it on an µSD card. It is also used to handle all the file directory, organization functions available for the gator:log. For the most part, users just need to be aware that the RST pad must be connected in addition to the other pads.
Here are some of the characteristics of the ATmega328P microcontroller from the datasheet:
| Characteristic | Range |
|---|---|
| Operating Voltage | 1.8V to 5.5V |
| Current |
Idle: approx. 25 mA (avg.) Peak: approx. 35mA (w/ status LEDs flashing) |
| Storage | SD Card |
| Input Channels | 1- Serial Data |
| Speed |
Input: Serial Data Output: Serial Data |
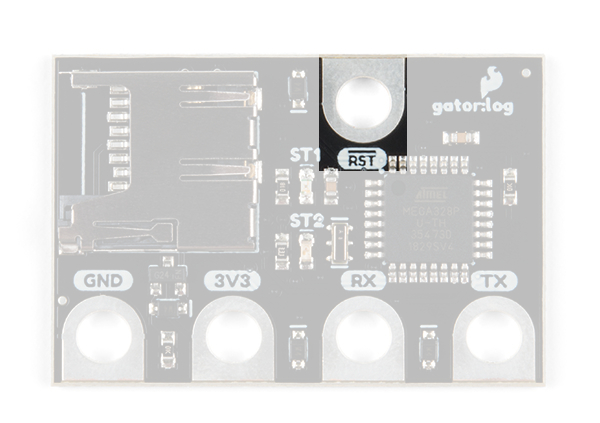
Reset Pad
The reset pad is used to initialize the begin function for the ATmega328P microcontroller. This pin must be connected when the gator:log is initialized to function properly.
What is a Data Logger?
A data logger is a device that records data over time, usually from an instrument or sensor. Most often, they are low power, use a microprocessor, include (internal or external) data storage options, contained in a compact enclosure, and are battery powered. Generally, data loggers are useful for collecting data from remote locations for extended periods of time. In s, these devices will include a renewable power source for self sufficiency and may have a remote data link when it is not be feasible to constantly drive out to change batteries and/or data storage.
Below is a list of a few examples of data logging applications:
- Weather Stations and Buoys
- Monitoring Agricultural Conditions
- Road Traffic
- Wildlife Conservation
- Building Monitors (i.e. for Power/Water usage and HVAC Efficiency)
- Monitoring for Athletes Performance (Biosenors)
For more details on data logging applications, check out these online resources:
- Sensor Fusion and Smart Sensor in Sports and Biomedical Applications
- Data loggers reveal migration routes
- Monitoring Wetlands with Data Loggers:A Best Practices Guide (Example of a Commercial Data Logger Setup)
- Data Logger and Remote Monitoring System for Multiple Parameter Measurement Applications
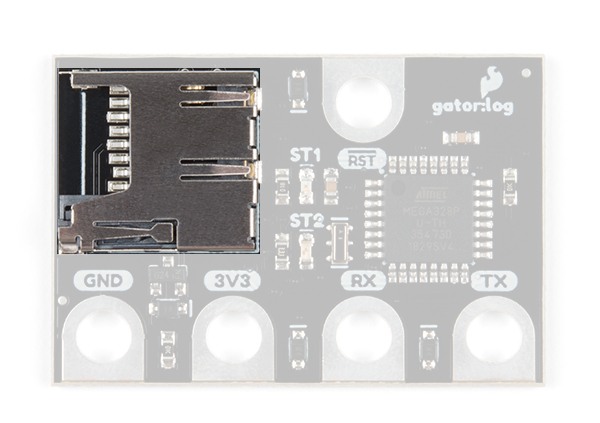
µSD Card Slot
A µSD (micro SD) card slot is available to for a µSD card, which is needed to store the data sent to the gator:log. The gator:log uses the SPI pins of the ATmega328P to send data to the SD card from a temporary buffer. In most cases, users only need to consider the recording time of the gator:log, know that the µSD card requires proper formatting, and be aware of the restrictions on the SD cards that are compatible with the gator:log, which are laid out in the table below.
| Characteristic | Range |
|---|---|
| Style | µSD card (microSD) |
| Type |
SD (SDSC) SDHC |
| Class | ≥4 |
| Capacity | 64MB to 32GB |
| Format | FAT16 or FAT32 |
Although, many users may already have a few SD cards lying around, the characteristics laid out in the table are known to be compatible with the gator:log. Be aware that using SD cards that fall outside of these restrictions are not guaranteed to work. If you aren't sure about the style or type of SD card you have, please check out this Wikipedia article on SD cards for more details.
Spring-Loaded Locking Mechanism: Once the SD card is placed in the slot, push in the card once. You should hear a soft click when the card is locked into place. To unlock or release the card, push the card in again. You should hear another click when it unlocks and the card will pop out. The card should slide out easily; if you feel resistance pulling out the card, it is probably still locked in place. Do NOT try to pry or force the SD card out of the slot, this will damage the locking mechanism and render the gator:log useless.
Calculating Data Usage
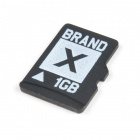
For most users, we recommend checking out our 1GB SD card. In most cases, this should hold enough data for a few sensors (depending on the amount of data you are storing and how quickly you are sampling that data).
Example Case:
- Our 1GB SD card has about 970MB of storage capacity
- Recording from 10 sensors
- Each sensor sends 20 characters of data
- Sampling rate of 1 ms
or
At 4850 seconds, that gives you about 1.3 hours of recording time. Now 1 ms is a pretty high data sampling rate, if you reduce that to 10 ms (or 100 times per second) and your recording time increases to about 13.5 hours.
If users need a longer recording time, they can change to an SD card with a higher storage capacity, change how often data is recorded, decrease the number of sensors used, or reduce the amount of characters stored per data set.
Status Indicator LEDs
There are two status LEDs on the gator:log to help with troubleshooting.
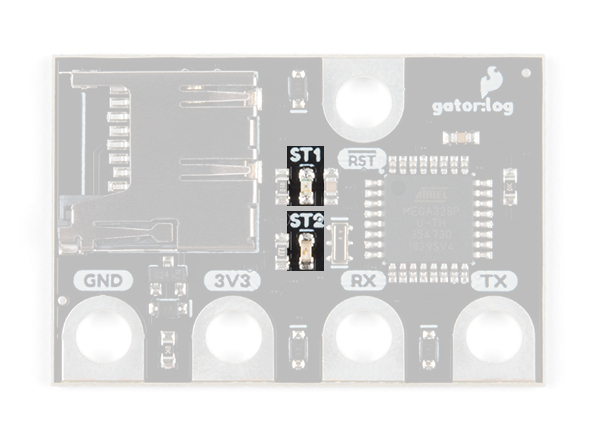
ST1 (Blue)
This blue indicator LED is attached to pad 5 of the ATmega328P. Mostly, users only need to be aware that this LED blinks when serial communication is functioning (i.e. data is being sent from the micro:bit to the gator:log).
ST2 (Green)
This green LED is connected to the SPI clock line on the ATmega328P. Mostly, users only need to be aware that this LED only blinks when the when the gator:log is recording data to the µSD card.
Note: If you are only sending short bursts of data, the green ST2 LED will be a lot more dim compared to the blue ST1 LED. You may need to cover it with your hands to see the LED blink clearly.
Serial Connection
Serial is an asynchronous communication protocol used to transfer data between devices. It is a 2-wire connection consisting of RX (receiving data in) and TX (transmitting data out). It's important to know that the RX and TX labels are with respect to the device itself. So the RX from one device should go to the TX of the other, and vice-versa.
Hardware Assembly
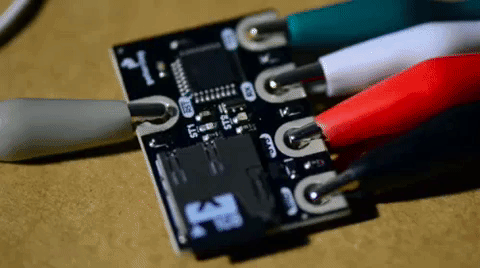
Connecting your gator:log to the to the gator:bit (v2) is simple. The board can also be daisy-chained with other I2C boards. This can easily be done with alligator cables or these special banana cables.
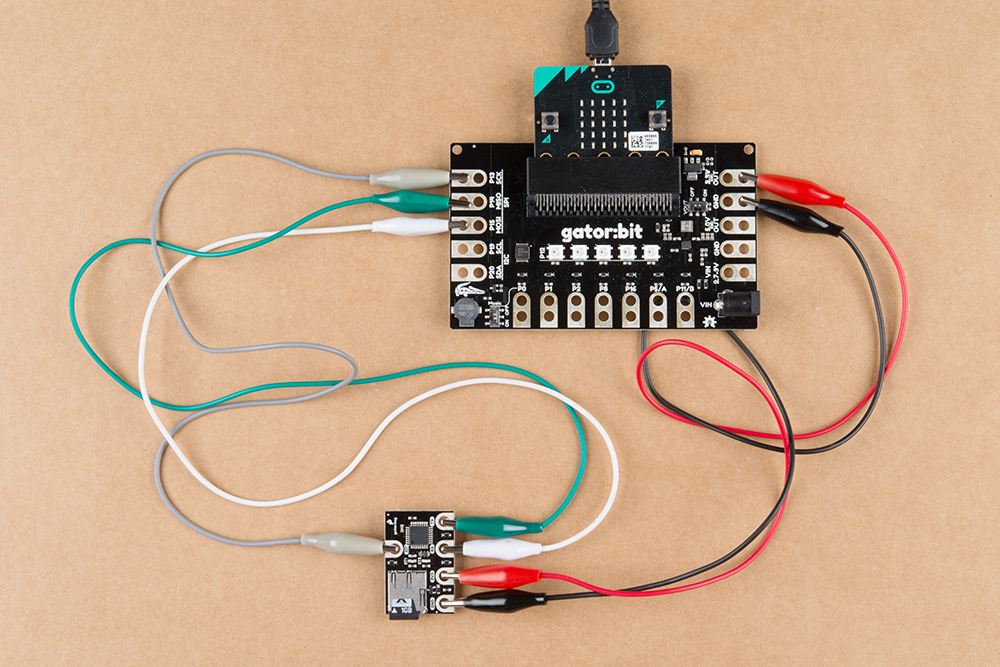
Hardware assembly of connections used in example. Click to enlarge.
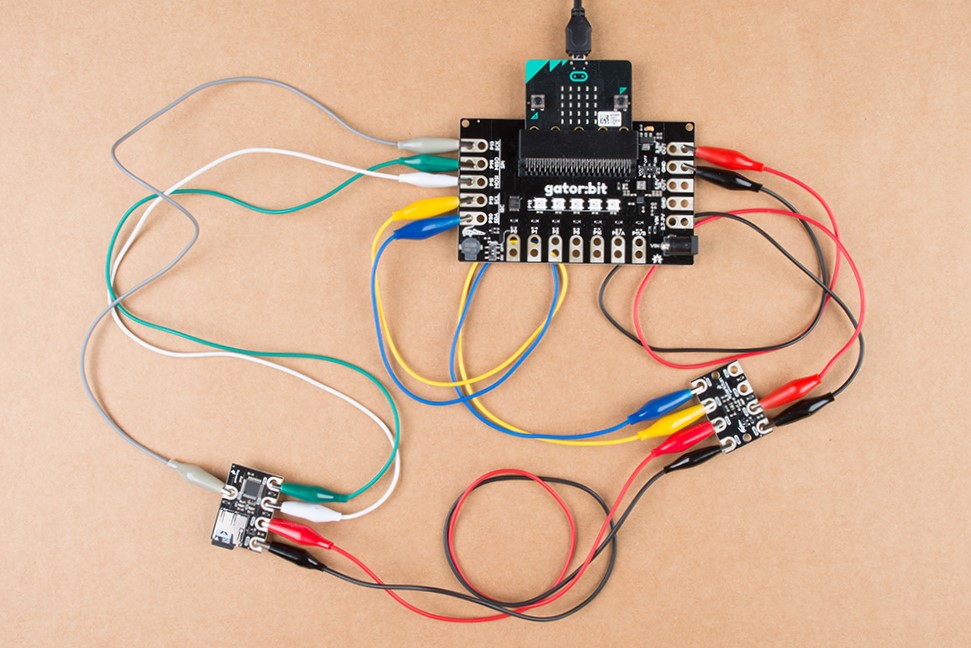
Example of connecting multiple gator accessory boards. Click to enlarge.
| gator:log | GND | 3V3 | RX | TX | RST |
|---|---|---|---|---|---|
| gator:bit (v2) | GND | 3.3V OUT | P15 (MOSI) | P14 (MISO) | P13 (SCK) |
Adding the MakeCode Extension
- If you have not previously used MakeCode, please check out the Quick Start Guide fro micro:bit.
- If this is your first time using a micro:bit, please review our Getting Started with the micro:bit guide.
- If this is your first time using the gato:bit (v2), please review our SparkFun gator:bit v2 Hookup Guide.
The easiest way to get started using the gator:log is to use Microsoft MakeCode, a web-based block editor. This tutorial assumes you are familiar with the with MakeCode, the gator:bit (v2), and the micro:bit development board. If this is your first time check out this guides linked in the suggested reading section (above).
Installing Extensions
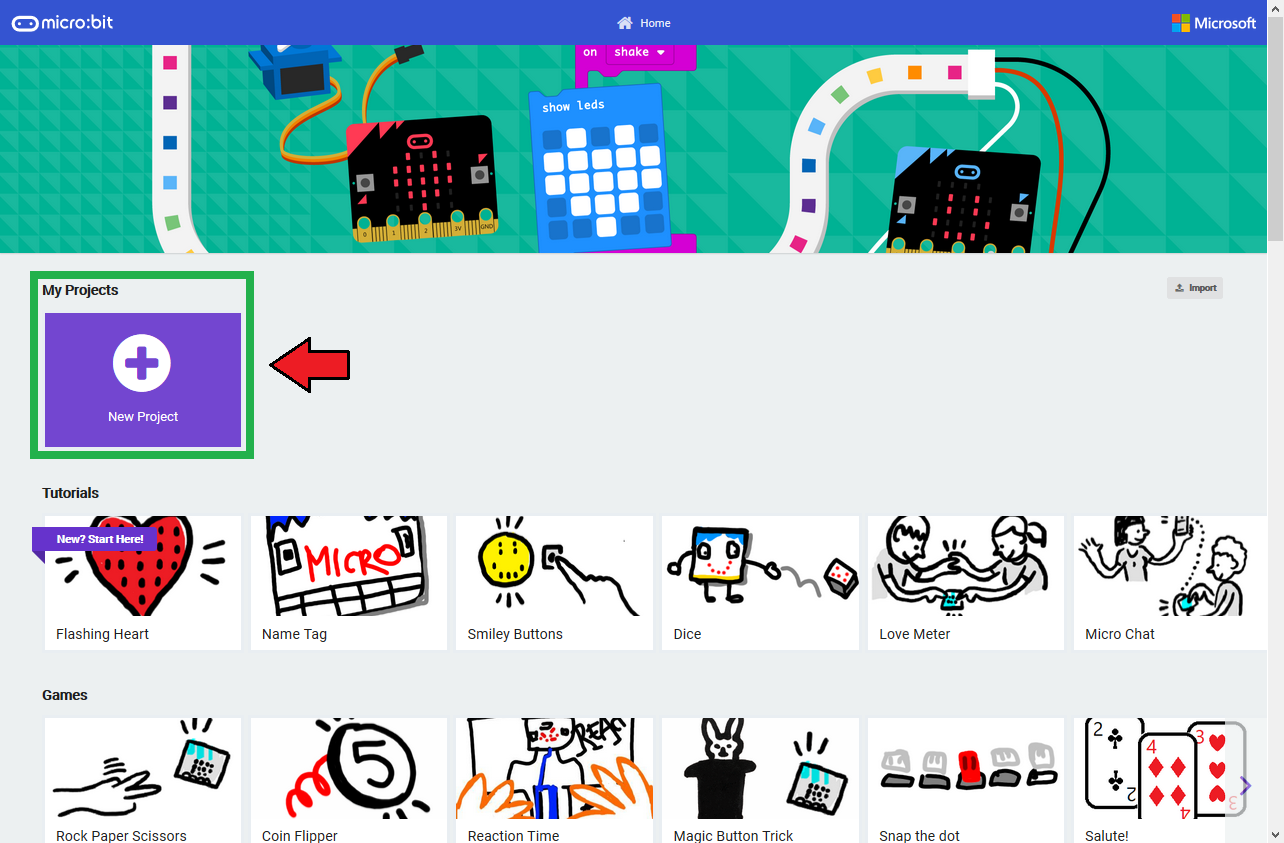
To get started with using MakeCode with the micro:bit, head over to the MakeCode for micro:bit website by Microsoft. Then, click the New Project button to start a new project and open the Editor. (*Yes, all you need to get start coding is a computer with internet access, an up-to-date web browser, and an available USB port!)
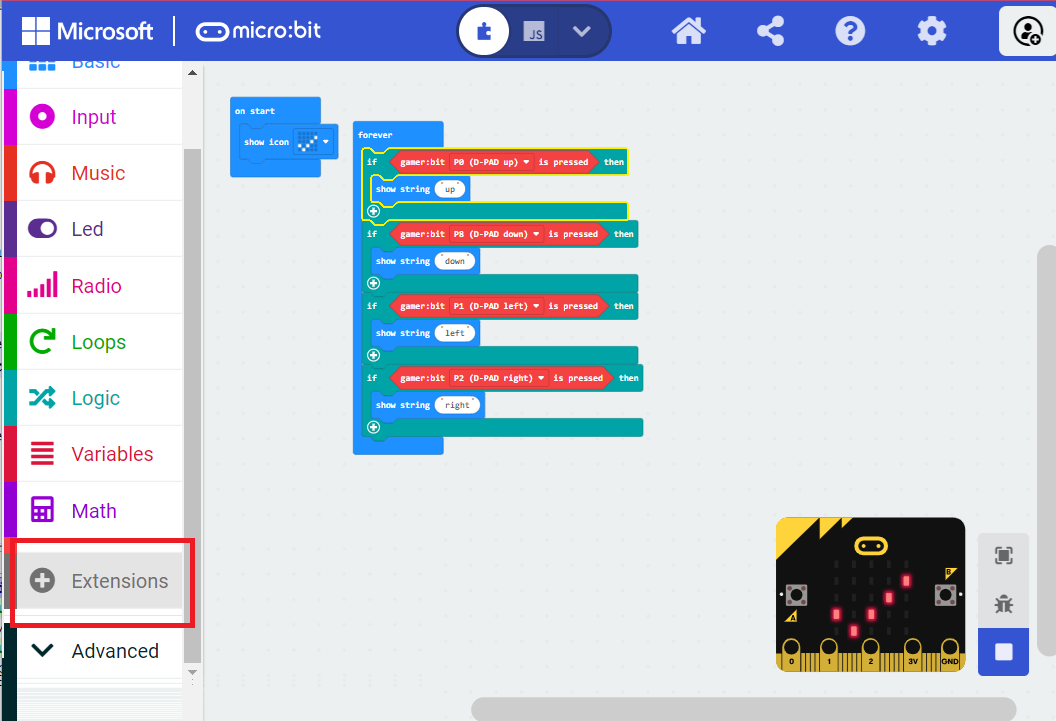
Once you have the editor up, click on the the Advanced block in the block library to reveal the drop down menu.
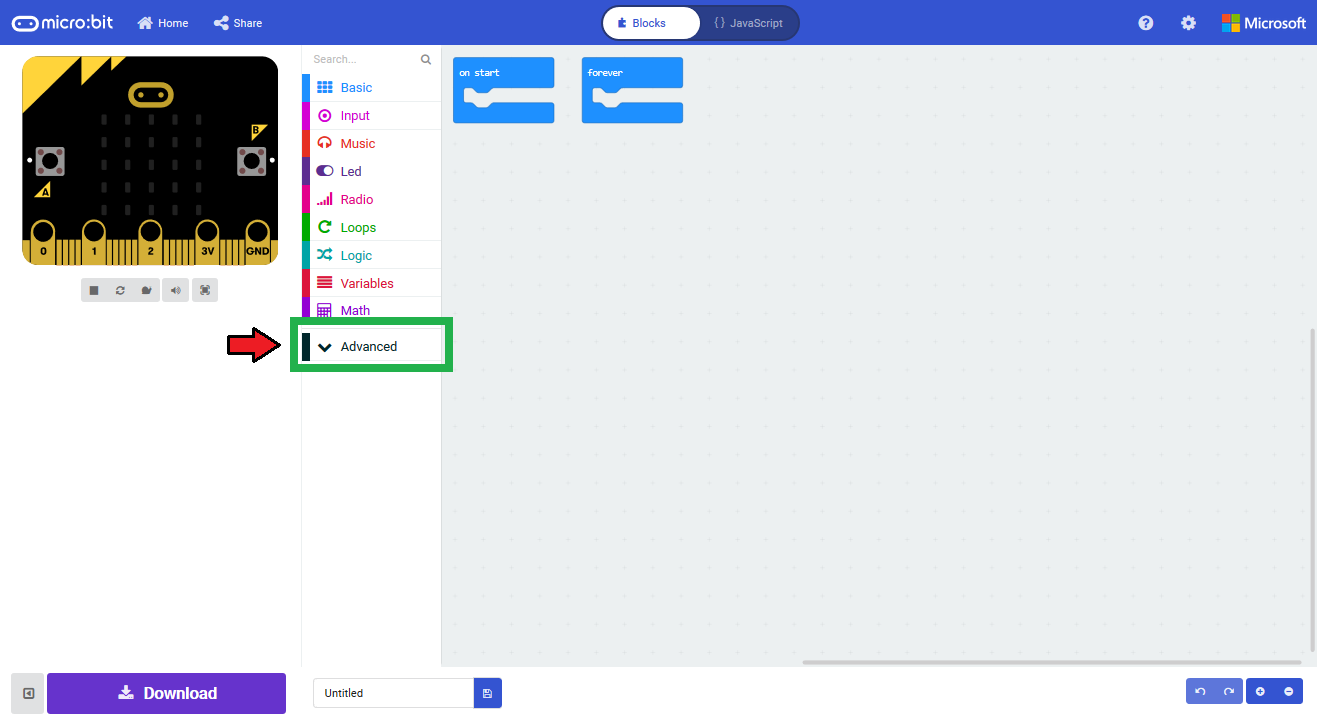
Finally, click on the Extensions block. This should bring up the extensions page. (*Alternatively, you could also click on the extensions link from the settings menu.)

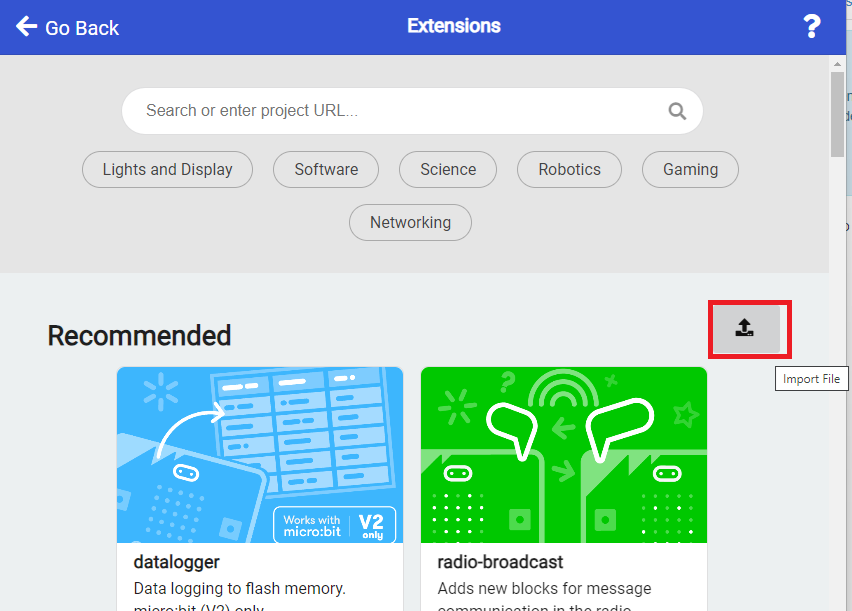
There are two methods for finding the gator:log extension:
- Search for the name used on the extension1.
- Use the link to the GitHub repository for the pxt-package as the search term.
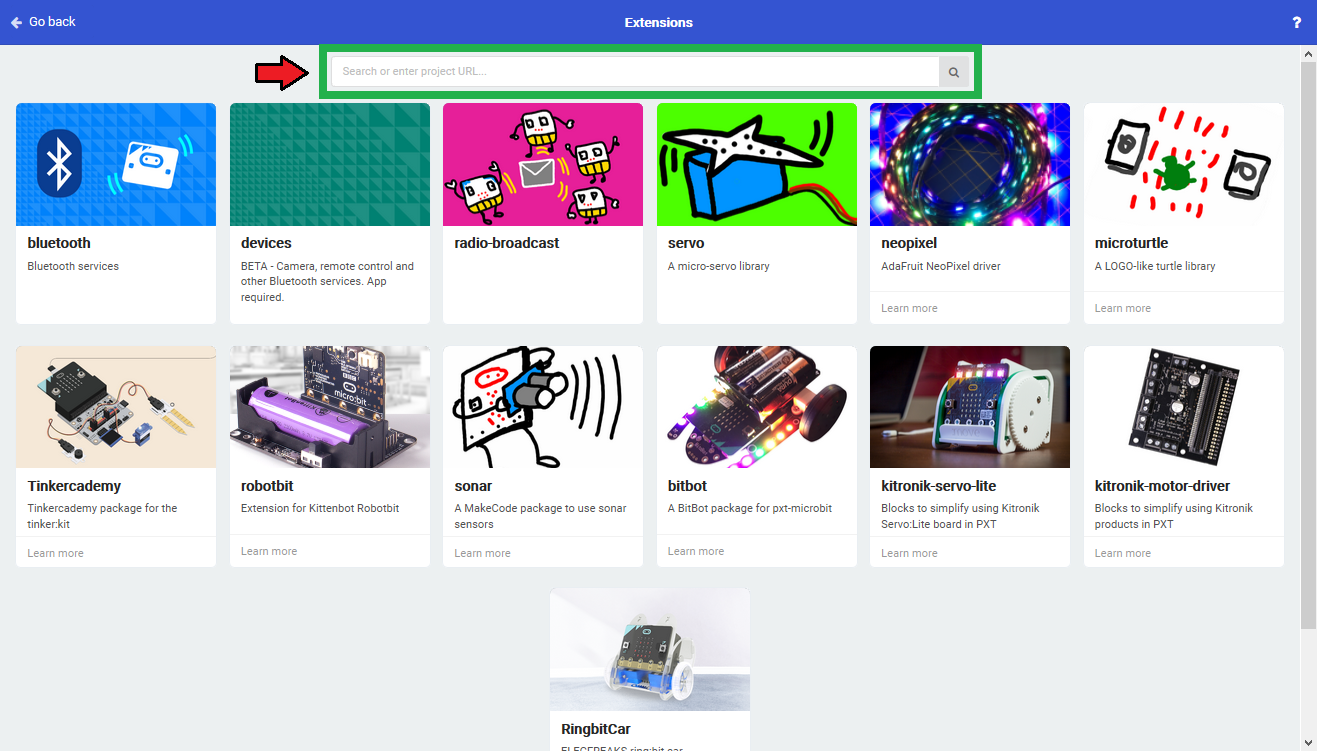
Search for the PXT-Package
Search for the gator:log extension using the GitHub repository link to the pxt-package:
https://github.com/sparkfun/pxt-gator-log

Then, click on the box for the extension to add it to the block library. The gator:log extension should now appear in the block library.
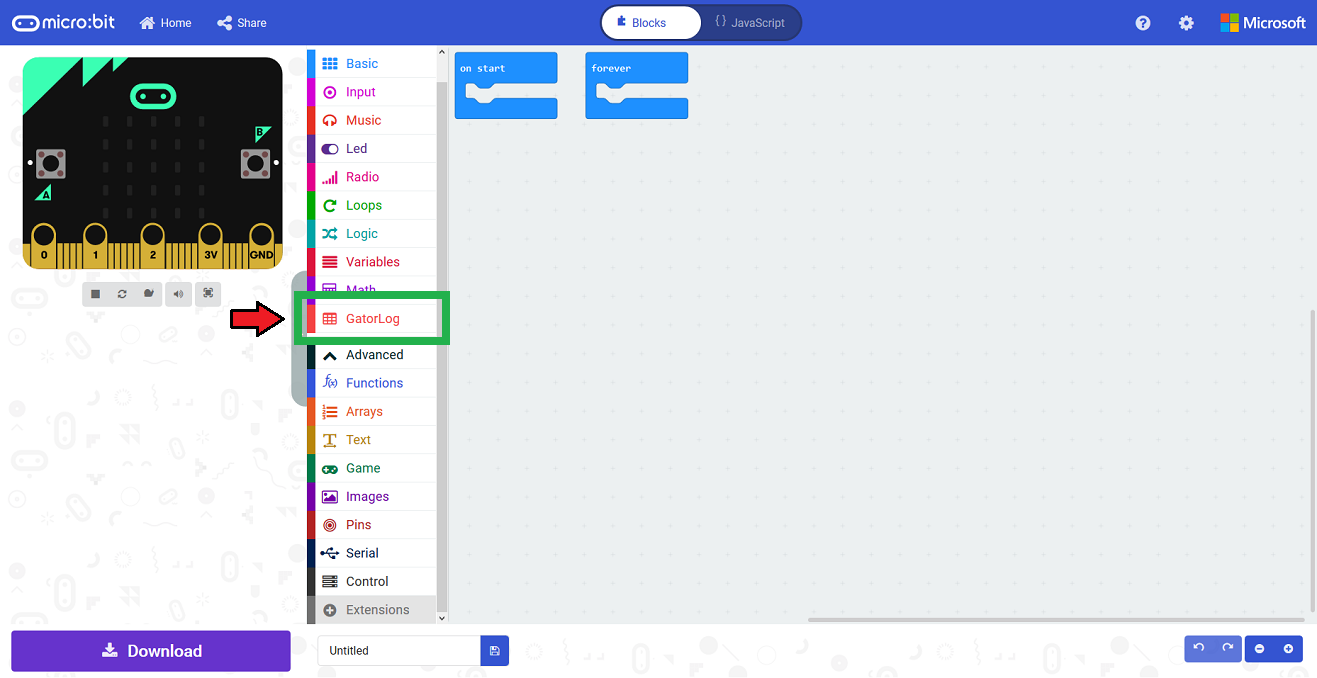
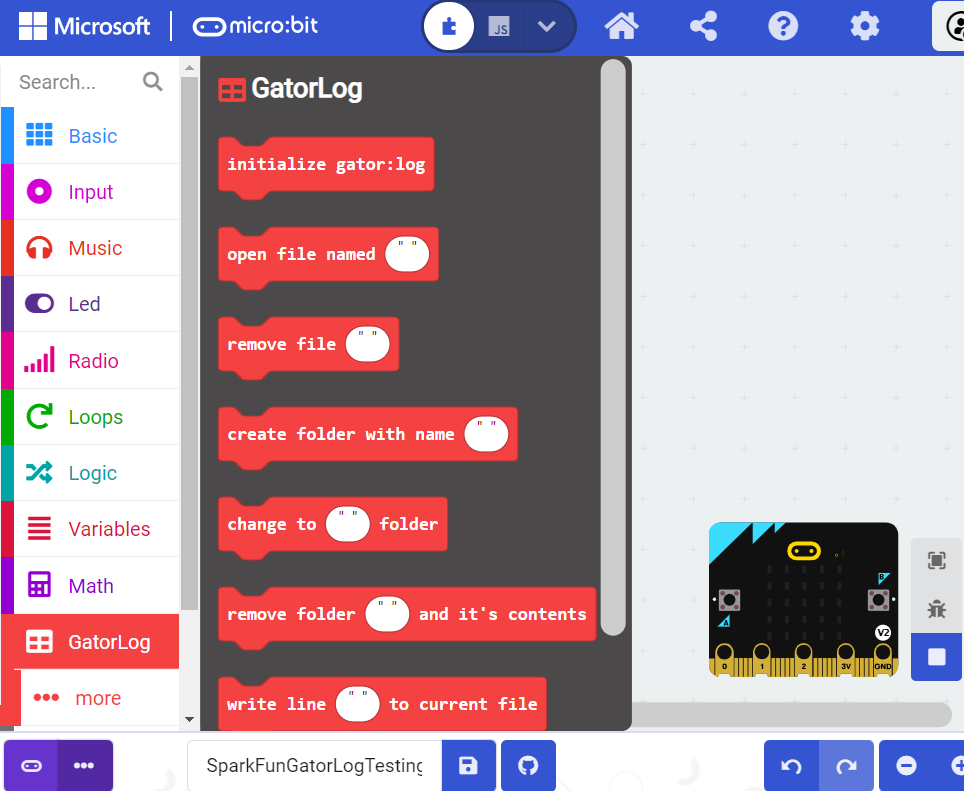
To verify that you have added the extension, click on the gator:log block to make sure that your drop down menu options match the image below.

MakeCode Examples
Now that you have added the gator:particle extension to the Editor, lets start with some example code. Plug the micro:bit into your computer using an USB micro-B cable after you have assembled your hardware with the instructions from the previous section. The micro:bit should appear on your computer as a removable storage device.

To upload new code, this is where you will be copying the downloaded .hex file to later.
Block Functions
Initialize gator:log
This block should be pretty self explanatory, it sets the gator:log and SD card to they are ready to log data. You should use this within the on start block.
open file named "____"
This block should be pretty self explanatory, it opens a specific file. If the file can't be found in the current directory, a new file with the input name will be created. (*New files aren't actually created until there is data written into them.)
File Name- Input name of file to be opened. Standard 8.3 filenames are supported. For example:
87654321.123is acceptable.987654321.123is not acceptable.
remove file "___"
This block should be pretty self explanatory, it deletes a file from the current directory
File Name- Input name of file to be to be deleted. Standard 8.3 filenames are used and wildcards (e.g. *) are supported.
create folder with name "___"
This block should be pretty self explanatory, creates a folder within the current directory.
Folder Name- Input name of sub-directory to be created.
change to "___" folder
This block should be pretty self explanatory, changes the current directory to a specific folder. If the folder can't be found in the current directory, a new folder with the input name will be created.
Folder Name- Input name of sub-directory to move to.
remove folder "___" and it's contents
This block should be pretty self explanatory, it deletes a folder and any content inside it.
Folder Name- Input name of directory to be deleted along with any files contained within it.
write line "___" to current file
This block writes data to the currently accessed file. If no specific file is accessed after initialization, by default this data is written to LOG00000.txt (created on initialization).
Data- Input data to be entered into current file. (Entry contains carriage return and next entry will begin on a new line.)
write "___" to current file
This block writes data to the currently accessed file. If no specific file is accessed after initialization, by default this data is written to LOG00000.txt (created on initialization).
Data- Input data to be entered into current file. (Entry does not contain a carriage return and next entry will begin on the same line after the previous entry.)
write line "___" at position ___
This block writes data to the currently accessed file at a specific character number. If no specific file is accessed after initialization, by default this data is written to LOG00000.txt (created on initialization).
Data- Input data to be entered into current file. (Entry contains carriage return and next entry will begin on a new line.)Position- An integer for where in the current data the entry should begin.
Basic Test
Below, is a simple example of how to test the data logger. To use this example, there are multiple options for accessing the .hex file:
- Replicate the block functions from the display below to copy the example project. Then download the
.hexfile. - Expand the display widow to pull up the example project. Then download the
.hexfile. - Use this link to pull up the example project. Then download the
.hexfile. Download the
.hexfile from the button below or the link on the bottom of the display.
This code is relatively simple, in that it is used to test the buffer on the gator:log. The code expands the span of the dataset stored on each subsequent line; except when the length of digits increase, then is expands by 3. This was to limit the cycle time spent to map that out neatly. (With this code, I was able to max out the gator:log in several minutes; whereas, when mapped out neatly the gator:log had only reached the 200th line after 30 minutes.)
The µSD card was removed from the gator:log and opened on a computer. You will notice the config.txt and LOG00000.txt files, which are created on initialization. The sample data set for this example is stored in sample.txt.
Based on the recorded data set, the last full row was line 1737, which had 1743 characters stored before the gator:log reset itself. Now, we do not expect many users to reach data sets that long on a single line, but users should be aware of certain limitations.
It is always a best practice to test/verify that the gator:log will work properly for your application. It would be a disappointing to lose a bunch of data or miss out on something important.
Multiple Files
Below, is a simple example of how to write data to multiple files. Again, there are multiple options for accessing the .hex file:
This code is relatively simple, in that odd numbers are saved to the odd.txt file and even numbers are saved to the even.txt file. After loading this example and waiting a bit, you can remove the µSD card and open the odd.txt and even.txt files. You should see the corresponding integers stored in each file.
Troubleshooting the Extension
This product's extension has a dependency on Microsoft's build process. If the usual method of installing the MakeCode extension gives an error, you will need to manually install the MakeCode extension. We have provided a local build of this extension that can be uploaded to MakeCode:
To manually install this extension in makecode, go to the "Extensions" tab on the left side of the makecode site:
In the location you'd normally search for an extension, you'll notice an upload button on the right:
Click on this, and you'll get a window allowing you to upload your own built extension. Navigate to where you saved the above extension hex, and upload it to your project.
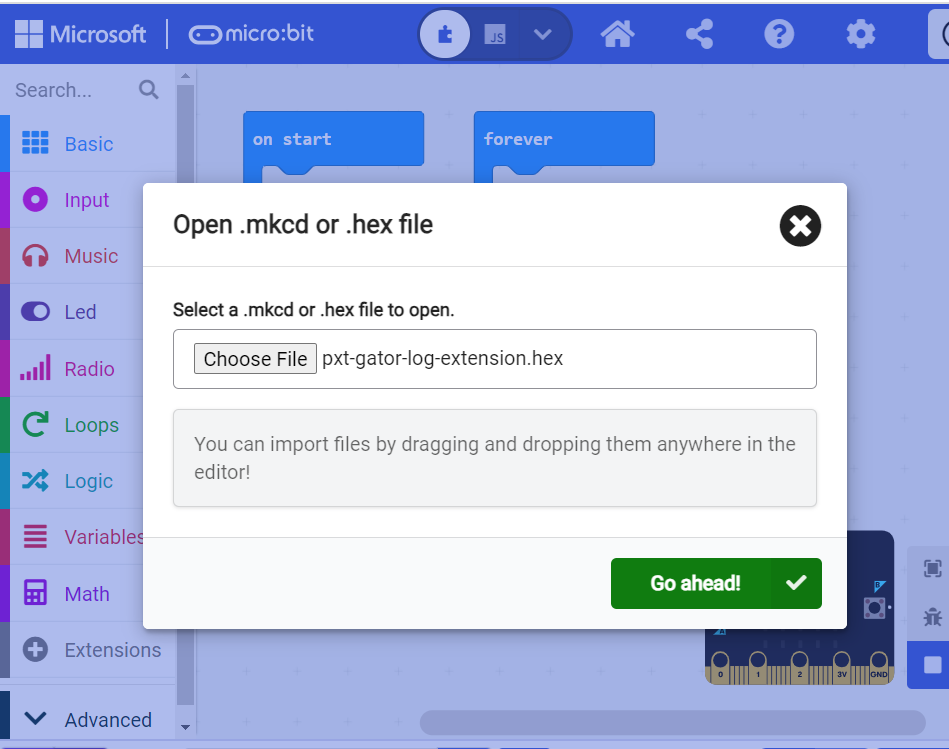
You should be able to see the extension and its functions now. In addition, you'll be able to build and download your project to your variant of micro:bit.
Other Troubleshooting Tips
Below are common issues to check, if you are having problems with your gator:log.
Check the Status LED Behavior
The behavior of the status LEDs may indicate different issues:
ST1LED:- 3 Blinks: The microSD card failed to initialize. You may need to format the card with FAT16/FAT32 on a computer.
- No Blinking: The gator:log probably isn't receiving data across the RX pad. Double check your connections.
ST2LED:- No Blinking: The gator:log probably isn't writing data to the SD card. Double check your SD card formatted properly, that the
config.txtfile is created on initialization, or your SD card isn't full.
- No Blinking: The gator:log probably isn't writing data to the SD card. Double check your SD card formatted properly, that the
Original gator:bit board
Double check which gator:bit board you are using. As mentioned earlier, the gator:log will not operate with the original gator:bit. Users must use the updated gator:bit (v2) board.
Add Delays Between Character Writes
By adding a small delay between data logging operations, you can give gator:log a chance to record its current buffer.
The gator:log may not save all the data properly, if there are a lot of characters being sent right next to each other. Inserting a small delay of 15ms between large character writes will help open:log record data without dropping characters.
Config File
The config.txt file is used to store the configuration settings for the ATmega328P to operate as a data logger. This file should not be modified. Changing the stored setting may potentially configure the gator:log in a way that locks users out. In which case, the gator:log may become unrecoverable without a special programmer. Users who have accidentally modified the file, can restore it with the following settings:
9600,26,3,0,1,1,0
baud,escape,esc#,mode,verb,echo,ignoreRX
Likewise, users who have bricked the gator:log may be able to insert a freshly formatted µSD card with a config.txt file containing the two lines as shown above.
Empty Files
The gator:log will not create a blank file without data. The file isn't actually created until data is put in it.
Double Check File Names
All file names should be alpha-numeric, according to the 8.3 filename guidelines. MyLOG1.txt is ok, but Hi !e _.txt will not work.
Format your µSD Card
Make sure that you format your card using a FAT16 or FAT32 format. (If you did not format your µSD card on a Windows OS, reformat the µSD card and create a DOS filesystem on the SD card.)
If you are running into issues writing to the SD card at high speeds, try to use a card with few or no files on it. (i.e. An 8GB µSD card with 3.1GB worth of ZIP files or MP3s has a slower response time than an empty card.)
Swap µSD Cards
There are many different types of card manufacturers, relabeled cards, card sizes, and card classes, and they may not all work properly. We have tested the following cards to work with the gator:log. If you run into an issue using one of these SD cards that you purchased from us (after formatting it properly), please create a post on our forum.
Old or Frequently Used Cards
All SD cards have a finite lifespan. A typical flash memory card unit has approximately 10,000 write/erase operations. The continued use of an old or frequently used SD card; may result in corrupted files or data.
Fakes and Counterfeits
Be wary of purchasing fake or counterfeit SD cards from overseas suppliers. The cost benefits may be tempting, but it can be a gamble.
Other Considerations
Below are a few other considerations for SD cards:
- SD cards are somewhat fragile and will usually cease to function once damaged, structurally.
- SD cards a usually waterproof to a certain degree, but should be clean and dry before use (including the hardware).
- SD cards have a wide operating temperature, but may fail in extreme temperatures (though you may run into other hardware issues first).
Verify the Number of Files in the Root Directory
The gator:log will only support up to 65,534 log files in the root directory. We recommend reformatting your µSD card to clear space and improve logging speed.
If you still have questions or issues with this product, please create a post on our forum under the Gator Products topic.
Additionally, if you are an educator and you have class or application based questions, please create a post on our forum under the Educational Products topic.
Resources and Going Further
For more product information, check out the resources below:
- Schematic (PDF)
- Eagle Files (ZIP)
- ATmega328 Datasheet (PDF)
- gator:log PXT Package
- GitHub Product Repo
- Dimensions (PDF)
- micro:bit Landing Page
- SFE Product Showcase
Interested in the micro:bit? Check out some of these other micro:bit products:
Need some inspiration for your next project? Check out some of these other micro:bit product tutorials: