SparkFun Blocks for Intel® Edison - OLED Block
 jimblom
Programming for the OLED Block
It'll take a bit of coding to get your display up-and-running. The Edison has all sorts of programming-language support, but we've decided to stick with C++ to control the display.
We've written a simple library to help get you started. You can download the latest version from our GitHub repository, or click the button below to get it in a zip folder.
The example code includes a simple makefile that should compile directly on the Edison. But first, you need to get these files onto the Edison. There are a few ways to do that. For example, you could get the Edison connected to a WiFi network and SSH it over -- check out the SSH how-to section of our Getting Started with Edison tutorial for help with that. Even better than that, you could follow along with our Programming the Intel(R) Edison: Beyond the Arduino IDE and set up Eclipse to remotely upload the code -- even remotely compile it on your development computer.
Once you've loaded the code, navigate to the "pong" folder and type make. The dependencies (spi, gpio, and oled libraries) will build, then the main example code ("oled_pong.cpp") will build to create an "oled_pong" executable.
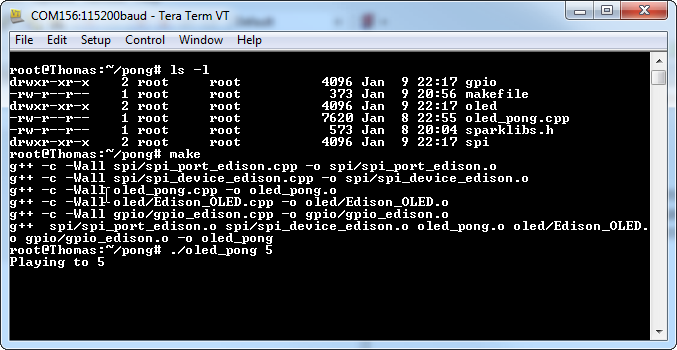
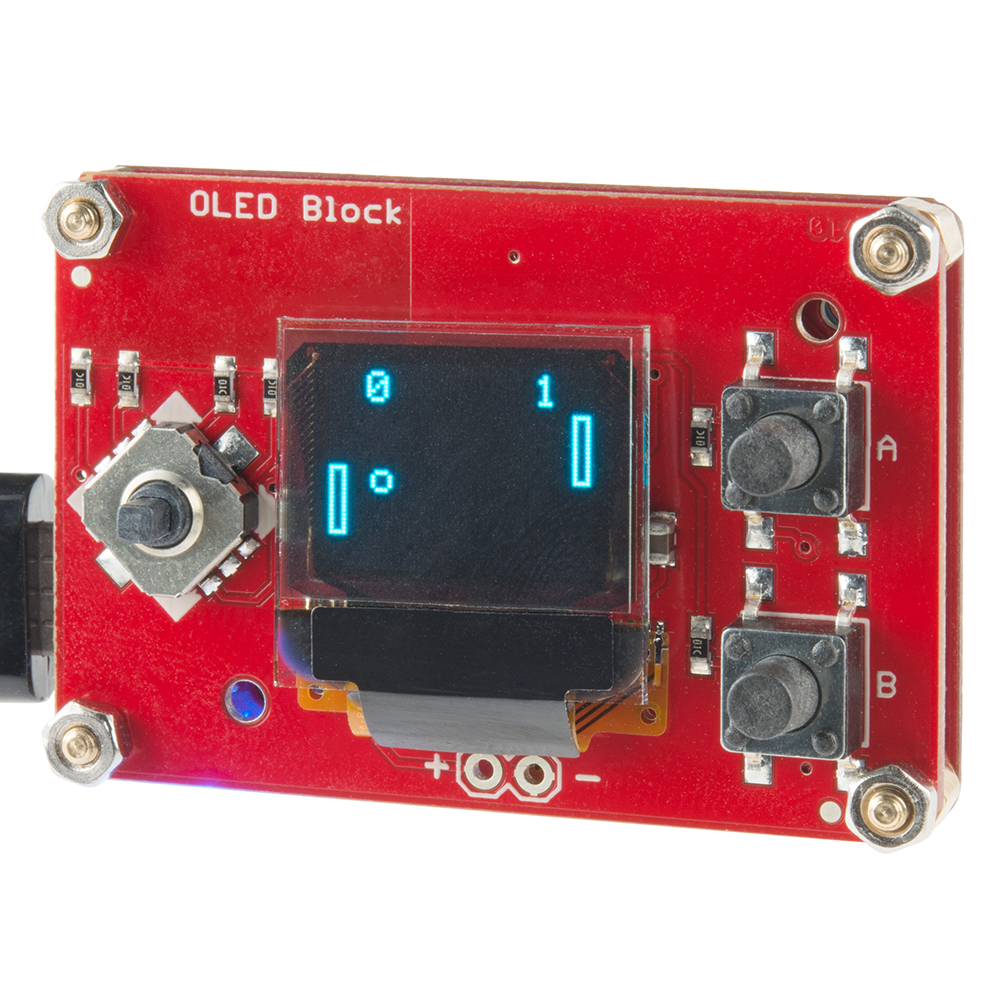
After the code has successfully been built, type ./oled_pong to play. This should trigger the OLED to light up and start a game of pong. Have fun!
Using the OLED Library
The OLED library, included in the download above, allows you to draw anything from pixels and lines to shapes and text on the little display.
The "pong" example code should serve as an excellent teaching tool. To begin, create an instance of the edOLED class, then initialize the display like this:
language:c
edOLED oled;
...
oled.begin()
oled.clear(ALL);
oled.display();
Then, continue to use the oled object to draw pixels, lines, and other shapes like this:
language:c
oled.pixel(x, y);   // Draw a pixel at x,y
oled.line(x0, y0, x1, y1);  // Draw a line from x0,y0 to x1,y1
oled.rect(x, y, width, height); // Draw a rectangle, begnning at x,y with a set width and height
oled.circle(x, y, radius);  // Draw a circle, centered at x,y with a set radius
Or you can draw text on the screen with function calls like:
language:c
oled.setCursor(x, y);   // Set the text cursor to x,y
oled.setFontType([0:3]);    // Set the font to one of four types.
oled.print(char);       // Draw a character
oled.write(char *);     // Draw an array of characters (string)
oled.write(int);        // Draw an integer value
Don't forget: the OLED's display will not update until you call oled.display().
Using the GPIO Library
The "gpio" library, also included with the example code, can be used to listen for button presses. Again, the pong example should serve as a good place to start learning how to use the library.
First, you'll need to initialize the pins:
language:c
gpio BUTTON_UP(47, INPUT);  // UP button is tied to GPIO 47
gpio BUTTON_DOWN(44, INPUT); // Down is tied to GPIO 44
gpio BUTTON_LEFT(165, INPUT); // Left is tied to GPIO 165
gpio BUTTON_RIGHT(45, INPUT); // Right is tied to GPIO 45
gpio BUTTON_SELECT(48, INPUT); // Select (pushing the joystick down) is GPIO 48
gpio BUTTON_A(49, INPUT); // Button A is GPIO 49
gpio BUTTON_B(46, INPUT); // Button B is GPiO 46
Then you can use the readPin() function of the gpio class to see if they're HIGH or LOW. The buttons are all pulled high, so they'll read as LOW if they're pressed down.
language:c
if (BUTTON_UP.pinRead() == LOW)
{
    printf("You're pressing down");
}
if (BUTTON_A.pinRead() == LOW)
{
    printf("You're pressing the A button");
}
Hopefully that brief primer will get you ready to begin developing for the Edison OLED Block. If you haven't already, we really recommend following our Programming the Intel(R) Edison tutorial for help setting up your programming toolchain.