OpenScale Applications and Hookup Guide
 Nate,
Nate,  LightningHawk
Configuration
Once OpenScale is connected and reporting to your terminal window press 'x' (or sending the character via the Arduino Serial Monitor with the Enter key) to bring up the configuration menu.
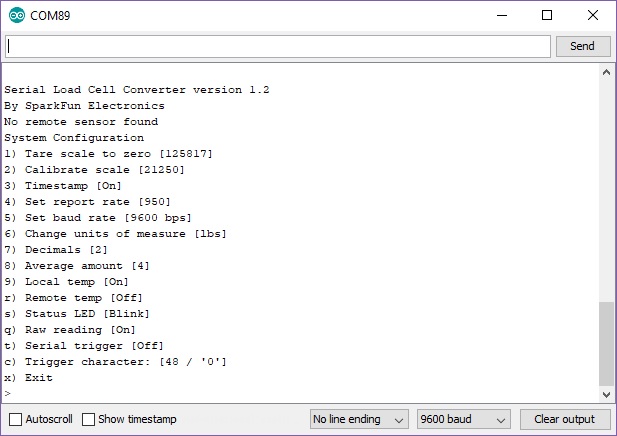
Press the corresponding letter or number to control that setting.
Tare Scale to Zero
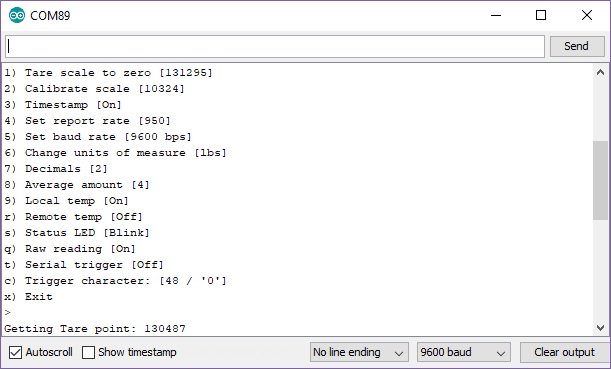
Use this to tell OpenScale what the base reading is. Remove everything from the scale that will not be there permanently and tare scale to zero by sending a value of 1 in the configuration menu. OpenScale will take a series of readings, average them, and store this value in non-volatile EEPROM. At each power-up OpenScale will use this value as 'zero'.
Calibrate Scale
Use this to calibrate your scale to a known value. First, remove everything from the scale that will not be there permanently and tare the scale to zero (see ‘Tare Scale to Zero’).
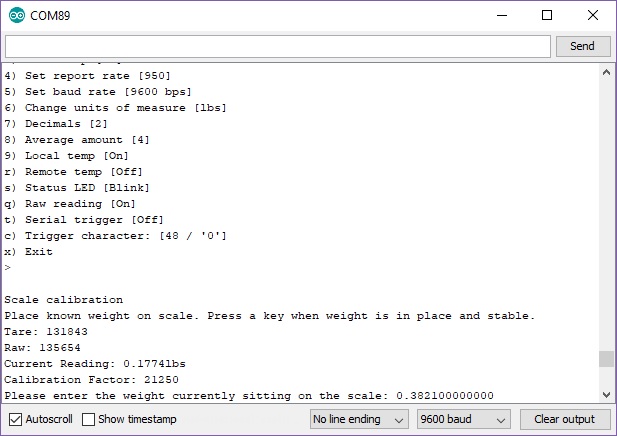
Next place an accurate and known mass onto your scale. Then select ‘Calibrate scale’ by sending 2 in the configuration menu.
If you are using Serial Load Cell Converter version 1.2, the prompt will tell you to place a known weight on the scale. After placing a known weight on the scale, send another character to move on to the next step of the calibration process. You will be prompted to enter the known weight on the scale. In this case, a smartphone was measured with another scale and recored as 0.3821 lbs. After entering 0.3821, additional trailing 0's needed to be entered to fill in the array.
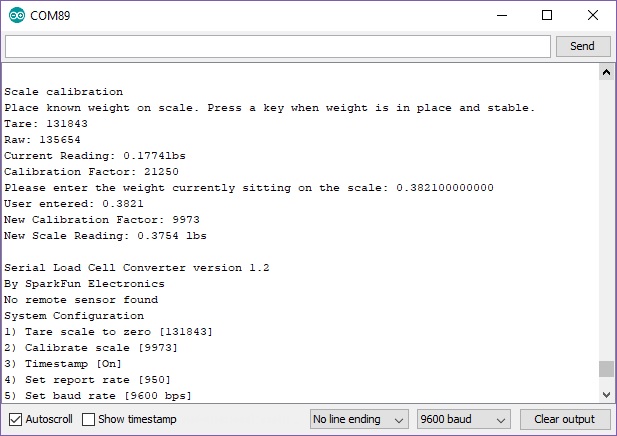
Once the array is filled with 0.382100000000, you will be taken back to the configuration menu.
Next use the ‘a’ and ‘z’ keys to increase or decrease the reading to match your mass. Holding ‘a’ or ‘z’ will change the calibration factor at a faster rate. Press ‘x’ once the reading closely matches the known weight.
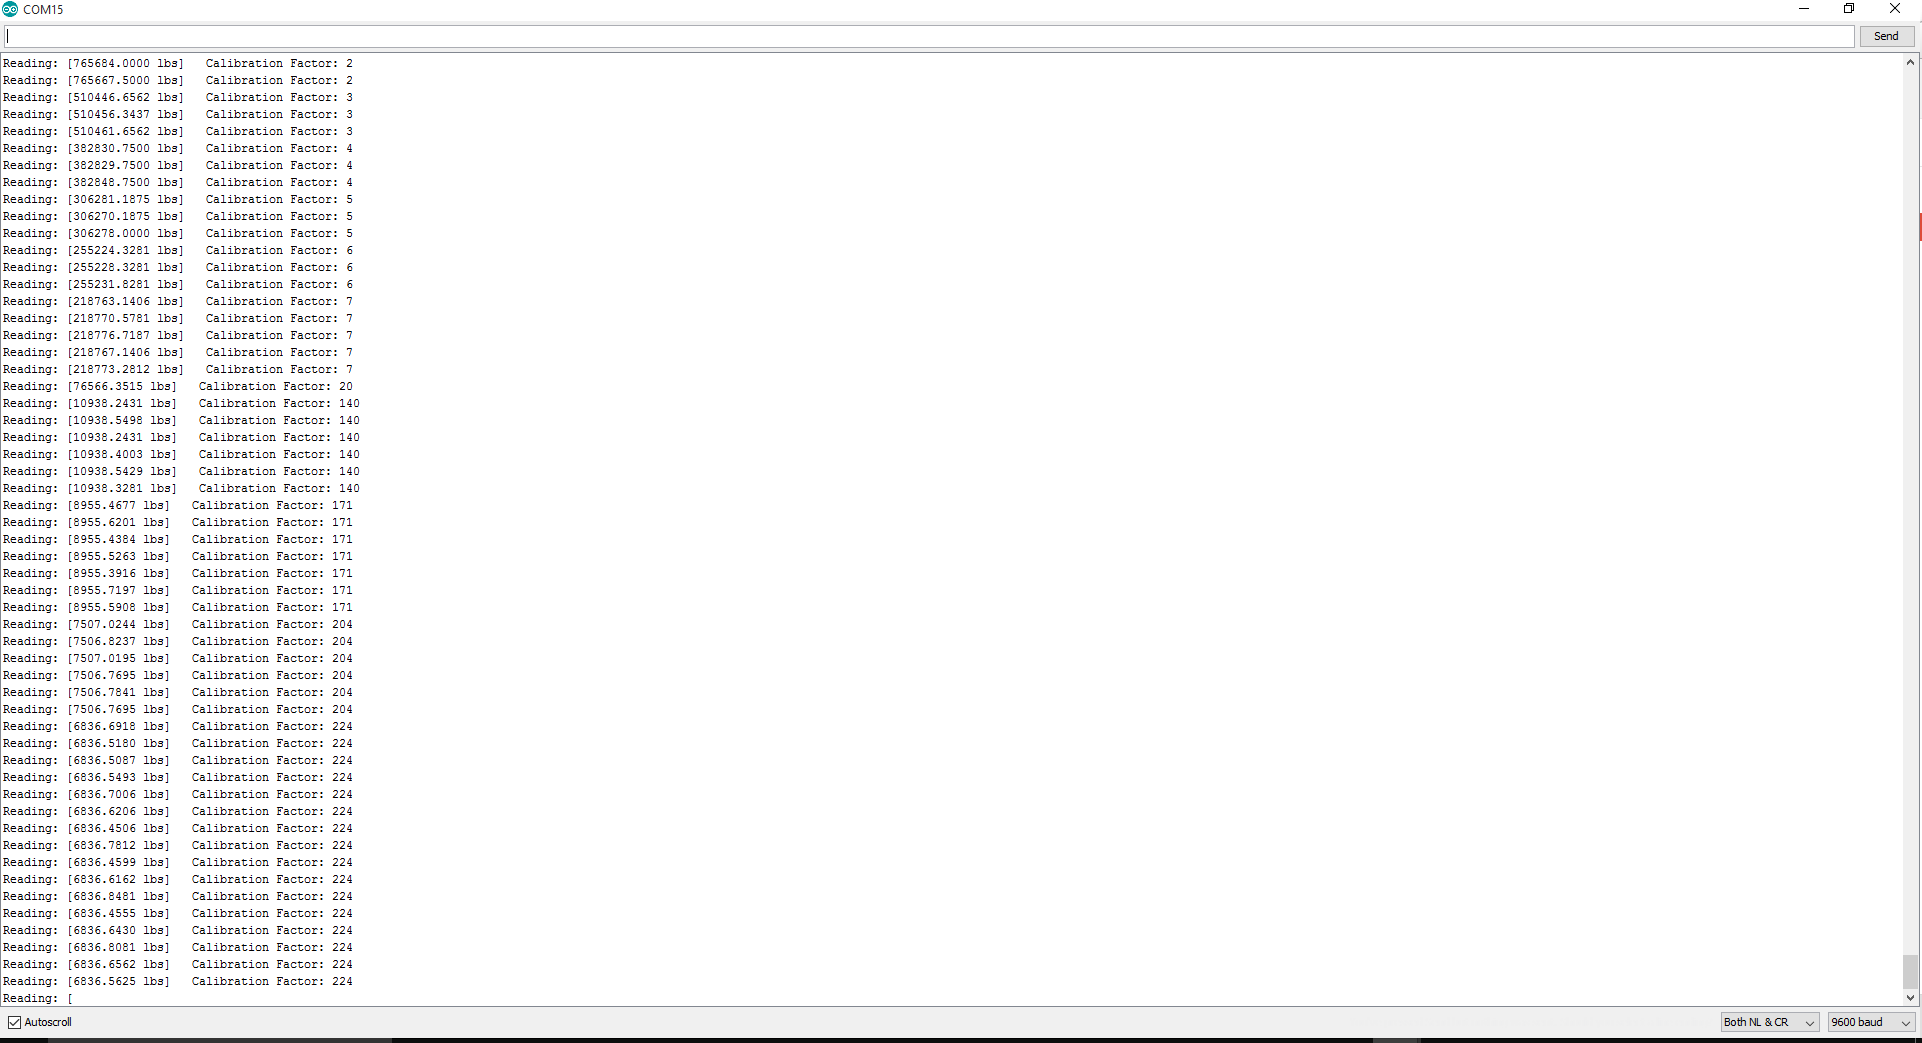
Click the image for a closer look
Timestamp
This will enable or disable the millisecond timestamp shown at the start of every reading. The default is to show a timestamp.
Set Report Rate
This controls how often OpenScale reports a reading. This is handy if you need a very accurate amount of time between readings or wish to limit the number of data points. Once selected from the configuration menu use the ‘a’ and ‘z’ keys to increase or decrease the time between readings. The default is 5Hz or 200ms between reports.
The report rate is calculated at power up and when the user selects ‘Set report Rate’ from the configuration menu. The fastest possible report rate is about 10.98Hz or 91ms between reports. This rate is affected by many things:
- Faster baud rates (115200bps) allows for faster printing of text
- Turning off time stamp and temperature readings require less characters to be printed
- Lowering the ‘average amounts’ setting will decrease the amount of time it takes to read the load cell.
- If attached, the remote temperature sensor takes around 19ms to read
- Decreasing the number of decimals decreases the number of characters to print
Set Baud Rate
This controls the baud rate that OpenScale communicates. OpenScale runs at 9600bps by default. Type in the baud rate you would like and press return. OpenScale will immediately go to this baud rate. This is configurable from 1200 to 1,000,000bps but standard baud rates (multiples of 1200: 9600, 57600, 115200, etc) are recommended. OpenScale will attempt to go to the user inputted baud rate but the timing errors for exotic baud rates may become significant enough to make communication impossible.
Change Units of Measure
This toggles the measurements between pounds (lbs) and kilograms (kgs). Setting the units from lbs to kgs will change the calibration factor to properly convert units. This will also change the text displayed with each report. The default is pounds.
Decimals
This controls the number of decimals displayed. The default is two.
Average amount
This controls how many readings to average across. The default is four. Decreasing the average amount will allow for faster report rates but will increase the noise in reports.
Local Temp
This controls reading of the on board temperature sensor. The default is to show the local temperature. This is helpful if you need to calibrate your scale readings with local temperature readings. The onboard sensor is the TMP102 digital temperature sensor. It is very precise but will need calibration by the end user.
Remote Temp
This controls the reading of the off board temperature sensor. The default is to show the remote temperature if a sensor is detected at power on. A DS18B20 one-wire temperature sensor can be connected to the board to read the temperature of the load cell if further accuracy is needed. It is very precise but will need calibration by the end user.
Enable Status LED
By default the onboard status LED blinks with every other reading. This can be turned off to conserve power and users’ eyesight.
Serial Trigger
Once powered OpenScale will report a weight reading after each report period has passed (see Set Report Rate). Once the serial trigger option is enabled OpenScale will stop reporting and wait to be triggered by an incoming serial character. Any incoming character will cause OpenScale to wake up, take a reading, report, and return to low-power sleep. This setting is valuable for remote applications where power saving is important. To maximize power savings it is recommended that the Status LED be disabled as well. The default is to not be triggered by incoming serial characters.