MicroView Digital Compass
 AGlass0fMilk
Introduction
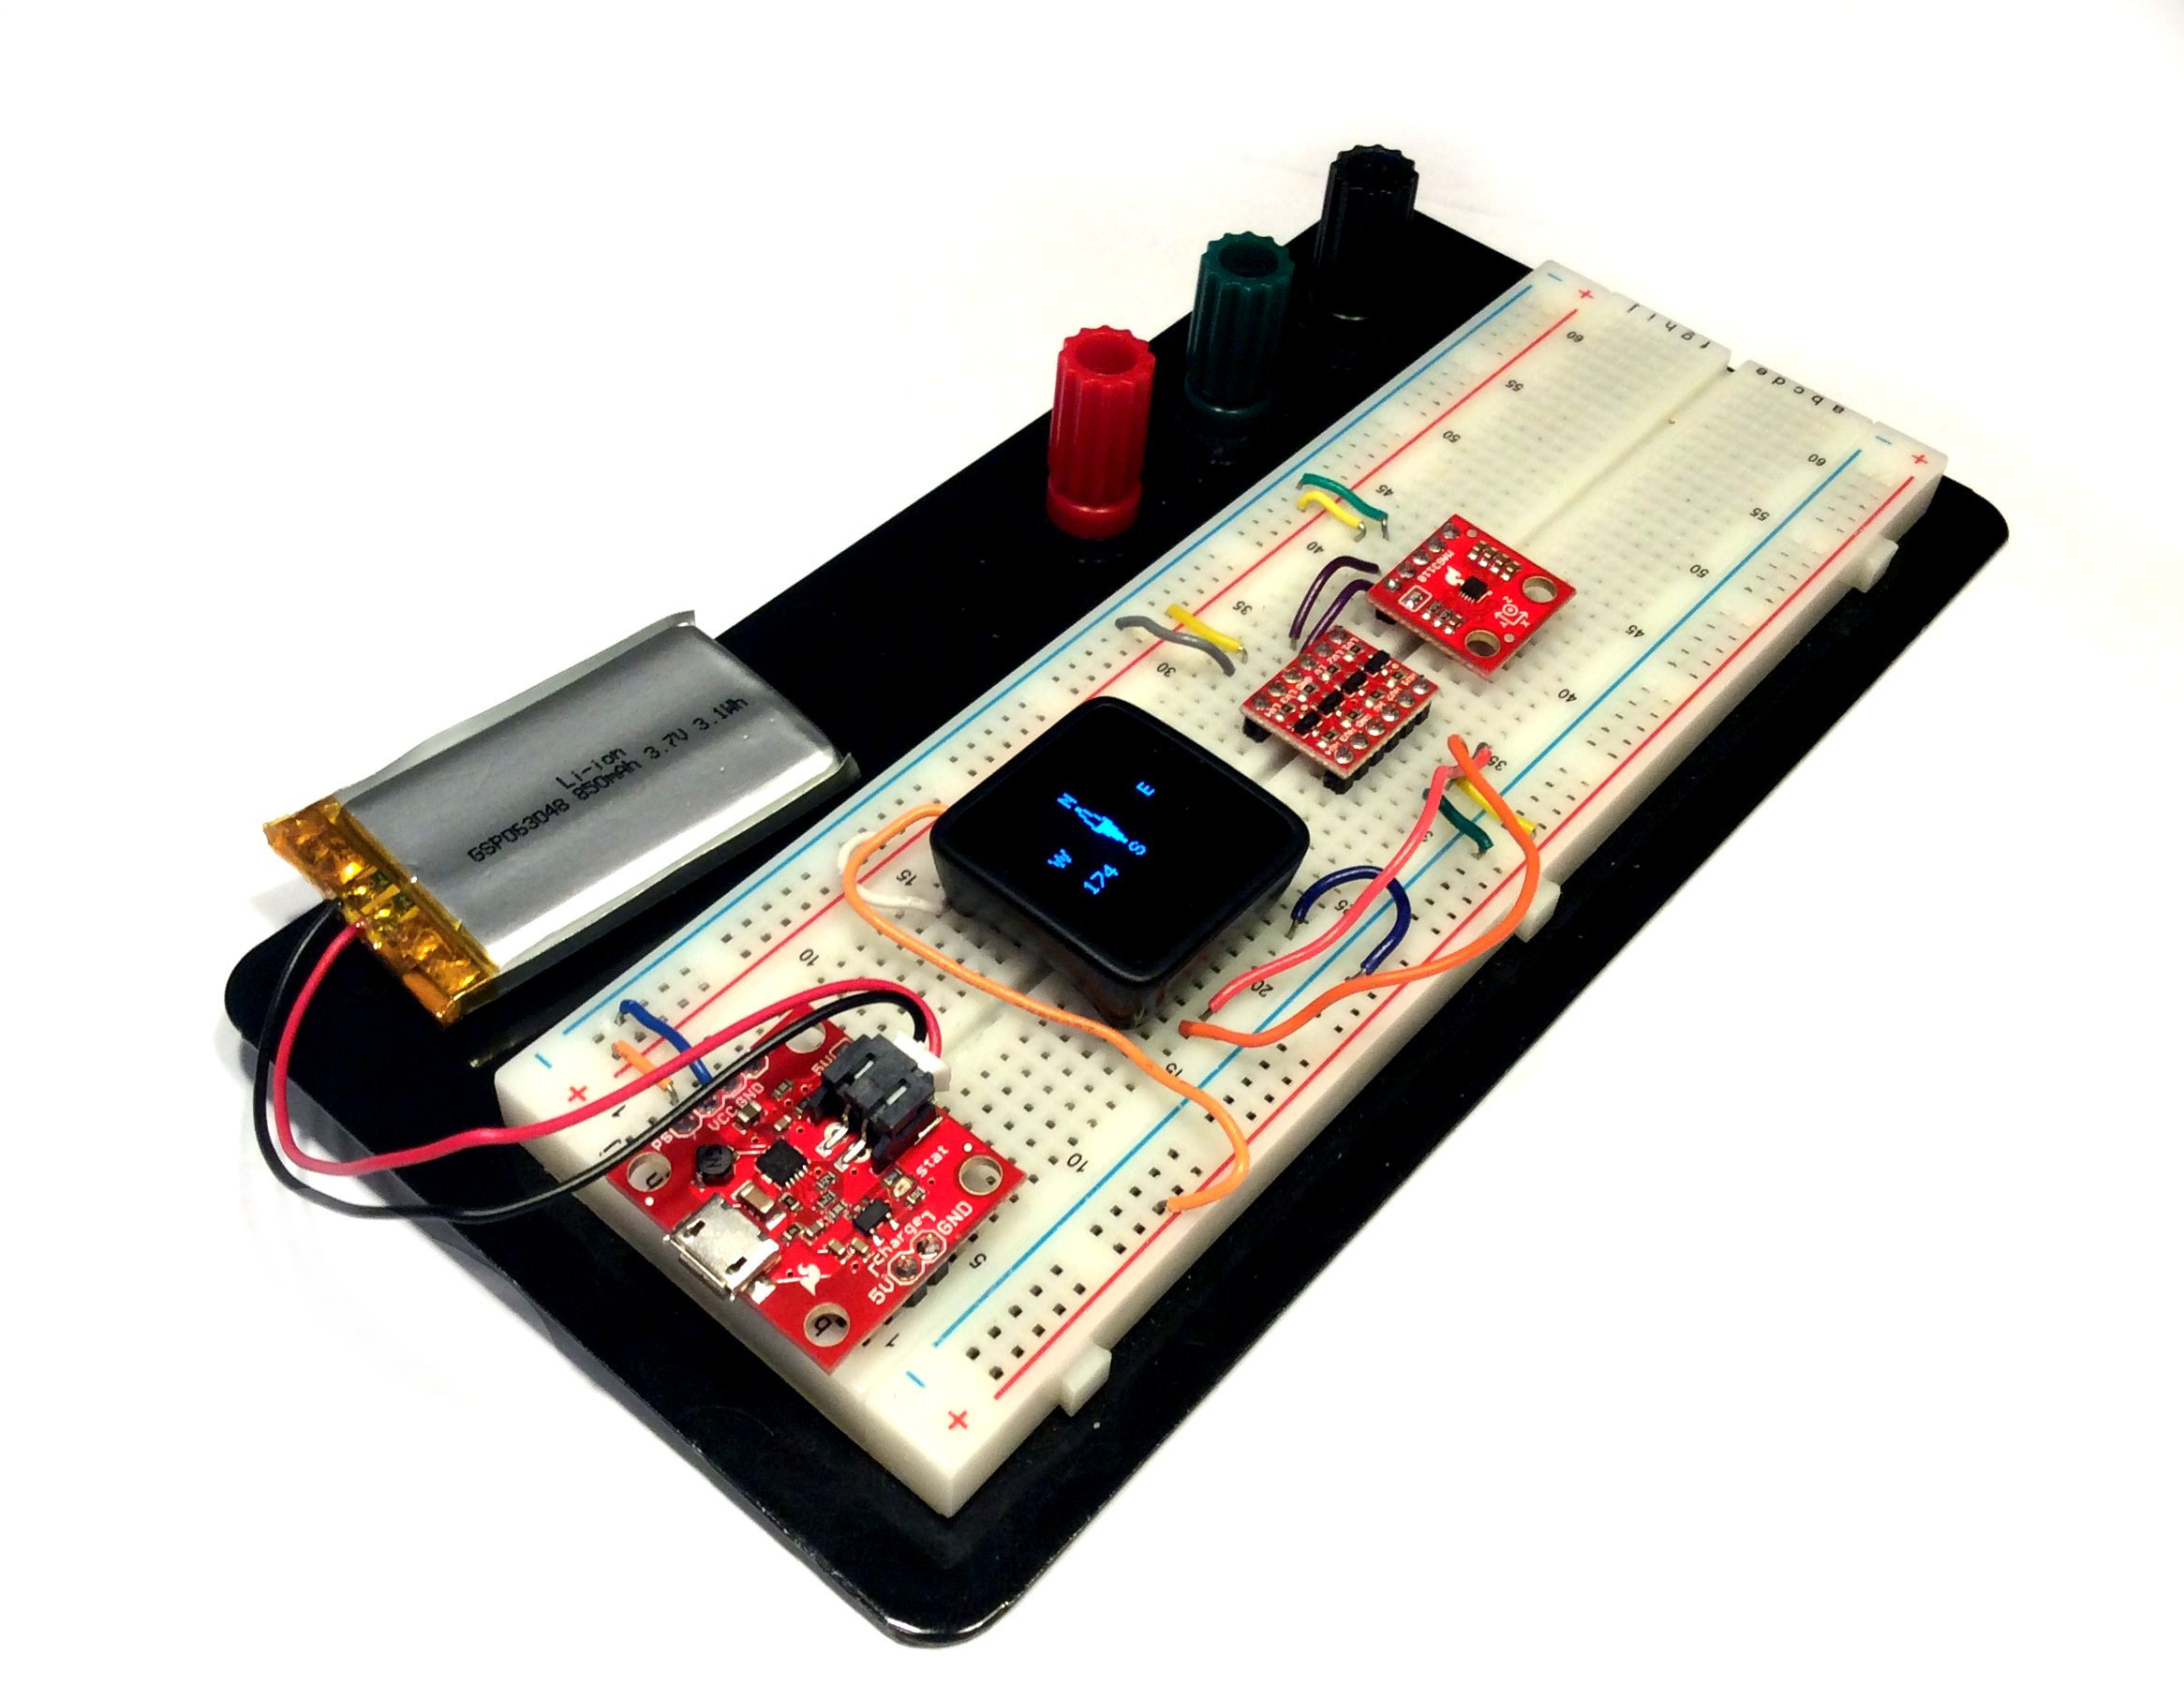
In this tutorial you will learn how to use a MAG3110 3-axis magnetometer to make a portable digital compass! This project will also use the SparkFun MicroView to display the heading.
If you haven't checked it out already, go see the new MAG3110 Hookup Guide to learn how this device works!
Required Materials
This project uses the MAG3110 magnetometer to sense magnetic north along with the SparkFun Microview to display and control the whole show. If you don't have one, you will need a MicroView Programmer as well to upload code to the MicroView.
Since the MicroView is a 5V logic device and the MAG3110 is lower voltage device, you will also need a Bi-Directional Logic Converter to facilitate communication between them. Be careful, if you hook them up directly to each other, you could damage the MAG3110 sensor!
I chose to make the whole thing battery-powered, so I could walk around with it. I used SparkFun's Power Cell - LiPo Charger/Booster and an 850mAh LiPo Batter. However, feel free to keep it tethered to your computer over USB if you don't want to get the extra parts.
You can build the whole thing on a breadboard or use SparkFun's nifty snappable protoboard for a more permanent project.
For most of these parts, you may have to solder on male headers for use with a breadboard. See the suggested reading below for tips on how to do this!
The wish list below contains most of the parts you'll need to follow along.
Suggested Reading
Before embarking upon this guide, you may want to familiarize with any of the topics below.
- I2C Communication
- Through Hole Soldering (And Hot Tips on Soldering Headers!)
- Bi-Directional Logic Converter Hookup Guide
- PowerCell Quickstart Guide
- Getting Started with the MicroView
- MAG3110 Hookup Guide